Validation Management
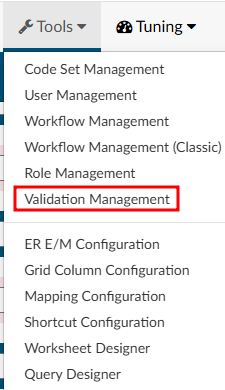
Validation Management allows user roles with the correct permission to create rules that show up on the code summary page prior to submitting an account. Rules can be made to prevent an account from being submitted until certain requirements are met, or issue a warning to alert users about potentially incomplete items while still allowing the user to submit an account.
Examples of rules that can be created include:
- An account must have a discharge date to submit an inpatient chart
- The newborn weight must exist on a newborn chart
- If a certain charge is on a chart and a diagnosis code is not present
Creating a Validation Rule
Begin by entering a rule name in the top right-hand corner of the page and then click on +Add Rule.

When the new rule is added, a number will be associated with the rule. The number will be used as reference when troubleshooting a rule that may not be working as intended.
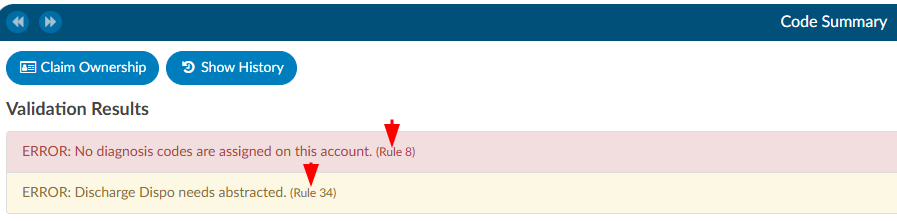
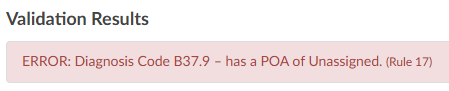
When a rule is triggered in Code Summary, the rule number will display on the right end of the rule.
Level Type
Once a validation rule has been added, the rule can be edited by clicking on the + to the left of the rule number.
Start by selecting the Level from the dropdown menu on the left-hand side of the screen.

| Level | Description |
|---|---|
| Error | Must be resolved before the user can submit a chart. This validation rule typically only applies to Coders because CDI specialists do not generally submit charts. Errors have a red background, indicating there is a hard stop. |
| Critical | Same as an error, with an additional warning. If upon clicking save, the end-user still has a critical error, they will get a pop-up box that indicates they still have validation rules outstanding and will be asked if they wish to continue. This validation rule has a red background, indicating there is a hard stop. |
| Warning | A soft stop used to notify a user that there may be items to resolve. It does not prevent the user from submitting the chart. This validation rules has a yellow color background, indicating possible intervention is needed. |
| Toast Message | A notification that comes from the top right-hand corner of the browser as a red message presented for a few seconds. Toast messages do not stop the user from submitting or saving a chart. It is simply a notification message to alert the user. |
| Disabled | This level will disable the validation rule and prevent it from alerting the end user. The rule will turn red within validation management to show it is not active. |
| Informational | A notification will appear with a light blue background. These messages do not prevent the user from submitting the chart. |
Defining the Criteria
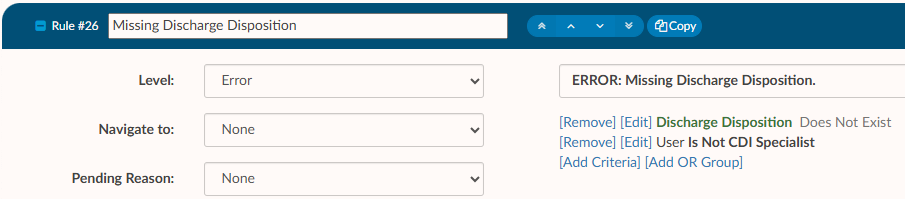
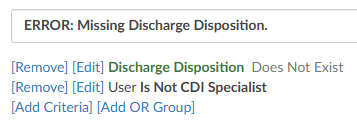
Once you have selected the level of the validation rule you want to create, you must define what the criteria is starting with the verbiage you want to display to the end user. For example, you can display an error if a chart does not have a discharge disposition so it does not get submitted to billing without one. Since we would want to warn the Coder and not the CDI specialist, we would add another criterion input so user role is not equal to CDI specialist. First, type in the display name; this will be what the user will see on the code summary. Keep the information concise, but also provide how they can fix the error.
Example: Missing Discharge Disposition - The end user would know they have to add the disposition to continue.
Type of Criteria
To add criteria to rule, as in the example above, click on Add Criteria to define how the system fires this rule.
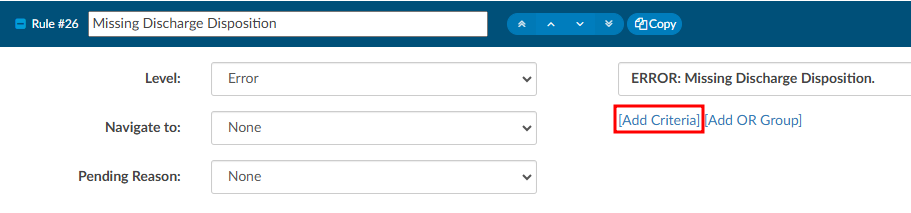
Upon clicking on Add Criteria, you will be presented with different types of criteria.
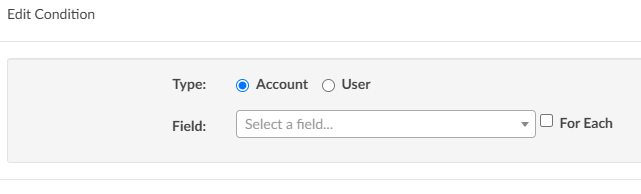
Account - Account type criteria allows you to select fields for a patient chart/account such as discharge date, discharge disposition, admit date, procedure codes, diagnosis codes, and many others.
User - User type criteria allows you to restrict the rule to a certain user role(s), such as a Coder or a CDI user role only. Typically, account-level criteria and user roles are used together, though account-level criteria can be used independently of user roles. However, creating a rule based solely on a user role without specifying any additional account-level criteria is not advisable.
Once you have defined the type of criteria, you can then add the details.
Example: Missing Discharge Disposition
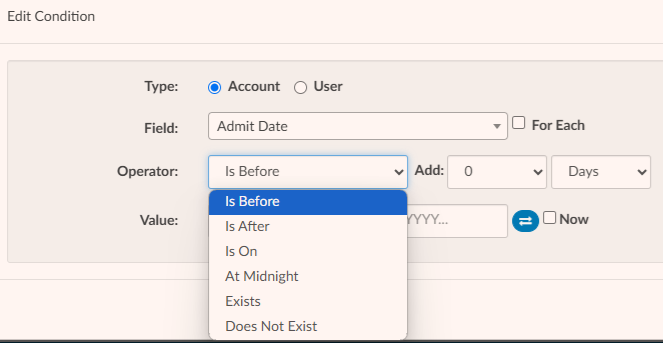
Building criteria for a validation rule is much like workflow. For this example, select account, then in the field name find Discharge Disposition. Once you drop in the field name, it will then give you other fields. In this example it allows you to select an operator.
AND/OR Criteria
Validation Rules, much like workflow, has two different options to create a validation rule.
- AND criteria - think of adding the word “and” to the end of each criterion
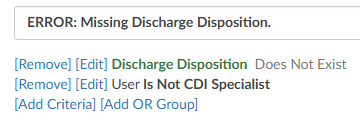 This rule will trigger if the user is a CDI Specialist and the discharge disposition does not exist
 - OR criteria - think of adding the word “or” to the end of each criterion in blue. OR criteria will turn blue
to differentiate between the conditions
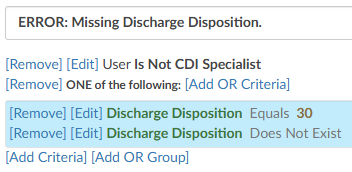 This rule will trigger if the user is a CDI Specialist and the discharge disposition equals 30 or does not exist
| Operator | Description |
|---|---|
| Equals | One value must be the same as another value. Case sensitive |
| > | The value on the left must be greater than the value on the right |
| < | The value on the left must be less than the value on the right |
| >= | The value on the left must be greater than or equal to the value on the right |
| <= | The value on the left must be less than or equal to the value on the right |
| In List | The value can be any of the following listed items |
| Not In List | The value can not be any of the listed items |
| Starts with | This operator is a search function that identifies resulsts where a string begins with a specific set of characters such as codes and document types. |
| Does not start with | This operator is a search function that identifies results when a string does not beging with a sppefici set of charatcters such as codes and document types. |
| Contains | The value can contains entered. This is common when including payors. |
| Only Contains | Any one of the codes it is not needed to do all 3. |
| Exists | This will search to see if anything “exists” in this field, if it’s not blank it will match. No value is needed after the operator. |
| Does not Exist | This will search to see if anything “does exists” in this field if it’s blank it will match. No value is needed after the operator. |
| More Than | This operator is only used with date fields, you will need to define “more than” how many days ago. You cannot add a date into the field as this field will need to be dynamic therefore days ago is used. |
| Less Than | This operator is only used with date fields, you will need to define “less than” how many days ago. You cannot add in a date into the field as this field will need to be dynamic therefore days ago is used. |
| Later Than | This operator is only used with date fields, you will need to define the exact date you do not wish to exceed. |
| Is On | This is for an exact date, this is uncommon to use for workflow. |
| Includes Each Of | If you have more than one value, it must contain all of the following. However, note the chart must have each of the values but can also have other values. |
| Includes Any Of | If you have more than one value and it could be any of the following. |
| Does not Include | If you have more than one value, you do not want it to equal you must use “Not In List” |
Once you have selected the field and your operator add a value.
Example: ERROR: D/C Disposition must be present We might select Does Not Exist as an operator. This would mean if a discharge disposition does not exist, then this rule would display on the code summary and prevent the user from submitting the chart.
Additionally, we may only want to display this rule if the user has a role of a coder. To constrain the rule further, click on the Add Criteria again, select user, and then select “Is not CDI Specialist”. This will prevent the rule from display to a user with a role of a CDI.
For Each Check Box
For each is used for fields that are repetitive. For example, a field like discharge disposition is a single field (there are not multiple discharge dispositions on a patient chart) therefore, you do not need the “for each” checkmark.
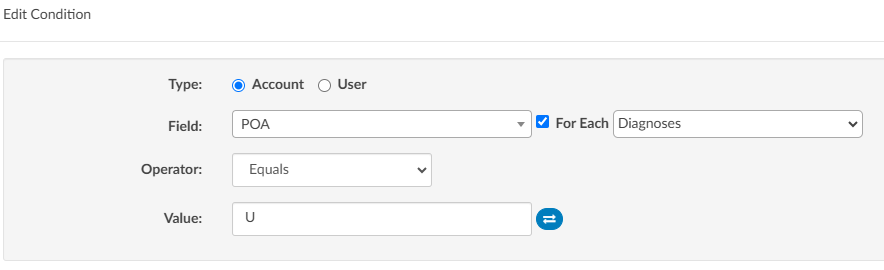
The For Each checkmark makes sense when you’re trying to create a rule that would have multiple outcomes, such as checking if any diagnosis codes have a POA status of U. We don’t want to check only the first diagnosis rather we want to check all diagnosis to see if it has a status of U. For Each can also be used if you want to check if a procedure code has a date of service and/or provider attached. We don’t want to just check the first procedure code for the date of service, we want to check each of them.
To use this field, first select For Each before defining a field. The system will open another drop-down field to the right of For Each to indicate where you want to create the rule. There are only a handful of fields the For Each field make sense for: charges, CPT codes, diagnosis codes, procedures, pending reasons, and physicians.
Once you have selected a fields, you need to define the field you are looking for. Example: Place an error reminding the Coder to add the POA status on any diagnosis code that has a U Click on For Each, then select diagnosis codes. Select POA from the field drop-down menu which will allow you to review operators. For this example, use the operator of Equals. Once you select the operator of Equals, then you have a field to fill in the value, which would e be “U” in this example.
Adding Fields to a Rule
Fields can be added to the message displayed by rule to tell the user exactly what is triggering the rule when it is displayed in the Code Summary.
You can inject a field within the rule that will be displayed for the end-user. Do this by putting the field name in braces exactly like this {Code}. When the rule fires for the end-user, it will display the code with the issue. If there are multiple, use the For Each field to see each of the codes that are the issue as an individual rule.
Navigate To
Once you have defined your rule, you will want to decide if it makes sense to take the end user somewhere in the software to correct the issue based on the rule created. In the example of a discharge disposition, it does make sense to direct the user to go to the account information page as that is where they would likely change the disposition. Under where you selected the level, there is a field for
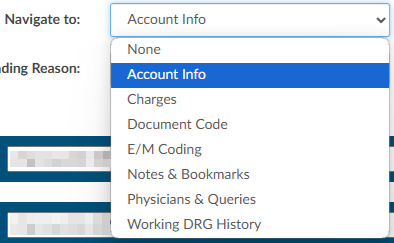
Navigate to (these are placed within the patient chart, under the Navigation tree).
- None – Will not take the user anywhere if they click on the error/warning.
- Account Info – Will take the user to the account information viewer.
- Charges – Will take the user to the charges viewer.
- Document Code – Will take the user to where the code was validated/added within the documentation.
- E/M Level - Will take the user to the E/M Level viewer.
- Notes & Bookmarks - Will take the user to the Notes & Bookmarks viewer.
- Physicians & Queries – Will take the user to the Physicians & Queries viewer.
- Web Page - Will take the user to the URL specified. Note that URLs must start with http:// or https:// and cannot be left blank if “Web Page” navigation is selected. From the Code Summary viewer, clicking on the validation rule will open the web page.
- Working DRG History - Will take the user to the Working DRG History viewer.
Pending Reason
This field will have a dropdown with all available pending reasons. If a rule is triggered on an account and it has a pending reason attached, then the pending reason will be added and the user will be able to see the number of the rule. Pending reasons that have a physician or date requirement will NOT be available in this list. The only way to remove a pending reason that was added by a rule is to have that rule cleared
Saving Rules
Once you’ve completed adding criteria for your validation rule remember to click on Save Rules in the top right-hand corner. It is recommended that you test your validation rule by opening a chart that fits the criteria of your validation rule

Validation FAQs
What is the difference in validation rules between Not In List and Does Not Include? The difference applies to properties that contains lists. Here is an example:
Say you have an account with three assigned diagnosis codes: I10, R12, and Z36.
In Validation Editor, I’m building validation rules with the “Diagnosis Codes” property. In memory, the “Diagnosis Codes” property equates to a list of three codes – I10, R12, and Z36.
The validation criterion Diagnosis Codes -> Not In List -> Z36 is TRUE because there are codes in the list on the left – the three assigned diagnosis codes – that are not in the list of the codes on the right, which just has “Z36”. Those codes are I10 and R12.
The validation criterion Diagnosis Codes -> Does Not Include -> Z36 is FALSE because the list of codes on the left – the three assigned diagnosis codes – does indeed include the codes that are listed on the right, which is “Z36”.