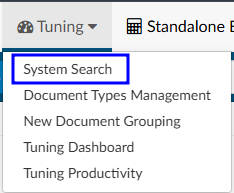
System Search
System Search
System Search works similarly to Account Search.
Creating filters allows the user to search for patient charts using different criteria. System Search is also used by the Tuning Team to identify targeted codes that need reviewed and possibly refined.
An example of a System Search would be all inpatient charts with a diagnosis of hypertension.
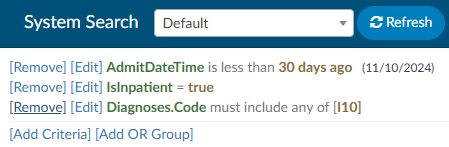
Users may want to include other hypertension codes such as I13.0, I13.9, I12.0, I12.9, etc.
Clicking Refresh will display a list of all accounts that meet the criteria. If this is a search that will be used more than once, users can save the search, making it available in the drop-down box.

The results that yield may show other codes, as the filter placed will bring up any chart with the
codes suggested. The grid displays all codes on the account as well as the code in question. To filter to only those codes within in the grid column, click on the hamburger button in the column header to further filter the list.

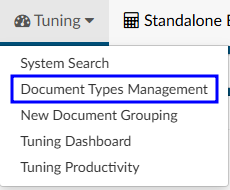
Document Types Management
Filing Documents
To file documents:
- Open Document Types Management
- Sort on documents by clicking on the group name to display the documents currently not in a folder. Choose the documents that need to be filed
- Change the friendly name by double-clicking on the name and replacing it with another name using a naming convention that new users will understand

Engine Handling
Engine Handling is set up after the documents have a friendly name. This set-up instructs the code suggestion engine what to do when it encounters each document.
Depending on how the organization is configured, there may be a drop-down menu to select the type of handling the document receives.
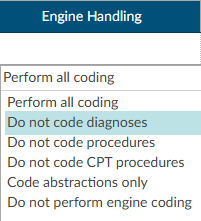
Alternatively, there are two different columns that allow for inclusion or exclusion of certain code sets starting with a prefix.
For example, on a Newborn History and Physical, the engine should exclude O codes to prevent confusion if the account conatins documentation for the mother. This exclusion will prevent O codes from being suggested on the newborn’s chart.

Once engine handling is set up, documents can be sorted into a folders. Sorting is done by double-clicking the
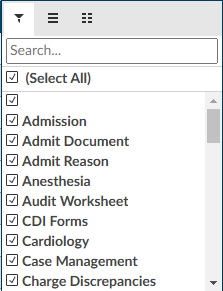
empty space in the Group Name column and entering the name of the desired folder. To view the folder structure, go to the top of the group name, hover over the column, and click on the hamburger button to see all the available group names.

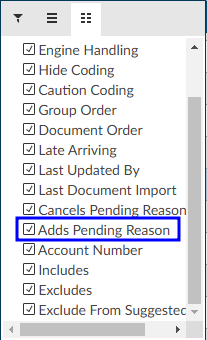
Adds/Cancels Pending Reason
This field in Document Types Management can be used to edit any existing pending reason.
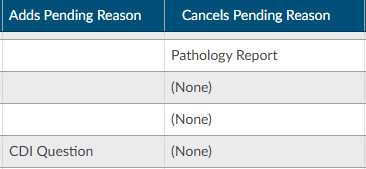
A selection in the Cancels column will remove the existing pending reason(s) and re-trigger workflow. If the original pending reason is used for DNFC reporting and/or a user needs to know the original reason for pending, the pending reason does not need to be deleted. Instead, there is an option to Add a Pending reason.
Two important facts about the “Adds Pending Reason” field:
- The presence of an “Adds Pending Reason” value overrides the functionality that cancels pending reasons from the “Cancels Pending Reason” field. In other words, when a pending reason exists on the account that matches the “Cancels Pending Reason” field, the pending reason is not deleted when there is an “Adds Pending Reason” value present. The functionality is designed to be one or the other – not both – but the account must have one of the “Cancels Pending Reasons” to add the pending reason.
- The “Adds Pending Reason” is intentionally free-form text. It can contain a value that is not listed in the Pending Reasons mapping so that users cannot select it. Whatever value is recorded in this field will be the pending reason name that the Script Engine will automatically add to the account.
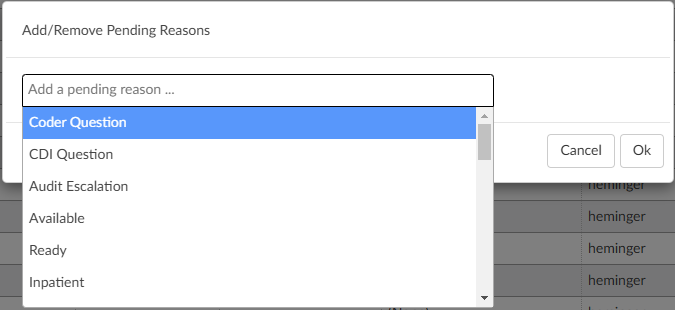
Enabling “Adds Pending Reason”
Caution Coding
Documents can be configured in Document Types management to be caution code documents. Coders should not code from these documents, but still be aware that the verbiage exists as it may result in a possible query. For example, if a nurse indicates the patient was being treated for respiratory
failure but the provider never mentioned it, the caution code will help to ensure users are not missing anything.
In Document Types Management, change the “Caution Coding” field of the Document Type to “All Patient Types” by double clicking in the Caution Code column. Save the change, then load the account and that document. The code suggestions within the document will have a golden “caution” background instead of the usual lavender background to indicate they cannot be assigned. The Unassigned code tree displays the same caution background for those codes, and the right-click menu on those
codes prevent assigning or changing the caution code.
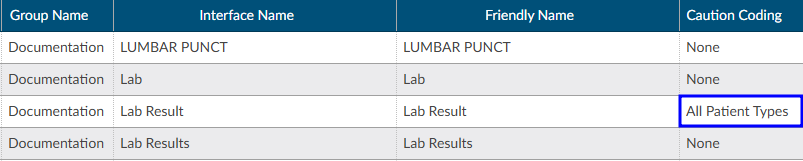
In the Unassigned codes tree, any code attached to a caution document will show in a yellow background and will not have the option to assign on the right click menu.
New Document Grouping
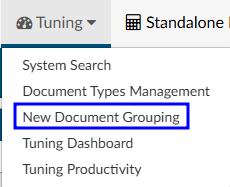
By default, users with the Administrator role or the Tuning role have access to the “New Document Grouping” page in the Tuning menu. This page allows users to create a list of groups that should be created for new document types. For example, if the document name contains the word “consults” or “consultation”, the organization may want to file it within the Consults folder and set the engine handling to Do not Code Procedures.

Creating a New Automated Grouping
| Field Name | Description |
|---|
| Group Name | Name of existing document group from Document Types Management. When one is selected, the Group Order automatically populates. |
| +Add Group | Adds a new document group that is not in Document Types Management. Users will be prompted to enter a new document group name and order number. |
| Group Order | Sequence of the document grouping. The order is copied from Document Types Management but can be edited. Edits will only affect new document types. |
| Includes, Excludes, and NLP Handling | As in Document Types Management, these fields indicate limitations placed on the group(s). |
| Documents | List of documents included in the group. |
| Sequencing buttons | New document types are processed through the groups in the order that is displayed. |
To create a new group:
- Click +Add Group
- Select the appropriate group name from the drop down or click + to create a custom group name
- Select how the engine should handle these types of documents using the engine handling dropdown or includes/excludes
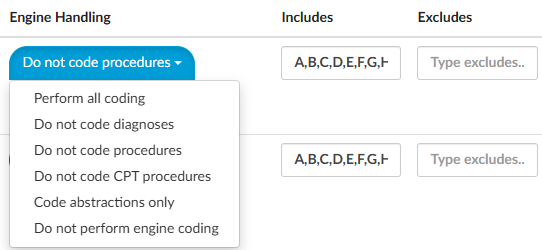
The drop down allows users to block certain code sets. If more targeted handling is needed to
include or exclude certain codes, consider using the includes or excludes method.
Using includes or excludes allows users to override the settings and choose to either include or exclude certain code prefixes. The image above indicates that the group will uses codes that start with A,B,C,D,E,F,G, or H.
Includes and excludes cannot be used at the same time.
Once the folder and engine handling have been set, select the documents to be included in this group. Click on Edit, then +Add. When choosing an operator, “Contains” will likely be the best choice. For example, if the user wants to
put all radiology documents into a folder, consider that if it contains XR, NM, MRA, MRI, US, CT, then those should go into the radiology folder. Use a comma to separate multiple items. Click OK once complete.
Once the new grouping is complete, select Save All in the top right corner.