Accessing Accounts
Clicking on the Accounts tab at the top of the screen allows users to access accounts in the system. Click anywhere on the row of an account to open it.
Account List
The main view for a workgroup is called the Account List, which displays accounts that need to be worked by the user.
Accounts are commonly sorted into workgroups based on criteria set by the operational/management team. Each workgroup is a list of work that needs to be completed by users assigned to the workgroup.
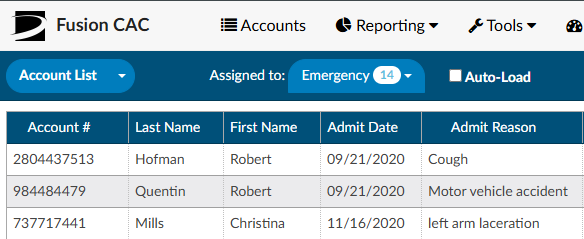
To access assigned worklists, click on the down arrow to the right of the Assigned to dropdown. Each of the user’s assigned worklists will be listed along with a bubble showing the number of accounts in the group available for coding. By default, a worklist must have at least one pending chart to display in the system. Assigned Workgroups will not be visible here if there are no accounts available for coding for that specific Workgroup.

Note
If there are no workgroups in the drop-down, ensure the drop-down menu to
the left of Assigned to says Accounts. If it does,
contact your supervisor.
For more information on workgroups at your organization, contact your supervisor.
Auto-Load

Checking the Auto-Load box before starting a session, or while in an assigned worklist, will automatically load the next chart in the selected Workgroup upon Save, Submit, or Cancel. Users can discontinue Auto-Load at any time by unchecking the Auto-Load box. This will return them to the Assigned to Workgroup for manual selection of the next chart in the selected Workgroup.
Fusion CAC is regularly reacting to account activity, submitting information to the encoder, updating Workgroups, and returning data to the EHR. When working from the assigned accounts listing, it is recommended to occasionally refresh the data and update the Workgroups with recent information.

To ensure the most up-to-date information for accounts is presented in your assigned Workgroups, or when your current session of Fusion CAC has been idle for an extended period, hit the Refresh button, within the application, to update the session with recent activity.
Note
The refresh button within Fusion CAC is different from the refresh button in your browser. Using the browser refresh button is NOT recommended as this will reload your session, resulting in a loss of work.
Assigned Account Grid

Each column within the Assigned Accounts Grid has menu options to pin, auto size, and reset columns as well as a Tool Panel to select which columns you want displayed in your view of the assigned accounts grid. Click on the Menu icon to view the drop-down listing.
Pin Column
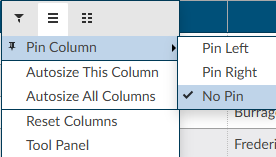
The Pin Column feature allows users to freeze desired columns to the right or left of the accounts grid pane. Doing so will keep these columns visible when moving to other areas of the assigned accounts grid. Columns can be rearranged after they have been pinned based on view preferences. To unpin a column, select the Pin Column option from the menu and choose No Pin.
Autosize & Reset Columns
Within the assigned accounts listing, the default column width is based on the account with the data field with the most characters. Users can size individual columns, or all columns to automatically fit the width of contents of that particular column. To autosize just one column, select the menu button for the column, then select “Autosize This Column”. To automatically fit the width of contents for ALL columns, select the menu button for any column, then select “Autosize All Columns”. To return column widths to their default settings, select the menu button for any column, then select “Reset Columns”.
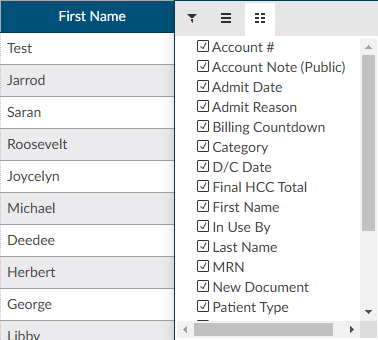
The Tool Panel feature gives users the flexibility to customize which columns are displayed within their Assigned Accounts Grid.
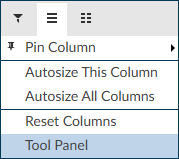
Click on “Tool Panel” from the Column Setting drop-down listing to view the Tool Panel selection menu. Select/deselect columns to be displayed and then click on “Tool Panel” again to hide the Tool Panel selection menu.
Grid Column Fields
Users can choose which columns to view when displaying their assigned accounts list by clicking on the Columns icon in any column on the assigned accounts listing.
Tool Panel settings will remain for all future coding sessions and subsequent logins. To bring all columns back into view, click on Reset Columns from the Column Settings drop-down listing.s
Sorting and Filtering
After selecting a workgroup, a list of accounts will appear in the grid. The displayed grid can be customized using the column menu settings to pin, auto size, sort, filter, and select columns to display. Columns can also be re-ordered by clicking and dragging the column headings. These setting are custom and “sticky”, meaning they can be set per user and remembered for future logins.

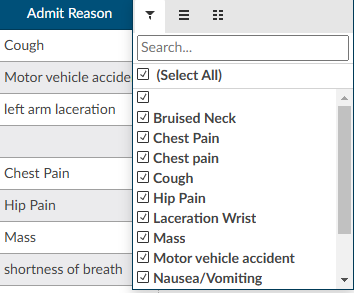
Using the filter menu allows users to narrow down and isolate the accounts to be worked based on data elements within the selected column. For example, the filter menu for the D/C Date column allows the user to filter the account list by selected dates using the checkboxes or entering specific dates in the Search box. A icon in front of the column heading means that a filter has been applied.
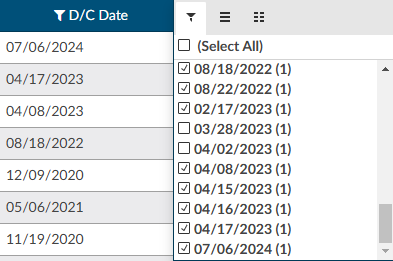
To remove any selected filters, click on the and then check the box for (Select All) to remove all filters.
When filtering more than one column, use the ‘Reset Filter’ button to remove all filters instead of removing the filter from individual columns.

Sorting information in the assigned accounts grid allows users to see data the way they want and find accounts quickly. Data can be sorted by text (A to Z or Z to A), numbers (smallest to largest or largest to smallest), and dates (oldest to newest and newest to oldest). To sort a single column, click once on the column header of the column you want to sort. The column header will change to an up arrow. This will sort the column first in ascending order (A-Z). Click the column header again to change to a descending (Z-A) sort with a down arrow. Clicking on the column heading a third time will return the column to the default sort and the arrow will disappear.
Ascending Sort: 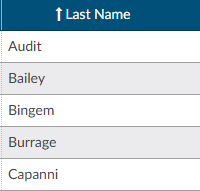
Descending Sort: 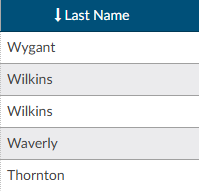
Users can select multiple columns for ascending and descending sorts. To sort multiple columns, click the column heading of the first column in the selection, then hold down the SHIFT button while clickiing the column headings of other columns to be added to the selection for sorting. Click the column header for sort selection (ascending, descending, default) until the individual column is sorted in the preferred sort order. After all selections have been made, release the keys for the sort results.
Manually Loading an Account
If a specific account is needed, it can be accessed by typing the account number into the Account # field on the right side of the Account List bar. The entered account will open after the user hits the Enter key or
clicks the List icon.

Alternate Views
Other special-case views are available by clicking the drop-down next to Account List and selecting the appropriate option:
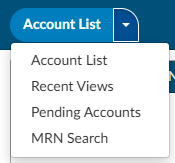
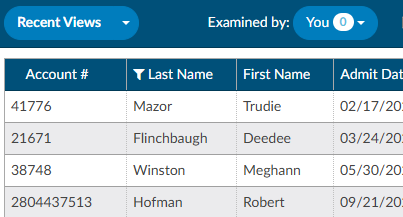
Recent Views
The Recent Views menu item allows users to quickly find accounts accessed within the last 24 hours in sequenced order.
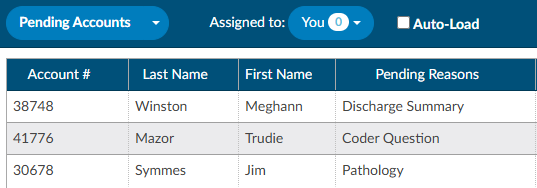
Pending Accounts
The Pending Accounts menu item displays all of the accounts that currently have a Pending Reason set by the user.
MRN Search
The MRN Search field allows users to search accounts by MRN. The grid will display MRNs that match the search.

Subsections of Accessing Accounts
Adding/Validating Codes
Validating a Code
Codes can be validated/added to the chart as Assigned Codes while reviewing documents and the suggested codes within each document.
Right-click on the code to Edit/Assign the code.
| Code Highlight | Meaning |
|---|

| If the background of the text suggestion has a purple background, the text matches a code suggestion |

| If the background of the text suggestion has a red background, the text matches only a secondary token |

| If the background of the code has a green background this means the code was already validated on a different document |
Adding a Code
There are multiple ways to add a code to a chart, if it has not already been suggested by the engine
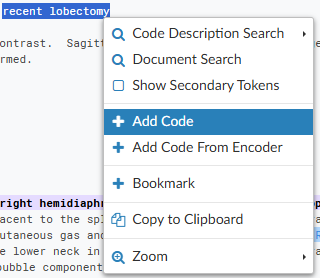
Add Code via Right Click
After reviewing all suggested codes from either the Documents tree or the Unassigned code tree, users can add a code to a text document by highlighting the relevant word(s) or phrase and then right-clicking to open the Add Code menu.
Add Code via Direct Entry
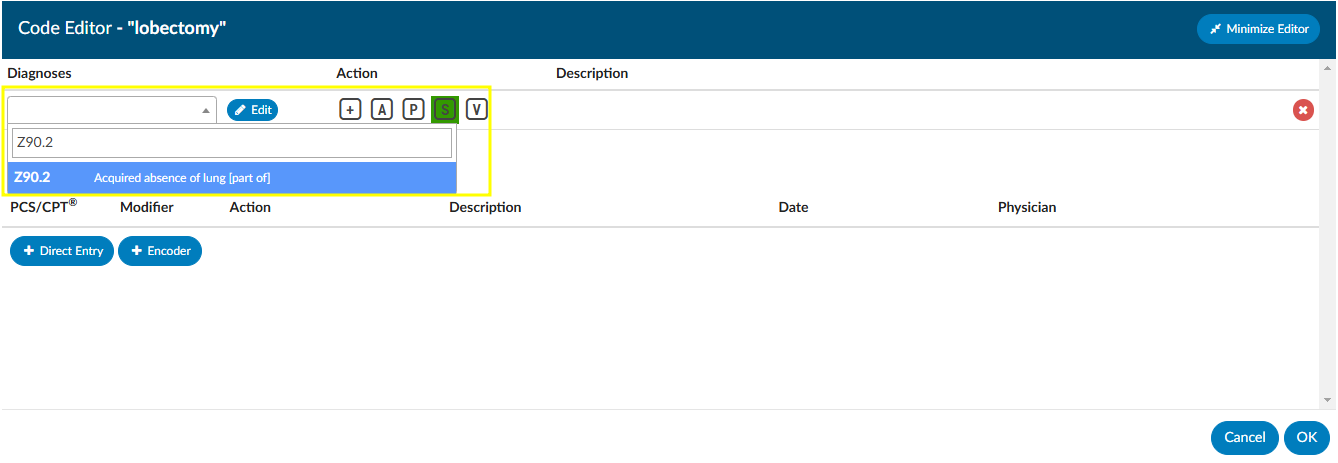
The Add Code box can be used when the code to be assigned is known and encoder is not needed.

Alternatively, the user can highlight a term, right click, and select +Add Code.
Enter at least the first 2 characters of the code to bring up the drop-down list of available codes for the main term, then scroll down the listing for codes to confirm the sub-term and select the appropriate code for complete coding. From the Code Editor window, users can also confirm the code description, set the POA Indicator, and designate the code as Admit, Principal or Secondary.
Users may also enter the text description of the code and select the code that way.
Either a Diagnosis or Procedure/CPT® code can be entered from the Code Editor window.
Add Code From Encoder
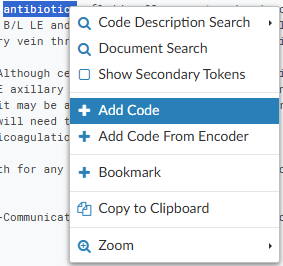
Users can add a code to a text document by highlighting the relevant word(s) or phrase and then right-clicking to open the Add Code menu. Left-click and drag the mouse to highlight the selected text for code addition, then right-click to open the Add Code Menu.
Click on the Add Code from Encoder + sign to launch the Encoder. Continue to use the encoder and accept the final code which will be returned to your chart.
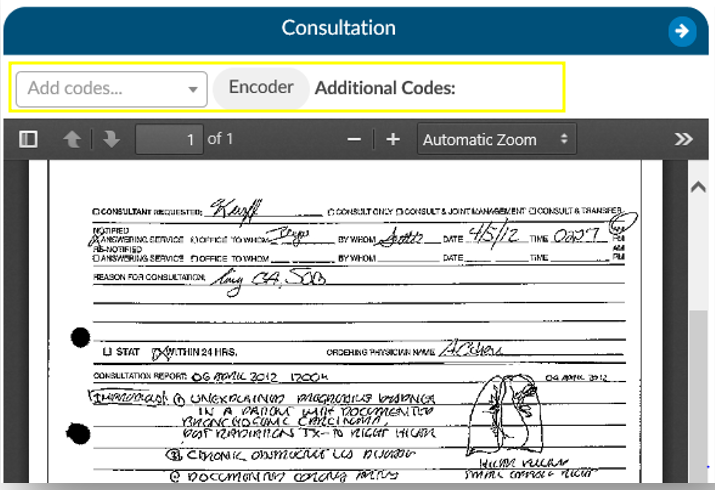
Add Code to Scanned Documents
The engine does not suggest codes from scanned documents. Users can add codes to scanned documents for codes not assigned elsewhere within the chart. Adding codes to scanned documents is recommended only when a code has not already been added to a text document within the chart or documentation to be coded is not found elsewhere.
To add a code to a scanned document, start typing the code in the Add Code box or click on the Encoder button in the bar above the scanned document.
Codes added to the scanned document will appear in the Additonal Codes space at the top of the document viewer.
Add Code From Codebook
Users can add a code to a text document by highlighting the relevant word(s) or phrase and then right-clicking to open the Add Code menu. Left-click and drag the mouse to highlight the selected text for code addition, then right-click to open the Add Code Menu.
Click on Add Code from Encoder + to launch the Encoder. Continue to use the encoder and accept the final code which will be returned to the chart.
The exact functionality of adding a code from encoder can vary depending on organizational settings and the encoder used. Please consult your supervisor if you need further instructions.
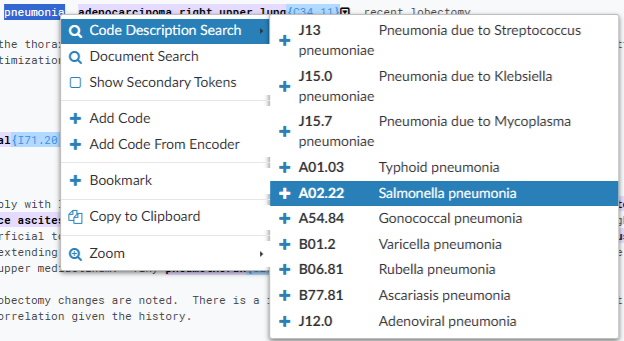
Code Description Search
Left-click and drag the mouse to highlight the selected text for code addition, then right-click to open the Add Code Menu. Click on Code Description Search to have Fusion CAC present any relevant code based on the highlighted word or phrase. If the correct code appears in this list, clicking on it will add the code to the document.
Supporting Evidence
Supporting evidence is defined as the components within the chart that were used to make up any suggested codes.
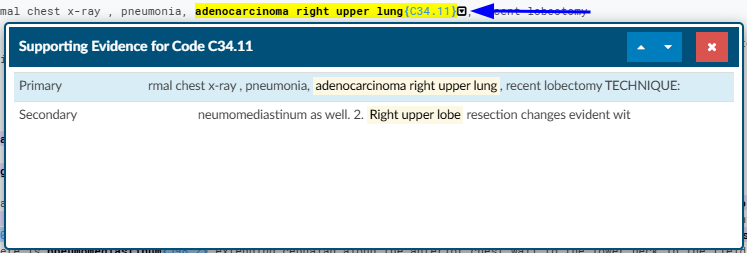
The supporting details help the user understand why the engine suggested a code. Clicking on the down arrow next to the code will show the words/phrases used to create the code. This linkage will allow users to determine if the code is correct or if it tried to put two thoughts together together incorrectly.
Best Practice: Reviewing Suggested Codes
Step 1: Review the Unassigned Codes Tree
The Unassigned Codes tree is your starting point when opening an account. All codes suggested by the engine will initially appear in this tree.
Begin with a quick scan of the list to gain a general understanding of the patient’s documented conditions. This brief review provides helpful context before you begin reading the chart and validating or assigning codes.
Important: At this stage, do not click on individual codes. This step should be a high-level overview only.
Step 2: Review Documents and Begin Coding
After scanning the Unassigned Codes tree, move to the Documents tree and begin reviewing the documentation necessary for coding.
Validate Codes as Needed
- As you read, If you encounter a suggested code from the engine and determine it is needed, right-click the code to add it to the Assigned Codes tree.
- If the suggested code is not needed, ignore it and continue reviewing the documentation.
When You Identify a Condition That Needs a Code
If you find a term that requires coding but do not immediately see a suggested code within the document:
- Check the Unassigned Codes tree to see if the code is already listed.
- If the code appears in the Unassigned Codes tree, right-click the code from the Unassigned Codes tree and assign it as secondary. (Code position - such as principal, admit reason or visit reason can be determined later.)
Important: Always right-click the code from the Unassigned Codes tree if you intend to use it.
Right-clicking moves the code to the Assigned Codes tree without navigating away from your current location in the document. Left-clicking will redirect you to another location in the chart and interrupt your workflow.
If No Code Was Suggested
If a condition needs to be coded and:
- No code was suggested in the document and
- The code does not appear in the Unassigned Codes tree
Then:
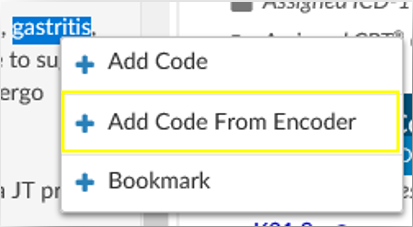
- Highlight the relevant word or phrase (double-click a word or click and drag to highlight a phrase).
- Right-click and select Add Code from Encoder.
- Use the Encoder to locate and assign the appropriate code.
Editing Codes
To edit an existing or suggested code, left click on the code to bring up the encoder and Code Editor windows. If the user is set up with dual monitors, the encoder window can be moved to the second monitor to remain open as they work through validation of each the engine suggested codes. From the Code Editor window, users can update codes from the code drop-down menu, via Direct Entry, or Encoder. The POA indicator and code status (Admit, Principal, or Secondary) can also be updated in the Code Editor.
To change a code, place the curser in the drop-down box where the code to be changed is displayed. Code parts, such as the code extension, can be edited instead of removing the whole thing.
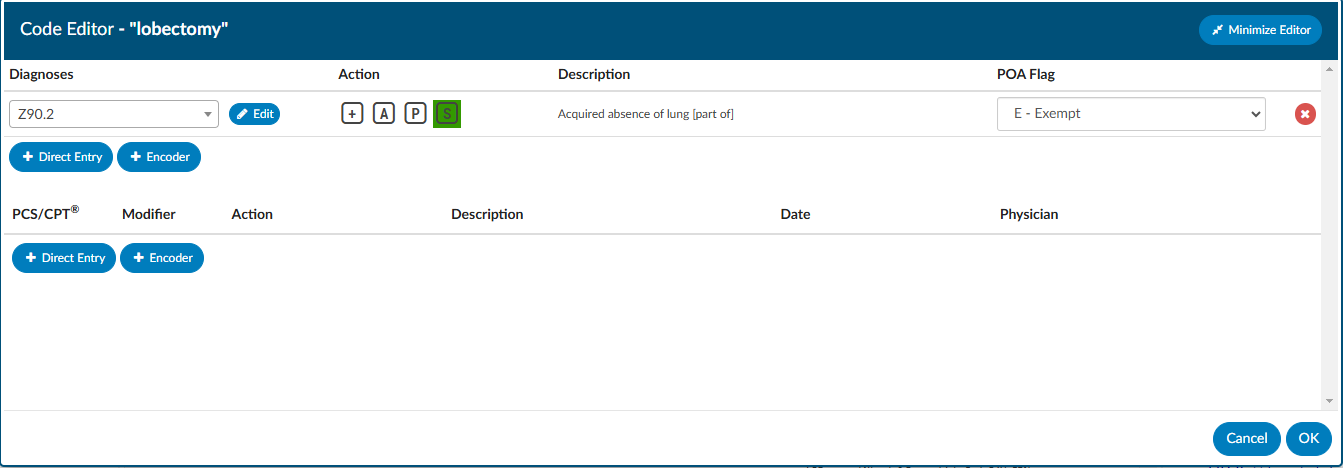
Users have the option to minimize and restore the Code Editor window to continue viewing documents or other areas of the chart as they are working to complete additional details for the procedure code.
| Code Editor Icon | Description |
|---|

| This button launches the encoder for the existing code |

| Adds a new line for direct entry of additional codes |

| Launches the encoder for selection of a code |

| Saves any changes for the current session of Code Editor |

| Closes window without saving changes from the current session of Code Editor |

| Deletes the selected code from the chart |
| Minimizes Code Editor window so that the main screen can be viewed |

| Restores the Code Editor window to full size for review and completion |
Adding Procedure Code Data
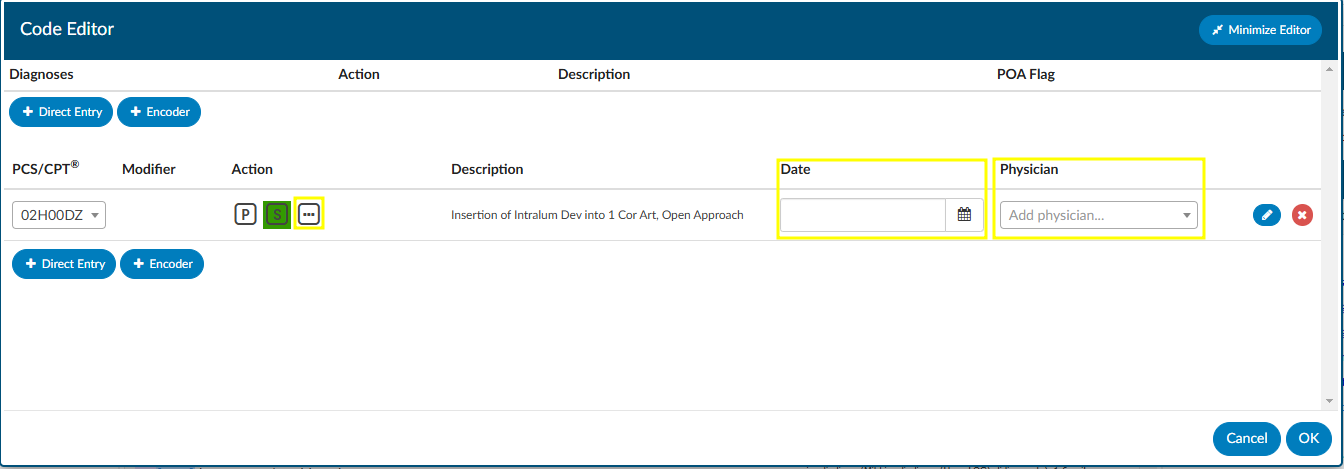
Procedure codes typically require additional information such as Physician and Date of Service for the procedure indicated along with procedure details. These fields are configured according to facility requirements and may look different per organization.
To enter in a date and physician to the procedure codes, right-click on the procedure code and then select Edit Procedure Info from the menu. After selecting a procedure code, the Code Editor window for the selected procedure code will open.
Add Procedure Date
To enter the procedure date, start entering the date in MM/DD/YYYY format or click on the calendar to select the procedure date.
Add Physician
To add the physician, click into the Add physician… drop-down menu. Start entering the name of the physician who completed the procedure, then select the physician’s name to complete this field. At least 3 characters of the physician’s last name are needed to view the drop-down listing. Continue entering characters of the physician’s last name to narrow the listing of physicians to choose from.
Add Additional Procedure Details
Click on the ellipsis … button under the Action heading.
Users have the option to minimize and restore the Code Editor window to continue viewing documents or other areas of the chart as they are working to complete additional details for the procedure code.
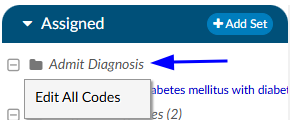
Mass Editing Codes
Mass editing of codes can be accessed by right clicking and selecting “Edit All Codes” on any of the code headers such as assigned diagnosis, assisted procedures, admit diagnosis.
Each code has a checkbox, and each section has an ‘ALL’ checkbox. If the user clicks the All checkbox, a checkmark will appear in all codes under it. Any change made to one of those checked codes will be reflected in all other checked codes.
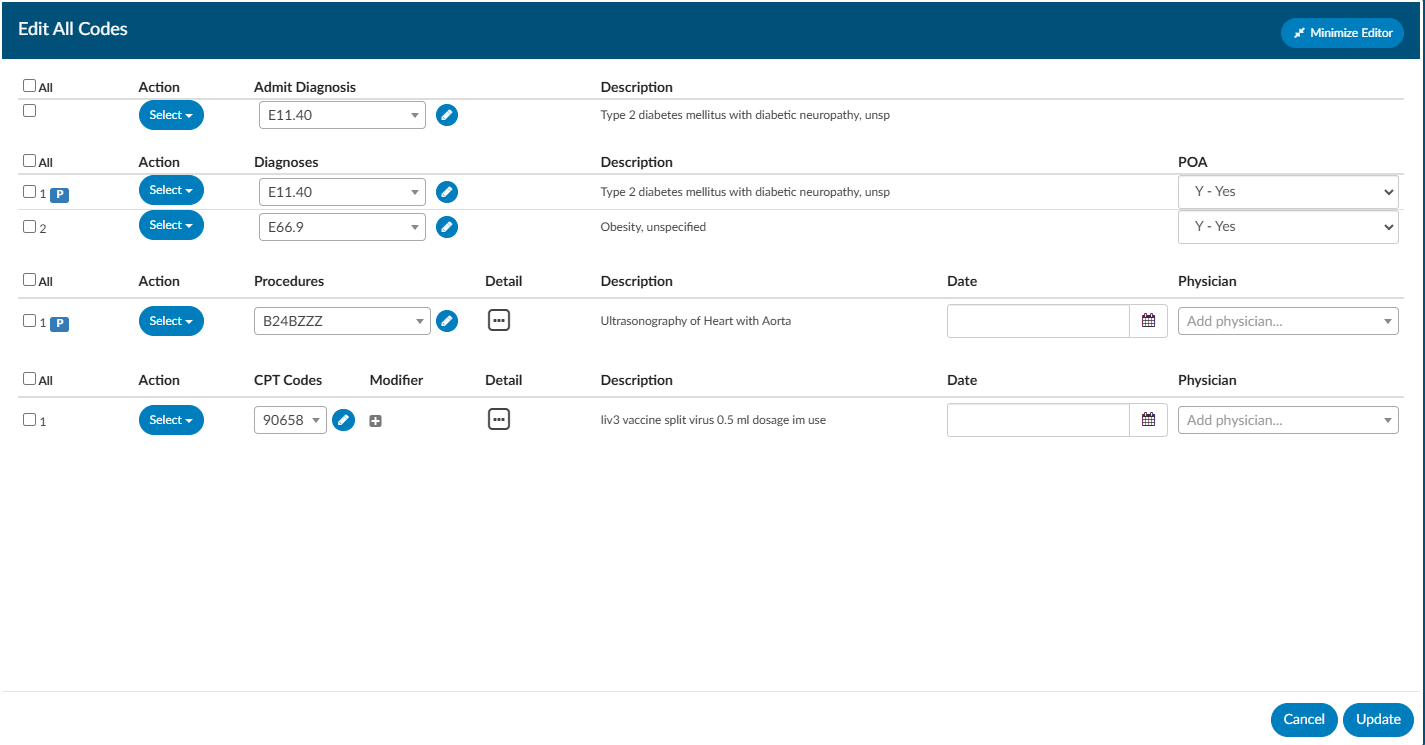
The CPT code section has a Modifier column with a plus sign. Clicking the plus will open up the details window to add/change Modifier, plus other items that are included in that window. Clicking on the ellipsis symbol next to the Episode field will also open the details. The user can add up to 4 modifiers, unless they are using the Solventum™ Coding and Reimbursement System (CRS) then they will be able to add up to 5 modifiers.
Associate a DX with a CPT
Fusion CAC allows users to associate a diagnosis code to a CPT code. After ensuring all necessary diagnosis and CPT codes have been assigned in the assigned code tree, right-click on the header in the assign code tree “Assigned CPT Codes” gray text to “Edit All Codes”. An Edit All Codes dialog will open. Click on the ellipsis (…) under detail to open the Procedure Details dialog.
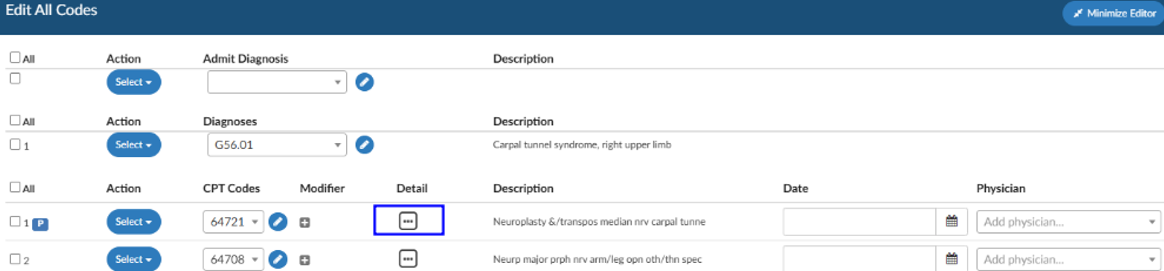
Then click on the “pencil” icon by “Diagnoses” to associate the diagnosis with the CPT.
PCS and CPT codes can be updated together. If there is a check mark, the change will be made to both the CPT and the Procedure Code. When both CPT and Procedure are selected together, only the Physician and Date can be changed.
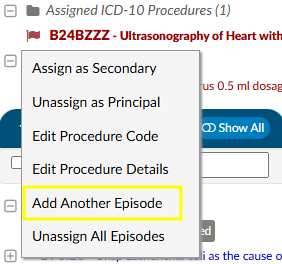
Add Another Episode
Right clicking on a procedure allows the user to add another instance of the same procedure without needing to duplicate the effort of recoding the procedure.
From Edit Procedure Info, you can also update additional information for the selection of procedure codes to add procedure date, add physician, and update additional details such as
- Anesthesiologist
- Anesthesia Type
- Tissue Sample
- Procedure Location
- Minutes)
These fields are configured according to facility requirements and may look different per organization.
Code Sequencing and Computing a DRG
Code Sequencing
There are multiple ways to re-sequence codes that have been validated and added to a chart. Dolbey’s recommendation is to re-sequence codes using the existing encoder.
Code Sequencing and Grouping with Encoder
After clicking the Compute button, all patient demographic information and validated codes are uploaded to the existing encoder.

Use the encoder to re-sequence codes, complete grouping, and complete the encoder session to return the computed grouping and re-sequenced codes to Fusion CAC. From here you will be directed to the Code Summary page for review of Validation Results (and resolution or errors), Assigned Diagnosis Codes, and Assigned Procedure Codes.
Code Sequencing with CAC
If grouping and billing edits are not required, codes can be re-sequenced by dragging and dropping codes within the Assigned Codes Tree.
Left click and hold the code to be re-sequenced, then move it to the new sequence location and release.
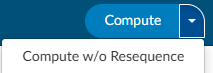
TruCode users have the option to perform an encoder calculation without automatically resequencing the assigned codes on an as-needed basis. In the dropdown menu on the right-side of the “Compute” button, the “Compute w/o Resequence” menu will perform the encoder computation but leave all diagnosis codes in their original position. This feature will enable sites to re-sequence codes above a certain position.
Computing a DRG/Grouping
Use the Compute button to launch the encoder and proceed with confirmation of codes and sequencing to complete grouping and return the computed grouping and codes to Fusion CAC.
Principal DX Analysis
Use the Principal DX Analysis button to analyze all assigned codes on an inpatient chart to see what the DRG would be if the code was a principal diagnosis.
TruCode users have the option of Principal DX Analysis. In the dropdown menu on the right-side of the “Compute” button, the “Principal DX Analysis” menu.
Exiting a Chart
Once a user has finished working in an account, there are three ways of proceeding:
Cancel

This action cancels all work in the chart and either returns the user to the Workgroup or autoloads the next account (if autoload is selected). Upon canceling, the user will be prompted if any unsaved changes exist.
Save

This action saves the users work and either returns to the Workgroup or autoloads the next account (if autoload is selected).
Submit

This action saves and sends the users work to the next phase of workflow, based on the organizations requirements. The user is either returned to the Workgroup or the next account via autoload (if autoload is selected).
Account Changed Warning Box
Upon taking one of the actions above, Fusion CAC may present a pop-up warning that reads, “Warning: Account Changed. The account has been changed by an upstream system” This warning appears when Fusion CAC has received a change to the account – usually a new document – between the time the account was opened and when the user chooses to Cancel, Save, or Submit. This warning allows the user to double check their work based on new information provided to Fusion CAC.
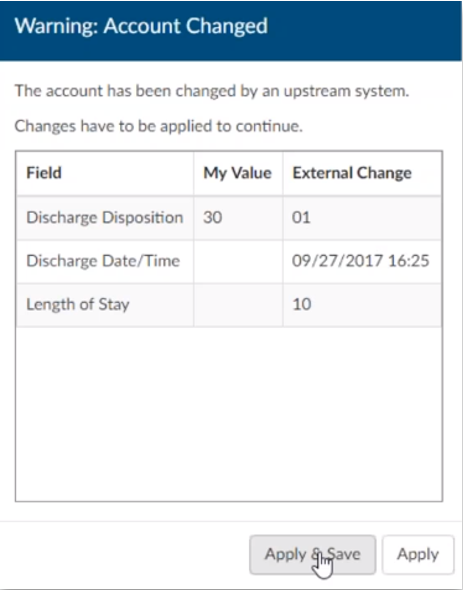
Selecting Save and Apply will apply the incoming changes to the account and continue with the process the user had selected. Choosing Apply will apply the incoming changes to the account and return the user to the account to continue working.
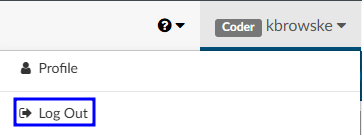
Ending a Coding Session (Log Off)
To log out of the application, click on the down-arrow next to the user name in the top right corner of the software, then select ‘Log Out.’