CDI/Clinical Alerts
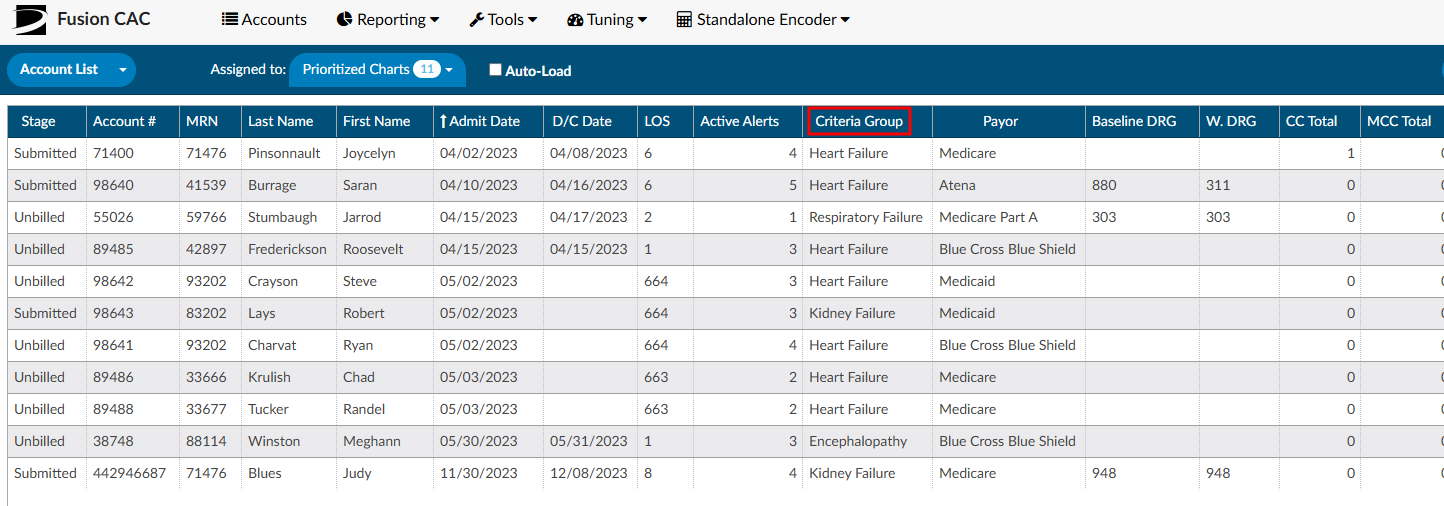
The software has a feature called CDI/Clinical Alerts which are automated messages generated by the software that can be used to prioritize CDI workflow. CDI/Clinical Alerts are used to detect potential inaccuracies, inconsistencies, and/or discrepancies in clinical documentation. These Alerts help CDI teams to prioritize the charts based on potential query opportunities available.
The software provides real-time Alerts when potential query opportunities are identified. Which will then allow CDI staff to prioritize charts based upon those potential opportunities.
What is a CDI/Clinical Alerts Topic?
CDI/Clinical Alert Topics are the diagnosis that is being targeted by the Alert. The Topic encompasses a broad range of diagnoses that address various issues being targeted by the system. These diagnoses then branch out into more specific types known as Alerts. These are based on the type of issue being targeted.
What is a CDI/Clinical Alerts Message?
The Alert message is a specific message that details what is missing, incomplete, and/or inaccurate documentation that is missing with the Diagnosis/Topic that is being targeted.
CDI/Clinical Alerts Types
CDI/Clinical Alerts branch out into four (4) types of Alerts.
| Alert Type | Description |
|---|---|
| No Documentation but, Clinical Indicators | This Alert type is when the provider did not document a diagnosis but, there are clinical indicators that support “Possible Diagnosis”. |
| Documentation but lack of Clinical Indicators | This is where the provider documented the diagnosis but there is a lack of clinical indicators that support the diagnosis. For example, Sepsis was documented by the provider but it’s not supported by clinical indicators. This Alert helps to ensure that diagnoses are audit proof, ensuring that the supporting evidence requiered for a proper diagnsosis validation is present within the patient’s chart. |
| Documentation but Not Fully Specified | This is where the provider documented a diagnosis but, it was not documented to its full specificity. For example, Heart Failure Unspecified: the diagnosis is not documented to the full specificity. This CDI/Clinical Alert is helpful for ensuring that diagnoses are documented to their full extent in order to combat denials. |
| Conflicting Diagnosis | This alert detects instances where two or more fully specified versions of a diagnosis may conflict. For example, if one provider documents Acute Diastolic Heart Failure in one section of a patient’s record, while another records Acute on Chronic Systolic Heart Failure elsewhere, the alert flags the discrepancy. By ensuring diagnostic consistency, this alert helps maintain an accurate clinical picture, enabling all care providers to deliver the best possible care. |
Setting up CDI/Clinical Alerts
In order to set up CDI/Clinical Alerts, reach out to the SME Team (smeteam@dolbey.com) for assistance. There is a module that must be deployed in conjunction with set up within the workflow management editor.
Viewing CDI/Clinical Alerts
To access and view CDI/Clinical Alerts within a patient’s chart, locate them in the Navigation tree and click on the “CDI/Clinical Alerts” viewer. This will make the viewer display in the middle of the screen. There is also a box with an arrow next to “CDI/Clinical Alerts” that will allow the user to pop-out the viewer in a different tab. Doing this gives the user the ability to move the tab to a different monitor, if desired.
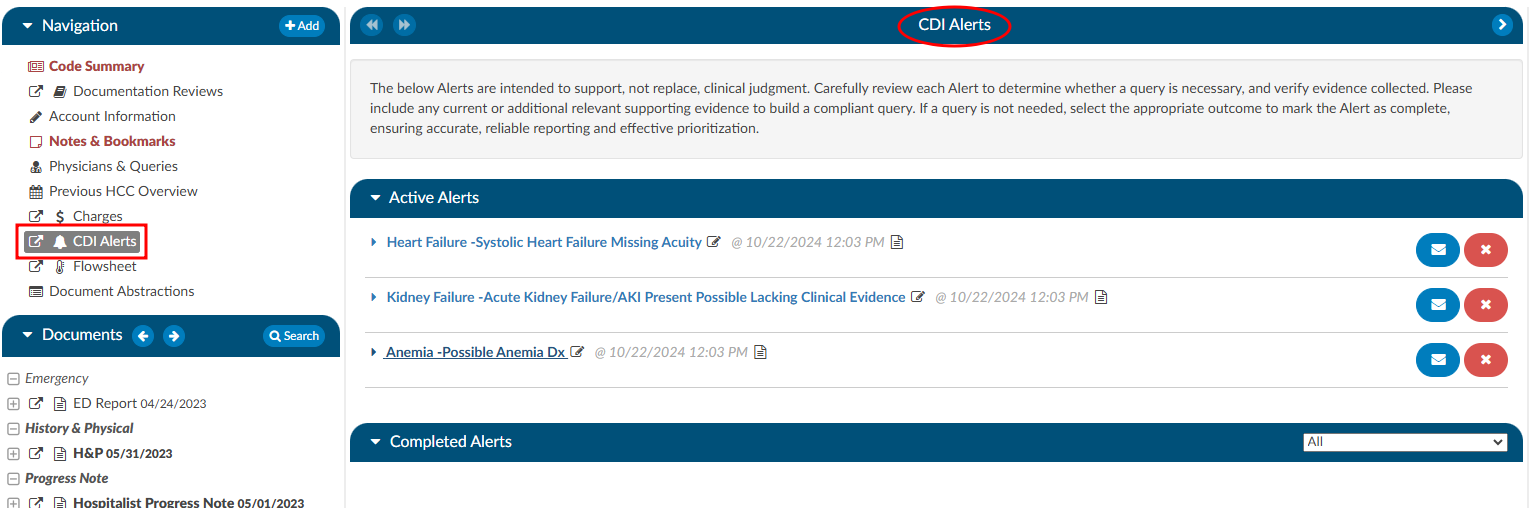
Navigating the CDI/Clinical Alerts Viewer
In the CDI/Clinical Alerts viewer there are two headings in the dark blue bars which include:
Clicking on either of these headings will expand or collapse the section. Within each section are the actual Alerts that were triggered for the current account that is opened.
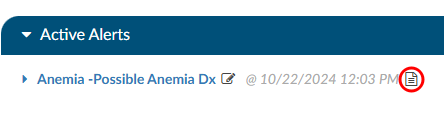
Active Alerts
The section “Active Alerts” are Alerts that the system found and no action has been taken to resolve them.
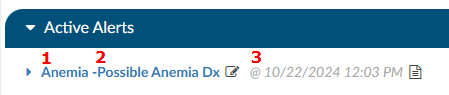
There are three parts to an Alerts title to observe:
- Alert Topic - This corresponds to a diagnosis.
- CDI/Clinical Alerts Message - This is a brief description of what the system found to be missing, incomplete, or possibly inaccurate and corresponds to the Topic.
- Date and Time - This is the date and time when the system found evidence for the alert to trigger. This information is tracked for reporting to see how quickly the system is triggering an alert.
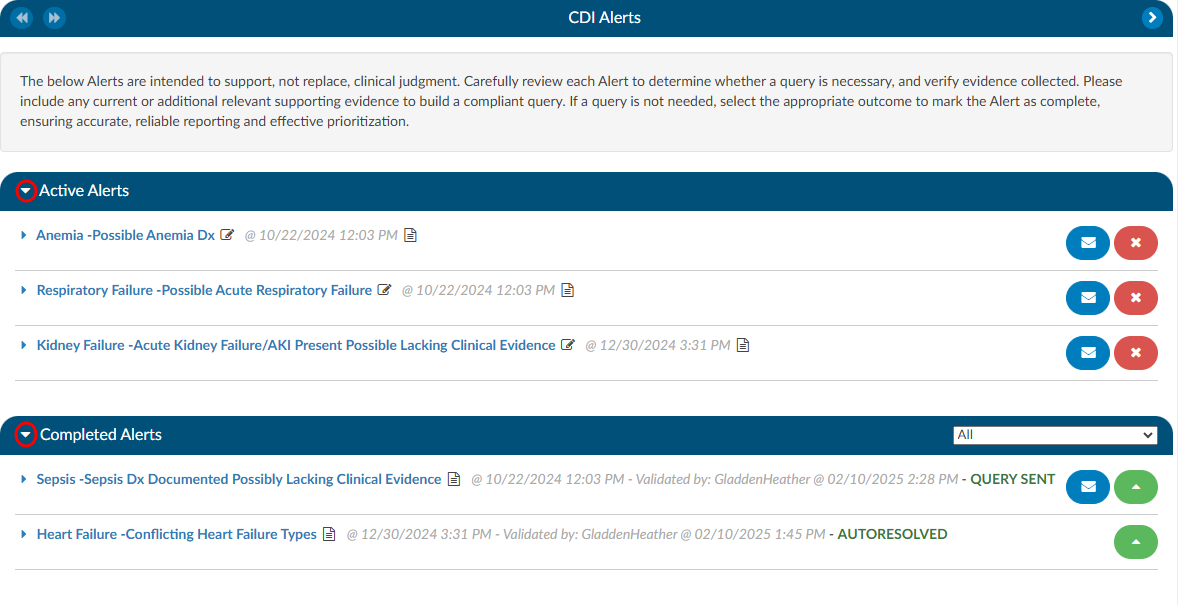
Completed Alerts
The section “Completed Alerts” are Alerts that have been closed in one of the following manners:
- Auto-Resolve by the system
- CDS initiates a query
- CDS clicks on the RED X next to the Alert
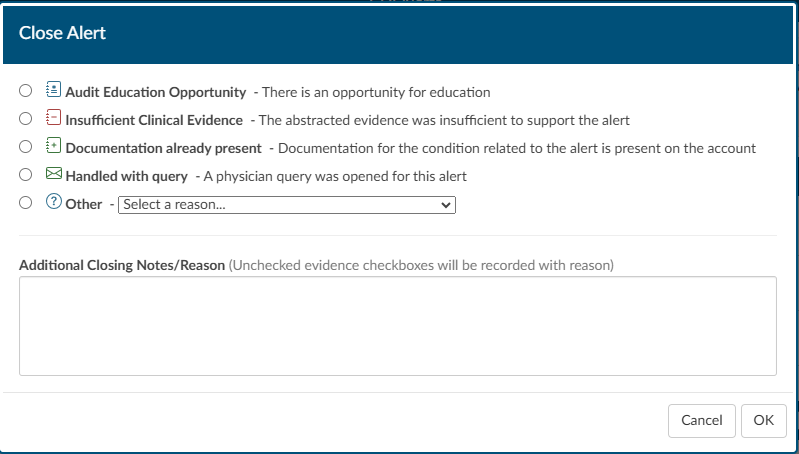
When choosing to close the Alert, the CDS will be presented with a “Close Alert” dialouge box to select why they are closing the alert.
The date and time stamp in the title of the Alert will indicate when the Alert was closed, and by whom. The title will also display GREEN text that depicts how the Alert was closed.

CDI/Clinical Alerts Notes
Next to each of the Alerts in either the Active or Completed Alerts section is a paper icon.
When clicked, this icon will launch a notes page. This can be used by a CDS to leave a note if they do not feel the Alert currently has enough evidence to build a query, but also shouldn’t be ruled out as it could trend towards the diangosis alerted. Once a note is typed in it will leave the date and time as well as the CDS name so if another CDS enters the chart, they will be able to clearly see who chose to monitor the Alert at this time and why.

Upon adding the note the paper icon will turn RED , notifying the next user that is reviewing the CDI Alerts that there is a note present on the Alert.

Once a note is typed in it will leave the date and time as well as the CDS name so if another CDS enters the chart, they will be able to clearly see who chose to monitor the Alert at this time and why. Upon adding the note the paper icon will turn red, notifying the next user that is reviewing the CDI/Clinical Alerts that there is a note present on the Alert.
CDI/Clinical Alerts Editor Function
Adjacent to the Alert message, there is a pencil icon. Clicking on it will open an editor, enabling the CDS to rearrange and customize the placement of evidence using a drag-and-drop functionality. This feature empowers CDI professionals to organize their items in a personalized manner, aligning with their specific querying requirements.
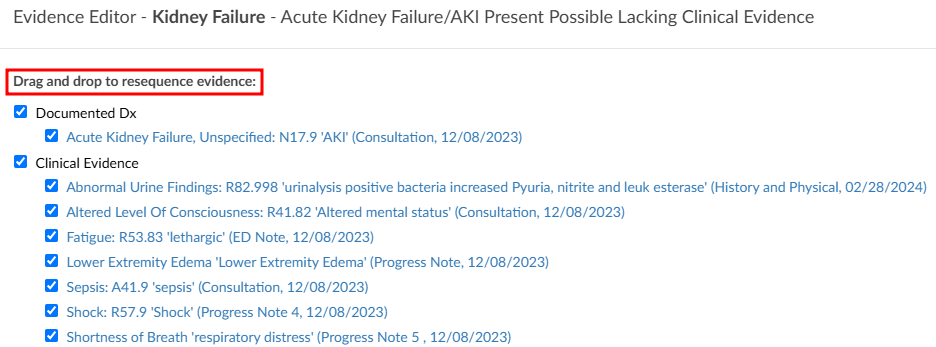
Reviewing Clinical Evidence
Each CDI/Clinical Alert contains clinical evidence extracted from the patient’s chart. There are four different types of evidence that can be extracted.
- Words and phrases within documentation such as signs and symptoms, and medications.
- Value abstractions from the documentation such as vital signs or laboratory findings within physical documents.
- Code abstractions from documenation.
- Discrete values such as laboratory studies and vital signs found in the flowsheets, medications from the medication viewer and other flowsheet data.
The evidence in the Alerts are linked to documents within the patient’s chart, via a blue hyperlink, ensuring that the CDS directly connects to the relevant document associated with the Alert. This feature is especially useful for referencing specific documents that may be crucial to a particular Alert. The evidence is systematically categorized into sections such as Laboratory Studies, Clinical Evidence, Vital Signs, and Intake & Output Data.

After the abstraction process, there will be words or phrases in quotes—these represent the terms the engine identified within the documentation or values. If the data is derived from a document, the document name and date are displayed; if obtained from flowsheets, the result date and time are shown.
For medication discrete abstraction, key details such as the medication name, dosage, route, and administration date and time are presented, ensuring essential context is provided.
When selecting evidence with a document type and date, a hyperlink will direct the CDS to the exact location in the document where the abstraction was found, with the relevant text highlighted in yellow. Additionally, there will bes green highlights within the documentation, marking abstractions specific to CDI/Clinical Alerts. These function similarly to code abstractions but are tailored for CDI rules.
Hovering over a green-highlighted abstraction will display which Alert the evidence is associated with, especially when multiple Alerts are present.

When clicking on a hyperlinked evidence that is followed by result date and time, indicating a discrete value abstracted from the flowsheets, it will automatically take the CDS to the corresponding location in the flowsheets and highlight the respective row.

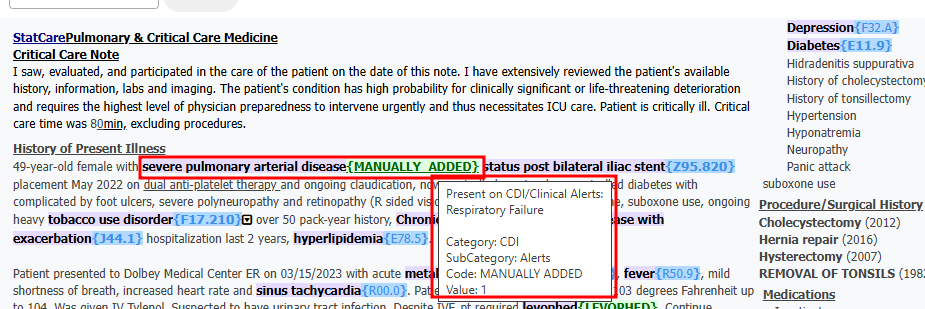
Another noteworthy capability within Clinical Evidence is the ease with which a CDS can incorporate additional evidence. While reviewing documentation and flowsheets, if a CDS identifies items deemed crucial for inclusion in the CDI/Clinical Alerts as supporting evidence for a query, they can effortlessly highlight words or phrases in a document, up to a maximum of 1000 characters, and perform a right-click. This action triggers a menu presenting various options, including one that reads “Copy to CDI Alert.” Clicking on this option reveals a pop-out menu displaying available Alerts to which the evidence can be added.
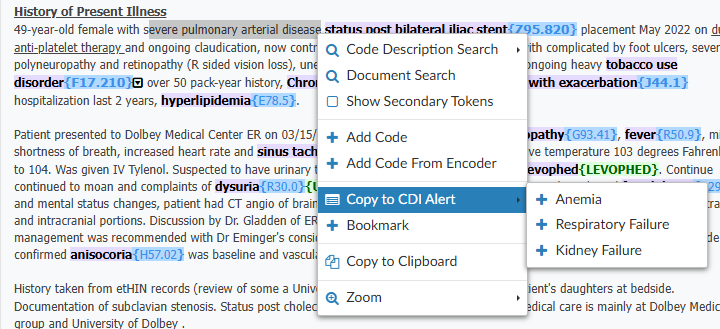
Upon selecting the desired Alert, the system opens the Evidence Editor, allowing the CDS to specify where the evidence should be attached. If the CDS clicks on existing evidence, the new evidence will be attached below it. Once the evidence is copied over, the system provides details such as the evidence itself, the name of the document, and the date. For Laboratory Studies, it includes the result date and time.
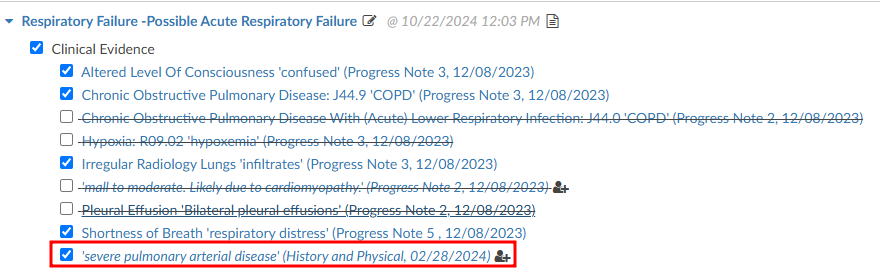
After incorporating the evidence into the designated alert, any highlighted evidence will be displayed in the document in purple, accompanied by the phrase “MANUALLY_ADDED” in green at the end. This informs the user that the evidence was added manually. Similar to other evidence, hovering over the green-highlighted section will provide information about the CDI/Clinical Alert to which the item was applied.
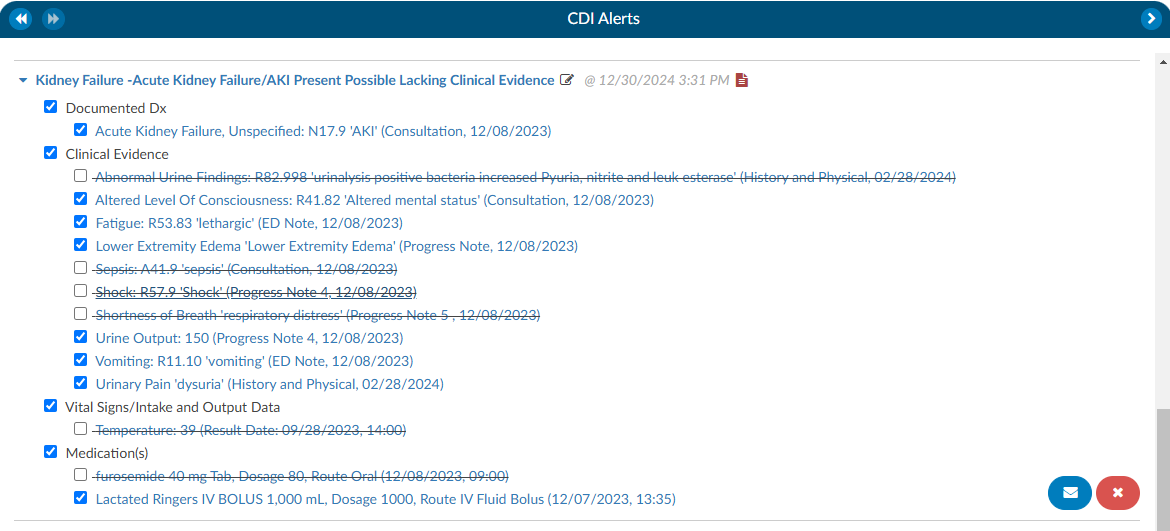
When going back to the CDI/Clinical Alerts viewer there will be check boxes present next to the evidence which serves two purposes. First, when a query is initiated, any evidence marked with a check mark will be automatically copied to the clipboard allowing the CDS to conveniently paste the evidence into the query. This copying action occurs when the clicking on the BLUE ENVELOPE icon.
Second, unchecking any of the clinical evidence will put a strike through the text and it will prevent it from being copied over. Additionally, any unchecked evidence will be reported back to Dolbey’s Clinical Team if an Alert is closed due to it having invalid clinical indicator, insuffiecient clinical evidence, or documentation is already present.
How to initiate a Query
In the right hand corner of the Alert there is see a BLUE ENVELOPE icon next to a RED X icon. Clicking on the BLUE ENVELOPE will launch the CDS into a query template.
Query
A query template will autoload for the specific Alert that is being queried. These templates can be set by the management staff specific to each organziation.
The evidence previously examined on the Alerts viewer page can now be effortlessly incorporated into the query. When the query button is pressed, the selected evidence will be automatically copied to the clipboard. This can be pasted using a simple process, either by pressing the “ctrl” and “v” keys, the standard Windows keyboard shortcut for copying, or by performing a right-click and choosing the paste option. After the query is submitted, the corresponding CDI/Clinical Alert will transition from the Active Alerts section to the Closed Alerts section.
Once that query has been submitted that CDI/Clinical Alert will move from the Active Alerts section down to the Closed Alerts section.

Autoresolve
The Alerts have the ability to autoresolve themselves if documentation comes in that would satisfy the Alert. Once an Alert is Autoresolved it will move to the Completed Alert section. This will ensure that only Alerts that require attention are active for the CDS.
Closing Alerts without Querying
If it is determined that an Alert can be closed without initiating a query, a CDS can click on the RED X and the CDS will be presented with a “Close Alert” dialouge box to select why they are closing the alert (see the Completed Alerts section of this page).
Best Practices for Closing CDI/Clinical Alerts
The goal of this process is to ensure that end users provide actionable feedback directly within the CDI Alerts viewer. This helps streamline communication, create a consistent feedback loop, and provide a clear picture of system performance.
When reviewing an alert, the user should:
Assess the clinical evidence included in the alert.
Uncheck any inaccurate markers before closing the alert.
Select the appropriate closure reason from the list below.
End users have two ways to provide feedback on an alert:
Close a CDI Alert, or
Issue a Query.
Manual CDI Alert Closure Reasons
Audit Education Opportunity:
Indicates an opportunity for education when a CDI Specialist closes an alert as “Insufficient” but should have instead issued a query. Managers can click the green “Reopen” button, reopen the case, and update the closure reason to “Education”.
This closure reason is for Managers only. CDI Specialists should not select this option.
Insufficient Clinical Evidence:
Indicated the abstracted clinical evidence is not sufficient to support the alert. In your opinion, the evidence does not justify the alert and it should not have triggered. The method of closure helps the tuning team identify alerts that may need refinement to improve accuracy.
Example: A patient chart triggers a bleeding alert because the patient is on anticoagulation therapy. However, the medication is being used to treat atrial fibrillation (Afib), not active bleeding. In this case, select Insufficient Clinical Evidence and include a short comment explaining why.
Documentation Already Present:
To be used when the diagnosis is already documented in the chart, whether or not it has a corresponding code. This method identifies cases where tuning or auto-resolution processes may need optimization.
Example(s):
- The diagnosis is documented and coded, but the alert failed to auto-resolve.
- The specialist manually adds the code, indicating that the system’s tuning logic may need adjustment.
Handled with Query:
For when a physician query was placed before the alert was reviewed to indicate the alert correctly identified a valid issue, but it was already being addressed. This type of closure confirms that the alert was accurate, but action was taken independently.
Example: The CDI specialist noticed the same clinical concern and issued a query before the alert triggered.
Other:
Used when the alert is closed for reasons unrelated to its accuracy or CDI performance. The below can be customized in the mapping table thus your organization may have different or additional options than shown below. This closure method should be used when the chart no longer requires a query or the reason does not fall into one of the previous categories.
Dropdown Options:
Alert Triggered but Queried for a Different Clinical Condition - Use when the alert led to identifying and querying for a different condition.
Chart Optimized for the Billing DRG - Use when the alert was correct, but the chart is already optimized and no query is necessary.
Coding Guidance Prohibits Coding of the Condition - Use when the alert triggered from data that cannot be coded due to coding rules or exclusions.
Condition or Diagnosis Is a Tuning Concern - Use when the alert triggered incorrectly because of an abstracting or coding error.
Adding Comments:
Comments are otptional, but encouraged. Users can add free-text comments when closing an alert to provide context for why the alert was closed. These comments help Dolbey’s development and tuning teams understand user perspectives and identifies patterns or potential system improvements.