Subsections of Release Notes
V2.23 (Dec 2021)
V2.23.8021 Released 12/17/21
The notes below indicate changes and additions to the software. Please review these release notes
carefully when deciding to apply a software update to an installation.
Each note is related to an issue tracking assignment number (starting with CACTWO) in the heading.
Please refer to the change with this tracking assignment number when communicating questions or issues.
The heading also contains a parenthesized "Change Type", indicating the severity or importance of
the change. The severities used are:
- Critical - Recommended that this application be upgraded as soon as possible at all sites
running previous versions.
- Conditionally Critical - Recommended that this application be upgraded as soon as possible at
all sites running previous versions matching the stated conditions.
- Important - Recommended upgrading the application if the customer is experiencing the issue
denoted or currently applying a work-around for a specific non-functional feature.
- Enhancement - Recommended upgrading only if the specific functionality is desired.
CACTWO-3581 (Enhancement)
Allow customers with encoder other than TruCode to see Partial Code Suggestions
TruCode encoder users today can receive benefits when the documenation is
not fully available for engine to suggest a complete code. In this case,a partial
code is suggested We have added the ability for non-TruCode encoder users
to also enjoy this feature but, TruCode must be liscensed to enable this
feature.
Please contact your sale representative for pricing to enable.
CACTWO-3892 (Enhancement)
New section added to Administrative Dashboard
New sections have been added to the Administrative Dashboard: Coding
Trends, Top 10 Queries, and Top 10 Final DRGs. Top 10 Final DRGs has a
dropdown to allow viewing for current month, prior month and last 6 months.
The Top 10 Queries in Last 30 days pane has a dropdown to allow viewing of
all accounts, inpatient accounts or outpatient accounts.
The Coding Trends per Day has a dropdown to allow viewing of Average Daily
Codedand Average TAT to Submit. This pane does not have any grid links
associated with it and is intended for informational purposes only. Coding
Trends are based on the last day work was submitted and does not include
today’s work. The last workday will show in the pane’s title bar.
CACTWO-4386 (Enhancement)
New Engine Outcome per CDI report
The Engine Outcome per CDI report shows the total codes that the engine is
suggesting, and what CDI is using vs. what CDI is manually adding compared
to the coder’s Final Codes. This report should tell the level of manual effort
per CDI of those codes that are being used for final code assignment by
coders. It will show total assigned codes by CDI broken down by code set along
with how many codes were suggested by the engine versus added by text
documents and non-text documents in addition to those that were added in
duplicate. Duplicate is defined as codes that both the engine and the end-user
added and are notated with an exclamation mark (!) in account detail. There
is also a column to indicate the codes manually added and how many the
coder assigned for final code assignment. This report card should be used as
an educational opportunity to show possible improvements for the end-user
and/or the code suggestions. This report is recommended to be used in
conjunction with an audit. This is not retroactive enhancement.
CDI Feature
You must be using Fusion CAC for CDI to view this report.
CACTWO-4412 (Enhancement)
Add Workgroup Type classifications to each worklist to more accurately depict the Coding Chart Status Report
In Workflow Management, each workgroup now has a new “WorkGroup
Type” field. This field is optional, but sites can designate a type for each
workgroup. The purpose of doing so is for current and future reporting. For
this feature, setting a workgroup to a type besides “Coding” will exclude the
account’s time assigned to it in the “Coding Chart Status Report”.
Workflow groups can now be excluded from the Coding Chart Status Report
if a group other than ‘Coding’ is selected. A new dropdown will appear in the
criteria pane of the workgroup:

The Workgroup Type dropdown is based on a new Mapping Configuration
that the user can add to if desired. A default set is included with the upgrade.
If a user sets this field as anything other than ‘Coding’ or leaves it blank, any
account with this workflow assignment will no longer count in the ‘From
Coding Worklist’ column. In this Inpatient case, the account was assigned to
workflow that had a Workgroup Type of Audit for 1 day, then was moved to
a workflow with a Workgroup Type of Coding for another day before
submission. Only the Coding time is showing in the column.

CACTWO-4601 (Enhancement)
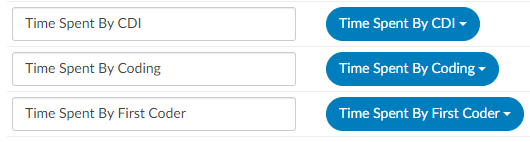
Add 3 New columns to grid columns
Three new fields are available in grid columns for use in account search: Time
Spent by CDI, Time Spent by Coding and Time Spent by First Coder. This
change is not retroactive.
CACTWO-4654 (Enhancement)
Create Dashboards for Auditors
Two additional Dashboards have been created: Audit Personal Dashboard
and Audit Management Dashboard. With the addition of these dashboards,
the original buttons used for selecting the dashboard have been changed.The
user can either click on the down arrow and drop down to see all the
dashboards, or the user can click the left and right arrows to page through
each dashboard choice.

CACTWO-4691 (Enhancement)
Work Available list added to all Dashboards
A panel on the dashboards that shows all work available will now show on all
dashboards. The worklist starts with a ‘You’ assignment, then continues down
through all workflow groups in order to how they appear in your users profile.
The columns in this panel are the assigned groups, total charts in each group,
oldest discharge date and total charges.
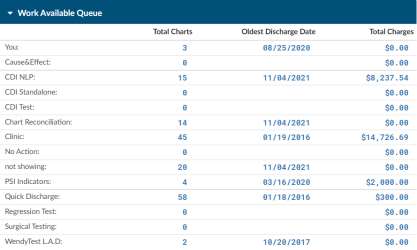
Work Available Numbers Are Not Clickable
Most dashboard numbers in blue are clickable, but on the work
available queues they are not since some users are in force autoload mode
and therefore this view is simply a view of whats available in each.
CACTWO-4692 (Enhancement)
Allow Forced Autoload user to view the new Work Available Queue
A new privilege called ‘View Work Available Queue in Forced Autoload has
been added to Role Management. When this option is enabled, a Forced
Autoload user will now see the Work Available Queue on the dashboard.
Note
This feature requires Roles Management to be enabled.
CACTWO-4698 (Enhancement)
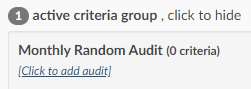
Scheduled Workflow for Auditors
A new workflow category of Audit has been created which allows its assigned
workgroups to be scheduled to run. When a criteria is created for the
workgroup, a new link for adding an audit will be shown under the criteria
name:
Clicking on the new link will bring up a schedule box, allowing that criteria to
only be run daily, weekly or monthly.
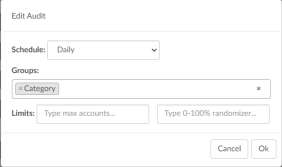
Limits for the audit are assigned at the bottom. The first box is a max amount
of accounts to pull into the workgroup, the second box is a percentage of
matched accounts to be pulled in. If both boxes are filled out, the max amount
will override the percentage. This can also be set to be run per group,
selected from the groups drop down field.
CACTWO-4700 (Enhancement)
Add assigned workgroup to top of Audit Worksheet
The top of the Audit worksheet will now display any Workgroup assignments
for that account.

CACTWO-4704 (Enhancement)
Add buttons to move through document tree
New backward and forward arrows have been added to the top of the Documents
panel. This will allow the user to move up and down through the documents listed in
the panel.

CACTWO-4705 (Enhancement)
Add buttons to move through viewer panel
New backward and forward arrows now appear to the left in the blue bar of
the document viewer. This will allow users to move back and forth through
documents that have been opened into the viewer screen. Note that when a
user arrows back and forth, then clicks on another document, the user is
starting a new history for that option.

CACTWO-4707 (Enhancement)
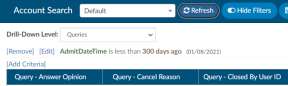
Add ability to drill down to physician queries in Account Search
‘Queries’ has been added to the Drill-Down Level options in Account Search.
This will automatically add Queries columns to the resulting account search
without the user having to add them. These default columns appear at the
beginning of the grid and can be moved to other positions.
CACTWO-4710 (Enhancement)
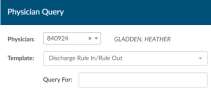
Add ‘Query For’ field on queries to further define generic queries.
The new field will appear under the template name,. This additional “Query For” field will allow the
template reason to be more specified.
The text that is added in this field will show in a new ‘Query For’ column in these reports:
Outstanding Queries, Query Impact by Discharge Date, Query Impact Report, Query TAT by Author
Report and Query Template Volume Overview. In order to see this new field
you must add it to the template created in forms designers.

CACTWO-4716 (Enhancement)
Add internal note for physician queries
Internal only notes can now be added to Physician Query templates from Query Designer.
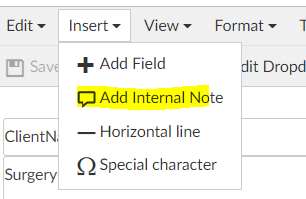
On a template, clicking the Insert dropdown will now show a new option of Add Internal Note. The
Internal note is only displayed for the user filling out the query and is not set to the provider
receiving the query. Selecting this option will add a highlighted free text line to the document

When adding a physician query the user will see the highlighted section in the
query when that template is selected.
After sending, this note will no longer
be seen unless the user has the privilege of ‘Edit Open Queries to resend’ in Role
Management. An Edit checkbox will show on the dte line, and checking it
will show the query with the internal note.

CACTWO-4721 (Enhancement)
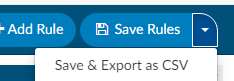
Allow Validation Rules to be exported
A new ‘Export’ button has been added to the top of the page under the save
rules button of the Validation Management page. Clicking on the down arrow
will give the user the ability to export as a CSV file.
CACTWO-4722 (Enhancement)
Add chatroom to Validation Management
The chatroom that automatically opens if more than one user is in the same
page has been added to Validation Management.
CACTWO-4724 (Enhancement)
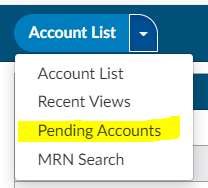
Add Pending Reason drop down to Account List
The Account List dropdown button now has the
option for a list of pending accounts. When
Pending Accounts is chosen, the user will get a
list of any accounts they have added a pending
reason to.
CACTWO-4731 (Enhancement)
Add ‘You’ count to the Dashboard
The dashboards have a Work Available Queue panel. ‘You’ has been added to
the list of workflow to show accounts that are assigned to that user.
CACTWO-4733 (Enhancement)
When ESC is selected while in a field it will clear new contents
By putting your cursor in any of the above text fields. If the field has an original
value, then change it, then press ESC. The field should revert to its original
value before you placed the cursor in the field (note: not the original field from
the database).
- Account Search
- System Search
- Tuning Dashboard
- Validation Management
- Workflow Management
CACTWO-4741 (Enhancement)
Move Cancel button in Physician Query
The Cancel button has been moved a little farther away from the send button
on a Physician Query to alleviate accidental clicks.
CACTWO-4748 Enhancement
Add columns to Account Search Pending Reasons drilldown
When drilling down on Pending Reasons in Account Search, new and updated
automatic columns will be added: Added By, Added On, Current Role,
Physician, Service Date.
CACTWO-4754 (Enhancement)
Change portions of the Audit Management viewer
In Audit Management viewer the Abstractions section of the viewer are no
longer included in the Overall section. The Overall section has been renamed
Overall Code Statistics. The tooltips in this section will no longer include the
Abstracting values.
CACTWO-4755 (Enhancement)
Add Stages to the CDI Query Detail Report
A new column for “Stage” has been added to the right of the “Financial Class”
column in the CDI Query Detail Report.
CACTWO-4758 (Important)
Reports updated to improve performance
Several user reports were timing out when the user was on a large database.
Updates to reporting have been made to fix those performance problems.
The reports affected are:
- Case Mix Index Report by Attending Physician
- Outstanding Queries
- Pending Reasons
- Query Overview
- Query Stats
- Query Template Volume Overview
CACTWO-4762 (Enhancement)
Allow for editing of text when changing physician on a query
When a user chooses to change a physician on a physician query after it is
sent, the other fields on the query will also be open to editing the original
query will retrain oringal text and can be found in the query list as “Canceled”
CACTWO-4765 (Enhancement)
Save section selection/arrangement when editing queries
All dynamic sections on physician querieswill be saved and viewable when
editing a set query. Prior to this, when sections were changed on a query and
the query sent, if subsequently edited, the changed sections would revert to
their original positions. This will no longer happen.
Testing Steps: Create any query with a template using
sections. Rearrange/hide sections, populate some values, and send the
query. Open the query and click the “Edit” checkbox to edit the query (if you
are a non-Administrator, you need a privilege enabled to see the “Edit”
checkbox). When you edit the query, the rearranged/hidden sections are still
rearranged and hidden. Previously, all sections reverted to their original
display.
CACTWO-4766 (Enhancement)
Populate the name field with the grid column name
When adding a new column in Grid Column Configuration, the Title will now
automatically be defaulted to the field name. You can still change the friendly
name if the automatic name is not what you want to use.
CACTWO-4769 (Enhancement)
Replace ‘filters’ with ‘criteria’
The word ‘filter’ has been changed to ‘criteria/criterion’ throughout the
Workflow Management page for clarification purposes.
CACTWO-4774 (Enhancement)
Allow Autoload users work lists to be updated live
If a change is made to an Force Autoload user’s worklist in his profile, the user
will no longer have to log out and log back in to get the new sequence. It will
happen automatically.
CACTWO-4777 (Enhancement)
Add more drilldown ability to Administrative Dashboard
On the Admin Dashboard, Total Charts AutoClosed Today and Total
ChartsRejected Today statistics will now be drilldowns.
CACTWO-4780 (Enhancement)
Add Auditor count to Administrative Dashboard
The Admin Dashboard will now show Auditors Online and Offline in the Users
Online pane.
CACTWO-4781 (Enhancement)
Change Coder Productivity Pending data in the Admin Dashboard
On the Admin Dashboard Coder Productivity Pending Info and $ will only
reflect discharged patients. The coder Productivity Pending Info and $ should
only reflect discharged patients. We are using the pending info/$ to show
DNFB which is Discharged Not Final Billed and we are capturing non-
discharged patients here as well.
CACTWO-4782 (Enhancement)
Add Case Mix Index pane to Administrative Dashboard
On the Admin Dashboard a section for Case Mix Index has been added . This
pane will show the Last 7 Days, 30 Days, 90 Days and 180 Days.
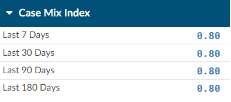
Case Mix Index is defined as the sum of DRG Relative Weights divided by the
number of accounts with a DRG Relative Weight.
CACTWO-4783 (Enhancement)
Add Working Case Mix Index pane to CDI Management Dashboard
On the CDI Management Dashboard a section for Case Mix Index for Working
DRGs has been added as a pane to the Administrative Dashboard. This pane
will show the Last 7 Days, 30 Days, 90 Days and 180 Days.

The Working Case Mix Index numbers come from the sum of Working DRG
Relative Weights divided by the number of accounts with a Working DRG
Relative Weight.
CACTWO-4785 (Important)
Errors occurring in the Discharged Not Final Coded report
When a large data amount is being reported, the Discharged Not Final Coded
report would not complete as an XLSX and gave incorrect data. This has been
corrected.
CACTWO-4786 (Important)
Missing physician validation rule is not being triggered
A rule to trigger for a missing physician that was set up in Validation Manager
was not triggering when the account did not have a physician. This has been
corrected.
CACTWO-4788 (Important)
Large accounts cause Validation Rule delays
Long stay accounts with thousands of documents were not triggering
Validation Rules in an acceptable amount of time. Performance has been
corrected.
CACTWO-4789 (Enhancement)
Allow Physician ID to be added to CDI Query Detail report as XLSX
The CDI Query Detail report will now add a Physician ID column only when it
is exported as a XLSX.
CACTWO-4795 (Important)
Missing drilldown columns from Account Search
When a drilldown is used in an Account Search filter, the columns associated
with that drilldown are added to the results grid. But when scheduled as a
report, those columns were not showing in the report. This has been
corrected.
CACTWO-4797 (Enhancement)
Reassign a chart after a specified time period
A new field has been added to workflow to allow accounts to be assigned to
new workgroups if they have sat too long in their original workgroup.
“WorkGroup Assigned Date” has been added to Workflow Management.
When used, this field adds a new optional workgroup field to type in the name
of a workgroup. By doing so, the workflow engine will check the assigned
date/time of the specified workgroup to determine assignment eligibility.
To test, assign any account to any workgroup (manually or automatically,
doesn’t matter). In Workflow Management, create or edit a custom
workgroup with the criteria “WorkGroup Assigned Date” –> name of the
workgroup you assigned the account to –> “More Than” –> 1 day ago. Let the
Script Engine run overnight. At midnight workflow additionally assign the
account to your custom workgroup. If it didn’t, attach the Script Engine log for
review.

When implemented at the site, to mimic “24 hours”, the criteria should be
“More Than –> 2 days ago” since workflow works off days and not times.

CACTWO-4798 (Enhancement)
Change how Audit accuracy fields appear in Account Search
In Account Search, any Audit accuracy fields were showing as a decimal point.
This has been changed to show as a percentage.
CACTWO-4803 (Important)
Weekly Coder Activity report receiving disconnect error
A connection error was occurring when running the Weekly Coder Activity
Report multiple times. This has been corrected.
CACTWO-4804 (Important)
Not correctly checking codes for validity using the Solventum CRS Encoder
When using Solventum CRS encoder, the Discharge Date was used for figuring validity
of a code in Solventum CRS. Any outpatient accounts that have a discharge date that
is after the admit date are then likely to get coded with invalid codes.
Correction has been made so that outpatient accounts use the admit date as
the discharge date for figuring whether a code is valid.
Solventum CRS Users Only
This fix only applies to Solventum CRS users.
CACTWO-4805 (Important)
Document Type Management was not saving mass edit changes
Document type changes were not being saved properly when using mass edit
or changing document group assignments. This has been corrected.
CACTWO-4806 (Important)
Restored images are being marked as new documents
If an image that has been purged is restored by redownloading, it was being
marked as a new document. This has been corrected so that restored images
are given an original import date to keep it from being considered as a new
document.
CACTWO-4813 (Important)
Validation rules not being triggered properly for empty fields
A validation rule that looks for a field match was not being considered when
the field was blank. These operators have been updated to ensure that if a
property is an empty string, the validation rule will interpret it the same way
as if the field was null or didn’t exist: Not Equal, Not In List, Not Contains and
Does not Exist.
CACTWO-4817 (Important)
Data in Audit comment bubbles is not being retained
Text that is attached to a code in an Audit via the comment bubble was not
being retained when sent to the Coder from the
Auditor. This has been corrected. The code will
remain with the red bubble, which when hovered
over or clicked on will show the text.

CACTWO-4823 (Important)
Physician deactivation is calculated in inconsistent ways
If a physician’s deactivation date is during an inpatient account timeline, they
could still be assigned to a procedure if the date is after the physician’s
deactivation date. For the sake of consistency, the procedure date will be
looked instead of the account date to determine if a physician is deactivated.
CACTWO-4825 (Important)
Display of sample date on monthly run reports is not correct
When a report is scheduled to run in a monthly format, the ‘sample’ date that
is shown to the right does not match the month dates. This has been
corrected.
CACTWO-4826 (Important)
Role Management not giving ‘save’ reminder
When in Role Management and making a change, the user is not being
reminded to save when attempting to leave and open a different page. This
has been corrected.
CACTWO-4830 (Important)
Change how duplicate codes are calculated in Audit Worksheet
When a procedure code is duplicated by a coder and an Auditor then updates
the Audit worksheet, one of the codes was being calculated as an additional
code. This has been corrected so that intentional duplicates are not read as
extra codes.
CACTWO-4831 (Enhancement)
Change coloring of Code Summary to red for warnings
The Code Summary shows as red in the Navigation Tree if there is a validation
error. Validation warnings in the Code Summary will display in red, to indicate
more attention needs to be paid to the validation rule.
CACTWO-4836 (Important)
Single Path Coder is not able to submit an account
An error was occurring when a Single Path coder role attempted to submit an
account. This has been corrected. Single Path coders can both save and
submit.
CACTWO-4838 (Enhancement)
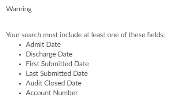
Allow Account Search on accounts without date properties
The user can now run an Account Search based on an account number without
using a date property criterion. If a user
puts together Account Search criterion
without having a date or account number
field, they will receive a new pop-up
warning box:
CACTWO-4851 (Important)
Scheduled Report is being duplicated
If a user accidently double clicked while saving an Account Search as a
Scheduled Report, two reports were being recorded. This has been corrected.
Multiple clicking will only result in one ‘save’ of a scheduled Account Search
report.
CACTWO-4863 (Important)
Data entered on a pop-out worksheet not appearing on main viewer
When popping out a worksheet and then moving to a different document on
the main viewer, if the user added data to the popped-out worksheet and
then on the main tab moved from the document back to that worksheet, the
data would not show in the main viewer. This has been corrected.
CACTWO-4864 (Important)
Account Search adding in columns during detail search
After a saved Account Search is called up and the user opens multiple account
details, the Account Search adds in all the columns that are not check marked
for that search. This has been corrected.
CACTWO-4867 (Enhancement)
Add warning when using PrincipalDX dropdown in TruCode™
The TruCode™ PrincipalDX dropdown button on the Compute button in
Account list will open a blank screen if used on an outpatient account. This
feature is only for inpatient accounts, so a new pop-up message will now
occur if the user tries to use PrincipalDX on an outpatient account.
CACTWO-4885 (Important)
Birthweight not updating when entered in Solventum CRS
CAC2 will now capture the birth weight from Solventum CRS if it is provided from Solventum
CRS. Note: The birth weight is only prompted in Solventum CRS on newborn accounts
if an APR-DRG grouper is used.
Solventum CRS Users Only
This fix only applies to Solventum CRS users.
V2.24 (Apr 2022)
V2.24.8129 Released 04/04/22
The notes below indicate changes and additions to the software. Please review these release notes
carefully when deciding to apply a software update to an installation.
Each note is related to an issue tracking assignment number (starting with CACTWO) in the heading.
Please refer to the change with this tracking assignment number when communicating questions or issues.
The heading also contains a parenthesized "Change Type", indicating the severity or importance of
the change. The severities used are:
- Critical - Recommended that this application be upgraded as soon as possible at all sites
running previous versions.
- Conditionally Critical - Recommended that this application be upgraded as soon as possible at
all sites running previous versions matching the stated conditions.
- Important - Recommended upgrading the application if the customer is experiencing the issue
denoted or currently applying a work-around for a specific non-functional feature.
- Enhancement - Recommended upgrading only if the specific functionality is desired.
CACTWO-4838 (Enhancement)
Do not require date fields for Account Number searches
In Account Search, filters cannot be completed unless there is a date field
included in the criteria. This has been changed so that if the user is searching on
a particular account number, they will not be alerted to select a date field.
CACTWO-4857 (Enhancement)
Add columns to System Search
New columns have been added to the System Search page: Admit Date,
Discharge Date, First Submitter and Facility. They will appear as the last columns
and have the same sorting and filtering abilities as other columns on the page.
CACTWO-4867 (Enhancement)
Alert user for PrincipalDX usage on inpatient accounts
The PrincipalDX button on the Compute Dropdown is for use on TruCode™
encoder inpatient accounts only. If a user accidently deploys it on an outpatient
account, the result is a blank screen. If a user does this, they will receive a
message stating the PrincipalDX option is only for inpatient accounts.
TruCode™ Users Only
This fix only applies to TruCode™ users.
CACTWO-4871 (Enhancement)
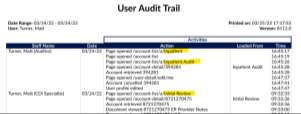
Add Workgroup column to User Audit Trail report
The User Audit Trail report has a new column that will display the name of the
workgroup the user opened the noted account from.
CACTWO-4872 (Enhancement)
Allow TruCode™ to be opened from Anesthesia codes
The TruCode™ Encoder codebook can now be opened by clicking on an
Anesthesia Code in the TruCode™ Research Panel.
For TruCode™ Encoder users only.
CACTWO-4900 (Enhancement)
Allow ‘Does Not Include’ to include a multi-string value
Currently in Validation Management Rules, using the operator ‘Does Not
Include’, such as Diagnosis Codes – Does not Include – only allows for one
property, such as R05.
This has been changed to allow for multiple properties. For Diagnosis Codes –
Does not Include – R05, R06.02, I10, the rule will trigger if the account does not
include all of those codes. If the account has one of those codes, the rule will
not trigger.
CACTWO-4905 (Enhancement)
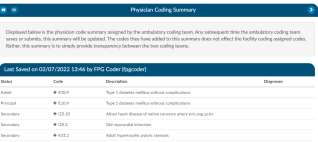
Add Physician Coding Summary to the Navigation Tree
When a physician coder adds codes to an account, a coder working in that
account will now see an Physician Coding Summary viewer listed in the
Navigation Tree.
CACTWO-4913 (Important)
Editing a suggested PCS code is not defaulting the date and physician
The date and physicians that are populated on a document from an interface,
then default onto PCS codes. When PCS codes are assigned, the defaulted data
is held. But, if a user edits a code while it is still unassigned, the date and
physician are not being defaulted in the Edit Code box. This has been corrected.
CACTWO-4914 (Important)
The HCC viewer was not displaying correctly on multiple MRN accounts
When multiple accounts have the same MRN and the earliest account has an
HCC status on a code, the later account is not creating a Previous HCC Overview
viewer in the Navigation Tree. This has been corrected.
CACTWO-4915 (Important)
Short Cut keys are not performing according to the menu
The Keyboard Shortcuts menu under the Help button was displaying incorrect
data for some of the code assignment shortcuts. These have
been corrected.

CACTWO-4916 (Important)
Workflow Categories not being deleted properly
If one of the five default workflow categories (Audit, Autoclose, Post Discharge,
CDI/Concurrent, QA Review) is deleted when no workgroups are present,
returning to Workflow reinstates that Category. This has been corrected so that
empty categories remain deleted.
CACTWO-4920 (Important)
Receiving error when submitting accounts with codes on image
In some instances, when codes are added to an image file and the account is
submitted while the user still had the image in their viewer, an error message
was occuring. The underlying issue has been corrected.
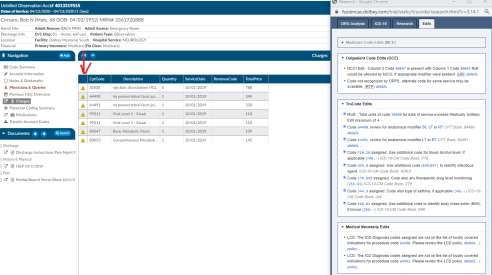
CACTWO-4921 (Enhancement)
Allow all codes in TruCode™ Edit panel to be clickable
Any code that appears in the TruCode™ Edit Encoder panel can now be clicked
to open the Codebook to that code. Please note that if the user has a pop-up
blocker deployed, this can interfere, so it should be turned off .
For TruCode™ Encoder users only.
CACTWO-4922 (Enhancement)
Remove ‘+’ sign when not necessary in the Transactions Viewer
In the Charge Transactions Viewer, the ‘+’ sign indicates multiple instances, and
can be clicked to show them. This change will take the ‘+’ sign away from any
transaction that has a single instance to prevent unnecessary clicking.
CACTWO-4924 (Enhancement)
Add new Caution Column to Transactions and Charges viewers
A new Caution Column has been added to the Transactions and Charges
viewers for TruCode™ users. This column will indicate a flag if TruCode reports
an edit on a charge on an outpatient account.
TruCode™ Users Only
This fix only applies to TruCode™ users.
CACTWO-4927 (Enhancement)
Add Physician Coder criteria to Validation Management
New user level criteria has been added to Validation Management: Is Physician
Coder, Is Not Physician Coder
CACTWO-4928 (Important)
PSI indicators not displaying if procedure code is a multiple
If a procedure code appeared twice on an account, but had different procedure
dates, the PSI code was not being triggered. This has been corrected.
Quality Module Users Only
This fix only applies to Quality Module users.
CACTWO-4929 (Enhancement)
The Engine Outcome per Coder report has been updated
New updates have been made to the Engine Outcome per Coder report.
- For each ‘Total For’ value, the result has been changed from an average to a sum.
- All subtotal values are now whole numbers.
- User Score and Engine Accuracy percentage show as whole numbers.
CACTWO-4931 (Important)
Create a warning if account is locked in use
A new warning will appear at the top of any document that has been updated
while the account has been locked in use.

CACTWO-4935 (Enhancement)
New drilldown for Physician Coding added to Account Search
A new drilldown menu that will present data for Physician Coding Assigned
Codes has been added to Account Search.
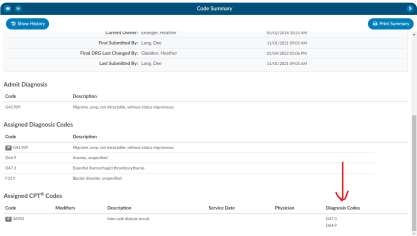
CACTWO-4936 (Enhancement)
Add new column to Physician Code Summary viewer
A Physician Coder will now see an additional column in the account’s Code
Summary viewer, identifiying any Diagnosis Codes that were attached to the
Procedure Codes.
CACTWO-4939 (Important)
Account comments with emojis are not saving properly
If a user added a comment with an emoji to a note on an account, the account
saved, but when later accessed, would not resave the account. This has been
corrected.
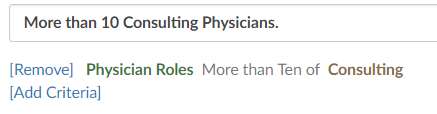
CACTWO-4943 (Enhancement)
Add new operator to the Physician Roles field in Validation Management
A new operator of ‘More then Ten of’ has been add to the Physician Roles field
in the Validation Management page. Using this will alert the user that there are
more than 10 of a certain physician role on an account.
Single Path Coding Only
This feature requires the physician coder or single path coding module.
Please contact SME Team at smeteam@dolbey.com if you want to learn more.
CACTWO-4944 (Important)
Blank procedure date not triggering validation rule
When a CPT code without a date was added to an account, the validation rule
which looked for non-existing procedure dates was not triggered. This has been
corrected.
CACTWO-4947 (Enhancement)
Allow HTML within text fields to not cause display issues
Previously, HTML was allowed in text fields, but some characters such as < / > =
were causing a display issue. The update has been corrected to allow those
characters to display correctly.
CACTWO-4949 (Enhancement)
New Query Template Volume by Discharge Date has been created
This report is close to the Query Template Volume Overview report except that
it reports by discharge date, not query creation date. Only queries of discharged
accounts will show on this report.
CACTWO-4950 (Enhancement)
Allow Workgroups and Criteria to use an ‘or’ statement
Workgroups and workgroup criteria within Workflow Mangement can now
include an ‘or’ statement. When clicking on the criteria link, and the dropdown
opens the user will now see an option to add an ‘or’ group:

Clicking on the “Add OR Group” results in a line that states ONE of the following
with an “Add OR Criteria” link.
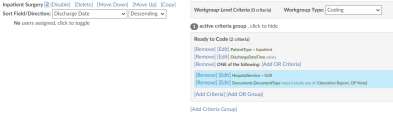
Example of OR Criteria
This is an example of an “OR” criteria. Essentially, at the end of each criteria you
will add an ADD or an OR so it looks like the below. Based on this criteria, the
chart will fall into the Inpatient Surgery worklist if the chart has a patient type of
Inpatient AND the patient has been discharged and the patient has EITHER a
hospital service of SUR OR the Documents must include an Operative Report or
OP Note. The OR criteria is listed in blue to call attention.
CACTWO-4953 (Enhancement)
Allow ability for Workflow to have quoted, comma separated values
When creating criteria in Workflow Management, the user can now use double
quotes around a value that contains a comma to show it is all one value:

CACTWO-4959 (Important)
TruCode™ DRG Analysis tab is not populating
When a Primary Grouper is identified as a TruCode™ grouper and the Secondary
Grouper is identified as a GPCS Grouper, the TruCode™ DRG Analysis tab is not
displaying correct data if it is available. This has been corrected.
For TruCode™ Encoder users only.
CACTWO-4960 (Enhancement)
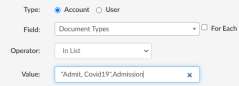
Allow Validation Manager to support double quotes
In the instance of document names with commas, Validation Management
reads the entry as two separate documents. Users can now use double quotes
around a document with a comma in its name to prevent that split. As an
example, if the user wanted to make a list search for a document called Admit,
Covid19, they would write the rule as “Admit, Covid19” so that it is read as one
document, not two.
CACTWO-4961 (Enhancement)
Allow for double quoted documents in Account and System Search
Double quotes can now be used around document types that have commas
inside them when searching using Account Search and System Search. In this
case, the document type of Admit, Covid-19 would be written as “Admit, Covid-
19” so that the system reads it as one document, not two

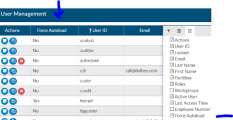
CACTWO-4964 (Enhancement)
Add a column for Forced Autoload to User Management
A new column for Forced Autoload has been added to the User Management
grid. To turn it on, access the ag-grid and check the box. The new column
appears first in the grid after the Actions column, and can be moved anywhere on the grid.
CACTWO-4965 (Enhancement)
Autoset Exempt POA in realtime
The Exempt POA status will now be set in realtime for any POA-exempt diagnosis
codes that are assigned. The issue occured when an account was originally
outpatient when FAE results were received (no POA) and then the account was
changed to inpatient or the code was originally not POA-exempt prior to a
coding update and then the patient remained in-house after the coding update.
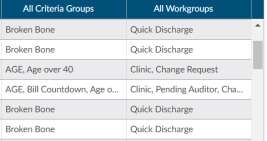
CACTWO-4968 (Enhancement)
Combine default and custom workgroups into new columns
New columns added to Grid Column Configuration “All Criteria Groups” and “All
Workgroups”. These columns will show default and custom workgroups and
criteria together, comma separated.
CACTWO-4972 (Important)
The hospital services field is not being saved correctly in reports
When creating a user report, if the Hospital Services field was filled and then
saved, it looked like it saved. But exiting and re-entering that report showed the
field as being blank. This has been corrected.
CACTWO-4977 (Important)
Slowness in Account Search for very large results
A process improvement has been made to speed up the results for Account
Search where the criteria search includes long periods of time for large amounts
of data.
CACTWO-4978 (Important)
Scheduled report being triggered to save without changes made
When opening an older scheduled report, the user was receiving a ‘save’ prompt
when closing. This was due to another field being added by the system behind
the scenes. The save prompt will no longer show unless the user makes a change
or selection.
CACTWO-4983 (Enhancement)
Add new column to CDI Activity report
A new column called Time Spent has been added to the end of the CDI Activity
report. This will show the time the CDI spent within the stated Category.
CACTWO-4984 (Enhancement)
Change Document Type Management to stop group removal
When right clicking on any field in the Document Type Management page, the
user will no longer have the Tools option to remove grouping rows. Grouping
rows must stay static.
CACTWO-4987 (Important)
Change conflict occuring on null fields
The change conflict feature is not treating null fields the same as empty fields,
causing the box to pop when it shouldn’t. This has been changed so that null,
undefined, and empty fields are all treated the same.
CACTWO-4988 (Important)
Transferred codes are not in the correct order
When using the Transfer Account Codes viewer, the codes that are selected are
being copied over in reverse order. This has been changed so that the codes
copied are in the same order as on the originating account.
CACTWO-4989 (Important)
HTML code is appearing the in TruCode™ encoder
When a user highlights words in a document and right clicks and selects Add
Code from Encoder, sometimes HTML coding is appearing in the TruCode™
encoder. The system has been updated to interpret that code as a blank space.
TruCode™ Users Only
This fix only applies to TruCode™ users.
CACTWO-4990 (Important)
Physician ID drop down is not readable at screen bottom
The Physician ID field drops down in the Physicians & Queries pane, but when
the user is at the bottom of the screen, the results cannot be seen. This field
has been changed so that it will drop up the list, instead of dropping the list
down when at the bottom of the screen.
CACTWO-4992 (Important)
Account change window popping during document saves
When an account is opened that has an automatically added form, if the user
saves without adding anything to the form, then adds to the form and saves
again, the account change window was displaying. This has been corrected so
that the window no longer displays.
CACTWO-4995 (Enhancement)
Create field for Alternate DRG
A new field has been created called Alternate Reconciled DRGs. This field can
be added to grids using the Grid Column Management page. Once added, it will
display manually recorded DRGs that have been added by a CDI Specialist in the
Working CDI History viewer.
CACTWO-5000 (Important)
Forced Autoload user is not being advanced to their next account
If a Force Autoload user was working in an account while an administrator was
changing the assigned workgroup limits on that user, the user was not advanced
to the next assigned account upon submission of the current one. This has been
corrected.
CACTWO-5005 (Important)
Change CSV export view for transaction
When right clicking in the transactions viewer to export to CSV, the grouping
row was showing up as a line in the report. If there were two transactions under
Group 88888, it was showing in the CSV report as three rows, when it was only
two. This has been corrected to no longer show the grouping row.
CACTWO-5054 (Important)
Prevent blank query when changing physician of responded query
If you click “Change Physician” on a physician query with a response, the new
physician query will no longer be blank.
ER E/M Module
The ER E/M Viewer is an add-on module that was partially released within 2.23 for beta testing therefore
the release notes below are changes made to this release. If you do not have this module, you can contact
the SME Team (smeteam@dolbey.com) for more information
CACTWO-4877 (Enhancement)
Collapse options in the ER E/M Configuration page
The options in the ER E/M Configuration page (Trauma, No Charge, etc) can now
be collapsed and expanded to allow proper focus when working in this page.
Clicking ‘Add’ on any option will auto-expand the option panel.
CACTWO-4925 (Important)
Multiple issues with the new ER E/M Viewer
These items in ER E/M Viewer were corrected or changed:
- Send Charges Outbound is now a checkbox
- New Assigned CPT Codes section will appear above Summary
- A History section will list prior submitted E/M charges below Summary
- If a duration of critical care is entered, the following two questions
(Criteria Met and Time Determined) must have an answer of Yes to
suppress the E/M Level entry
- Modifier(s) can be added if a critical care charge is present
- The quantity for a charge indicating ‘initial’ can only be 0 or 1
Erroneous Conflict Check will no longer occur.
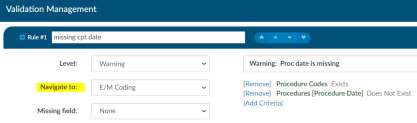
CACTWO-4937 (Enhancement)
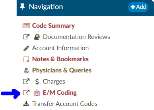
ER E/M Coding added to Validation Management
The E/M Coding viewer can now be set as a navigation option in Validation
Management. If the rule that is set with this navigation is triggered, the account
will bring up that viewer. In this instance, if a procedure code exists but does
not have a procedure date on it, the validation rule will trigger and will take the
user to the account’s E/M Coding viewer.
CACTWO-4938 (Important)
E/M Coding viewer not showing as read-only
When an account is in read-only mode, the E/M Coding viewer was not. This
has been corrected.
CACTWO-4945 (Enhancement)
Identify E/M Coding that has not been sent outbound
The E/M Coding Viewer has a button to send the coding outbound. The viewer
name will now be colored red if the coding exists but has not been sent, to alert
users. Once the coding is sent outbound, the color of the viewer name will
change back to black.
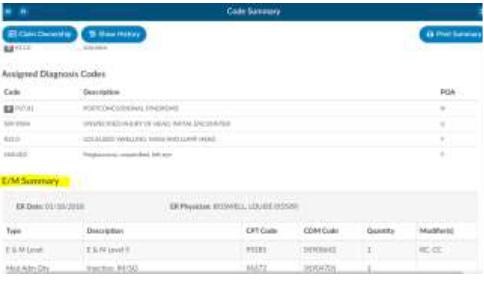
CACTWO-4948 (Enhancement)
Add display for current E/M Coding charges in Code Summary
The bottom of the Code Summary viewer will now display the totals of the
charges from the E/M Coding viewer.
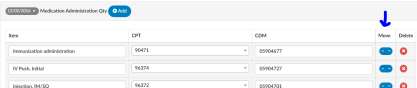
CACTWO-4973 (Enhancement)
Add arrows to move columns in ER E/M Configuration
A new column called Move with up/down arrows have been added to drop down
items in the Options section of the ER E/M Configuration page. This will allow
users to arrange the order they want those items to display
V2.25 (Jun 2022)
V2.25.8210 Released 06/24/22
The notes below indicate changes and additions to the software. Please review these release notes
carefully when deciding to apply a software update to an installation.
Each note is related to an issue tracking assignment number (starting with CACTWO) in the heading.
Please refer to the change with this tracking assignment number when communicating questions or issues.
The heading also contains a parenthesized "Change Type", indicating the severity or importance of
the change. The severities used are:
- Critical - Recommended that this application be upgraded as soon as possible at all sites
running previous versions.
- Conditionally Critical - Recommended that this application be upgraded as soon as possible at
all sites running previous versions matching the stated conditions.
- Important - Recommended upgrading the application if the customer is experiencing the issue
denoted or currently applying a work-around for a specific non-functional feature.
- Enhancement - Recommended upgrading only if the specific functionality is desired.
CACTWO-3976 (Enhancement)
Widen header banner in XLSX reports in User Reports
The columns in XLSX user reports have been widened to show the full name
of the header to make it easier for users to understand where the data is
coming from in User Reports. Prior to this change all fields required the user
to expand each field to see the field name.
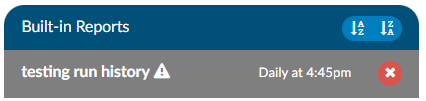
CACTWO-4847 (Enhancement)
Show run history of Scheduled User Report
Scheduled User Reports will now show the run history. If the user clicks on a
report on the left side of the screen, the right side will now show a run history
above the schedule data for the last three times the report ran, whether it
was successful or errored.

CACTWO-4942 (Enhancement)
Allow a report deleted in JSReports to be recreated
If a report in the Scheduled User Reports page is deleted in the JSReport
Studio, an exclamation point will appear next to the report in Scheduled User
Reports. Clicking on that report name will bring up a red toast message letting
the user know the report was deleted in JsReports, and they should either
delete it or save it again. If Saved, it will recopy to JsReport Studio
CACTWO-4996 (Enhancement)
Allow ‘Or’ filters in Validation Manager
Validation Rule Editor can now be filtered using both ‘And’ and ‘Or’ filters.
When adding an ‘Or’ filter, the user needs to make sure they are adding ‘Or’
criteria, not regular Add Criteria. ‘Or’ and ‘And’ criteria can both be used on
the same validation rule.
CACTWO-5001 (Enhancement)
Alert user if scheduled Account Search report does not return any data
If a scheduled Account Search runs but no data is returned, it currently mails
a blank report. This has been changed so that an email is no longer generated
if a scheduled Account Search returns no data.
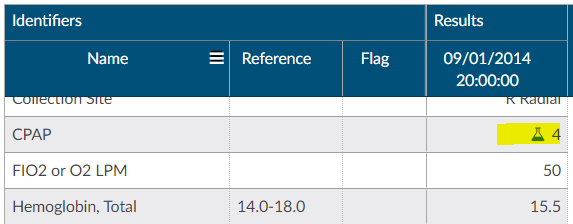
CACTWO-5006 (Enhancement)
Add Specimen symbol to Flowsheet viewer
If a discrete value on the Flowsheet viewer has a specimen, it will now show
as a beaker symbol in the Results column. Hovering over the symbol will
provide the name and site of the specimen.
CACTWO-5012 (Enhancement)
Add dropdown to Flowsheet viewer
If multiple discrete values have the same major category but different
categories, clicking on the major category will now show all the discrete values
merged together. Clicking on a subcategory will show the user which discrete
values are attached to which subcategory. This will allow you to trend data
better so that all subcategories display together.
CACTWO-5013 (Enhancement)
Add the ability to use Or groups in Account Search
Or group functionality that was added to Workflow can now be used in
Account Search. The user can now add an Or Group with multiple criteria
under it as part of the filter and the search can be scheduled for reporting.
CACTWO-5024 (Enhancement)
Add focus for the cursor in the TruCode™ Codebook
When the TruCode™ CodeBook is opened via the Encoder button at the top
of a document, the cursor will now automatically focus in the search box. Prior
to this change the user had to place there cursor in the box.
TruCode™ Users Only
This fix only applies to TruCode™ users.
CACTWO-5025 (Enhancement)
Remove case sensitivity from Flowsheet viewer
When performing a search in the Flowsheet viewer, the search will no longer
be case sensitive.
CACTWO-5026 (Enhancement)
Allow CDM manually in the EM E/R Configuration screen
In the EM E/R Configuration screen, after clicking Edit CDM Table, there will
now be a new button to Add CDM. This will allow the user to manually record
and save a CDM entry.
CACTWO-5047 (Enhancement)
Add minimize button to the “Shift Reasons for Physician Query” dialog box
When a physician query is closed the shift reasons viewer now has a
mimumize button so you can view data behind the dialog box if needed..
Additional Update Steps Required
If you are upgrading, please contact Support for necessary update.
CACTWO-5066 (Enhancement)
Add new columns to the Query Impact by Discharge Date report
Four new columns have been added to the Query Impact by Discharge Date
report: Admit Date, Discharge Date, Financial Class and Payor.
CACTWO-5067 (Important)
Dashboard Prior Month Top 10 DRG is always blank
The Top 10 Final DRGs panel in the Administrative Dashboard were not
calculating correctly for Prior Month. This has been corrected.
CACTWO-5069 (Important)
Workgroup level criteria is not being considered in Audit Workflow
The Audit Category of Workflow was not considering workgroup based
criteria. This has been corrected.
CACTWO-5071 (Enhancement)
Allow DX associated with CPT codes or charges to be sequenced by Physician
Coder
Currently, DX associated with CPT codes or charges that were added by a
Physician or Single Path coder are sorted alphabetically. This change will allow
that user to decide on the sequence for the codes.
CACTWO-5085 (Enhancement)
Add Suggested GMLOS for use in grids
The Suggested DRG module will display the Suggested GMLOS to the account
for use in account grids.
For Suggested DRG Module users only.
CACTWO-5087 (Important)
Exception occuring due to criteria issues in the Validation Editor
In Validation Rule Editor, if a criterion with the operator of ‘does not include’
is followed by a single numeric character, an exception is occuring in the
Account that triggers that validation rule. This has been corrected.
CACTWO-5096 (Enhancement)
Allow TruCode™ to override an unspecified code edit
When a user receives an unspecified code edit in the TruCode™ edits tab
which results in a DRG of 999, they will now be able to override that. When
computing, if they receive the edit, the user can go to the Account Information
viewer of the account and add a Billing note.

This note defaults to None. Selecting one of the other two options and clicking
compute again will remove the edit and create a valid DRG.
TruCode™ Users Only
This fix only applies to TruCode™ users. This will require a change to the account
information tab, please reach out to the support team if this needed.
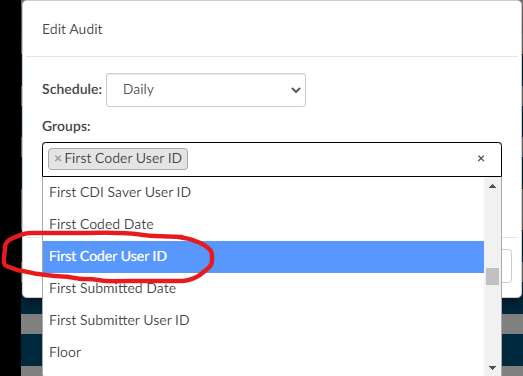
CACTWO-5098 (Enhancement)
Add new options to the Audit Schedule grouping
In Workflow’s category of Audit, the Audit Schedule will now allow a grouping
for User ID fields. These are all fields that end with a User ID in their
description.
CACTWO-5099 (Important)
Cancel button in Audit Schedule box is not working properly
If a user clicks an ‘x’ next to an option in the Audit Schedule box in an Audit
Workflow criteria, then clicks the Cancel button, the option is still being
removed. The Cancel button should be canceling the move. This has been
corrected.
CACTWO-5100 (Enhancement)
Add Physician Coders to the online/offline count in Admin dashboard
The online/offline display in the Administrative dashboard has been updated
to look at either user’s current role. These are Auditor, Coder, CDI Specialist,
Physician Coder and Single Path
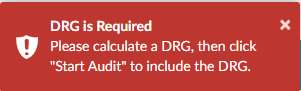
CACTWO-5102 (Enhancement)
Prevent starting inpatient audit without a DRG
A DRG will now be required on inpatient accounts before an audit can be
started. If it is not present, a toast message will be presented to the auditor.
CACTWO-5104 (Enhancement)
Allow Solventum CRS to override an unspecified code edit
When computing a DRG and finding an unspecified code edit in the Solventum CRS
for in inpatient account, the user can right click on the code under Diagnosis
Code Details and choose ‘edit code properties’. Here the user will be able to
chose one of 2 values and complete the DRG, which then avoides the DRG of
999. It the user reviews the Account Information viewer on the account, they
will see the option they chose in the Billing Note, other than None. The user
can also select the billing note before they compute to avoid the DRG of 999.
Solventum CRS Users Only
This feature only applies to Solventum CRS users. This will require a change to the account information
tab, please reach out to the support team if this is needed.
CACTWO-5105 (Important)
Working DRG data is being removed from the Account History page
The Account Show History page has been updated with the following
changes: If a Working DRG is deleted within a sesssion, an entry will now
appear in the DRG timeline indicating this; the incorrect ‘Principal Diagnosis
Code’ entry that was being seen has been removed.
CACTWO-5107 (Important)
Tooltip is incorrect in Account Search
When an Account Search filter is saved, the tooltip is not showing that user’s
ID until the Account Search Page is left and re-accessed. Also, the date/time
of the tool tip was showing the date/time the Account Search was loaded, not
the date/time of the last change to that filter. This has been corrected.
CACTWO-5109 (Important)
Account History is not showing role of the user
The Account Show History page has been corrected so that the role of the
user is being properly shown in the View Changes list on the left side of the
Account Show History page.
CACTWO-5111 (Enhancement)
Add Hospital Service as a filter to the Coder Activity Report
The additional filter of Hospital Service has been added to reporting. Any
Report, such as the Coder Activity Report, that can be filtered on Hospital
Service will now show in that report’s filter.
CACTWO-5112 (Enhancement)
Allow each transaction to be editable in the Transaction (Charges) viewer
The Transaction/Charges viewer will now allow each transaction to be edited
by by physician coders: Diagnoses, Physician, Physician Modifiers. Prior to this
change only the main charge could be editted rather each charge nested.
CACTWO-5114 & CACTWO-5169 (Enhancement)
Allow EM E/R cofigurations to be copied to mutliple facilities
If a user has a Facility Mapping, the EM E/R Configurations can now be copied
between the various facilities. If the user works has a Facility mapping, a new
option will appear in the top right of the screen allowing selection of one of
the facilities. Once a facility is chosen, that facilities levels will appear. A new
Copy button will show at the top of the Levels section. Clicking it will open a
dialog asking the user what facility to copy those current levels to. The levels
will be presented in a dropdown. In this case, I am in Dolbey South –
Cincinnati, and when I select the copy button, I have the option to pick
another facility to copy those levels to:
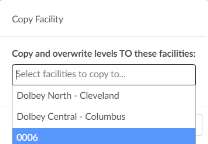
This option will overwrite and copy the current levels that are onscreen to the
facility that is selected. If the user does not have a Facility mapping, then these
copy options will be hidden.
CACTWO-5115 (Important)
Scheduled user reports will no longer run if User is disabled
If a user creates a scheduled report and that user is then disabled, the report
will no longer run. This has been corrected so that as long as that report is
marked ‘shared’ it will continue to process if the user that created it is
disabled.
CACTWO-5119 (Important)
Not all audits are being counted as completed in the Dashboard
The Audit Personal Dashboard was showing correct data for In Progress, but
the audits were not showing as completed if they were completed by the
coder instead of the Auditor. This has been corrected so that no matter how
an audit is completed, the auditor will have the audit show as completed in
their personal dashboard.
CACTWO-5123 (Enhancement)
Allow an account to be editable when in audit
A new privilege has been added to Role Management called ‘Edit Account
under Active Audit’. With this privilege assigned to a role, that role will now
be able to work on accounts in an audit status, rather than be locked out.
CACTWO-5128 (Important)
Abnormal value flag is not showing in an exported flowsheet
If a flowsheet with an abnormal flag is exported to CSV, the flag was not
showing on the output. This has been corrected.
CACTWO-5136 (Important)
Engine Outcome per CDI report was not giving correct data
If the Engine Outcome per CDI report was run as pdf or html, it was not
matching the data when run as xlsx. When run as xlsx, the report was
exporting the data to the Coder report, not the CDI report. This has been
corrected.
CACTWO-5137 (Important)
Allow up to 5 CPT modifiers per CPT code for Solventum CRS users
When using Solventum CRS as the grouper, CPT codes will now allow up to 5 modifiers
per code rather than 4.
Solventum CRS Encoder Users Only
This feature is only applicable to Solventum CRS encoder users.
CACTWO-5139 (Important)
PSI 04, 18 and 19 should not require a POA of N
These 3 PSI indicators will no longer take into consideration the POA
designation when calculating the PSI.
Quality Module Required
If you don’t have the quality module you can contact the SME Team
smeteam@dolbey.com for more details.
CACTWO-5141 (Important)
EM E/R Configuration not using correct dates on new lines
Adding new options in the EM E/R Configuration was taking the data of the
oldest effective date entry instead of the latest. This was causing anything
added after the oldest effective date entry to not be carried over to the new
option. This has been corrected.
CACTWO-5142 (Important)
Recent Suggested Working DRG report is missing a column
With accounts saved under very specific circumstances, when the Recent
Suggested Working DRG report is run as an XLSX, the column is missing. This
has been corrected.
CACTWO-5143 (Important)
Physician Query signature is not being copied to the message
If a signature was added to a Physician Query and sent out, that signature was
not appearing in certain outbound physician query interfaces. This has been
corrected.
CACTWO-5150 (Important)
Reports are not able to be stretched and are cut off
Due to mispositioning of several buttons, the user could no longer stretch a
report and it was cut off with no scroll bars. The buttons have been moved to
correct this issue.
CACTWO-5158 (Important)
Open queries are not being shown in query reports
If a physician query was initiated from an account-level physician that was
imported via ADT, the physician query was being left off these reports:
- Outstanding Queries
- Query Overview
- Query Stats
- Query Template Volume Overview
- Query Template Volume by Discharge Date
This has been corrected.
CACTWO-5161 (Enhancement)
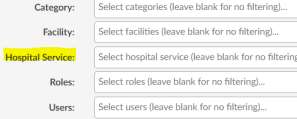
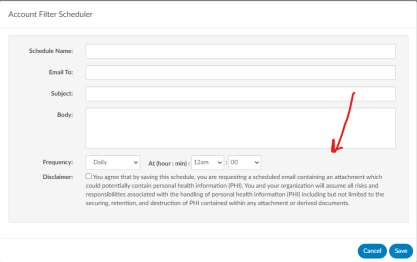
Add PHI disclaimer to scheduled account search
If a report schedule is set up for an Account Search filter, a new checkbox will
show at the bottom of the schedule screen with a disclaimer for PHI. The user
must check that box in order to save the schedule, and the box must be
checked anytime the schedule is edited.
CACTWO-5163 (Enhancement)
Add Query data to the Account Search drilldown
In Account Search, if the user selects a drilldown and they have a specific
matching field that filters the same drilldown, then the grid results will
automatically filter to the values in the criteria.
CACTWO-5164 (Important)
Scheduled account searches not showing some Working DRG information
properly
Fields associated with Working DRG that were used in scheduled account
searches were not showing correct totals. This has been corrected.
CACTWO-5174 (Important)
Validation rule for ‘does not exist’ is not working properly
If a validation rule was set for ‘does not exist’, it would still trigger if the value
equalled “0” or “00.” This has been corrected.
CACTWO-5180 (Important)
Correct the way pinned columns are displayed in schedule
If there are pinned columns in an account search that is scheduled, the
emailed report is showing the columns in their original position instead of
their pinned position. This has been corrected.
CACTWO-5182 (Important)
Time Spent field is not picking up all time in the account
If a user did work in an account, saved, remained in the account to do more
work and saved or submitted, the first time before the first save was not being
counted. The ‘Time Spent’ field will now total all work done in an account
before a save/submit and exit.
CACTWO-5187 (Important)
POA displays as ‘Y’ rather than ‘U’ in Code Summary viewer
In a case where an outpatient account is changed to an inpatient account,
POAs of U were displayed as Y in the Code Summary viewer. This has been
corrected.
CACTWO-5191 (Important)
Case Mix Index by Attending Physician sometimes showing no difference
The Case Mix Index by Attending Physician report was using a Reconciled DRG
as the Working DRG, resulting in a difference of zero. This has been corrected,
along with the CDI Query Detail Report and Case Mix Index Comparison Trend.
V2.26 (Sep 2022)
V2.26.8297 Released 09/09/22
The notes below indicate changes and additions to the software. Please review these release notes
carefully when deciding to apply a software update to an installation.
Each note is related to an issue tracking assignment number (starting with CACTWO) in the heading.
Please refer to the change with this tracking assignment number when communicating questions or issues.
The heading also contains a parenthesized "Change Type", indicating the severity or importance of
the change. The severities used are:
- Critical - Recommended that this application be upgraded as soon as possible at all sites
running previous versions.
- Conditionally Critical - Recommended that this application be upgraded as soon as possible at
all sites running previous versions matching the stated conditions.
- Important - Recommended upgrading the application if the customer is experiencing the issue
denoted or currently applying a work-around for a specific non-functional feature.
- Enhancement - Recommended upgrading only if the specific functionality is desired.
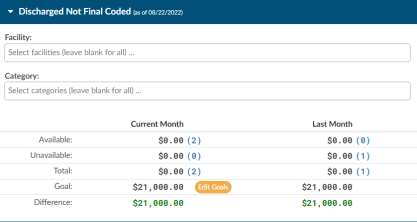
CACTWO-4888 (Enhancement)
Add Discharge Not Final Coded panel to Admin dashboard
A new panel will appear in the middle column of the Admin dashboard to show
‘Discharge Not Final Coded’ statistics. This panel will show both the last month
and current month statistics and will update during the script engine’s overnight
run. The panel can be filtered by category and facility. Clicking the Add Goals
(or Edit Goals after goals have been added) will allow users to add monetary
goals for categories. The blue numbers provide a drill down to see the accounts
behind the number of charts that are represented by the dollars holding.
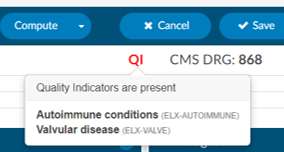
CACTWO-5002 (Enhancement)
Added Support for Elixhauser Comorbility Index calculations
Elixhauser Comorbility Index calculations can now be seen in account details, if
licensed. These are triggered by certain comorbidity diagnosis codes that are
added as secondary on the account. If an account matches criteria for an
Elixhauser calculations, two things will be displayed:
The banner bar will display QI. When hovering over the QI indicator it will show
what those designations are
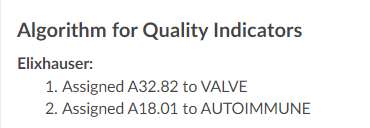
In the Code Summary viewer, the Algorithm for Quality Indicators will be
displayed at the bottom, showing the codes that match the descriptions in the
hover over of the QI tag.
Quality Indicators Module
Quality Indicators are an optional purchasable module. Please contact the SME team (smeteam@dolbey.com) to
learn more about this feature.
CACTWO-5031 (Enhancement)
Background Color for Physician Query internal notes lightened
When an internal note is added to a physician query templete, it is a very bright
color yellow. This has now been lightened so that the background is still yellow,
just not overly bright.
CACTWO-5110 (Enhancement)
Allow auditor to change coder of record
In the Audit Worksheet, the auditor now has the option to change the coder of
record. The coder of record will appear beneath the Audit type entry, and will
have a button to change:

If the record is changed, upon saving, the user will see the new coder of record
along with the history of the previous coder of record:

CACTWO-5135 (Enhancement)
Allow choice of where new Workgroup will appear in the list
A new checkbox has been added to the Create New Workgroup option in
Workflow management. This will allow the creator to choose whether the new
Workgroup is added to the top of the Category list, or if unchecked, the new
Workgroup will go to the bottom of the category just like it currently does.

CACTWO-5144 (Enhancement)
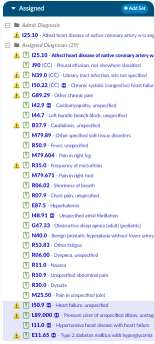
Highlight assigned diagnosis codes after the 25th position
Any diagnosis code that is in the assigned code tree to
an account will automatically be highlighted past the
25th position. This will help the coder/CDI know where
the diagnosis needs to move to make it within the top
25.
CACTWO-5146 (Enhancement)
Do not retrigger criteria group, if already validated
If there are two different workgroups that have the same naming of criteria
groupsand the CDI had already validated the criteria group within the matched
critera viewer, it will not retrigger. ,
CACTWO-5147 (Enhancement)
Create new total active Criteria group field for columns
A new field called ‘Active Matched Criteria Groups’ has been added to Grid
Configuration. When that has been added as a column through Grid
Configuration, the user will see a count of how many unvalidated matched
criteria groups also known as routed reasons there are on that account.
CACTWO-5152 (Enhancement)
Create an unspecified code field for use in Validation Rules
A new field has been created for the Diagnosis loop called ‘Is Unspecified Code’.
An unspecificed Diagnosis code will trigger the validation rule warning when set
to True.
CACTWO-5153 (Enhancement)
Identify validation rule triggered in warning message
The toast message that pops when an account is saved but has a validation rule
trigger will now show the name of the Validation Rule(s) that caused the
warning. If an account is submitted the validation box will now include a
message of all validation rules that are still present/not resolved
CACTWO-5157 (Enhancement)
Add field for Sequence Number and Total to Validation Manager
The ability to add a validation rule for a sequence number for each code along
with a total has been added.
CACTWO-5166 (Enhancement)
New report - CDI Metric Score Card
A new user report called CDI Metric Score Card has been created and will show
CDI activity, specifically the number of initial and follow up reviews and query
data.
CACTWO-5176 (Enhancement)
Add Total line to Coder Activity Report
A grand total line has been added to the Coder Activity Report
CACTWO-5177 (Enhancement)
Allow Code tree to be sortable and filterable
The All Codes tree now has a search box to filter codes. Right clicking on a code
in the tree will also show the addition of sorting codes or descriptions by a-z and
z-a.
CACTWO-5181 (Enhancement)
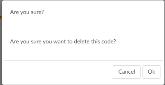
Add warning when deleting in Code Editor
A new confirmation box will open when deleting a code in the Code Editor to
allow the user to verify that they do want to delete.
CACTWO-5188 (Enhancement)
Remove procedure codes from unassigned if they are a multiple
If a procedure code appears on multipe documents and it is validated , it will no
longer appear in the unassigned code tree. This should reduce the amount of
procedure codes on inpatient charts.
CACTWO-5192 (Enhancement)
New Report - Case Mix Index per Month
A new user report has been created that shows Case Mix per Month. The case
mix is the average DRG weight of submitted inpatient accounts, by Facility and
then by Financial Class. A grand Total of All Facilities will show at the bottom of
the report if data for more than one Facility occurs.
CACTWO-5198 (Enhancement)
Add warning statement to report description
The descriptions of Query Impact by Discharge Date and Query Impact Reports
now includes a warning that the report should not be run as a PDF file, due to
the number of columns.
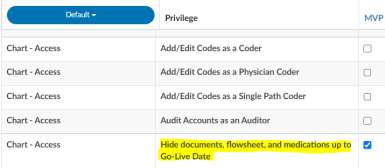
CACTWO-5199 (Enhancement)
Allow Documents, Flowsheets and Medications to be hidden
This feature provides the ability to “hide” data up to the Go-Live date. The go-
live date is a new column that has been added to the Facility in Mapping
Configurations. This way, clients with multiple locations that are going live at
different dates can be set.In Role Management, a new privilege can be
assigned to any role, but the new role of MVP has been created specifically for
this request.
Any user with this new privilege assigned will ONLY see the Admit Document
and any document manually added to the account by a Coder or CDI via the
+Add button. Regular documents that come in BEFORE the go-live date will be
hidden. The Medications and Flowsheet viewers will also be hidden if they are
before the go-live date.
This is for New Facility Staging
If you are live and not staging any additional facilities to added to your
system you can skip testing this, its used to stage facilities into an already
production system or to allow a site to go live without the document interfaces.
If you need more information about this feature please contact the SME Team.
CACTWO-5215 (Enhancement)
Ignore starting or trailing blank spaces in Workflow Management
If a Workgroup Category or a Workgroup is created with leading or trailing blank
spaces, Workflow will now automatically strip those.
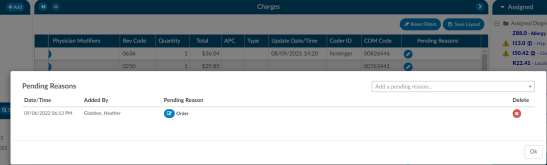
CACTWO-5223 (Enhancement)
Allow Physician Coder to add Pending Reasons to charges
New optional functionality has been created to allow a Physician Coder to add a
pending reason (and note) to charges in a Charge or Transaction viewer. This
new column also will show in an Account Search with a drill down of Physician
Coder pending reason. It can also be used in a Validation rule.
Physician Coder Module
Physician Coder is a optional add on feature. Please contact SME Team to
learn more about how Dolbey supports professional coding.
CACTWO-5225 (Enhancement)
Turn off encoder for Physician Coders
Physician Coder can now have the encoder disabled through a new setting.
Physician Coder Module
Physician Coder is a optional add on feature. Please contact SME Team to
learn more about how Dolbey supports professional coding.
CACTWO-5227 (Enhancement)
Add column to Pending Reasons report
If a Pending Reason has a physician, and that physician has a specialty field
populated, a new column called Physician’s Speciality will show on the pending
reasons report. If there are no physicians, or there are physicians without a
specialty, the column will be hidden.
CACTWO-5228 (Enhancement)
Add the ability to put notes on a pending reason
When adding a Pending Reason, a new note icon will appear next to it. Clicking
the icon will open a note field for that pending reason.

Data can be entered in that field, and if the note is no longer needed, clicking
the note icon will reopen it, and the trashcan next to the word Note will delete
it. This field has also been added to the Pending Reason drill down in Account
Search.
CACTWO-5229 (Important)
Worksheets are duplicating
If a user adds a worksheet and saves the account but does not respond to the
‘Do you wish to exit the account’ pop up before the system times out, a duplicate
worksheet is created. This has been corrected.
CACTWO-5230 (Enhancement)
Add Physician Specialty to Account Search
When using ‘Queries’ as a drill down in Account Search, a new column and field
for Physician Specialty will be available for use.
CACTWO-5231 (Enhancement)
Add a ‘cosigner’ field to physician queries
With a new setting, a second physician field will show in the query window to
allow for a cosigner on that query. This setting is not turned on by default since
this will this field also requires an query interface change to allow this to go
outbound as well as the receiving system must support co-signer providers.
Additional Configuration Required
Please contact SME Team to enable this functionality.
CACTWO-5234 (Enhancement)
Turn off conflict message for incoming charges on inpatient accounts
If the account’s charges are updated on an inpatient account by an interface
while the account is locked in use, when the user saves or submits the account,
they will not be prompted to resolve the conflict check on the charges
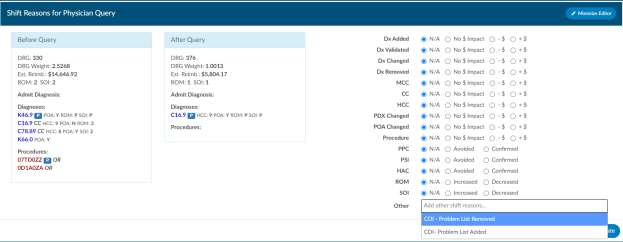
CACTWO-5236 (Enhancement)
Allow custom shift reasons created
A new dropdown will appear at the bottom right of the Shift Reasons screen if a
mapping called ShiftReasons has been created.
CACTWO-5237 (Important)
Validation Rules not recognizing {Code}
When using {Code} in a validation rule message, the code was not being
displayed. This happened when the rule originally had a loop which was
subsequently deleted. This has been corrected.
CACTWO-5238 (Enhancement)
New Report - Incentive Productivity
A new user report called Incentive Productivity has been created to calculate
incentive points. In Mapping Configuration, the Category mapping now has a
column in which an incentive multiplier can be added. The report will look at
the first submitted accounts in each category, list the incentive amount, and
then create the incentive points (incentive multiplier x amount of acct submitted
in that category). If an incentive multiplier is left empty, it will be read as 1.
CACTWO-5242 (Enhancement)
Add checkboxes to the pre-audit section of the Audit viewer
Check boxes have been added to the Audit viewer and show at the start of every
item in the pre-audit column. This allows the auditor to check off each code,
drg and discharge disposition as it is audited.

CACTWO-5243 (Enhancement)
Add new option to the Edit codes feature in Assigned Codes pane
If a diagnosis code has a match in these three areas, Principal, Visit Reason,
Admit, then a new ‘Edit Only’ option will appear in the right click menu, allowing
only that particular instance to be changed.
CACTWO-5245 (Enhancement)
Allow pending reasons to be restricted by facility
A new column has been added to Pending Reason in Mapping Configuration.
This allows each reason to be restricted by the facility of the account. Multiple
facilities can be added per reason.

CACTWO-5246 (Enhancement)
Allow pending reasons to be sorted in Mapping Configuration
In Mapping Configuration, Pending Reasons now has up/down arrows to allow
for sorting.
CACTWO-5247 (Important)
Long error occurring when canceling out of an account
In certain incidents, if a timeout occurred and the user canceled out of an
account before the timeout brought up the log in screen, a long red error was
seen. This has been corrected so that if the user clicks cancel just as the timeout
occurs, they will receive a much shorter time out message.
CACTWO-5251 (Important)
Document Type Management page not appearing correctly
The Document Type Management page was showing a number at the bottom
that was not matching the amount of types displayed. This was caused when a
Document Order field was populated. It has been corrected.
CACTWO-5253 (Important)
Validation rule using a ‘false’ statement is not working properly
If a criterion in a validation rule used a statement checking for a ‘false’ or ‘is not
true’, the criterion was not being evaluated correctly. This has been corrected.
CACTWO-5255 (Important)
Workgroup is being cleared by Physician Coder submission
When a Physician Coder submits an account, the assigned workgroup is being
cleared. A new field has been created to stop the workgroup from changing or
clearing.
CACTWO-5265 (Important)
Validation loop is not working if it’s the last criteria edited
If a Validation rule is created with a loop along with other criteria, if the loop is
changed after the initial save, it is not being respected. This has been corrected.
CACTWO-5269 (Important)
Include autoclosed submissions in reports
Autoclosed submits will now be included in these reports:
- Coder Activity Report
- Global Productivity
- User Detail
- Weekly Coder Activity Report
CACTWO-5281 (Important)
Prevent pending reason from getting deleted during upload of document
Pending Reasons can be removed when late arriving documents come in that
have been set for a cancellation of the reason. This should not be happening
for pending reasons added by physician coders. If a document type is set up
with a cancel pending reason, it will no longer remove the reason when it comes
into the account if the reason was added by a physician coder.
CACTWO-5307 (Added)
filter to calendar view to filter on physician coders
On the calendar view you can filter the data based upon a “Physician Coder”
type please note that the “Single Path” activity is also included the physician
coder data and the “Inpatient” or “Outpatient” views because single path coders
do facility coding at the same time.
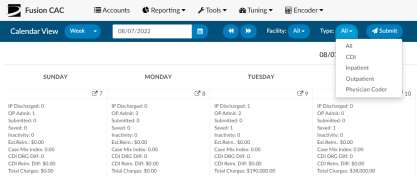
V2.27 (Dec 2022)
V2.27.8378 Released 12/16/22
The notes below indicate changes and additions to the software. Please review these release notes
carefully when deciding to apply a software update to an installation.
Each note is related to an issue tracking assignment number (starting with CACTWO) in the heading.
Please refer to the change with this tracking assignment number when communicating questions or issues.
The heading also contains a parenthesized "Change Type", indicating the severity or importance of
the change. The severities used are:
- Critical - Recommended that this application be upgraded as soon as possible at all sites
running previous versions.
- Conditionally Critical - Recommended that this application be upgraded as soon as possible at
all sites running previous versions matching the stated conditions.
- Important - Recommended upgrading the application if the customer is experiencing the issue
denoted or currently applying a work-around for a specific non-functional feature.
- Enhancement - Recommended upgrading only if the specific functionality is desired.
CACTWO-5149 (Enhancement)
Add permission role for Dolbey Community
A new privilege called ‘Hide Access to Dolbey Community’ has been added to
Role Management. If checked, that user type will no longer have access to
Dolbey Community in the Help menu. Dolbey Community is a new web-based
community for customer management teams launching on January 10, 2023.
Dolbey Community is intended to bring Fusion CAC users together to
collaborate and discuss topics that are important to you. You will have the
opportunity to:
- Ask questions and get answers from your peers.
- Share ideas and best practices that you’ve learned along the way.
- Learn tips and tricks — or pass along some of your own.
- Access resources like release notes, training videos, and marketing materials.
- Submit feature requests that may be incorporated into future releases.
If you would like a login for Dolbey Community, please reach out to the
SMEteam@dolbey.com.
CACTWO-5171 (Enhancement)
Hide supporting evidence from documents
Supporting evidence will now be hidden from documents by default. If the
supporting evidence dialog is open, clicking on the icon next to the code will
reveal the secondary codes. This will now be hidden to reduce the white noise
of codes on a chart; however, the evidence is still available. Upon opening the
supporting evidence dialog you will see the evidence markers.
CACTWO-5224 (Enhancement)
Allow TruCode™ edits while computing with any other encoder
If a site uses an encoder other than TruCode and wants to use the TruCode
edits to supplement their existing encoder they can now do so to display MCE,
OCE, and medical necessity edits (NCD/LCD).
TruCode Edits License Required
This feature requires a TruCode Edits License, please contact the SME Team
for more information.
CACTWO-5256 (Enhancement)
Allow physicians to be attached to pending reasons from Account Search
If a pending reason is added to an account from account search and is
configured to have a physician attached, the user can now add that physician
in Account Search. Either single or multiple accounts can be highlighted, then
in the right click menu, after Add Pending Reason is selected, if the pending
reason selected from the dropdown is set to trigger for physician, the
physician entry box will be displayed.
Testing Steps
Testing Steps: In Mappings Configuration, make sure you have at least one
pending reason that requires a physician. In Account Search, select one or
more accounts, then right-click and choose “Add Pending Reason”. Note that
if you select a pending reason that requires a physician, an additional
physician drop down appears. If the pending reason requires a physician, the
physician cannot be left blank. After selecting a physician reason and
physician, load the account and examine the Code Summary viewer. The
physician should be present with the newly added pending reason.
CACTWO-5257 (Enhancement)
Allow mass removal of pending reasons in Account Search
If an account has multiple pending reasons, they will now all be removable
using Account Search. In Account Search, the user will need to create a search
using the Pending Reasons Drill Down Level. Highlighting one of the lines on
the account (pending reasons each have their own lines) and right clicking to
select Delete Pending Reasons will delete all reasons on the account without
having to highlight each line.
Info
Testing Steps: Perform this action on selected accounts, then examine these
accounts in Account Detail. Any accounts with pending reasons should have
their pending reasons removed.
CACTWO-5264 (Enhancement)
Add number ordering for criteria groups
Using Grid Column Configuration, first add the columns Custom Criteria
Sequence and Criteria Sequence. With these added to the Account List, users
will be able to see the sequence of the criteria group. The sequence will also
be viewable in Workflow Management, in front of each criterion. Re-
arranging the criteria list will update the sequence number as needed.

Testing Steps
Testing Steps: In Grid Columns Management, add the column “Criteria
Sequence” for default workgroups and the column “Custom Criteria
Sequence” for custom workgroups. For both columns, make sure the
“Account List” checkboxes are checked. (Note that these columns are not
added automatically; not all sites will use this feature.)
The criteria group sequence number is now displayed in Workflow
Management. When an account is assigned to a workgroup and criteria group,
the criteria group sequence is now recorded with the workgroup assignment.
The column “Criteria Sequence” will display the sequence number for default
workflow and the column “Custom Criteria Sequence” will display the
sequence number for custom workflow. Like with “Criteria Group”, these
columns are swapped when examining a specific workgroup in the Account
List page, depending on whether the workgroup is a default workgroup or a
custom workgroup. The “Matched Criteria Groups” viewer will also display the
sequence number for matched criteria.
Re-run Workflow to Update Existing Accounts
This feature is commonly used with CDI and this feature is not
retroactive for existing accounts. Workflow must be rerun on existing
accounts and the account’s workgroup, or criteria group must change to see
the sequence number.
CACTWO-5283 (Enhancement)
Allow chronological sort for documents
The user can now right click within the document tree and a new menu option
‘Show Chronologically’ will be there. When clicked, it will sort all the
documents in chronological order. The order will be saved per user and can
easily be changed back by right clicking for the menu, from where they can
choose ‘Show Document Groups’.
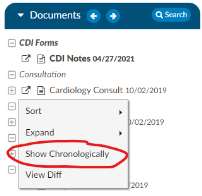
CACTWO-5294 (Enhancement)
New capture rate report for CC/MCC
A new user report has been created called CC/MCC Capture rate. It will show
the final result of CC/MC capture rates
CACTWO-5296 (Enhancement)
Show provider name on document
If a provider name is sent in the meta data of a document, it will now show in
the Document tree, next to its document. The name is shown after a comma,
and will be order by last name, first name.
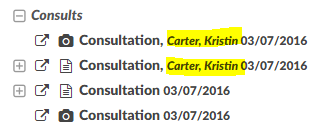
CACTWO-5298 (Enhancement)
Add MDC fields columns
Grid Column Configuration will now allow the addition of 4 columns: Final
MDC, Final MDC Description, Working MDC, and Working MDC Description.
CACTWO-5308 (Enhancement)
Add dropdown to hide coding in Document Management
A new column, Hide Coding, has been added to Document Types
Management, allowing the user to choose to show suggested codes based on
whether the account is inpatient or outpatient.
This will allow sites to hide codes, for example, on radiology reports or
supporting documentation “non” physician documents for inpatient charts
only.
CACTWO-5311 (Enhancement)
Add new sort fields to workgroups
In Workflow Management, the fields below have been added to the Sort/Field
Direction boxes for workgroups. When no other sort order has been set in
Account list, this is the sort order that will be followed.
- Active Matches Criteria Groups
- Admit Date w/ Time
- Age in Years
- Billing Countdown
- Discharge Date w/ Time
- Late Document Count
- Random Inclusion Factor
- Total Documents
CACTWO-5312 (Enhancement)
Add Financial Class filter to CDI Metric Scorecard
The CDI Metric Scorecard report is based on inpatient activity. A filter for
Financial Class has been added. Other updates to the report include number
of queries with a disagreement; percentage of queries with a disagreement;
and DRG pre-bill and post bill match rates.
CACTWO-5313 (Enhancement)
Add ability to use document status for validation rules
If a document has been added as a for each loop in the Validation
Management editor. Users can now create a validation rule that will look at
each document status and report each instance of a matched validation rule
on the Code Summary viewer.
Use Case Example
Use Case: Prevent coders from submitting the account when a document is in
something other than signed status and notify them using validation rules to
provide a hard or soft stop to add a pending reason. Common document
status includes but are not limited to:
- D = draft
- P = preliminary
- F = final
- S = signed
- A = addendum
Document Status Flag Required
This feature requires a document interface that provides a document status
flag. Check your interface before adopting this feature.
CACTWO-5314 (Enhancement)
Change expands all options to increase performance
To help with performance, some menus have been changed. The right click
menu on the Document tree now has an Expand option that allows for
collapse or expand of documents. There is no longer a code expansion, that
is done by the plus sign only. On the Unassigned/All Codes tree, in the right
click menu, the Expand option will allow users to expand Codes. This will show
the codes, or collapse all to hide the codes and only show the headings.
CACTWO-5316 (Important)
Add facility filters to Administrative dashboards
Three dashboards will now have the ability to filter by facility: Audit
Management, CDI Management and Administrative. The filters will apply to
most dashboards, except for the Autoclose, Discharged Not Final Coded, and
any panel displaying user counts. The top of the dashboard contains the filter,
and once the user clicks to filter and selects the facilities desired, clicking the
refresh button will refresh all the panels to only show the results for that
facility or facilities.

CACTWO-5317 (Important)
User clicking ‘refresh’ during account load causes accounts to be removed
When an account list is in the process of being retrieved and a user clicks the
refresh button, the beginning of the list is removed. This has been corrected.
CACTWO-5318 (Important)
Validation Editor not evaluating criteria of Charge Codes exist correctly
If multiple charges exist on an account and one of them does not have a CPT
code, a validation for Charges Exist does not work properly. This has been
corrected.
Testing Steps
Testing Steps: You need an account with charges where at least one charge
does not have a CPT Code. In Validation Editor, add a rule “Charge Codes –>
Exists”. On that account, if at least one charge has a CPT Code, the rule should
trigger even if another charge doesn’t have a CPT Code.
CACTWO-5321 (Important)
SOI/ROM values on banner bar do not match Audit Worksheet
If an Audit was opened on an account with SOI/ROM values, those values on
the banner bar were not matching what was showing on the Audit worksheet.
The Audit Viewer displays the ROM where the SOI should be displayed. The
data on the account and the audit is correct; it’s just the display that is
incorrect. This has been corrected.
Requires Audit Management
This feature requires Audit Management which is an additional module; please contact
SME Team if you are interested in learning more. This also requires an APR-
DRG license.
CACTWO-5322 (Enhancement)
Provider not showing in drop-down when last name entered contains a space
If a Physician has a last name containing a space, such as Van Hutton or De
Graff, the physician is not found when searching on the Physicians & Queries
page or on a procedure to add the provider by the first part of the last name.
This has been corrected.
CACTWO-5326 (Enhancement)
Show middle name in Solventum™ Coding and Reimbursement System (CRS)
encoder
The Solventum CRS encoder was only showing the patient’s last name. This has been
changed to show the patient’s first, middle and last name in the encoder.
Solventum CRS Users
This feature is for Solventum CRS users only
CACTWO-5327 (Important)
Changing query from Canceled to Wrong Provider doubles query
When using the “Change Physician” option on an open query a query is
created as expected, but when reopening the query and changing the
canceled reason to “Wrong Provider” a second query was resent. To prevent
this, there is now a dropdown on the Change Physician button that will drop
down the cancel reasons. Clicking Send New Query will send the query to the
new physician and close the query to the incorrect one. If a user then
reopens that canceled query and changes the cancel reason at the bottom,
an additional query will not be sent.
CACTWO-5328 (Enhancement)
Change HCC Viewer to show friendly value
The HCC Viewer has been updated to show the mapped friendly value for the
Category.
CACTWO-5331 (Important)
CDI Activity report is displaying 00:00:00 for some charts
On the CDI Activity report, any chart with a facility on it caused the records
‘Time Spent’ to zero out. This has been corrected.
CACTWO-5332 (Enhancement)
New ‘Today’s Date’ fields created
In Grid Column Configuration, two new options have been added: Today’s
Date and Today’s Date /w Time. These can be added to show the current date
and time on any screen chosen as a column, including Scheduled Reports.
CACTWO-5334 (Important)
CDI Query reports percentages are not being computed correctly
The CDI Query Score Card and CDI Query Score Card by Admission Month
reports were not calculating the DRG Pre-Bill and Post-Bill percentages
correctly. This has been corrected.
CACTWO-5336 (Enhancement)
Allow Modifier entry to code by using hyphen
In version 1, the software allowed you to enter a CPT Code followed by a dash
and a modifier. The version 2 software now has this feature. When adding,
editing, or mass editing a CPT code, the modifier can be added by adding a
hyphen after the code, along with the modifier.
CACTWO-5338 (Important)
Prevent Out of Memory exceptions in Account list
If there are more than 5000 accounts in a workgroup when loading the
account list, the user will now see an error message:
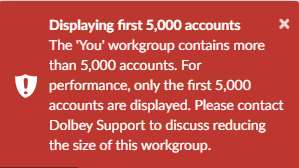
CACTWO-5340 (Enhancement)
Allow for default POA other than Y
CAC now allows the installation to configure the default POA other than Y
Contact Support to implement this option.
CACTWO-5341 (Enhancement)
Add columns and calculations for Audit Abstract Report
The Audit Abstract Report will display the calculation of modifier changes.
The number of original modifiers, plus the number of new modifiers are added
to the Pre Audit score. Several column names have been updated accordingly.
CACTWO-5343 (Important)
Using computed field in Account Search doesn’t return all results
If there were more than 1000 accounts that matched an Account Search that
used a computed field, such as Age in Years, then all results were not being
shown. This has been corrected.
CACTWO-5344 (Enhancement)
Screen changes for the New Document Grouping page
Several updates to the New Document Grouping page have been made. The
‘delete all’ button has been removed, and the ‘save all’ button has been
changed to ‘save all groups’ for clarity. A confirmation pop up will now occur
when deleting a document group.
CACTWO-5348 (Enhancement)
Prevent “Account Changed” dialog when only images are redownloaded
When a change is made upstream to an image on an account while that
account is opened, the Account Changed box pops. This has been changed so
that only documents will cause the change box to open.
CACTWO-5350 (Enhancement)
Banner Bar is not showing Discharge Disposition title
The Discharge Disposition in the banner bar has been changed to now show
the title from the Discharge Disposition mapping, instead of being hard coded.
CACTWO-5357 (Enhancement)
Add productivity count to top of screen so the coder does not have to return to
dashboard to know productivity
When a user clicks on their user ID in the right corner of the screen, a new
chart will appear showing the updated work count for the day. If the user is
both CDI and Coder, the chart that appears will be based on the current profile
This allows the user to see how charts were worked today without needing to
return to the dashboard. In this instance, the user is a coder:
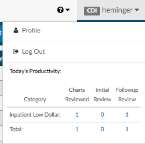
CACTWO-5360 (Enhancement)
Allow Solventum CRS facility to be populated in CAC2
Dolbey now supports the field available in Solventum CRS which is an account-level
“EncoderFacility’ field.
Solventum CRS Users Only
This feature is for Solventum CRS users only.
CACTWO-5362 (Enhancement)
Add PSI data to the After Audit section of Audit worksheet
If an account has a PSI assignment, it shows on the Coder Outcome (Pre-Audit)
side of the Audit Worksheet. The PSI assignment will now also show on the
Auditor Outcome (Post-Audit) side after the Update Codes button is clicked
CACTWO-5366 (Important)
CDI Query Score Card reports should not count all accounts
The CDI Query Score Card and CDI Query Score Card by Admission Month
should only count accounts with both Working and Final DRGs on the first
Submit in the Pre-Bill Mismatch statistics. It was counting all first submit
accounts. This has been corrected.
CACTWO-5367 CACTWO-5366 (Important)
CDI Query Score Card reports should not count all accounts
The CDI Query Score Card and CDI Query Score Card by Admission Month
should only count accounts with both Working and Final DRGs on the first
Submit in the Post-Bill Mismatch statistics. It was counting all first submit
accounts. This has been corrected.
CACTWO-5370 (Important)
Visit Reasons being unassigned when assigning Admit or Principal Diagnosis
On an outpatient account, if a Diagnosis code was set as a Visit Reason, then
subsequently right clicked on and added as Admit or Principal, the Visit
Reason was being deleted. This has been corrected.
CACTWO-5371 (Enhancement)
Allow Single Path user to switch between facility and professional charge
If facility charges and professional charges are received separately on an
account, a single path user will be able to toggle between facility and
professional charges. The toggle will appear in the upper left corner of the
charges viewer.

CACTWO-5375 (Enhancement)
Add ROM/SOI indicators on more viewers
The Working CDI History viewer and the Final Code Summary viewer will now
show columns for ROM/SOI and HAC/HCC per each code. The designation
HAC will be shown in the CC/MCC column, when applicable.
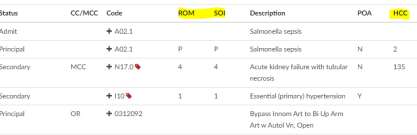
CACTWO-5382 (Important)
Solventum CRS responses are doubling
Solventum CRS responses are doubling if the user is timed out of the app and then
logs back in and reopens the account. This has been corrected.
For Solventum CRS users only
CACTWO-5384 (Important)
Audit Worksheet checkboxes are being unchecked
If the Audit Management viewer is popped out to another tab and a checkbox
in the Coder Outcome (Pre-Audit) is checked, adding a code on the main
browser was clearing the checked box. This has been corrected.
CACTWO-5385 (Enhancement)
Enable Alternate Length of Stay in Solventum CRS
The ability to provide Alternate Length of Stay to Solventum CRS to prevent
prompting for it with specific groupers has been added.
For Solventum CRS users only
CACTWO-5387 (Important)
Or groups in Validation Management are not working properly
If an Or group criteria is created in Validation Management and contains a
looped result, that result was being ignored. This has been corrected.
CACTWO-5388 (Enhancement)
Add Hospital Service filter to the Weekly Coder Report
The Weekly Coder Activity report can now be filtered by Hospital Service.
Hospital Service will not appear in the header of the report as a filter unless it
is utilized.
CACTWO-5389 (Enhancement)
Add grand total line to CDI Activity Report
A grand total line has been added to the CDI Activity report.
CACTWO-5390 (Enhancement)
Add CDI codes added via Solventum CRS to All codes list for Coders
Currently, the All Codes list (when user is a Coder) will only show CDI codes
that are added on a document. They can then be hidden by the Hide CDI
codes list. Codes that are added by a CDI via the Solventum CRS encoder will now also
appear in that list.
For Solventum CRS users only
CACTWO-5392 (Important)
User Detail report is not showing AutoClose statistics
The User Detail report is not showing AutoClose statistics, or data for any
account with no documents, or has documents with no codes, but direct
coding via Solventum CRS has occurred. This has been corrected.
CACTWO-5393 (Important)
Filtering results from account search does not update the displayed numbers in
the bottom left
When a report pulled up via Account Search is subsequently filtered, the
number of lines at the bottom of the page are not updating to show the filter.
This has been corrected.
CACTWO-5394 (Important)
Submit button is being grayed out when it shouldn’t be
The submit button on accounts will now be grayed out according to validation
rules, rather than being hard coded for reasons of no principal diagnosis being
assigned
CACTWO-5395 (Important)
Queries closed as No Opinion do not show in Account Search
If an Account Search report is created using the Queries Drill Down level,
accounts that had queries closed as ‘No Opinion’ were showing as blank. This
has been corrected.
CACTWO-5397 (Enhancement)
Display physician coder data on Code Summary page
When a physician coder is in an account, they will now see ‘Physician Coding
Last Saved’ and ‘Physician Coding Last Submitted’ data on the Code Summary
page.
CACTWO-5398 (Enhancement)
Add looped field for E/M in Validation Management
User can now create a validation rule based on E/M loops in Validation
Management.
CACTWO-5401 (Important)
Edit pending reasons in Workflow list not dropping or closing properly
If user edits a criteria group filter in workflow management and leaves the
edit form open, then clicks on a filter to save, the edit form was staying open,
and the Edit Pending Reason link was appearing. This has been corrected.
CACTWO-5402 (Important)
Code designations are not showing correctly during recalculation
Codes that have been given a CC, MCC, or HAC designation are not updating
properly when the code itself is moved into a different position in Solventum CRS or
the Assigned codes pane. This has been corrected.
CACTWO-5403 (Enhancement)
Allow full column name to be displayed in Account and System Search
The Tools button in the Account and System Search pages will now display the
full friendly name of the column when deployed.
CACTWO-5404 (Important)
Slow loading of Dashboard if more than 5000 accounts per workgroup
A new message will show to alert the user if there are more than 5000
accounts per workgroup in the dashboard. The limit of 5000 has been placed
to prevent lockups.
CACTWO-5406 (Enhancement)
Remove ROM/SOI from Pre-DRG in queries
ROM/SOI will no longer show when the MS-DRG is grouped and APR is the
secondary grouper within a physician query.
CACTWO-5407 (Enhancement)
Coder DRG Summary report has been created
A new user report called Coder DRG Summary report has been created.
Accounts must be discharged and submitted to appear in this report. This
report will show the breakdown per coder MS-DRG to show the total visits per
DRG.
CACTWO-5408 (Important)
Cannot reassign codes in Edit All Codes page
With the Edit All Codes page open, changing a Secondary diagnosis to Principal
changes the codes. But, if the user then tried to change the former Principal
back to Principal, that option was not in the codes select dropdown. This has
been corrected.
CACTWO-5413 (Important)
Allow Solventum CRS to stay open past timeout
For sites with the Solventum CRS encoder, the timeout will now be advanced by 4
hours when using Solventum CRS as the encoder. If Solventum is open, the timeout will be
held for 4 hours before activating.
For Solventum CRS users only
CACTWO-5414 (Enhancement)
Disallow coders from changing charge physician
Coders can now be prevented from changing the physician on a charge.
Please contact Support to enable this feature
CACTWO-5416 (Enhancement)
Allow Scheduled Reports to generate blank report for emails
In a previous release there was a feature that if an account search yielded no
results, it would prevent a report from being generated. This feature is turned
off by default. The system will not generate an email with blank results until
it is enabled.
Please contact Support to enable this feature
CACTWO-5418 (Enhancement)
Show full assigned username in Code Summary
The default Code Summary will now show the full username with the ID in
parenthesis if an account is assigned to a user rather than a workgroup.
CACTWO-5419 CACTWO-5421 (Important)
Edit Pending Reason link missing in Workflow Management
When copying criteria from workflow management that has a Pending
Reason, the copy is not showing the Edit Pending Reason link at the end of the
criteria line. This has been corrected. If the workgroup is copied and another
criterion is added to the Pending Reason criteria group, it was copying down
that reason instead of showing a blank for whatever criteria was chosen. This
is now corrected.
CACTWO-5422 (Important)
Account Search not paging properly
If a filter in Account Search uses a computed field (such as Age), then the
numbering of accounts per page did not show correctly. This has been
corrected.
CACTWO-5424 (Important)
Save Last Saver if Auditor saves/submits an account
Currently, an Auditor will only show as last saver if there has been a
saver/submitter before. It did not show as a first saver. This has been
corrected so that no matter what, the auditor’s name will show if last saved.
CACTWO-5427 (Important)
Alert user to not close browser when logging out to save an account
If the user is in an account, clicks on the Log Out menu option, and chooses
“Save the account,” the user needs to be notified not to close the browser
until the save is completed. There is no visual indicator to indicate that a save
is in progress if the save takes a few seconds. Closing the browser early could
prevent the account from saving completely.
CACTWO-5437 (Important)
Engine Results by CDI is not filtering correctly
When adding Users to the Users field in the Engine Outcome per CDI report,
the results were not the same as if you ran the report without filtering to
specific user. This has been corrected so that the user filter looks at the same
columns a non-filtered report does.
V2.28 (Mar 2023)
V2.28.8497 Released 03/24/23
The notes below indicate changes and additions to the software. Please review these release notes
carefully when deciding to apply a software update to an installation.
Each note is related to an issue tracking assignment number (starting with CACTWO) in the heading.
Please refer to the change with this tracking assignment number when communicating questions or issues.
The heading also contains a parenthesized "Change Type", indicating the severity or importance of
the change. The severities used are:
- Critical - Recommended that this application be upgraded as soon as possible at all sites
running previous versions.
- Conditionally Critical - Recommended that this application be upgraded as soon as possible at
all sites running previous versions matching the stated conditions.
- Important - Recommended upgrading the application if the customer is experiencing the issue
denoted or currently applying a work-around for a specific non-functional feature.
- Enhancement - Recommended upgrading only if the specific functionality is desired.
CACTWO-5369 (Enhancement)
Financial Class Outcome by Discharge Report
A New user report is created based on discharge date. The Financial Class
Outcome by Discharge report is configured as a monthly report, with a
maximum of 12 months per report. The accounts must be inpatient with a
Final DRG. If no financial classes are filtered, there will be an ‘Overall’ section
at the bottom of the report.
CACTWO-5410 (Enhancement)
Allow Charge viewer codes to be drag and dropped
Physician/Single Path coders will now be able to drag and drop diagnosis
codes within the add codes list on the Charges Viewer.
CACTWO-5411 (Enhancement)
Allow mass editing of Charge Viewer codes.
Physician/Single Path Coders can now select multiple lines in the Charges
Viewer, and by clicking on the Edit code icon and selecting codes, apply those
codes to all items in the selection.
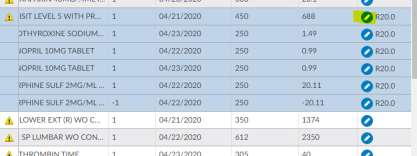
CACTWO-5429 (Enhancement)
Allow document updates to add or cancel pending reasons
If a document is set up to add or cancel pending reaons, those will now occur
on document updates, not just document additions.

CACTWO-5431 (Enhancement)
Add Working DRG History to Validator Editor.
When setting up a validation rule, the user can now select Working DRG
History as a viewer to navigate to. When the validation rule occurs on the
Code Summary page, clicking on it will take the user to the Working CDI
History.
CACTWO-5434 (Enhancement)
CDI Codes on Submitted Charts report
A New user report CDI Codes on Submitted Charts report was created.
Discharged submitted inpatient accounts with both a Final and Working DRG
will appear on this report. The Working DRG displayed on this report is the
last Working DRG computed before discharge. Because this report is so large,
it should not be run as a PDF.
CACTWO-5453 (Enhancement)
Show diagnosis designations on Unassigned code tree
If a code in the Unassigned Code tree has the potential to be an MCC, CC or
HCC code, itwill now show next to the code for inpatient accounts. The HCC
is controlled by the HCC display flag on Category in Mapping Configuration.
No HCC will display if the admit and discharge dates are in different years.
CACTWO-5465 (Enhancement)
Add columns for Query Responder
When a physician who was not the physician of record on a query answers the
query, there is no way to mark that on the query. A new column for the data
on the query responder has been added to the Physician and Queries viewer,
and are also available in the Account Search drill down level for Query.
CACTWO-5466 (Enhancement)
AMA CPT Utilization Report
A new user report was created. This calculates the number of times a CPT
code is touched with any action that assigns or edits a CPT code on an account.
This is a report that Dolbey uses to report usage to the AMA per contract.
CACTWO-5475 (Enhancement)
Current Workgroup report
A new report, Current Workgroup, was created. This report ignores the data
range and only reports on ‘today’s’ workgroup list. If no user is filtered for
this report, the results will output the current workgroup statistics for all
enabled workgroups that do not have a workgroup type of Purge, which is set
in Workflow Management.
CACTWO-5480 (Important)
Change drilldowns for Dashboard
Drilldowns for dashboards will still allow a maximum of 5000 accounts to be
retrieved, but they will now be displayed in pages like Account Search. This
will help to improve performance.
CACTWO-5482 (Enhancement)
Allow ‘Query For’ field in Physician Query to be a drop down
Mapping Configuration can have an entry added that will allow the Query For
field to be a dropdown choice field.
Additional Configuration Required
Please contact Support to enable this option.
CACTWO-5484 (Important)
Change drilldowns for Calendar
The calendar has been updated to show drilldowns that exceed 500 accounts
to page them. This will help to improve performance.
CACTWO-5485 (Enhancement)
Force inactivity prompt for timeouts
A new setting will allow inactivity prompts to occur when an account is auto-
saved due to a session timeout, regardless of the minimum and maximum
minute setting.
Additional Configuration Required
Please contact Support to enable this option.
CACTWO-5494 (Enhancement)
Allow physician query response to be a dropdown
The physician query response of ‘no opinion’ can be changed to be ‘other
opinion’ with a drop up selection.The response will now show in an ‘other
opinion’ column on these user reports:
- CDI Metric Scorecard
- CDI Query Scorecard
- CDI Query Scorecard by Admission Month
- Query Stats
Additional Configuration Required
Please contact Support to enable this option.
CACTWO-5497 (Enhancement)
Enhance color on codes that have been assigned multiple times on the
account
If an account has multiples of one code, and the code is assigned from within
the document, all other instances will show as italicized with a light green
background. This will help alert the user that the code is already assigned
elsewhere in the account. In this example, a diagnosis and a PCS code have
been assigned on other documents
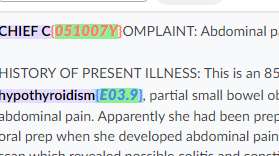
CACTWO-5498 (Enhancement)
Allow comments to be added to codes in trees
A comment can now be added to a code on the document tree, or the
Unassigned/Show All code tree. The comment will show as a green flag in the
trees and on the code in the document. On the trees, the comment is
readable via a hover over; in the document itself, the flag can be clicked to
open the comment. The comment can be added to or deleted by erasing the
text. The comment will show in its own section in the Notes and Bookmarks
viewer, and can be edited or deleted there.

CACTWO-5499 (Enhancement)
Bold assigned codes in the Show All code tree
If there is a code that appears on multiple document types and one of those
is assigned, it will now appear as BOLD in the Show All codes tree. In this
example, the code was assigned on the Consultation document type.
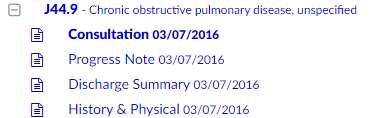
Please note, this may not be retroactive..
CACTWO-5500 (Enhancement)
Show Autoload on the User Audit Trail report
A new autoload column has been added to the User Audit Trail Report, which
will populate with TRUE for activites in which auto-load was enabled. This is
NOT retroactive.
CACTWO-5501 (Enhancement)
Add columns to User Detail and User Session Log reports
Columns for Discharge Date were added to the User Detail and User Session
Log reports. A column for Total Charges has also been added to the User
Session Log report.
CACTWO-5507 (Enhancement)
Add sequencing column for Physician and Single Path Coders
A new column has been added to the Add Code dialog box within the charges
viewer for Physician Coders. This way no matter how long the list is, the user
can always see how many codes are in the list
CACTWO-5508 (Important)
Non-stop scrolling occurring in Account Search
If the down/up arrow is clicked when using ‘ Less than’ or ‘More than’ under
date options in Account Search, the scrolling never stops. This has been
corrected.
CACTWO-5519 (Important)
Inpatient Coder Scorecard report not filtering user properly
When filtering by user, the report was not evaluating that user as the Audit
coder of record; instead it was evaluating as the auditor that opened the
audit. This has been corrected for both the Audit – Inpatient Coder Scorecard
and the Audit- Outpatient Coder Scorecard.
CACTWO-5532 (Important)
Working History is duplicating
Working CDI History was duplicating the first baseline DRG. This has been
corrected.
CACTWO-5534 (Important)
Engine Outcome per CDI report needs a column change
The Totals column is actually based on averages, so the name of the column
has been changed to Averages.
CACTWO-5535 (Important)
Caution codes should not be assignable
If a Document Type is set to have a caution code, it will now be unassignable.
In this case, the Operative document called Operative Report is set to have
Caution Coding for all patient types:

In the Unassigned Codes pane, any code attached to that document will show
in a yellow background, and will not have the option to assign on the right
click menu.
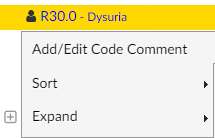
CACTWO-5536 (Important)
Data on worksheets is disappearing when printing then leaving viewer
If a worksheet with a multi-line text field is added to an account and filled in,
printing it and then moving to another viewer, like Physicians and Queries,
was blanking out the sheet data. This has been corrected.
CACTWO-5549 (Enhancement)
Remove blue bar titles in a template with sections
For Physician Query templates that use sections, the blue bar will still show,
the title or wording within that bar will no longer show. Blue bar remains so
that section can still be moved around or deleted.
CACTWO-5556 (Enhancement)
Create new fields for Grid Configuration
New fields have been created in the Grid Configuration for addition to pages.
Fields are Physician Coding First Coder and Physician Coding First Submitter.
These fields are retroactive.
CACTWO-5562 (Important)
Scheduled Reports not opening if report is actively running
Several reports were not opening if they were being actively processed at the
moment a user tried to open them. This has been corrected.
CACTWO-5563 (Important)
CC/MCC Capture Rate report totals are not correct
Non-CC/MCC DRGS are being calculated in the totals of the CC/MCC Capture
Rate report. This has been corrected.
CACTWO-5565 (Enhancement)
Add Working and Final Principal Diagnosis Code fields
New field options for setting up criteria for Final, Working and Physician
coding. The new fields will start with Principal for final coding, Working
Principal for CDI and Physician Coding Principal for Physician coding.
CACTWO-5566 (Important)
Charges attached to codes not included in encoder calculations
When calculating APC or EAPG for charge codes with the TruCode™ or Solventum™
encoders, the charge per unit was not included. This has been corrected.
CACTWO-5567 (Important)
Lists with spaces and commas are not correctly triggering workflow
If a list in a workgroup criteria was created with a space or spaces before
commas within the list, the criteria was not being triggered. This has been
corrected.
CACTWO-5570 (Important)
Names are being created with starting or ending spaces
User ID, first, middle and last name fields should not be able to be created in
User Management if they start or end with spaces. This has been corrected
and if a space is detected, a red error message will appear.
CACTWO-5589 (Important)
Display issues when toggling in Show History
When in Show History, if the user was toggling on and off the workflow button
after selecting a record, display issues were occurring. This has been changed
so that if a user makes a selection from the lefthand list and then toggles on
and off either the User or Workflow buttons, the selection will clear.
CACTWO-5590 (Important)
TruCode™ Standalone not adding codes
When clicking the Pencil symbol next to a blank code field in TruCode
Standalone encoder and selecting a code, the code was not being added to
the field. This has been corrected.
Info
This feature is only applicable if you have the TruCode encoder.
CACTWO-5592 (Important)
TruCode™ Standalone not editing codes properly
When editing a code in the TruCode™ Standalone feature, instead of replacing
the old code with the new one selected from the Code Book, it was keeping
the old code and adding the new one on its own line. This has been corrected.
Info
This feature is only applicable if you have the TruCode encoder.
CACTWO-5596 (Important)
Workgroup not appearing in Account List dropdown
If a Workgroup contains more than 5000 accounts, it is not appearing in the
Account List dropdown. This has been corrected.
CACTWO-5604 (Important)
Prevent Change Conflict message for custom workflow flags
If a site has custom workflow flags implemented, they will now be able to
prevent the change conflict dialog from appearing when saving or submitting
an account.
Info
Please contact Support to implement this feature.
V2.51 (Jul 2023)
V2.51.8581 Released 07/07/23
The notes below indicate changes and additions to the software. Please review these release notes
carefully when deciding to apply a software update to an installation.
Each note is related to an issue tracking assignment number (starting with CACTWO) in the heading.
Please refer to the change with this tracking assignment number when communicating questions or issues.
The heading also contains a parenthesized "Change Type", indicating the severity or importance of
the change. The severities used are:
- Critical - Recommended that this application be upgraded as soon as possible at all sites
running previous versions.
- Conditionally Critical - Recommended that this application be upgraded as soon as possible at
all sites running previous versions matching the stated conditions.
- Important - Recommended upgrading the application if the customer is experiencing the issue
denoted or currently applying a work-around for a specific non-functional feature.
- Enhancement - Recommended upgrading only if the specific functionality is desired.
CACTWO-5202 CACTWO-5648 (Enhancement)
Added the ability to see APR-DRG in Principal Dx Analyzer for TruCode
When a TruCode user clicks the Principal Dx option on the Compute button,
they will now see data columns for APR-DRG (if they are set up with an APR-
DRG Grouper). If an account is not configured to use an APR-DRG grouper,
they will only see the usual MS-DRG data.
TruCode™ Users Only
This feature only applies to TruCode™ users.
CACTWO-5921 (Enhancement)
New Page Display for Workflow Management
The new workflow management page display offers new capabilities
including:
- Enhanced Vertical Viewing Space for Workgroups - This display
provides an improved vertical viewing space, allowing workgroups to
access and manage their workflows more efficiently.
- Side-by-Side Comparison of Workgroups - This will allow users to
compare and analyze workgroups with a side-by-side comparison.
- Filtering Ability to Search Workgroups by Specific Fields - This
feature allows you to filter on all workgroups that has a specific field
- Cleaner/Sleeker Look and Feel
We understand the importance of ensuring a smooth transition. To
accommodate your preferences, we have implemented a convenient option
to switch between the classic view and the new page display. To facilitate the
adoption of this new view, we will be maintaining the classic workflow
management for a few releases. This way, you can transition gradually and
comfortably, choosing the workflow management that suits your immediate
needs. To simplify the transition process further, we have imported all your
existing workflows into the new workflow management system. This means
you can make changes in either of the pages and it updates the other.
This will allow you to become familiar with the enhanced features and
maximize the benefits they offer.
CACTWO-5244 (Enhancement)
Allow filtering in Workflow Configuration workgroups
Users can now filter Workgroups by a variety of fields in the new workflow
managment. At the top of the new Workgroup column there is a filter icon.
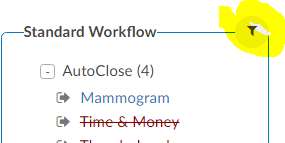
Clicking on the filter icon will open a gray box from where the user can add
filter, and then Apply it to whittle down the workgroups to only the ones the
user wants to review.
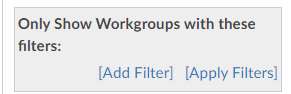
After the Apply Filters link is clicked, the workgroups will filter to only show
accounts that match the filter. The filter symbol turns green to alert the user
that they are working within a filter.
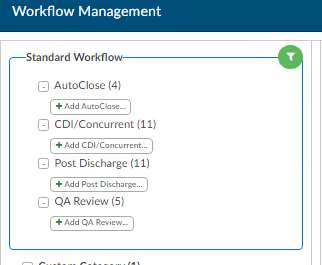
When the filter is no longer necessary, the user can click the green filter icon
to open the filters. A little garbage can will show to the right of the filter,
allowing it to be deleted.
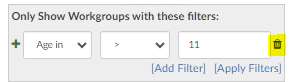
CACTWO-5488 (Enhancement)
Support Pediatric Quality Indicators
The application now supports PDI – Pediatric Quality Indicators .
This feature is included in the Quality Module, please contact support to
enable. If you do not have the Quality Module this is an additional cost.
CACTWO-5597 (Enhancement)
Assigned users in workgroups will show both name and ID number
The new Workflow Management will now display both the name and login
ID of the assigned users.
In the new Workflow Management, the assigned users will now show both
their login ID and their name.
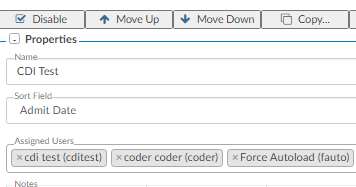
CACTWO-5633 (Enhancement)
Allow Flowsheet comments to pop out
If a Discrete Value comes in with data in the comment field, the user can
now right click and choose ‘View Result in Window’ in order to see the full
comment.
CACTWO-5666 (Enhancement)
Allow Charges viewer to auto-refresh
It will now refresh the Charges viewer if it is open when an account change
conflict occurs.
CACTWO-5672 (Enhancement)
Add time to procedure dates in Account Search
If the user wants to see time along with the dates assigned to procedure
codes, they can have a script run to add that. Then, when drilling down in
Account Search and selecting procedure code options that have dates, the
time will also display.
Additional Configuration Required
Please contact Support to enable this feature.
CACTWO-5698 (Enhancement)
Check DRG weight to determine if there is DRG Reconciliation mismatch
During Reconciliation of the CDI DRG and Coder DRG, the weight of those
DRGs will also be compared.With APR-DRG you have the same DRG with a
different DRG Weight due to the ROM/SOI that drives the DRG weight.
CACTWO-5714 (Important)
Not receiving timeout reminder
When timing out of CAC while in a physician query, when logging back in,
the user is not receiving the timeout reminder letting them know the account
was not completed. This has been corrected.
CACTWO-5754 (Important)
Shorten date/time fields in Form Designer
The date and datetime fields in Form Designer takes up the whole line, which
doesn’t allow for additional data to be added next to the date or datetime.
These fields have now have a shortened max width.
CACTWO-5756 (Enhancement)
Allow sharing of worksheets
A new section in Form Designer has been created called Shared Worksheets.
Worksheets added here will be visible and editable by both CDI and Coders.
With the help of Support, worksheets that are currently CDI OR Coder can be
changed to Shared.
Additional Configuration Required
Please contact Support to change existing worksheets to Shared.
CACTWO-5761 (Important)
Account List sort order is not being retained
If a user had no accounts in his ‘You’ folder, but does have accounts in other
workgroups, then a sort order that is created is not being retained when
moving back and forth to the Recent Views screen. This has been corrected.
CACTWO-5767 (Enhancement)
Add a Physician Charges drill down for Account Search and Validation Editor
A new drill down in account search was created for Physician Charges and
within Validation Editor.
Physician Coding Users Only
This feature only applies to Physician Coding users.
CACTWO-5771 (Enhancement)
Allow mappings to be dragged and dropped
Mappings can now be dragged and dropped within the list to other positions,
rather than using up and down arrows. The drag must be done from any
whitespace on that line, you cannot drag from within the input boxes or
buttons.
CACTWO-5775 (Enhancement)
Allow Workflow Audits to be done in monthly schedules
When setting up an Audit workflow criteria, clicking on the line to create the
audit will now allow the user to schedule monthly and restrict the months –
numerically – that the audit occurs. In this instance, the Restrict Months box
is checkmarked and it is set to run on the first, second and fourth month of
the year.
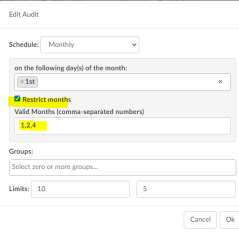
CACTWO-5778 (Enhancement)
Remove several columns in the Physician Coding Assigned Codes drill down
Several columns have been removed from the Physician Assigned Codes drill
down in the account search as they are not useful.
- Physician Coding Episode
- POA Exempt Code
- Is Principal
- POA
- PPC
CACTWO-5787 (Enhancement)
Allow reports with PHI to be scheduled
Currently, user reports that include PHI cannot be scheduled. That has been
changed so that all reports can be scheduled. Reports with PHI will show a
disclaimer message when they are chosen. The disclaimer must be
checkmarked in order for the schedule to be saved.
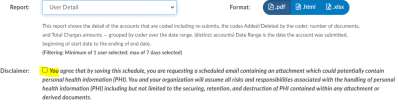
CACTWO-5795 (Important)
Single Path and Physician coders are handling code validation differently
Code validity was in question since Single Path follow Discharge Date and
Physician Coders follow Admit date. When an accounts dates crossed a
quarter, codes were not validation properly. This has been updated so that
both Single Path and Physician coders follow the Discharge date.
CACTWO-5800 (Important)
Drag and drop in the Edit All Codes table is stopping the scroll bar
When clicking on a code in the Edit All Codes table to drag and drop, the scroll
bar no longer works. This has been updated so that to drag and drop, the
user must drag and drop in white space on that line, or from the POA, Date or
Physician boxes.
CACTWO-5805 (Enhancement)
Add a query type column in the Queries drill down in Account Search
A new Query Type column is now available in the Queries drill down in
Account Search. Retrospective will show in the column if the Query was
created after the Discharge Date. All other accounts will show as Concurrent.
CACTWO-5814 (Important)
Validation rules based on Physicians assigned to Procedures do not work
Validation rules that included a filter of Procedure Physicians was not
reading the field when looping through multiple Procedures. This has been
corrected.
CACTWO-5825 (Enhancement)
Show Physician Specialty in Charges and Transactions viewer
Physician Coders can now see the specialty of the Physician assigned to a
procedure code in the Charges/Transactions viewer if the opt-in script has
been run.
Additional Configuration Required
Please contact Support to activate this option.
CACTWO-5829 (Important)
Navigation Tree is showing Physician Queries when there aren’t any open
If the user was reviewing their accounts using Autoload and pinned the
Navigation Tree so that it was open, the Navigation Tree was showing a color
alert for Physician Query, indicating there is an open query, even when there
was not. This has been corrected.
CACTWO-5874 (Important)
Solventum™ date fields are grayed out in the Encoder
When Solventum™ is launched via the Encoder menu and the user changes to
APCFinder or DRGFinder, the Admit and Discharge date fields are locked. This
has been corrected.
Solventum™ Users Only.
This fix only applies to Solventum™ users.
CACTWO-5895 (Enhancement)
Add today into the last 7 days calculation on the CDI Management
Dashboard
In the CDI Management Dashboard, ‘today’ work was not being included in
the last 7 days calculation for intial cases reviewed and cases re-reviewed.
Today’s work will now be included.
V2.52 (Sep 2023)
V2.52.8658 Released 09/22/23
The notes below indicate changes and additions to the software. Please review these release notes
carefully when deciding to apply a software update to an installation.
Each note is related to an issue tracking assignment number (starting with CACTWO) in the heading.
Please refer to the change with this tracking assignment number when communicating questions or issues.
The heading also contains a parenthesized "Change Type", indicating the severity or importance of
the change. The severities used are:
- Critical - Recommended that this application be upgraded as soon as possible at all sites
running previous versions.
- Conditionally Critical - Recommended that this application be upgraded as soon as possible at
all sites running previous versions matching the stated conditions.
- Important - Recommended upgrading the application if the customer is experiencing the issue
denoted or currently applying a work-around for a specific non-functional feature.
- Enhancement - Recommended upgrading only if the specific functionality is desired.
CACTWO-5428 (Enhancement)
Allow an alt-click to open code editor
In the Assigned code tree, the user can now alt-click to get a partial code
editor that is based on that assigned code. In the Unassigned code tree, an
alt-click will open a full code editor, since no action has been assigned yet to
that code.
CACTWO-5504 (Enhancement)
Add verification prompt to Cancel button
A new message box will prompt when a user cancels out of an account after
making a change and not saving.
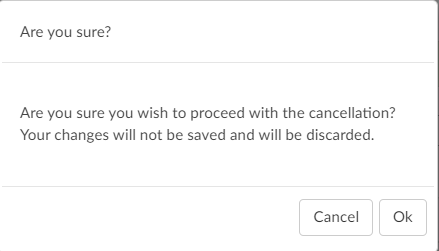
CACTWO-5533 (Enhancement)
Improve support for copying and pasting queries
Some customers create a physcian query from within form designer and then
copy and paste it into a different system, they were finding that the signature
block could not be copied and was indented and wanted it to be left aligned.
Additionally, any input fields where the user typed information into was bold
and they requested non-bolding. This enhancement covers these three items:
- Signatures will no longer be indented
- After the query is created, the query contents and the signature can now be copied together.
- Text entered into field will no longer display in bold
Additional Configuration Required
Please contact Support to activate the non-bold text option. The
bolding was intially added as an option for those sites to be able to tell what
was keyed in by the end user appart from the template.
CACTWO-5539 (Enhancement)
Warn user if no shift reasons selected
If a user closes a query and does not make a valid selection in the manual
shift reason box, a warning will alert them that no selections have been
made, and they can either ok that or cancel it and make a selection.
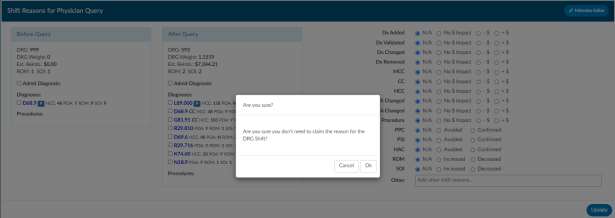
CACTWO-5588 (Enhancement)
Added ‘starts with’ to be used as an operator in some criteria
The ability to use ‘starts with’ in criteria has been added in these pages for all
fields that provide a list of string values, such as codes and document types:
- Account Search
- Workflow Management
- Validation Management
An example of how you would use this would be if you want to run an account
search to look for procedures with a range. For example, any procedure code
that begins with 021 or 02Y. You would write the logic like the below.
Assigned Procedure Codes –> Starts With –> 021,02Y
Additional Configuration Required
If you wish to use this operator with AutoClose, you must contact
Support for updated AutoClose script.
CACTWO-5602 (Enhancement)
Remove ‘hover’ from the Navigation Tree
The Navigation Tree will no longer expand when hovered over. The user will
now have to specifically click the arrow to open it. The system will remember
this preference between accounts.
CACTWO-5618 (Enhancement)
Add Elixhauser code description to tag
If a code has a tag after it, which identifies an Elixhauser code, hovering over
the tag will now give the Elixhauser definition previously it only displayed the
abbreviations it now displays the friendly name as well. This can be seen
across all appropriate viewers in an accounts Navigation Tree.
CACTWO-5681 (Enhancement)
Add notes to Audit worksheet for the outcome columns
In the Audit Management viewer, the Coder and Auditor outcome columns
now have a conversation bubble added to the right of each column heading,
to be used for general audit notes.

CACTWO-5764 (Enhancement)
Add patient fields to the sort order in Workflow Management
The sort on a workgorup in Workflow Management will now allow sorting by
patient fields, such as patient last name.
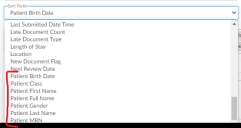
CACTWO-5798 (Enhancement)
Allow text changes in Audit viewer for Training Recommendations
The Auditor can now format the text in the Training Recommentations box
within the audit viewer. To do this highlight the words and the format menu
will be presented like other areas in the software.
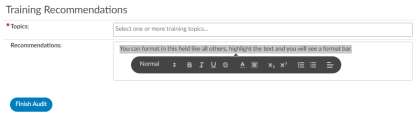
CACTWO-5799 (Enhancement)
Add CPT Modifiers as part of the CPT code errors
The Audit Management viewer will now include totals for modifiers, including
modifiers that were added or removed, CPT Score and Error rate.
CACTWO-5827 (Enhancement)
Allow criteria to use a specific code and POA value
There is now the ability to create account search and workflow criteria with a
criteria of ‘Assigned Diagnosis Code of a specific code with POA of N. Note this
is a new field “Assigned Diagnosis Codes with a POA of N “ For example, a user
may want to review any patient that has a diagnosis code for acute kidney
failure with a POA of N.
CACTWO-5861 (Enhancement)
Add the ability to check a box on shift reasons dialog next to the code that caused the shift
When a physician query is closed that creates Shift Reasons, if you have
manual shift reasons turned on you will now see a check box next to the codes
that allows you to check the box next to each code that was the reason for
the shift.
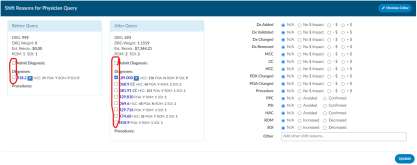
If the user checks a box, that code will appear in the shift reason description on the closed
query.

CACTWO-5891 (Enhancement)
Add Document Date to Account Changed warning box
A new column for Document Date has been added to the Account Changed
warning box. Now when a document is added to an account from an outside
feed and the account is saved aftere that, the warning box will now show the
date of the added document.
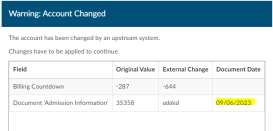
CACTWO-5893 (Enhancement)
Create a collapse/expand menu option in Flowsheet
In the Flowsheet viewer, a right click in the Major Category column will show
a menu allowing the user to expand or collapse all categories.
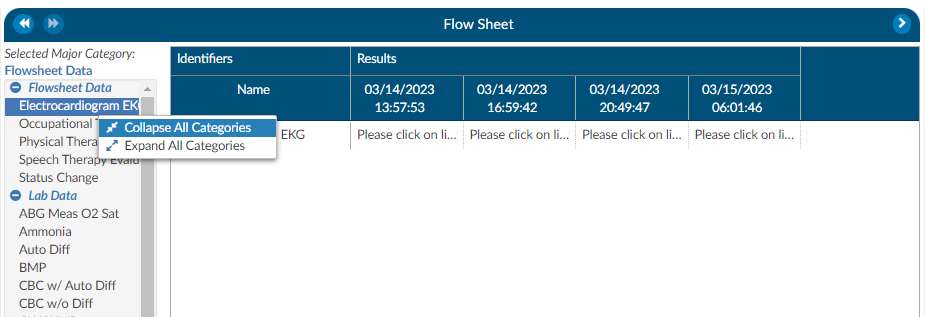
CACTWO-5899 (Enhancement)
Allow clicking on white space to update Flowsheet
In the Flowsheet viewer, Major Category column, when you moused over the
major categories the whole section would highlight in blue and the mouse
becomes a hand with a finger to indicate you can click it. However, the actual
click is only registered if you were to click on the major category. This has
been updated so that if the user clicks on the white space next to the subject,
the Flowsheet viewer will update to show that subject’s data.
CACTWO-5911 (Enhancement)
Allow Final Code Summary to pop out to a new tab
The Final Code Summary viewer now has the ability to pop out into another
browser tab.
Please contact Support to enable this option.
CACTWO-5927 (Enhancement)
Automatically un-filter when deleting filters in new Workflow Management
page
If a filter is created on the new Workflow Management previously, if you
clicked the garbage can icon and didn’t click “apply filters again it didn’t
unfilter.
Now by clicking on the filter, it turns green once the parameters are set, and
filters accordingly. But if you click on the filter again and then the garbage
can, the workgroups that had been filtered out are not coming back without
having to click extra keys. This has been corrected so that when a filter is
deleted, all the workgroups return.
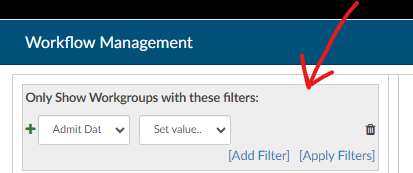
CACTWO-5930 (Enhancement)
Make the disabled workflow criteria coloring more obvious
Currently, when disabling criteria in the new Workflow Management page,
the criteria is struck out with red hyphens. To make this more noticeable, the
entire square the has the criteria will be surrounded by a red hyphenated line.
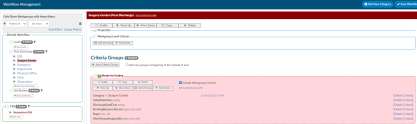
CACTWO-5931 (Enhancement)
Add tag on categories in new Workflow Management for active numbers
A gray oval tab has been added next to each Category in the the new Workflow
Management page to show the number of active workgroups.

CACTWO-5939 (Enhancement)
Prevent Autosave during timeout if another save/submit occurred
If an account is opened in two different browsers and one of them is saved
before an auto timeout occurs, the account will ‘read’ that the account was
updated in another browser, and when timing out, will not autosave the
account. This is so that work done and saved in a second browser is not
overwritten by the first browsers time out.
CACTWO-5945 (Enhancement)
Add ablility to copy rows in Flowsheet
In the Flowsheet viewer, the user can now right click on a row and select to
copy the row.
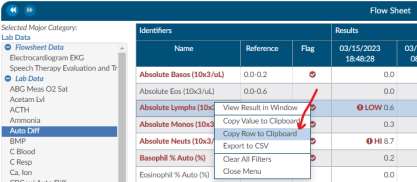
When pasted, the Name column and the Date/Results column will appear; the
reference column will not. For example
| Name | 03/27/2023 12:20:08 | 03/27/2023 20:12:43 |
|---|
| Base Excess Art (mmol/L) | 6.9 | 6.6 3.1 |
CACTWO-5948 (Enhancement)
Add Total Auditor Drafts to the Dashboard
In the Open Queries panel of the Dashboard, Total Auditor Drafts have been
added for consistency.
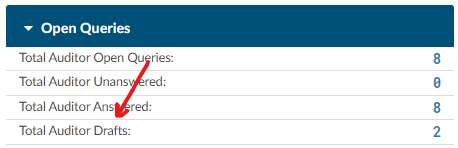
CACTWO-5967 (Important)
PPC code is not being retained when leaving and re-entering an account
When computing a DRG, PPC codes are sometimes added to the account. If
the user saved the account, left, and reopened later, the PPC was no longer
showing. This has been corrected so that PPC codes remain in the banner bar
and on the Code Summary viewer.
CACTWO-5968 (Important)
Friendly name change causing issues with pulling up worksheets
If the friendly name of a worksheet is changed in Document Types
Management, users adding that worksheet designed in form designer on an
account would not get the correct worksheet. This has been corrected.
CACTWO-5970 (Important)
Shared Minor category not showing proper data in Flowsheet
If a Flowsheet viewer has a minor category that shares its name with other
minor categories clicking on one was showing the data for all, which it should
not do. This has been corrected.
CACTWO-5974 (Enhancement)
Create select all button next to the code type section in Audit Management viewer
Auditors will now see a checkbox on the Audit Worksheet on each code type
heading, ie, Diagnosis. Clicking on that box will select all codes under that
heading. This allows the auditor to check off the codes they reviewed as part
of there audit, if needed.
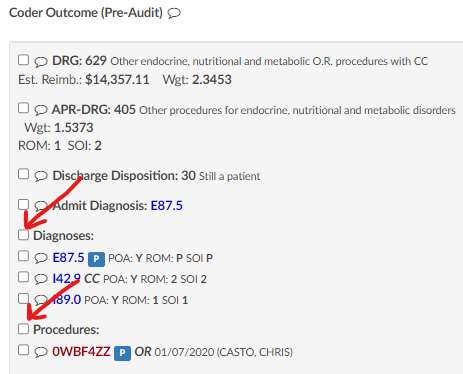
CACTWO-5978 (Important)
Add Random Inclusion Factor as a sort column in workflow management
In workflow management, random inclusion factor field was not available.
This feature adds this as a sort option.
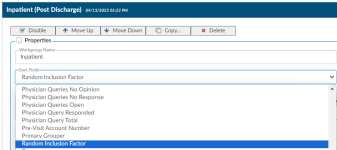
CACTWO-5982 (Enhancement)
Add an ‘Add All’ button to charges viewer for physician coders
When a physician coder is working in a charge viewer, they can add all
diagnosis that have been added to the assigned code tree by clicking on the
‘Add All’ button will add all diagnosis codes assigned to the account, up to 12
codes.
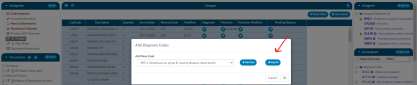
CACTWO-5983 (Important)
Procedure PPCs are not being counted in the Final PPC Total field
Previously, only Diagnosis PPCs were counted in the Final PPC Total field. This
has been corrected so if the Final PPC Total column has been added to the
grid, it will count both Diagnosis and Procedure PPCs.
CACTWO-5987 (Important)
Manual assignment of custom categories not being applied
When manually assigning an account to a custom workflow category from
account search, it was not displaying on show history. This has been
corrected.
CACTWO-5989 (Enhancement)
Update PSI and PDI Quality indicators
The PSI and PDI Quality Indicators have been updated to AHRQ v2023
CACTWO-6004 (Enhancement)
Move the Add/Edit Code Comment option in the right click menu
Add/Edit Code Comment has been moved below the Edit
Code option in the right click menu found in the
document code tree and the Show All Code tree. This
was requested by a few customers as the users were
familiar with where the assign secondary fields were and
it was causing them to scroll and accidently click the
wrong action. This field has been moved down since its
not used as much as these other fields
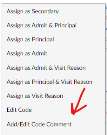
CACTWO-6032 (Important)
Unable to copy and paste a list in Workflow Management
If a user wants to copy all or part of a list contained in a criteria in the new
workflow management page, they are able to highlight, but it does not copy.
This has been corrected.
CACTWO-6056 (Important)
Unable to see full name of Workgroup in new Workflow page
A long Workgroup name is not being displayed properly in the new workflow
management page. The view has been changed to show as much of the name
as possible followed by ellipsis. Workgroups also now have a hover over
which will show the full name of the group.
CACTWO-6059 (Enhancement)
Allow Validation Management to filter for code comments
In Validation Management, the user can select the ‘for each’ checkbox and
see a new option of Code Comments. Also added to the Navigation dropdown
is Notes & Bookmarks. This will take the user to the Notes & Bookmarks
viewer when the validation rule in Code Summary is clicked on.
V2.53 (Dec 2023)
V2.53.8745 Released 12/15/23
The notes below indicate changes and additions to the software. Please review these release notes
carefully when deciding to apply a software update to an installation.
Each note is related to an issue tracking assignment number (starting with CACTWO) in the heading.
Please refer to the change with this tracking assignment number when communicating questions or issues.
The heading also contains a parenthesized "Change Type", indicating the severity or importance of
the change. The severities used are:
- Critical - Recommended that this application be upgraded as soon as possible at all sites
running previous versions.
- Conditionally Critical - Recommended that this application be upgraded as soon as possible at
all sites running previous versions matching the stated conditions.
- Important - Recommended upgrading the application if the customer is experiencing the issue
denoted or currently applying a work-around for a specific non-functional feature.
- Enhancement - Recommended upgrading only if the specific functionality is desired.
New Module (Enhancement)
Add CDI/Clinical Alerts Module
The software has a feature called CDI/Clinical Alerts which are automated messages
generated by the software that can be used to prioritize your CDI workflow.
CDI/Clinical Alerts are used to detect potential inaccuracies, inconsistencies and or
discrepancies in clinical documentation. These Alerts help CDI teams to
prioritize the charts based on potential query opportunities available.
The software provides real-time Alerts when potential query opportunities
are identified. Which will then allow CDI staff to prioritize charts based upon
those potential opportunities.
CDI/Clinical Alerts can also be used by coding and auditing charts where CDI did not
review the chart.
Contact SME for more information
If you are upgrading, please contact Dolbey’s SME Team for more information on purchasing and
enabling this feature.
CACTWO-5378 (Enhancement)
Allow multiple Denials to be added to a single account
The Denial Management viewer will now allow multiple sheets to be created.
Sheets can also be deleted via a red X to the right of each Denial heading.
When reporting in Account Search, a new Denials drilldown is available, but it
will only report on the first Denial on each account.
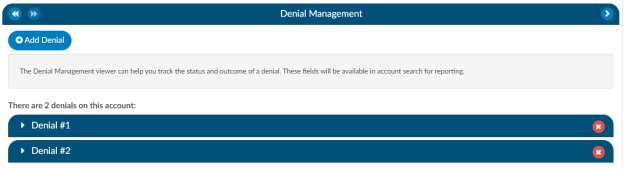
CACTWO-5423 (Enhancement)
Add Pending Reasons to Discharge Not Final Coded user report
A new column for pending reasons has been added to the Discharge Not Final
Coded user report. If there are multiple pending reasons, they will be
separated by a comma.
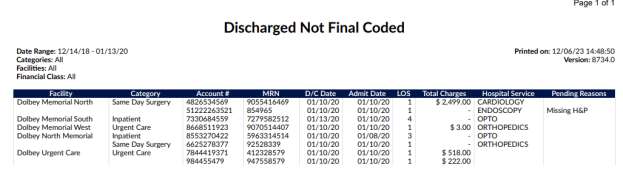
CACTWO-5446 (Important)
Recalculate query counts when saving an account
Currently, if a user was in an account that had an open physician query, and
an external interface closed that query, the count on the Account List for the
Query Total would still show the query open. This has been changed so that
the query total on the account is updated upon closing the account.
CACTWO-5481 (Enhancement)
Users with multiple roles would like column orders to be maintained
Currently, if a user has multiple roles (e.g., Coder, Auditor, CDI Specialist),
when the columns are changed for one role, the other roles are automatically
set to match. This has been changed so that column changes for Account List,
Charges and Transaction Viewers, and Medication viewers can now all be
unique to each role.
CACTWO-5537 (Enhancement)
Allow physician field when embedded on physician query to display
automatically
A new field option has been added to Form Designer under the +Add Field
selection.. If the Physician field is added to a Physician Query, then the
physician that is assigned will automatically show in that field.
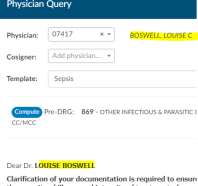
CACTWO-5667 (Enhancement)
Add Auditor to ‘run for’ on Scheduled Reports
The ‘run for’ field in Scheduled Reports will now show an ‘Auditor Only’ option
for these reports:
- Outstanding Queries
- Query Impact Report
- Query Impact by Discharge Date
- Query TAT by Author Report
- Query Template Volume Overview
- Query Template Volume by Discharge Date
- User Session Log
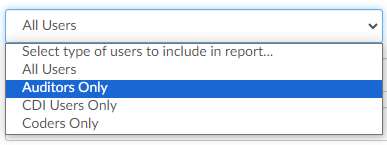
CACTWO-5873 (Enhancement)
Display the document author in hover over on Documents pane
A hover over will now display on the documents pane to provide the author
of the document if it is sent from the interface.
CACTWO-5955 (Enhancement)
Allow Validation Rule to add a Pending Reason
In Validation Management, a new field has been added to the rules that are
created called Pending Reason. This field will have a dropdown with all
available pending reasons. If a rule is triggered on an account and it has a
pending reason attached, then the pending reason will be added and the user
will be able to see the number of the rule. Pending reasons that have a
physician or date requirement will NOT be available in this list. The only way
to remove a pending reason that was added by a rule is to have that rule
cleared.
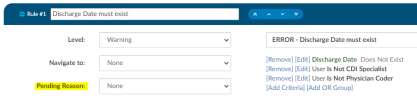
CACTWO-5964 (Enhancement)
Allow Document Search box to be resized
In an account, when the Document Search is opened, the box can now be
resized by grabbing and pulling the lower right corner.
CACTWO-5972 (Enhancement)
Add zoom in and out ability to text based documents
The ability to zoom in and out has been added as a right click option in
documents, both on the main page and a pop out. This new zoom feature will
work for Chrome and Edge users. When a user selects a zoom level, that level
will be retained for all documents and the last zoom used before log out is the
zoom level the user will get when they sign back in.
CACTWO-6041 (Enhancement)
Add Provider Name and Date to the document viewer header
If there is a physician name and date of service that is sent on the interface
for a document, the physician name and date will now show in the document
viewer header, on the popout, and in the Ctrl+ click of the header.
CACTWO-6098 (Enhancement)
Highlight Navigation Tree if Query draft exists
The Physicians & Queries viewer on the Navigation Tree will now show with
an amber highlight if there is a Query Draft. When the draft is either updated
and sent or deleted, the amber color will go away.
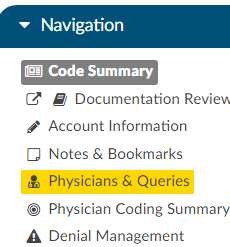
CACTWO-6107 (Enhancement)
On HCC codes, display HCC version to support V24 and v28
A code that is followed by an HCC indicator in account detail will now display
the version of HCC for calendar year 2023 (retroactively) and 2024 when the
user hovers over the H in the Assigned Codes panel. On the Final Code
Summary and the Working CDI History viewer, the code’s HCC designation will
show the HCC number and its version.

CACTWO-6108 (Enhancement)
Allow history on changes in Form Designer
Form Designer will now create a history for changes made in Form Designer.
Once a change is made on a form and saved, a Show History button will show
in the top right of the worksheet. Clicking on it will bring up a notes box
allowing for the end user to make a note as to the change, this function like
the Workflow Management viewer notes.

CACTWO-6115 (Enhancement)
Add more fields to Denial Management viewer
Additional fields for a 3rd appeal and extra DRG information have been added
to the Denial Management viewer. These fields can also be added to Grid
Maintenance.

CACTWO-6117 (Enhancement)
Allow all stratums for PSI 04 quality indicators to show in Code Summary
In the Algorithm for Quality Indicators section of the Code Summary viewer,
only the first PSI 04 indicator is displaying. This has been updated to show all
5 of the indicators.
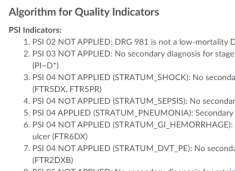
CACTWO-6118 (Important)
CDI Activity Report grand total line is incorrect if users are filtered
If the CDI Activity Report is being filtered to just one user, the Grand Total line
is showing the total for all users instead of just the one filtered. This has been
corrected.
CACTWO-6120 (Important)
OR groups are not showing in new Workflow Management page
If an OR group is added to workgroup level criteria, it is not appearing within
each criteria group. This has been corrected.
CACTWO-6122 (Important)
Audit Management error rate not being reported correctly in reports
The following reports were not calculating the Audit Management error rate
correctly. They have been corrected.
- Audit Executive Summary
- Inpatient Auditor Productivity
- Inpatient Coder Scorecard
- Outpatient Audit Scorecard
- Outpatient Auditor Productivity
- Outpatient Coder Scorecard
CACTWO-6125 (Important)
CDI Activity Report is not reporting Reconciliation correctly
The CDI Activity Report was reporting a DRG Reconciliation if an account set
for DRG Reconciliation was opened, but then canceled out. This has been
corrected so that accts canceled will no longer be included.
CACTWO-6126 (Enhancement)
Allow Users to be excluded from the Inactivity prompt
New funcitonality has been added so that Role Management now contains an
option to exclude a role type from being triggered.
CACTWO-6135 (Enhancement)
Allow Flowsheet to save the collapse function
If a user collapses or uncollapses a major category on the Flowsheet viewer,
that configuration will remain for all accounts that have the Flowsheet viewer.
Note that if a user collapses/uncollapses a major category in the pop out, it
will not be seen on the main page until the user moves to a different viewer
and back.
CACTWO-6136 (Important)
Auditor Physician Query Draft line is not showing on Dashboard
If an auditor, CDI specialist, or coder has at least one query draft but no sent
queries, the total drafts count will now appear for the role with the open
queries, unanswered, and answer counts displaying as zero on the dashboard.
CACTWO-6144 (Enhancement)
Show friendly values in Workflow dropdowns
Currently the new Workflow Management page is not showing the friendly
value for criteria of a property with a mapping. This has been changed to
show the friendly value, just like the classic Workflow Management page.
CACTWO-6146 (Important)
Solventum is opening another instance when opening a dashboard drilldown
If a user opens a dashboard drilldown, another window with Solventum is opened.
This has been corrected so that there is only ever one Solventum open.
Solventum Web Component Users Only
This fix is only applicable for Solventum Web Component users.
CACTWO-6147 (Enhancement)
Hide Visit reason fields if there are none on the account
The Audit Management Worksheet viewer will no longer show all of the Visit
Reason fields if there are no visit reasons on the account left by the coder or
the auditor. If a visit reason is added by the auditor during the audit process,
the Visit Reason fields will open up when the auditor clicks the Update Codes
button.
CACTWO-6150 (Important)
Reports are not properly counting intial reviews of accounts
If a CDI Specialist creates a Baseline DRG (the first Working DRG), then edits
the account further causing the Working DRG to be cleared, and then saves
the account without computing a new Working DRG, the creation of the
Baseline DRG now counts as an initial review.
CACTWO-6181 (Important)
New Workflow Management page is holding Note text when it should clear
Adding text into the Note field in a workgroup was resulting in that same text
appearing in every subsequent workflow This has been corrected.
CACTWO-6188 (Important)
Adding workflow is changing the workflow order in User Maintenance
If new workflow is added to the new Workflow Management page, the users
attached to that workflow are having their order in the User Management
profile change. This has been corrected so that any newly added workflow
will go to the end of the list in the new Workflow Management page and the
User Management profile.
CACTWO-6195 (Important)
Reporting is not calculating manually added codes properly
Two user reports (Coder Suggestion Use by Coder and Engine Results by
Documents) were not calculating codes added manually. This has been
corrected.
CACTWO-6201 (Enhancement)
Allow Query to be created and closed in one step
For customers who do not have a physician query interface and do not createa
physician query until a response is received, a query can now be created and
not sent. When enabled, a physician query will show a “Continue” button in
place of “Send”. Clicking the ‘Continue’ button will refresh the query to open
the physician response fields so that the query can then be closed. This is
common for Epic EHR customers.
Additional Configuration Required
Please contact Support to enable this feature.
CACTWO-6202 (Important)
Improve performance of encoder calculations with several codes
When a user performs an encoder computation, the red bar showing that an
encoder is open was taking a few seconds to disappear over the
Compute/Save/Submit buttons. This has been corrected so that it disappers
sooner.
CACTWO-6204 (Enhancement)
Update Audit reports to show blank for accuracy
For the Inpatient Coder Scorecard and the Outpatient Coder Scorecard if there
are no CPT or PCS codes, the CPT Codes and PCS Codes accuracy columns will
now display as blank, rather than 100%.
CACTWO-6205 (Enhancement)
Make Accuracy rates stand out in the Audit Worksheet
To make the accuracy rate lines stand out in the Audit Worksheet, the
backgrounds have been changed to show as light blue.
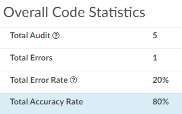
CACTWO-6217 (Important)
Field in worksheet showing as ‘Select an item’ when printed
On worksheets, dropdowns prompting users to select an item were not
displaying the selection when that worksheet was printed. This has been
corrected.
CACTWO-6224 (Enhancement)
Allow DRG Reconcilation to compare DRG weight
A new setting has been created that, when set to true, will compare DRG
weights as well as the DRG during reconciliation. By default, the comparing of
DRG Weights will be disabled.
Additional Configuration Required
Please contact Support to implement this change.
CACTWO-6225 (Important)
Account Search not using ‘only contains’ properly with “Assigned Diagnosis with POA N” field
Account Search will now correctly use the Only Contains criterion.
CACTWO-6239 (Important)
Code Suggestion by Coder report is not calculating correctly
When a code is being added via Solventum to an account that is then being
submitted, that code is not showing up in the Direct column of the From Other
Sources section of the Code Suggestion Use by Coder report. This has been
corrected.
V2.54 (Apr 2024)
V2.54.8854 Released 04/05/2024
The notes below indicate changes and additions to the software. Please review these release notes
carefully when deciding to apply a software update to an installation.
Each note is related to an issue tracking assignment number (starting with CACTWO) in the heading.
Please refer to the change with this tracking assignment number when communicating questions or issues.
The heading also contains a parenthesized "Change Type", indicating the severity or importance of
the change. The severities used are:
- Critical - Recommended that this application be upgraded as soon as possible at all sites
running previous versions.
- Conditionally Critical - Recommended that this application be upgraded as soon as possible at
all sites running previous versions matching the stated conditions.
- Important - Recommended upgrading the application if the customer is experiencing the issue
denoted or currently applying a work-around for a specific non-functional feature.
- Enhancement - Recommended upgrading only if the specific functionality is desired.
CACTWO-5598 (Enhancement)
Include new accounts when autoloading
A new database setting has been created to allow a change to how auto-
loading works.
When set to true, if an account is added to a workgroup currently being
worked by a user with auto-load enabled and that new account has a
discharge date before the date of the account being worked, the next account
to autoload will be that new account, rather than the next account in the
workgroup list.
Additional Configuration Required
Please contact CAC Support to enable this feature.
CACTWO-5823 (Enhancement)
Create symbols to identify Auditor code changes on Audit Worksheet
The Audit Worksheet will display new symbols next to codes that were
changed between the Coder and Auditor.
- A green ‘plus’ sign indicates the code was added.
- A red ‘minus’ sign indicates the code was deleted.
- A orange up or down ‘arrow’ sign indicates the code location has been changed (ex. a primary and secondary are swapped.)

CACTWO-5865 (Enhancement)
Allow Audit Subtypes to be context sensitive based upon what audit type was selected
A new column has been added to Mapping Configuration for the Auidt Type
mapping. This new Audit Subtype column will allow Administration to limit
the subtypes available for each Audit Type.
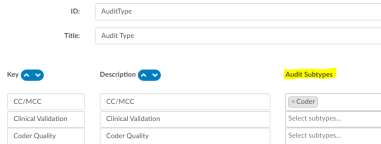
When an auditor then selects that Audit type in the Audit Worksheet, instead
of getting the full list of subtypes, the user will only see the subtypes allowed.
In this example, the Audit Type CC/MCC only has a subtype of Coder available,
so that is all that will show in the dropdown selection.

CACTWO-6030 (Enhancement)
Add a section for Rebills to the Audit Worksheet
The end of the Audit Worksheet has been changed to allow for an Auditor to
ask if the audit requires a rebill.

When answered ‘Yes,’ the Auditor can additional record a date for a rebill.

CACTWO-6033 (Enhancement)
Allow auditor to submit and route to coder post audit
An Auditor can now submit an account and either 1) submit and close the
audit, or 2) complete an audit on a chart, submit it as the auditor and then
route it back to the coder without the need to go back into the chart and route
it to the coder. This new box will appear when submitting an audit if the audit
isn’t closed yet and when doing so, will receive this new query box:
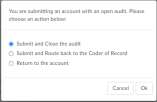
CACTWO-6060 (Enhancement)
Allow Audit worksheet to be printed
A new print button at the top right of an audit worksheet will allow the
worksheet to be printed.

Additional Configuration Required
Please contact CAC Support to enable printing
CACTWO-6074 (Enhancement)
Change the way Forced Autoload works
Several changes have been made to how Forced Autoload lists to-do accounts
for the user.
- When a Forced Autoload user logs off (and does or does not close
the browser) and logs back in during the same calendar the
application will remember where the user left off and start the
autoload feed there.
Additional Configuration May Be Required
If you would like this changed back to the original ‘start from beginning upon launch
of ‘Go To Next Autoload’; please contact Support.
- If a user has a chart assigned directly to them while they are working
on an assigned list, that chart will be next in the autoload process.
When completed, the user will be taken back to where they left off
within the list they were working.
- If a support personnel re-assigns a chart to a workgroup that is
currently being worked by a forced autoload user and the chart’s
discharge date is older than the one the forced user is currently in,
when the user cancels/saves the account, the earlier chart wll be
next in the list. After the chart is completed, the list will resume
where the user left of
CACTWO-6116 (Enhancement)
Add Privilege in Role Management to allow a user to add an account note or bookmark and worksheet
A new privilege, Edit Only Account Notes, Bookmarks, and Worksheets has
been created in Role Management to disallow any code work. When this
privilege, is checked, the role will be able to only add a Note or Bookmark to
a document, add and edit new worksheets, and add a comment on an
unassigned code. No coding work can be done.
CACTWO-6168 (Enhancement)
Allow lists to be attached to keys in Mapping Configuration
A new Mapping Configuration has been created called
CriteriaFindAndReplace. Once that mapping is created, keys attached to lists
of items can be added. In Account Search,Workflow, and Scheduled Account
Searche, the key can be used after the operator of ‘In List’ or ‘Includes Any Of’
as applicable when creating criteria. The key will allow all items attached to
it to be considered in the equation.
For example, if a user wants to create a key for Elixhauser to be used for the
diagnosis codes within a group, they would add a key of Elixhuaser categories,
with the description being the comma separated list of each of the different
categories for example:
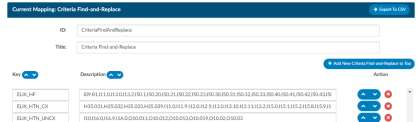
Then, in Account Search, Scheduled Account Search, or Workflow, the user
would use a criteria as shown below. CAC2 will look at ‘ELIX_HF` and apply
the criteria to all of the numbers listed in the Mapping description in the
equation.
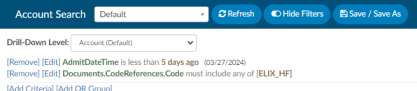
If an account had a diagnosis code of I50.20, this criteria would pick it up, since
that code is associated with the key of ELIX_HF.
Case Sensitive
This field is case sensitive. Criteria must match the case of the key in
Mappings.
Elixhauser Mappings
For Elixhauser users, having the Elixhauser coding updated will
automatically create keys and descriptions for all Diagnosis Codes
associated with Elixhauser in this new mapping.
CACTWO-6170 (Enhancement)
Allow filtering of multiple documents in the Documents Viewer
On an account, the user can now select multiple documents from the
Documents pane by using Shift+Left Click or Ctrl+ LeftClick, then right-clicking
to choose ‘Filter Selected’.
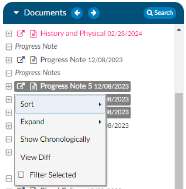
This will hide all unselected documents. A filter button will show in the panel
title showing the total number of documents along with what have been
filtered. In the below example, the account had 14 documents and was
filtered so that only 3 showed. When the filter button is clicked, hidden
documents will reappear. The filter can also be canceled by clicking on any
code in the Unassigned/All Code trees.
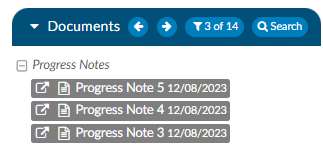
CACTWO-6203 (Enhancement)
Create error message when computing Solventum with dates prior to Oct 1 2015
Currently, TruCode™ displays a red error message if a user tries to compute a
DRG when an account has an Admit date, Discharge date, or Procedure Date
before October 1, 2015. This error has been extended to include
computations using Solventum™.
Solventum™ Users Only
This feature applies to Solventum Users Only
CACTWO-6219 (Enhancement)
Allow banner bar to be customizeable for printing
The banner bar that is printed on the top of each of the document and/or
forms can now be customized.. Your site must allow for printing.

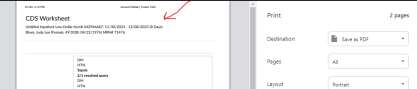
Additional Configuration May Be Required
Contact CAC Support for customized banner-print.html
CACTWO-6231 (Enhancement)
Change size of checkbox in Form Designer
When Checkbox is chosen as a field in a form in the Form Designer page, the
checkbox will now appear much larger in the document or query.
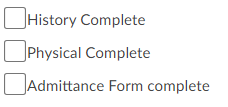
CACTWO-6248 (Enhancement)
Do not show Trauma section if not configured in the E&M Config within the E&M viewer
If the “Trauma” section of E&M Configuration is configured with 0 or 1
options, then the Trauma section will not appear in the E&M Viewer for an
account where “IsEmergencyRoomVisit” is set to true.
CACTWO-6251 (Enhancement)
Add new CDI fields to be used for Workgroup Management sorting
First and Last CDI Saver fields have been addedto the sort field options in
workflow management per workgroup. These will now show in the dropdown
of the Sort Field, under Properties of a Workgroup. This will allow for that
column to be sorted ascending or descending.

CACTWO-6292 (Enhancement)
Create new columns for query draft totals
Three new fields have been created to show totals for queries in draft status.
Users can add the fields via Grid Column Configuration as needed.
- Physician Query Drafts
- CDI Physician Query Drafts
- Coder Physician Query Drafts
CACTWO-6325 (Enhancement)
Allow Physician Query to be quick closed with manual entry
A new button has been added to the Physician Query viewer. After adding
a manual query response, a user can click Quick Complete, to complete
without having to send the query to the Physician.
CACTWO-6333 (Enhancement)
Allow mass editing of modifiers
When multiple CPT codes are selected in the mass edit window and all the
CPT codes have a common modifier, it will now display in the modifier box so
that it can be removed, if necessary, from all CPT codes.
CACTWO-6340 (Enhancement)
Allow Custom Workgroup to be retained upon reassignment
The Mapping Configuration ‘Workgroup Types’ now has a column called Used
By. This column lists user types, which, when added to a workgroup type in a
custom workgroup, will cause the workgroup to be retained IF the user that
is assigning an account has a profile that matches what is contained in the Use
By column.
As an example, for Workgroup ‘Cardiology Physician’, the Workgroup Type is
set as Physician Coding. In Mapping, Workgroup Type, I have set the Used By
column to Retain Always.
If a user is a Hospital Coder and assigns an account to another user and that
chart was also assigned to the Cardiology Physician Workgroup, it will be
retained.
If the user is a Physicain Coder and assigns that account to another user, then
the custom workgroup Cardiology Physician will be removed along with any
other workgroup on that account.
To configure, examine the mapping for WorkGroupType in Mappings
Configuration. A new column, “Used By,” is present.
Retain Always
An option of Retain Always can be set in the Use By column of the
WorkgroupType in Mappings, which will cause the Custom Workgroup using
that type to always be retained when an account is reassigned.
CACTWO-6343 (Enhancement)
Allow Solventum™ to save position on second monitor
The software will now remember where you last placed the Solventum Coding and
Reimbursement window(s) on your screen. When you reopen these windows,
they will appear in the same position as before.
This new feature works by using the Windows Management API. The first time
you log in after the update, you’ll see a message asking you to give permission
for this API to run. It’s important that all users agree to this, no matter how
many monitors you have or whether you use this feature right now. Saying
yes will help us use this technology for more improvements in the future.
CACTWO-6350 (Enhancement)
Add Auditor Activity to several coder reports
The following user reports will now automatically contain auditor activity in
addition to the coder activity:
- Coder Activity
- Global Productivity
- User Detail
- Weekly Coder Activity
CACTWO-6351 (Important)
Prevent the Search Document window from shrinking
When a Document Search window is used continually, each time the window
is getting smaller. This has been corrected.
CACTWO-6378 (Important)
Prevent multiple pop up boxes from resizing themselves
If more than one pop box is open at once, like a Document Search box and a
Physician Query box, when one is resized, the other is automatically resizing.
This has been corrected so that the second box is not resized.
CACTWO-6392 (Enhancement)
Allow Physician Query to show differences
A new button will now show under a physician (or manual) recorded answer
of a Physician Query, allowing the user to see anything that was added to the
query by the physician that received it.
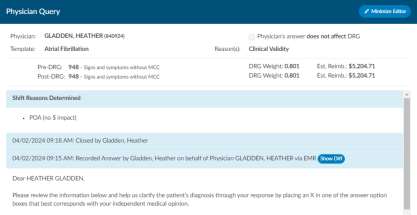
Clicking the Show Diff button will show any additions or subtractions made to
the query in the response in blue or red highlights.
In this example, the physician has marked a line and added text after it, and
the Show Diff button now shows as Hide Diff since it was deployed to view the
response:
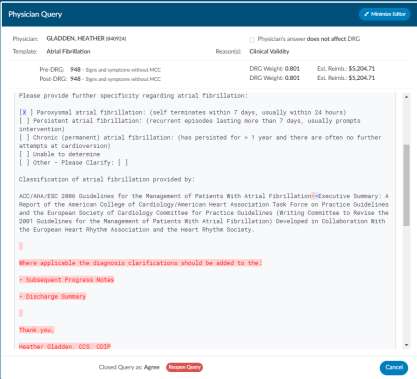
CACTWO-6399 (Enhancement)
Add Total Charges to Validation Manager
The field Total Charges has been added to Validation Management as an
account field.
CACTWO-6410 (Enhancement)
Add Calculated Date/Time as a field
A new field, Calculated Date/Time, has been added. This field shows the last
time the encoder was run. If it’s blank, the encoder needs to be run. This can
help the user find accounts that should have an APC, DRG, or if a coder clicked
on the encode to run edits.
CACTWO-6422 (Important)
Send proper cancel message rather than blank HL7 to Epic FEWS
For Epic customers who switched from COM integration to FEWS, an issue
that was causing errors in Epic has been corrected. Previously in the COM
integration, when someone clicked “cancel” in Fusion CAC, an empty message
was sent to Epic to close the communication. With FEWS these same blank
messages cause errors. Now, canceling a chart in the latest version won’t lead
to these errors in Epic for those using FEWS integration.
CACTWO-6458 (Important)
Update to Elixahuser codes
There has been an update to use Elixhauser v2024 for Elixhauser coding.
V2.55 (Jun 2024)
V2.55.8945 Released 06/28/2024
The notes below indicate changes and additions to the software. Please review these release notes
carefully when deciding to apply a software update to an installation.
Each note is related to an issue tracking assignment number (starting with CACTWO) in the heading.
Please refer to the change with this tracking assignment number when communicating questions or issues.
The heading also contains a parenthesized "Change Type", indicating the severity or importance of
the change. The severities used are:
- Critical - Recommended that this application be upgraded as soon as possible at all sites
running previous versions.
- Conditionally Critical - Recommended that this application be upgraded as soon as possible at
all sites running previous versions matching the stated conditions.
- Important - Recommended upgrading the application if the customer is experiencing the issue
denoted or currently applying a work-around for a specific non-functional feature.
- Enhancement - Recommended upgrading only if the specific functionality is desired.
Security - Create Two Factor Authentication
CACTWO-4974 (Enhancement)
Fusion CAC now allows organizations to use two factor authentication. When
enabled, the first time a user logs in after activation, a new panel will appear
on the login screen with a QR code or setup key to scan/enter into an
authenticator app. In the user’s authentication app, they will see
Fusion CAC [the environmentName appSetting] : [User's Login ID]
When logging in, the user will add the code after their password.
Additional Configuration Required
Please contact Support to enable this feature.
Add Metrics to CDI Query Scorecard Reports
CACTWO-5677 (Enhancement)
A new section called CDI Team Metrics has been added to the CDI Query
Scorecard/Scorecard by Admission date reports. This lists the accounts and
reviews per month. The review counts are determined by the discharge date
for CDI Query Scorecard.
Add Additional Abstracting Questions to the Audit Worksheet
CACTWO-5677 (Enhancement)
Several new bullet point style questions can be added to the top of the
Abstracting section of an Audit worksheet. By default, there is no change to
the Audit Management viewer. However, a site can request additional
prompts to be added to the Abstraction section of the Audit Management
viewer.
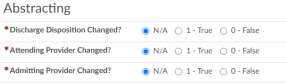
Additional Configuration Required
Please contact Support to enable this feature.
Allow Workflow to Retain Collapse State in Memory
CACTWO-6051 (Enhancement)
The Workflow Magement page will now save how each users collapse/expand
criteria settings. After collapsing or expanding criteria throughout the page,
the user will see that remain when there is movement between pages, or a
signoff/signon action. This is automatically retained; the user does not have
to click the Save Workflow button.
Allow to Copy a Row as a Single Line
CACTWO-6190 (Enhancement)
A new right click menu option has been added to the Flowsheet Viewer. This
will allow the user to highlight a row and choose ‘Copy Row as a Single Line’
to paste it into a text style editor.
Allow User to Copy Sections of an HTML Document to Clipboard
CACTWO-6214 (Enhancement)
lose format
When copying an HTML document into an a text field, forms or Physician
Query, the format was being lost. This has been corrected so that the HTML
will hold its format, while removing code suggestions and extra blank lines.
Create Coder Detailed Activity Report
CACTWO-6271 (Enhancement)
The new report Coder Detailed Activity Report is similar to the Coder Activity
Report, but has 2 new columns. Chart Touches will count the number of
unique times an account was touched, and the times for submitting and for
saving have been split.
Add New Column to the Query Impact Reports
CACTWO-6321 (Enhancement)
Both the Query Impact and the Query Impact by Discharge Date report will
now have a new column; Query Reason.
Add More Columns to the Pending Reason Report
CACTWO-6345 (Enhancement)
The Pending Reason report will now have two additional columns; Attending
Provider (first if there are multiple), and Discharge date.
Add Last/Prior Login Date to User Profile
CACTWO-6377 (Enhancement)
There are now two dates that can be seen in User Profile. It wil show the Last
Login (which is the last, or in some cases current time the user was logged in)
and Prior Login, which is the date previous to the current or last login.

Note that the first time a user logs in after the upgrade that enables this
tracking, there will be no Prior Date. Administrators can open the profiles of
other users from User Management and see their last and prior login
date/times.
Add Auditor Options to the Validation Manager
CACTWO-6393 (Enhancement)
Validation Manager now has two new user options; Is Auditor, and Is Not
Auditor. Please note that for profiles that have multiple roles, using these will
only trigger on an account if the current role is Auditor.
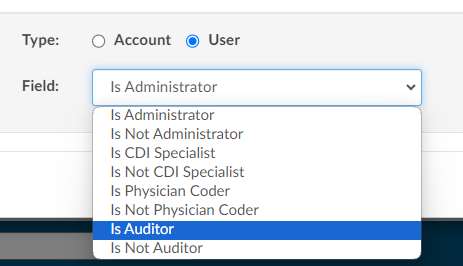
Create a way to Collapse all Categories in Workflow Management
CACTWO-6398 (Enhancement)
A button has been added to the top of the left side Workflow list in Workflow
Management. Clicking this button will perform either a Collapse all or Expand
all Categories as needed.
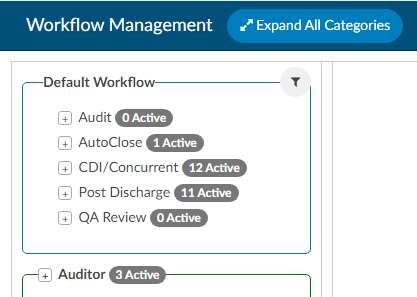
Changes Have Been Made to Denial Management
CACTWO-6451 (Enhancement)
The “Comments” box in the Denial Management viewer will now wrap text
and auto-expand as needed. Alsoif you highligh overtop of the text it will now
bring up the text edit styling box.
Allow TruCode to Compute a DRG Without Sequencing Codes
CACTWO-6460 (Enhancement)
A new option has been added for TruCode encoder users to the Compute
button’s right side dropdown called ‘Compute w/o Resequence’. This will
compute the DRG without ordering DX codes according to quality indicators.
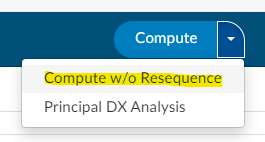
TruCode™ Users Only
This fix only applies to TruCode™ users.
Add Ability to Reconcile all DRGs, not Just the Primary
CACTWO-6479 (Enhancement)
With a new setting that support can enable you can now add the ability for
sites to trigger DRG Reconciliation if any DRGs or DRG Weights.
Additional Configuration Required
Please contact Support to enable this feature.
Create a DRG Reconciliation Viewer
CACTWO-6480 (Enhancement)
A new DRG Reconciliation viewer has been created. This will be available for
Inpatient accounts that have been reconciled and submitted by a coder. It is
for view only, and will display the Working DRG on the left, Final DRG on the
right. Symbols will be next to all codes indicating if they have been added,
removed, or moved to a different position.
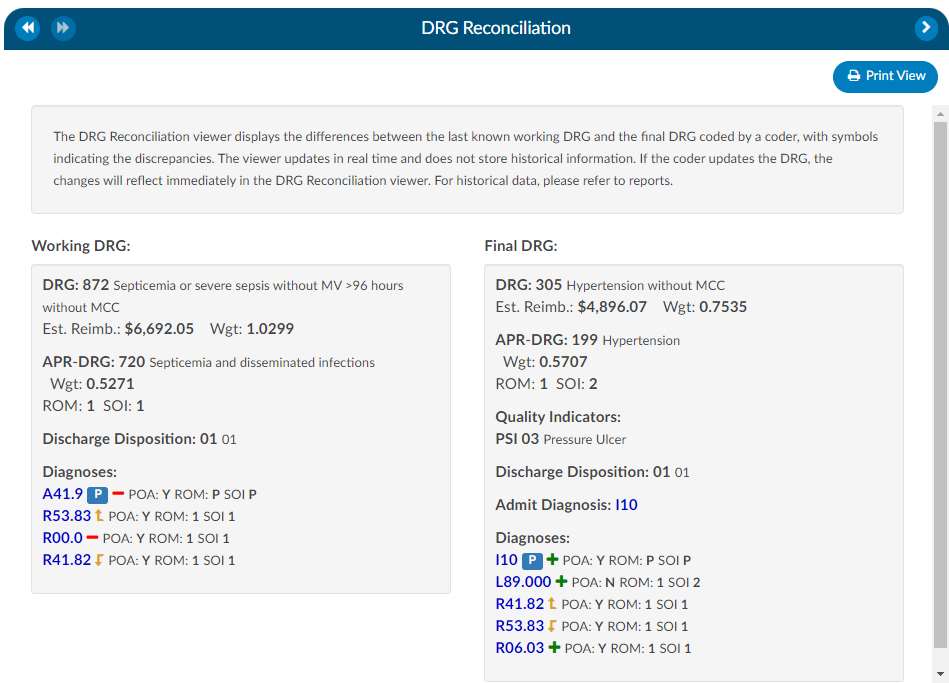
Additional Configuration Required
Please contact Support to enable this feature.
Add ‘Exclude’ on Report Filters on Most CDI Reports
CACTWO-6482 (Enhancement)
These five filters that can be found on CDI user reports will now give the user
the option to filter as ‘ include’ or ‘exclude’. The filters are: Category, Facility,
Financial Class, Hospital Service and Pending Reason.
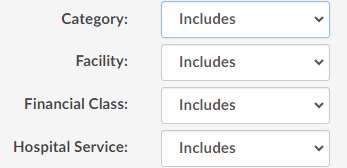
If the filters are left blank, then Include stands for ‘All’ and Exclude stands for
‘None’. These are the reports it was added to:
- CDI Activity Report
- CDI Executive Summary
- CDI Financial Benefit
- CDI Metric Score Card
- CDI Productivity - Admission Month
- CDI Productivity by Review Type
- CDI Query Detail Report
- CDI Query Score Card
- CDI Query Score Card - Admission Month
- Inpatient Audit Score Card (Audit Management only)
- Inpatient Auditor Productivity (Audit Management only)
- Inpatient Coder Score Card (Audit Management only)
- Outpatient Audit Score Card (Audit Management only)
- Outpatient Auditor Productivity (Audit Management only)
- Outpatient Coder Score Card (Audit Management only)
CPT Error Rate is not Refreshing Properly in Audit Management
CACTWO-6494 (Important)
In Audit Management, when there is a change to ‘Total Modifiers Added’ or
‘Total Modifiers Removed’, the CPT error rate is not refreshing. This has been
corrected to update the CPT error rate immediately.
Some Patient Birth Dates are Showing as 1 Day Earlier in Account Grids
CACTWO-6499 (Important)
Due to how certain dates are evaluated in Daylight Savings Time, some birth
dates of patients were appearing off by one day between various grids. This
has been corrected.
Allow Admin Users to Have Access to Create/Edit Documentation Review Without the Need for Privilages to be Added
CACTWO-6522 (Enhancement)
Administrators will now be able to create or edit documentation reviews
without having the explicit privilege ‘Create/Edit Documentation Reviews”. It
is uncommon to use documenation reviews for CDI users.
Incorrect Document is Staying in Focus
CACTWO-6525 (Important)
If a code from the Show All Codes tree is assigned to more than one
document, and the user clicks on one of those documents, it opens in the
document viewer. But if the user then clicks on a different document and
adds a code to it, the former document shows in the viewer instead of the
currrently opened one. This has been corrected.
Allow Collapses and Expands to Auto Save in new Workflow Management
CACTWO-6522 (Enhancement)
Upon opening up the Workflow Mangement page after updating, all
workgroups will be in a collapsed state. From that point on, Workflow will
save any collapse or expand that the user does without having to click the
save button.
Add Duplicate Code Icon for Solventum™ Users
CACTWO-6535 (Enhancement)
When a code is added via Solventum™, but is already in the unassigned code tree,
the unassigned code will no longer be visible, but clicking on the Show All
Codes tree will show the code with a duplicate icon.

Solventum™ Users Only
This fix only applies to Solventum Users.
Valid Value Error Occuring in Some Account Search Filters
CACTWO-6547 (Important)
An error message asking for a valid value was occuring during some Account
Search filters that used the ‘=’ sign. This was occuring when fields had a
mapping that did not include a blank key. This has been corrected. An
example was if you had Stage = Unbilled then switched the equal to not equal
it would give you the error. Previously you would have to click on unbilled
switch off of it then back on it in the drop down for it to take effect. This has
been corrected.
Allow Audit Reports to Filter by Audit Type
CACTWO-6548 (Enhancement)
Audit Type is now an Include/Exclude filter on all Audit reports

CACTWO-6560 (Enhancement)
A new setting has been created that will allow you to remove the quick
complete button on the Physician queries dialog box. If the setting is set as
false, the user will see a Quick Complete button and the Send button will say
Send to Physician. If the setting is set as true, the Send button will only say
Send.
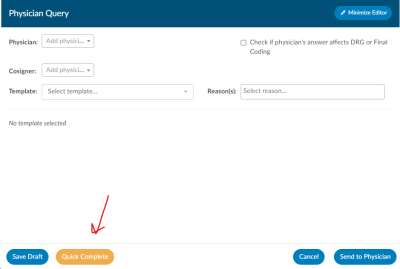
Additional Configuration Required
Please contact Support to enable this feature.
Create Physician Coder Activity Report
CACTWO-6562 (Enhancement)
A new report called Physician Coding Activity has been created to report on
data for Physician Coder and Single Path coder activity.
Additional Configuration Required
Please contact Support to add this report with a Physician Coding interface.
Forced Autoload Limits are Being Ignored
CACTWO-6566 (Important)
When a forced autoload user has limits on their workgroups, and they are on
the last account of a limit, if an account is manually assigned to them, the limit
restarts. This has been corrected so that the limit amount is never changed
during a manual assignment.
Add HCC Designation in Charges Viewer
CACTWO-6568 (Enhancement)
When a code with an HCC icon is added to the charges viewer by an Physician
Coder, it will now show the designation just like the Assigned Codes tree
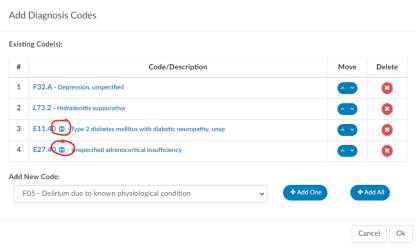
CACTWO-6573 (Enhancement)
CACTWO-6568 (Enhancement)
The Denials drilldown in Account Search will now show a Comments field.
CACTWO-6576 (Enhancement)
CACTWO-6568 (Enhancement)
Multiple changes have been made to this report:
- Name changed to Engine Outcome Summary by Coder
- New column Total Codes Assigned added
- The column Added has been split into Added Text and Added Non- Text (which includes worksheet)
- The column Direct will contain codes added via Solventum™, but also suggested by FAE
- The column Image has been split into Image (duplicate) and Image (non-duplicate)
- The column Worksheet has been removed
- The calulation of the column Score(now called Usage Score)
- Score is (Accepted +Edited + Added Text + Image non-duplicate) / Total Codes Assigned.
CACTWO-6577 (Enhancement)
CACTWO-6568 (Enhancement)
The Engine Outcome per Coder (or per CDI) have been changed to Engine
Outcome Detail per Coder (or per CDI). The other changes made are:
- Duplicate codes added to the top of text documents are now counted in the Added Non-Text rather than Added Text
- Added Non-Text will now include codes added via Solventum™ but also suggested by FAE
- The column Duplicate is now Added Duplicate
- It additionally counts codes duplicated on images and worksheets
- The column Duplicate Codes now includes codes duplicated on images and worksheets
- The calculation of User Score is now 1.0 – ((Added Duplicate + Added Nontext) / Total assigned).
- The calculation of Engine Accuracy is now 1.0 – (Added Text / Total Assigned).
These changes are retroactive except the ‘Added Non-text” column
calculatoin. This column will retroactively include codes assigned directly
within Solventum™ that were not suggested by FAE
CACTWO-6584 (Important)
CACTWO-6566 (Important)
The Elixhauser mapping comes with a bunch of default prefixes. The prefix of
ELIX_ has been added.
CACTWO-6585 (Enhancement)
CACTWO-6568 (Enhancement)
The Query Impact and Query Impact by Discharge Date reports now have
GMLOS columns under the Before Query, After Query and Difference portions
of the report.

CACTWO-6586 (Enhancement)
CACTWO-6568 (Enhancement)
Previously, once an account has been submitted, CDI Specialists could no
longer change the baseline DRG. This has been changed so that the baseline
can also be changed after submission of the account.
CACTWO-6605 (Enhancement)
CACTWO-6568 (Enhancement)
Previously, once a Forced Autoload coder submitted an account that had
directly assigned, if it was manually assigned back it would not appear in that
coder’s list until the next day. This has been changed so that if a manually
assigned account was submitted and then assigned back to the same coder,
they will receive it as their next forced autoload account instead of waiting
one day.
CACTWO-6627 (Important)
CACTWO-6566 (Important)
When running the CDI Metric Score Card report, the report description does
not identify what date range is acceptable. This has been added to the
description.
CACTWO-6638 (Important)
CACTWO-6566 (Important)
In the Audit Management viewer, the “Abstraction Pre-Audit” calculation is
incorrect, although user reports correctly displayed the accurate calculation
in releases v2.53 and v2.54. In these releases, the calculation omitted the
procedure codes for which users had recorded a procedure date or physician.
This issue affected only the display in the audit viewer, not the Audit user
reports.
CACTWO-6463 (Enhancement)
CACTWO-6568 (Enhancement)
If a discrete value’s name appears in more than one category within the
discrete data viewer within a major category when it is linked from the CDI
Alerts viewer, the entire major category will be highlighted in the Flowsheet
viewer. Otherwise, the original functionality of just highlighting its single
category applies.
CACTWO-6532 (Enhancement)
CACTWO-6568 (Enhancement)
Previously, all CDI/Clinical Alerts were expanded making it hard to view all alerts. This
requests was to initially be collapsed when the account is loaded.
Add Other Choice With Drop Down on the Close CDI/Clinical Alert Dialog Box
CACTWO-6578 (Enhancement)
Add new option of Other with the ability to add drop down box on the Close
CDI/Clinical Alert Dialog Box. This allows the user to Close an Alert because it did not
require a query to be sent and not because the Alert was wrong. They state
occasionally even though an Alert triggered appropriately; after reviewing a
query is not needed, they do not want to count it negatively as the alert did
what it was supposed to.
It will only appear if a mapping with the ID
“DrillDownMatchedCriteriaGroups_OtherOutcome” is created in Mappings
Configuration with additional alternate outcomes. The alternate outcomes
will be displayed in the Closed CDI Alert.
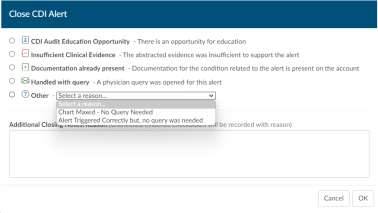
Add Line Spacing to Evidence
CACTWO-6580 (Enhancement)
Previously, the spacing was condensed; this adjustment provides more
vertical spacing, making the alert evidence easier to read.
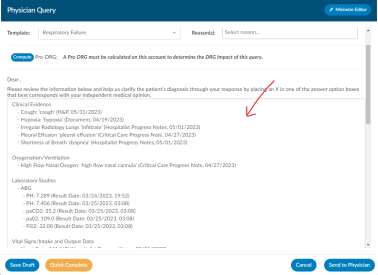
V2.56 (Sep 2024)
V2.56.9036.0 Released 09/27/2024
The notes below indicate changes and additions to the software. Please review these release notes
carefully when deciding to apply a software update to an installation.
Each note is related to an issue tracking assignment number (starting with CACTWO) in the heading.
Please refer to the change with this tracking assignment number when communicating questions or issues.
The heading also contains a parenthesized "Change Type", indicating the severity or importance of
the change. The severities used are:
- Critical - Recommended that this application be upgraded as soon as possible at all sites
running previous versions.
- Conditionally Critical - Recommended that this application be upgraded as soon as possible at
all sites running previous versions matching the stated conditions.
- Important - Recommended upgrading the application if the customer is experiencing the issue
denoted or currently applying a work-around for a specific non-functional feature.
- Enhancement - Recommended upgrading only if the specific functionality is desired.
Allow Multiple Audits on a Single Account
CACTWO-5379 (Enhancement)
Allow Multiple Audits on a single account
Users of Audit Management can now be updated to allow for multiple audits
on a single account. At the top of the Audit viewer, a new button has been
added called ‘Add Audit’. Clicking that will open an empty audit form. The
accounts can have many audits added to it with this change.
For Audit Module users only.
Display Physician Coder Diagnosis Changes to Charges in Show History
CACTWO-5527 (Enhancement)
Display Physician Coder diagnosis changes to Charges in Show History
If a Physician Coder or Single Path coder makes a change to diagnosis codes
in a charge, that will now show in the Visual Difference Column of the Show
History tab.
Display Changes to Physicians in Show History
CACTWO-5591 (Enhancement)
Any changes made to account level physicians will now show in the Visual
Difference column of the Show History tab.
Show More Audit Data in the Show History and User Audit Trail Report
CACTWO-5680 (Enhancement)
Show more audit data in the Show History and User Audit Trail report
The Show History tab of an account will now show Auditor work in the Visual
Differences column.
The Audit Trail user report will also show several Audit actions in the report:
Audit open, Audit Closed, Audit Reopened, Audit Rebutted, Audit Closed and
Audit Printed.
For Audit Management users only.
Ability to Copy Validation Management Rules
CACTWO-6065 (Enhancement)
Ability to copy Validation Management rules
Validation Management Rules now have a copy button to the right of the
directional buttons.
When clicked, a duplicate of the rule and its criteria will appear at the bottom
of the rule list, ready for editing.
Add Root Cause Field for Denial Management
CACTWO-6182 (Enhancement)
Add root cause field for Denial Management
Denial Management viewer wll now have the ability to select multiple entries
for each denial, as needed. The field is located above the Code(s) in Question
entry.
Clicking into the Root Cause field will display a dropdown with default
choices.To note if you would like to change these values you can add a
mapping the ID is DenialRootCauses.
For Denials Management users only.
Allow Validation Rule to Report on Audit Status
CACTWO-6323 (Enhancement)
Allow Validation Rule to report on Audit status
In Validation Rules a new ‘for each’ option of Audits has been added so that a
validation rules can be created for audit options.
For Audit Management users only.
Display in Show History Phsycian and Modifier Changes to Charges for Physician Coder
CACTWO-6403 (Enhancement)
Display in Show History physician and modifier changes to charges for
Physician Coder
If a Physician Coder makes any changes to a physician or code modifier, those
will now show in the Visual Difference column of the Show History tab.
Allow Physician Coders to Select Multiple Codes
CACTWO-6427 (Enhancement)
Allow Physician Coders to select multiple codes
Within the charge viewer allow physician coders to select multiple diganosis
codes to associate to a charge by clicking control and selecting codes. This
way multiple codes can be added as needed.
For Physician Coding or Outpatient CDI users only.
Add and Move Some Identifiers in Show History Chart
CACTWO-6444 (Enhancement)
In the Show History tab, the Location and Patient Type sections have been
removed and those identifiers have been added to the Event section. New
identifiers have been added to the Events section: Payor, Financial Class,
Admit Source, Admit Type and Discharge Disposition. By clicking on the
ledgend to the top right it color cods the events for easy viewing.
Add a Rebill Checkbox to Denial Management Viewer
CACTWO-6452 (Enhancement)
A new checkbox to indicate a rebill is needed has been added to the Denial
Management viewer. It appears after the Denial Complete checkbox.
For Denials Management users only.
Auto Populate Coder With First Submitted, but Allow Users to Edit
CACTWO-6453 (Enhancement)
Auto populate Coder with First Submitted but, allow users to change it if its
incorrect.The ‘Coder’ field in the Denial Management worksheet will now be
defaulted to the first Submitter.
For Denials Management users only.
CACTWO-6454 (Enhancement)
t Allow linking of related queries to a Denial
A new field has been added to the Denial Management viewer for related
queries. It is located after ‘Code(s) in Question, and if there are any closed,
non-canceled physician queries, they will appear in a dropdown when the
field is clicked.
For Denial Management users only.
Show Roles in the Summary of User Actions
CACTWO-6455 (Enhancement)
On the Code Summary viewer, each user listed in the Summary of User Actions
will now also display that users current role.
To Note: This feature is not retroactive.
Allow the Created by User on a Physician Query to be Editable
CACTWO-6481 (Enhancement)
Once a physician query is saved, the Created By field will show. This is now
changeable, whether or not the query is closed or still open. A Save button at
the bottom of the query will save the change.
Allow Quantity to be Modified Under Charges Viewer by Physcian Coder
CACTWO-6524 (Enhancement)
A physician Coder will now see the edit symbol on the Quantity line in the
Charges Viewer. The Quantity can be changed and saved.
For Physician Coding or Outpatient CDI users only.
Solventum™ not Closing Properly When User Changes Roles
CACTWO-6558 (Important)
When using Solventum™, if a user changed his role to a role that had a disabled
encoder, Solventum™ would not close or reopen properly when the user changed
back to his role that had the encoder enabled. This has been fixed.
Solventum™ Users Only
This change only applies to Solventum Users.
Add ‘Primary’ to Add Diagnosis Codes Window in Charges Viewer
CACTWO-6565 (Enhancement)
If a user goes into the codes in a Charges Viewer and moves the codes around,
the top code will always become the primary code.
Display Multiple DRGs in the Shift Reason Dialog Window
CACTWO-6570 (Enhancement)
If there are multiple DRGs on an account, when a query is closed and presents
the Shift Reason window, all DRGs will show, with the first one expanded and
the other collapsed. Both DRGs are expandable/collapsible.
Add Field Onto Denials Viewer for Letter Received by Facility
CACTWO-6574 (Enhancement)
A new field has been added to the Denial Management Viewer in addition this
field has been added into the drilldown in Account Search.
For Denial Management users only.
Add Columns to the CDI Activity Report
CACTWO-6608 (Enhancement)
In the CDI Activity user report, reviews and queries are now counted under
new columns of either Concurrent or Retrospective. Queries created during
DRG reconciliation are counted under Retrospective. With the additional
columns, the report will now show in landscape when PDF is chosen.
Add Columns to the CDI Financial Benefit Report
CACTWO-6611 (Enhancement)
Add columns to the CDI Financial Benefit report
Columns for First CDI Saver and First Submitter columns have been added to
the CDI Financial Benefit user report.
Add new Section to the DRG Comparison Report
CACTWO-6612 (Enhancement)
This user report has two DRG sections: one for Baseline and one for Final. A
new section for Working DRG has been added. This DRG is the last Working
DRG figured before the account was submitted.
Add More Fields to Workflow Management
CACTWO-6623 (Enhancement)
Several new fields have been added to Workflow Management to allow
criteria to detect a user’s assigned roles:
- First CDI Owner Roles Last CDI Owner Roles
- First CDI Saver Roles Last CDI Saver Roles
- First Coder Roles Last Saver Roles
- First Submitter Roles Last Submitter Roles
- Owner Roles Last Viewer Roles
Allow Audit Rebuttal to Always Show on the Audit Viewer
CACTWO-6634 (Enhancement)
Currently, a rebuttal on an audit viewer will be hidden once the coder clicks
the Agree button. Going forward, the rebuttal will continue to show, even
after the coder agrees.
For Audit Management users only.
Allow Coder to Save a Review of a Finished Audit
CACTWO-6672 (Enhancement)
When an auditor marks an audit as finished and the account is manually
routed to a coder, the coder will now see a “Save Account as Reviewed”
button at the bottom of the audit if it’s their first time reviewing it. This button
marks the audit as “Saved Review” and records this action in both the
account’s Show History and the User Audit Trail report. The “Save Account as
Reviewed” button will appear under these conditions:
- The audit has been closed.
- The account is routed to the coder’s personal queue.
- The coder is viewing the closed audit.
- The coder has not previously reviewed the audit.
When the coder clicks “Save Account as Reviewed,” an “Are you sure?” dialog
will appear. A new audit event will be logged to show that the coder reviewed
the completed audit, and this will be visible in both the Show History and the
User Audit Trail.
For Audit Management users only.
Add MRN Lookup to Transfer Account Code Viewer
CACTWO-6676 (Enhancement)
The account number and MRN now appear with radio buttons on the Transfer
Account Codes viewer. When the user selects the MRN radio button, the MRN
of the currently opened account will automatically be populated.
Add the Ability to Add a Summary Field to Saved Account Searches
CACTWO-6681 (Enhancement)
When saving a search in Account Search, a new field labeled “Filter Summary”
will appear in the save box. If this field is completed, the summary will be
displayed in the search banner.
It will show next to the Drill-Down Level.
Add Conditional Triggers for PSI/PDI Based on Exclusion Code Position
CACTWO-6682 (Enhancement)
PSI and PDI indicators originally did not trigger if a code that caused an exclusion for
that indicator was within the the top 25 codes (or limit that customer has set).
This has been changed so that if that happens, the PSI/PDI will still show in
the banner bar, with an asterisk next to it, to indicate the PSI was conditionally
applied. The algorithm at the bottom of the Code Summary viewer will show
the reason why.
For Quality Module users only.
Add Filters to Grid Colum Configuration
CACTWO-6684 (Enhancement)
Filters now appear at the top of the location columns in the Grid Column
Configuration. Clicking on a filter will reorder the column, displaying all
assigned columns either at the top or bottom.
Add Weight Breakdown for Elixhauser
CACTWO-6695 (Enhancement)
When Elixhauser coding is applicable, a new table under the Elixhauser
section of the Code Summary sheet will appear, showing weight totals for
each item that triggers.
For Elixhauser users only.
CACTWO-6699 (Enhancement)
The SOI/ROM will now show in the Audit Worksheet, next to each code and
then in the Codes section of the sheet, it will show numbers matching whether
there was a change in those numbers, 1 increase or decrease for each change.
For Audit Management users only.
CACTWO-6703 (Important)
Print button is missing in User Reports
The updated PDF viewer in a previous release within user reports removed
the Print button, but it has now been modified to restore any missing buttons.
Users can print or download PDF reports from the User Reports page.
Additional Configuration Required
If you wish to restrict this setting, please contact CAC Support.
Account Search Drilldown Erroring When Searching Large List
CACTWO-6705 (Important)
The Account Search drilldown was creating an error when a right click ‘View
Account Detail’ was done on an account from a large list of accounts.
CACTWO-6707 (Enhancement)
For any pop-up window that begins with the question “Are you sure…” has
been updated. The buttons that previously displayed as “Cancel” and “OK” will
now appear as “Yes” and “No.”
CACTWO-6711 (Important)
In Account Search, criteria that has a lot of data causing a lot of vertical space
to be used extending beyond the viewing screen, making the grid unreadable.
A new vertical scroll bar has been added to ensure users can access and view
all data without losing information beyond the filter’s edges.
Add red tag Next to Applied PSI/PDI for Improved Visibility
CACTWO-6712 (Enhancement)
When a PSI/PDI is applied to an account, it was previously difficult to identify
in the algorithm section of the Code Summary viewer. A new red tag has been
added to enhance visibility, making it easier for users to quickly locate the
PSI/PDI algorithm that was applied.
For Quality Module users only.
Unable to Remove a Matched Criteria Template in Workflow
CACTWO-6726 (Important)
A ‘Matched Criteria Query Template’ dropdown only appears in Workflow if a
criterion with the field ‘Evaluation Script’ which is used by CDI/Clinical Alerts is
present. When copying and pasting that criterion, the user has no way to
remove that template to choose another. A small gray ‘x’ has been added to
the box to allow removal of the template after pasting.
Allow ‘Frequency Edits’ for TruCode ™
CACTWO-6730 (Enhancement)
TruCode™ has an option to include frequency edits among the medical
necessity edits returned by TruCode. This has now been enabled.
TruCode™ Users Only
This fix only applies to TruCode™ users.
Increase Filter Length and Labels for Improved Usability
CACTWO-6732 (Enhancement)
The filter dropdown
length has been extended in account search to display more of the filter name,
reducing the need to click the down arrow, especially for filters with similar
names. The field for the account search name is now longer, and the “Delete
Filter” option has been replaced with a garbage can icon to save space
allowing for room for the increased length. Additionally, the “Tools” button
has been renamed “Columns” for better clarity.
‘Unexpected Error’ Messaging Occuring in Account Search
CACTWO-6734 (Important)
When using the Queries drilldown in a filter in Account Search that resulted
in a large amount of accounts returned, a red toast error message to contact
Dolbey Support was happening. This has been corrected.
Update PSI/PDI Algorithms
CACTWO-6737 (Enhancement)
PSI/PDI algorithms have been updated to AHRQ v 2024.
Code Dropdown Does not Reflect Date of Service in Denial Management Viewer
CACTWO-6740 (Important)
The codes that were reflected in the codes dropdown of the Denial
Management viewer was displaying current day codes vs date of service
relavant codes. This was corrected to use the accounts Admit date for
outpatient or Discharge Date for inpatient to determine which codes to
display.
For Denials Management users only.
Error Occuring When Closing Physician Query/Shift Reason Window
CACTWO-6742 (Important)
When closing a Physician Query or Shift Reason dialog box when the
Physicians & Queries viewer was not visible, a console error was occurring.
This has been corrected.
CACTWO-6745 (Enhancement)
The ‘Route to Auditor’ and ‘Route to Coder’ buttons in the Audit Worksheet
can now be hidden with a new site-configuration setting.
Additional Configuration Required
Please contact Support to enable this feature.
Allow Readmission Viewer to Show Multiple Accounts
CACTWO-6746 (Enhancement)
If an account has multiple re-admissions, they will now all show if they are in
the default time of 30 days. A new setting has been added to allow the
number of days to be changed. If the setting is updated to an amount other
than 30, that new amount will show in the Re-admission Viewer AND in the
red tag in the banner.
Additional Configuration Required
Please contact Support to enable this feature.
CACTWO-6749 (Important)
If a user has a zoom on their document viewer, and they click on an
unassigned code in the unassigned tree, the document in the viewer will scroll
towards it, but leave the highlighted code offscreen. This has been corrected
so that even with a zoom in place, the viewer will scroll to make the
highlighted code viewable.
Improve Copy to Clipboard Functionality Adding Intential Line Breaks
CACTWO-6746 (Enhancement)
There are some issues around intentional line breaks. The functionality has
been improved to alleviate those issues.
Add Copy Single Line and Copy to Table was Added to the Flowsheet Viewer
CACTWO-6746 (Enhancement)
When using the Flowsheet viewer, two changes have been made to the right
click menu:
- Copy Row as a Single Line has been renamed Copy Row as Text, and now
copies each result value to its own line.
Copy Row to Clipboard has been renamed Copy Row as Table for clarity.
CACTWO-6754 (Important)
The tooltip in the DRG Reconciliation viewer was not giving correct
information. These changes have been instituted: The tooltip on the left
side for deleted codes will now say ‘Deleted in Final DRG’. The tooltip on the
right for a resequened code will say ‘Higher in sequence than in Working DRG’.
The tooltip of the corresponding code on the left side will say ‘Lower in
Sequence in Final DRG’.
Changes to Procedure Details Were Applying Even if Canceled
CACTWO-6756 (Important)
If changes to procedure codes were made using Edit Procedure Details, the
changes were saving even if the user clicked Cancel. This has been corrected.
Change Display of SOI and ROM in all Viewers
CACTWO-6760 (Enhancement)
Currently this is displayed as ROM then SOI. The order has been corrected to
show as SOI, then ROM in all viewers.
Charts With Answered Queries had HTML Code in Their View Diff Viewers
CACTWO-6763 (Important)
If an account had an answered query and the View Diff viewer was deployed,
HTML code showed throughout the viewer. This has been corrected.
CACTWO-6769 (Important)
If a user opens a Physician Query and then makes the box smaller by pulling
up from the corner of the dialog box, the footer was overlapping the Buttons
at the bottom of the query. A scroll bar has been added, and now the bottom
buttons remain outside of the data inside the query.
Query Reports Erroring When Displaying Large Amount of Data
CACTWO-6771 (Important)
The Query Impact and Query Impact by Discharge reports have been
corrected for an error that was occurring if these reports were run over a long
time period.
Add Summary to System Search Filter
CACTWO-6773 (Enhancement)
When saving a filter in System Search, the Save box will now have the added
field ‘Filter Summary’ for addition of a note or comment.
This will then show above the filter criteria:
SOI and ROM Calculations are not Matching in Physician Query Pre/Post DRG and Shift Reason
CACTWO-6776 (Important)
The SOI and ROM values in a Physician Query were sometimes not matching
the ROM and SOI values of the Shift Reason screen. If the site is using Solventum and
an account has both an APR for a primary grouper and an additional APR as a
secondary or tertiary, the values will always match the SOI and ROM
calculations of the primary APR instead of the latter APR.
Physician Coder Submitting an Account is Closing an Audit
CACTWO-6784 (Important)
A physician coders submit now prevents a closing an open audit. Only a
facility coder can close an audit.
Update CAC Technical Support Page
CACTWO-6790 (Enhancement)
The CAC Technical Support page found under the above the banner bar
has been updated.
Copy to CDI/Clinical Alerts Function is not Appearing for Caution Code Documents
CACTWO-6798 (Important)
When a user highlights text and right clicks from a caution code document,
the funtion Copy to CDI/Clinical Alert does not appear. This has been corrected.
CACTWO-6805 (Important)
If a user attempts to ‘View Diff’ on documents that contain ‘html’ and ‘body’
tags, HTML code was showing in the viewer. This has been corrected.
Personal Stats Dashboard is not Loading for Some Users
CACTWO-6806 (Important)
If a large amount of accounts were assigned by a user in Account Search, if
the user then tried to look at their personal Dashboard, it would not load. This
has been corrected.
Add Patient’s Current Age to the Banner Bar
CACTWO-6812 (Enhancement)
A patients current age or discharge age will now be shown in the banner bar
if it is different than their admit age. If the account is not discharged, the age
will be the current day’s age. If it has been discharged, it will show the
discharge age. If the Admit and current/discharge date age are the same,
only the admit age will show, as usual.
Solventum™ is not Alerting User That the Encoder is Already Open
CACTWO-6815 (Important)
In the case of a Solventum™ encoder being open, with the user then opening a
physician query and attempting to compute a DRG, the user was not being
warned that the encoder was already open. The user closed the query and
was then stuck in the acount. This has been corrected. A blue warning box
will now occur if the Compute button in a physician query is clicked while the
encoder is already open.
Solventum™ Users Only
This change only applies to Solventum Users.
CDI Activity Report is not Displaying ‘Friendly Name’ in Facility Column
CACTWO-6816 (Important)
All reports show the ‘friendly’ name, but this one was showing the key of the
mapping instead. This has been corrected to now show the ‘friendly’ name if
the mapping is set up for that Facility.
Rename the Encoder tab on the Main Menu List
CACTWO-6820 (Enhancement)
Since Encoder can be taken to mean that clicking on it will open the regular
Encoder, a request came in to make that say Standalone Encoder. A new
setting has been created to change that name.
Additional Configuration Required
Please contact Support to enable this feature.
Prevent POA From Changing When Editing Codes Using Code Lookup
CACTWO-6822 (Important)
If the user launches and returns the Solventum or TruCode codebook from the Code
Editor dialog when editing a diagnosis code, the POA will reset to its default
value. This has been corrected.
Last Auditor to Save an Account is now Recorded as the Last Saver
CACTWO-6827 (Important)
If an auditor saves or submits an account, the Last Saver on the account was
not updated. This has been corrected. Additionally, a new set of “Last
Auditor” fields have been added to account grids, account search, and
workflow to determine the last auditor to save an account.s
V2.57 (Jan 2025)
V2.57.9116.0 Released 01/08/25
The notes below indicate changes and additions to the software. Please review these release notes
carefully when deciding to apply a software update to an installation.
Each note is related to an issue tracking assignment number (starting with CACTWO) in the heading.
Please refer to the change with this tracking assignment number when communicating questions or issues.
The heading also contains a parenthesized "Change Type", indicating the severity or importance of
the change. The severities used are:
- Critical - Recommended that this application be upgraded as soon as possible at all sites
running previous versions.
- Conditionally Critical - Recommended that this application be upgraded as soon as possible at
all sites running previous versions matching the stated conditions.
- Important - Recommended upgrading the application if the customer is experiencing the issue
denoted or currently applying a work-around for a specific non-functional feature.
- Enhancement - Recommended upgrading only if the specific functionality is desired.
CACTWO-4897 (Enhancement)
A new configuration will allow outpatient accounts to show PCS codes along
with CPT, and inpatient accounts to show CPT codes along with PCS, for
specific account categories.
Additional Configuration Required
Please contact Support to enable this feature.
Allow Users to be Assigned to Managers
CACTWO-5140 (Enhancement)
A new field will display within User Management that can be used by
administrators and managers to assign users to a manager.
The manager field is a dropdown that will only display for users with a manager
role. Clicking the blue button next to the field will allow you to associate users to a manager. When a manager has users assigned
when that manager runs User Reports, they will only see the users that are
assigned to them. A new manager column has been added to the User
Management grid.

Add the Ability to Bulk add Columns in Grid Column Configuration
CACTWO-5520 (Enhancement)
A new button has been added to Grid Column Configuration that will enable the user to bulk add columns. When the button is clicked, a box will open showing only available columns.
User can check as many columns as needed and click OK to have them added
to Grid Column Configuration.

Allow Drilldown Column Names to be Changed in Account Search
CACTWO-5678 (Enhancement)
In Account Search, for drilldowns other than Accounts, administrators and users with the privilege will see an edit button next to the drilldown field.

Clicking the edit button will bring up an edit pane, listing all columns
associated with that drilldown. The user can then change the name in the
‘new name’ column.
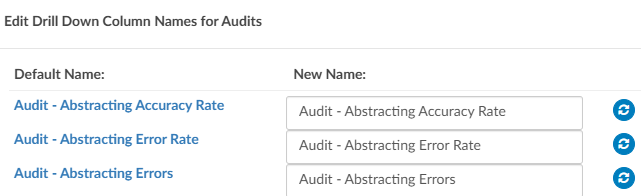
Please note that any changes made will be seen in ALL searches that use that
drilldown.
CACTWO-6400 (Enhancement)
Form Designer has been split into two menu items: Worksheet Designer and Query Designer.
This will allow query templates to be split up by user type, just like
worksheets. Current queries will initially be in the Shared Query folder, but
can be changed via the Type field at the top right of the query. Users can be
assigned a new set of privileges within role management for creating/editing
templates as needed.
When creating a query in an account, the user will only see the templates that
are assigned to them by their profile type, with the ability to have access to
more templates by setting the above privileges.
Lock Down Certain Sections of a Shared Worksheet
CACTWO-6363 (Enhancement)
A new dropdown has been added to the Add Field box in Worksheet Designer.
displayed as “Editable”, it allows the creator of the worksheet to set what type
of user can edit that particular field. It defaults to All Users. If a field is set as
Coders Only, then a CDI or Auditor looking at that worksheet will not be able
to alter that field. This will appear in Shared Worksheets only.
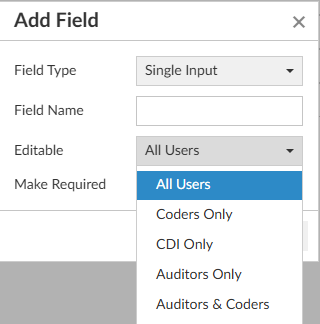
Create new Worksheets for Auditor Only
CACTWO-6364 (Enhancement)
Worksheet Designer now has a pane for Auditor worksheets. These
worksheets, once created, will only appear in an auditor’s worksheet drop
down when the Add button in the Navigation Tree is clicked. Only auditors,
admins and managers can create a form in Worksheet Designer for Auditors. A new
privilege has been created in Role Management to assign that ability to other
types of users.
New Fields Added to the Account Fields List in Worksheet Designer
CACTWO-6387 (Enhancement)
New field options have been added to the Worksheet Designer when using
Account Fields. These fields will be ‘stamped’ onto the form so that they do
not change even if changes occur on the account details.
Add Coder Scorecard to Coder Personal Dashboard
CACTWO-6389 (Enhancement)
If enabled, the Coder Personal Dashboard will display the Coder Scorecard
report at the bottom of the dashboard screen. The data can be drilled down
by clicking on any number other than 0 in the Open Audits and Closed Audits
columns.
Additional Configuration Required
Please contact Support to enable this feature.
Allow User to Change the ‘Reason’ Once the Query has Been Sent or Closed
CACTWO-6404 (Enhancement)
The reason field on a physician query can now be changed after being sent or
closed. If a user makes a change in that field, a Save Edit button will appear
at the bottom to save the change.
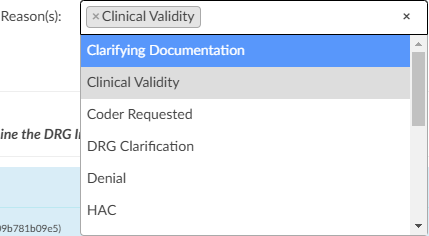
Add Charge CPT Code Section to Audit Viewer for Certain Revenue Codes
CACTWO-6440 (Enhancement)
CAC now has the ability to audit Charge CPT/HCPCS codes from the Charges
Viewer will now be added to the Pre/Post Outcome section of the audit.
A new Audited Charges section will show beneath the Pre and Post Outcome
sections of the Audit.
At the bottom of the list will be an Add button for the auditor to add a hard
charge if needed.
The charge CPT codes will will show in the the Pre and Post Outcome lists.
Further down the Audit, a section called Charge Codes will be showing
beneath the CPT codes section and will show all of the totals and error rates.
To enable this feature contact CAC support and provide a list of revenue codes
you wish to audit.
Additional Configuration Required
Please contact Support to enable this feature.
Add an Escalation Section for Audit Worksheet
CACTWO-6441 (Enhancement)
If a coder chooses to rebuttal an audit and the auditor does not agree, a new
section line for escalation will open in the audit.
If an escalation is marked as requested, the auditor can add his details, and
manually assign the acct to another auditor. Workflow can also be used to
assign to another auditor who has escalation privileges.
Add APC Changes for CPT Codes to Audit Worksheet
CACTWO-6443 (Enhancement)
Auditors can audit APC changes on outpatient accounts, which are
automatically created upon Computing an APC.
In Account Search, the Audits drilldown will now have 3 more columns; APC
Changes, APC Error Rate, APC Accuracy. APC columns have also been added
to the Outpatient user reports.
Additional Configuration Required
Please contact Support to enable this feature.
Allow When Recording a ‘Physician Response’ on a Query to Expand
CACTWO-6486 (Enhancement)
In a physician query, the physician response field block was static. It
has been fixed so that it can become larger as more text is added.
CACTWO-6487 (Enhancement)
A ‘Return to Query’ button has been added to the bottom right of the Shift
Reason window. When clicked, user will be taken back to the query to make
any change necessary, including recomputing a drg. Clicking the cancel button
at this point will remove any work done on that query. Selecting a closing
reason will again pop the Shift Reason window, where the query can be
updated and closed.
Allow for Tertiary Grouper in Audit, With a Billing tag on Inpatient Accounts
CACTWO-6516 (Enhancement)
If a tertiary grouper is present on an inpatient account, then all 3 DRGs will be
presented in the Pre and Post Outcome panels of the Audit Worksheet. If a
billing grouper is indicated, the billing grouper will receive a Billing tag.
Allow Billing Grouper Data in the CDI Metric Scorecard Report
CACTWO-6609 (Enhancement)
If an account has a billing grouper with anof APR-DRG, the CDI Metric Score
Card report will separate reviews and case mix index between MS-DRG and
APR-DRG.
Update Denial Management to act Like Audit Worksheet
CACTWO-6795 (Enhancement)
The Denial Management viewer has been changed to match how Audit
Worksheet is opened. Upon opening Denial Management, the user will see a
button called Add Denial. Clicking this will open the Denial worksheet, and
will allow for multiple worksheets to be open. Each Denial will open from its
own button, with the original Denial date.

Add Setting to Control Mandating a Pre Query DRG on Queries
CACTWO-6818 (Enhancement)
This update addresses challenges encountered with pre-query DRGs during
the query process. Initially, a pre-query DRG is determined based on existing
diagnosis codes.
However, as new diagnoses are added before closing the query, the post query DRG may not accurately reflect these updates. This discrepancy often
requires manual adjustments by removing or modifying diagnoses to capture
the intended impact accurately. Additionally, updates to the pre-query DRG
can inadvertently change the account-level DRG instead of just the query DRG,
leading to further manual corrections to re-enter the accurate account
information.
To streamline this process, we are introducing four configuration settings for
the “PreDrgQueryRequirement” site configuration, which can be adjusted by
CAC Support as needed.
- Default Behavior: The current system behavior continues, where the
pre-query DRG is automatically populated from the account and
required when sending a physician query. If the pre-query DRG is not
included, a validation error will prompt correction before
proceeding.
- Open: When a query is opened, the pre-query DRG is automatically
populated from the account (similarly for the post-query DRG, which
will initially match the pre-query DRG). Both DRGs must be edited
and confirmed by the user before the query can be closed.
- Manual: This setting gives full control to the user by not auto populating the pre-query DRG, but it remains a required field to close
the query. This option suits sites preferring complete manual entry
of both pre and post-query DRGs without auto-population.
- Never: Neither the pre-query nor post-query DRG is auto-populated
under this setting, and neither is required to close the query. This
setting is suitable for sites that do not require tracking of pre and
post-query DRG calculations. (Uncommon)
These new settings are designed to reduce the manual workload and improve
accuracy in DRG documentation during the query process.
Additional Configuration Required
Please contact Support to enable this feature.
Add a PCS to CPT Crosswalk to TruCode™
CACTWO-6829 (Enhancement)
A new section will appear in the Research tab of the TruCode™ reference tab
called CPT to PCS Crosswalk if a CPT code is clicked, or PCS to CPT Crosswalk if
a PCS code is clicked.
TruCode™ Users Only
This fix only applies to TruCode™ users.
Allow Pending Accounts to be Hidden for Autoload Users
CACTWO-6838 (Enhancement)
A new configuration setting will hide the Pending Accounts grid for all forced
autoload dashboard page.
Additional Configuration Required
Please contact Support to enable this feature.
Retain Highlighting of Text When Using ‘Add Code’
CACTWO-6841 (Enhancement)
When a user highlights text and chooses either Add Code or Add Code From
Encoder from the right click menu, the text will remain highlighted while the
dialog is open, previously there was no highlight.
Add Ability to Edit Codes for Query Pre/Post DRG Without Changing Account Level DRG
CACTWO-6861 (Enhancement)
In a query, a new dialog will open if the Compute button is clicked for the Pre
or Post DRG. In the dialog, the user can change the codes to compute for a
new DRG by clicking on the plus sign it will add the code from assigned codes
to either the pre/post query DRG codes the x button will remove them and to
add all codes from assigned code tree you can click on the button “Overwrite
All Codes”, but the main account DRG will not be updated.
Add New Columns to the Audit Report
CACTWO-6862 (Enhancement)
Two new columns, Principal Diagnosis Error and Accuracy Rate have been
added to 4 Audit user reports:
• Inpatient Auditor Productivity
• Outpatient Audit Scorecard
• Outpatient Auditor Productivity
• Outpatient Coder Scorecard
Create New Workgroup Assignment Report
CACTWO-6864 (Enhancement)
A new user report called Current Workgroup Assignment per User has been
created. This will display the workflow assignment for each active user from
the user’s profile. Only active users with at least one assigned workgroup
appear on this report. A Forced Autoload user will show an asterisk to the
right of the workgroup name if autoload was launched on that day.
Allow Customization to Medical Necessity in TruCode™
CACTWO-6867 (Enhancement)
This feature adds a configuration setting “SendChargesToEncoder” is set to
false to prevent charges from importing into Solventum CRS, but their new custom
“charges-filter.js” will inject the charges into the input packet for TruCode’s
medical necessity calculations.
Note
This fix only applies to sites using Solventum CRS with TruCode Medical Necessity Edits.
Error Occurring With use of Short Token Highlight
CACTWO-6869 (Important)
When text that is only a couple characters long is selected for adding a code,
an error was occurring if that text occurred in the HTML style attributes earlier
in the document. This has been corrected.
Created by Dropdown in Physician Query has Been Updated
CACTWO-6883 (Enhancement)
The Created By dropdown in a physician query showed all available users in
the list. This has been changed so that only administrators or users with the
privilege from role mangement to create/edit physician queries are listed.
CACTWO-6884 (Enhancement)
A comment field has been added to each of the three appeals in the Denial
Management viewer.
Change the Coder of Record Dropdown to Only Allow Coders on the Audit Worksheet
CACTWO-6890 (Important)
The drop down for ‘coder of record’ in the Audit Worksheet viewer had all
users show up. CDI should not be included in this dropdown, so this has been
corrected to only show Coders and Auditors.
Prevent ‘Coder of Record’ on a new Audit From Being a CDI Specialist
CACTWO-6890 (Important)
Previously, the Audit Worksheet was applying the last user to save the
account to the Coder of Record field. This could include a CDI, which it
shouldn’t. Now, the coder of record will be decided by this process:
- If the account was submitted, default the “Coder of Record” to the
last submitter. Otherwise…
- If the account’s Owner is not a CDI Specialist, default the “Coder of
Record” to the owner. Otherwise…
- If the account’s Last Saver is not a CDI Specialist, default the “Coder
of Record” to the last saver. Otherwise…
- Leave the “Coder of Record” blank for the user to fill in.
CACTWO-6903 (Important)
Using a physician query form with dynmaic sections, if sections were removed
via the red X on the form, they were scaling in green across the screen
horizontally instead of vertically. This has been corrected.
CACTWO-6905 (Enhancement)
In a physician query, when a query is closed, a shift reason panel is presented.
A new comment box has been added to the panel. This field is available in
account search. Even if no shift reasons are selected, the comment will still
show back in the query.
A new column for shift reason comments can be added to the Physician
Queries grid.
For any shift reasons created prior to this upgrade, the column will appear
blank.
Create an Impact Queries Viewer
CACTWO-6908 (Enhancement)
An Impact Queries viewer will show in the Navigation Tree whenever a billed
account has a CDI created query in place. This will give the CDI a quick look at
impacts among queries without opening each one. Clicking on the envelope
will open that specific query for investigation. The field for Assigned Impact
% is manually filled in by the CDI, and the total of all fields should not be more
than 100%. To ensure that doesn’t happen, a validation rule should be
implemented.
Three new columns and fields have been added to Grid Maintenance,
Validation Manager, Account Search and Workflow:
• CDI Query Impact Dollars
• CDI Query Impact Percent
• CDI Query Impact Weight
Additional Configuration Required
Please contact Support to enable this feature.
CACTWO-6910 (Important)
Several button options have been enabled to work from a popped out audit
worksheet: Route to Coder, Return to Auditor and Mark as Reviewed.
- “Route to Coder,” when logged in as an auditor to forward an open
audit to the Coder of Record
- “Return to Auditor,” when the coder rebuts the open audit assigned
from the auditor
- “Mark as Reviewed,” when the coder is assigned an account with a
closed audit and hasn’t marked the audit as reviewed previously
Force Autoload is Skipping an Account Assigned to the Workgroup
CACTWO-6917 (Important)
An account that was being added to a workgroup that was being worked on
by a forced autoload user was not being triggered. This corrects the following
problem: If an account was skipped in the forced autoload process due to
various reasons (locked in use, reassigned to a different user or workgroup,
has an open audit for a different coder), it does not appear for the forced
autoload later if the account appears again in the forced autoload user’s
workgroup.This has been corrected.
Add Strength Fields to Each Appeal on Denial Worksheet
CACTWO-6919 (Enhancement)
In Denial Management, strength fields have been added to each of the
appeals in the Denial Management. Strengths are low, medium and high.
These are also now showing as columns in the Denials drilldown in Account
Search.
‘Encoder Not Detected’ pops up Sporadically in Solventum™
CACTWO-6921 (Important)
If a user was accessing Solventum™ but not via the website, the ‘Core Encoder not
detected’ message was popping up in various places. This has been fixed.
Created ‘CDI Activity Detailed Report’
CACTWO-6923 (Enhancement)
New user report ‘CDI Activity Detailed Report’ has been created. Its similar to
the CDI Activity Report but, adds account numbers.
Ignore new Codes Added by Coder Post Audit
CACTWO-6927 (Important)
If an auditor submits an account with an open audit, the “post-audit” codes
will change to reflect what the auditor submitted. If any other user submits
an account with an open audit, the “post-audit” codes will not change.
Add Audited by Field to Denials Management
CACTWO-6935 (Enhancement)
An ‘Audited By’ field has been added to every denial in Denial Management.
This field will also show as a column in the Denials drilldown in Account
Search.
Audit and Denial Worksheets Should Verify Deletions
CACTWO-6936 (Enhancement)
When deleting an audit or a Denial Management, an ‘are you sure you want
to delete’ window will pop to verify the user wishes to delete.
Allow Secondary DRG to be Expanded by Default on Shift Reasons Dialog
CACTWO-6944 (Enhancement)
By default, the first DRG on the Shift Reason dialog is always expanded. If a
customer wants a secondary DRG to also auto expand, an updated shift-reason-calculator.js will be needed.
Additional Configuration Required
Please contact Support to enable this feature.
Popped out Audit Worksheet is Losing Fields and Minimizing
CACTWO-6945 (Important)
In some circumstances, a popped out Audit Worksheet will be minimized and
may lose the Recommendations box when changes are being made on the
main account detail page. This has been corrected.
Edit Procedure Details in not Allowing Deletion of Modifiers
CACTWO-6946 (Important)
On the assigned codes tree, if you right click on a CPT code and select Edit
Procedure Details, the modifier could not be removed. This has been
corrected.
Allow Physician Coders to Edit and Delete Code Suggestions
CACTWO-6952 (Enhancement)
Physician coders can now edit and delete code suggestions from documents.
Calculations on CDI Query Detail Report are Incorrect
CACTWO-6957 (Important)
The calculation of the two ‘chart impact’ columns in the CDI Query Detail
report were comparing Working DRGs with Final DRGs, which it should have
been comparing Baseline DRGs with Final DRGs. This has been corrected.
Correct CDI Review Counts in two CDI Reports
CACTWO-6966 (Important)
In both the CDI Activity and the CDI Activity Detail reports, a reconciled
account was showing as both a followup and a Recon touch causing a
discrepancy between the CDI Dashboard and the reports. This has been
changed so that a reconciled account will only show in the Recon touch
columns.
Workflow is not Moving Charts if the Stage is X for Physician Coders
CACTWO-6978 (Important)
Workflow will now process accounts with a Stage of X and a physician coding
stage that is other than X.
Discharge Disposition Data in Audit Reports are Incorrect
CACTWO-7001 (Important)
Two of the audit user reports, Audit Abstract Report and Inpatient Auditor
Productivity were reporting the opposite result for Disposition changes. This
has been corrected.
V2.58 (Mar 2025)
V2.58.9204.0 Released 03/14/25
The notes below indicate changes and additions to the software. Please review these release notes
carefully when deciding to apply a software update to an installation.
Each note is related to an issue tracking assignment number (starting with CACTWO) in the heading.
Please refer to the change with this tracking assignment number when communicating questions or issues.
The heading also contains a parenthesized "Change Type", indicating the severity or importance of
the change. The severities used are:
- Critical - Recommended that this application be upgraded as soon as possible at all sites
running previous versions.
- Conditionally Critical - Recommended that this application be upgraded as soon as possible at
all sites running previous versions matching the stated conditions.
- Important - Recommended upgrading the application if the customer is experiencing the issue
denoted or currently applying a work-around for a specific non-functional feature.
- Enhancement - Recommended upgrading only if the specific functionality is desired.
Create a Notifications Manager
CACTWO-5877 (Enhancement)
A new page called Notifications Management has been added to the Tools dropdown. Here, notifications can be created that can be seen either on the CAC2 login screen, the Dashboard, or both. The notification has a field for a Title and a Description, a start and end date for the notification, a color and the location it will appear.

Move the Productivity Panel From the User Drop Down
CACTWO-5990 (Enhancement)
In order to make room for more columns, the Today’s Productivity panel that was originally found when dropping down the arrow next to the user ID at the top of the page has been moved to its own icon. The icon is found to the left of the question mark next to the user ID.

When clicked, it will open a window box that will show a more robust productivity panel

Allow Notes to be Identified by Role
CACTWO-6424 (Enhancement)
A new column has been added to the Notes & Bookmarks viewer that will show the role of the user. All columns are now sortable from ascending to descending.
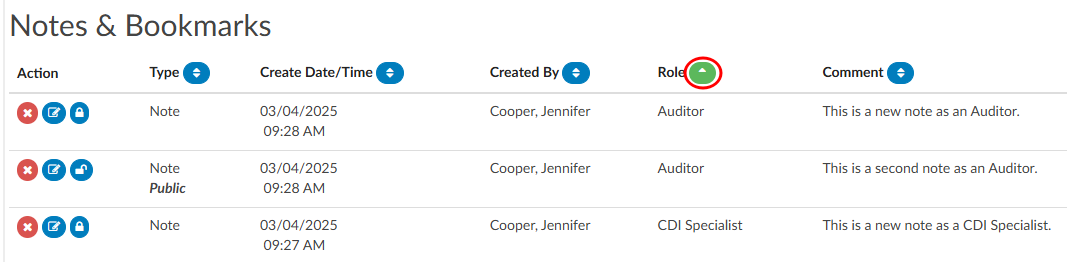
Prevent the Auto-Hiding of the Custom Workgroups column
CACTWO-6493 (Enhancement)
When a user selects a workgroup that is not custom from the worklist, if there was a custom workgroup column in the account list it was automatically being hidden. This will no longer happened.
Change how Date Sorting is Done in the Document Tree
CACTWO-6549 (Enhancement)
If a document was assigned an order number in Document Types Management, then when sorting by date that document was not obeying the new date sort. This has been changed so that an assigned number is not taken into consideration when sorting by date.
Show Inactivity Logout in the User Audit Trail Report
CACTWO-6758 (Enhancement)
New events have been added as triggers for the User Audit Trail report. If a user is logged out due to inactivity, a new line will now show in the report.
Add new Operator for Validation Management Only
CACTWO-6781 (Enhancement)
A new operator of ‘Does not Start With’ has been added to Validation Management.
Update how the Coder is Defaulted in Denial Management
CACTWO-6912 (Enhancement)
The Coder field of Denial Management will default to the Owner of the account (as long as it is not a CDI). If there is no Owner, the field will be left blank for user input. Otherwise, if there is no Coder but a Submitter, the field will default to the Submitter.
Allow CDI Permission to View the Audit Worksheet
CACTWO-6913 (Enhancement)
The Audit Worksheet viewer can now be seen by a CDI Specialist, if desired. The CDI would only have the option to view and print. Editing, creating, routing and deleting abilities are not available.
Additional Configuration Required
Please contact Support to enable this feature.
Incorrect Number of days Worked in CDI Query Scorecard
CACTWO-6948 (Important)
The ‘Number of Days Worked’ in the CDI Query Score Card and Score Card by Admission Month were not showing a correct total. This has been corrected so that the calculation is now the total number of unique day/user combinations, rather than counting every touch per day per user.
Remove Principal Dx From Outpatient Accounts
CACTWO-6982 (Enhancement)
The dropdown next to the Compute button in an account will now only show the Principal DX option if the account is an inpatient account.
This is only relevant to TruCode Encoder.
Add Pre and Post Columns to the Audit Drilldown in Account Search
CACTWO-6984 (Enhancement)
8 new columns have been added to Account Search when the Drilldown of Audits is used:
- Pre-Audit GMLOS & Post-Audit GMLOS
- Pre-Audit DRG & Post-Audit DRG
- Pre-Audit ROM & Post-Audit ROM
- Pre-Audit SOI & Post-Audit SOI
Remove Workflow Management Classic
CACTWO-7017 (Enhancement)
Workflow Management (classic) has been removed from the Tools menu.
Do not Allow Fields in Workflow to be Saved Without Adding Operator and Value
CACTWO-7020 (Important)
Workflow was allowing fields to be saved without operator and/or the value. This has been corrected so that unless the operator doesn’t require a value, the value field must be filled in before the user can save.
Accounts are not being routed correctly on time-out
CACTWO-7023 (Important)
If an account’s Workflow assignment changes while the user is in the account, and the user’s session times out, the account’s workflow was being reverted to the workflow when the account was first loaded. This has been corrected.
Add columns to the DRG Comparison Report
CACTWO-7032 (Enhancement)
Two columns have been added to the DRG Comparison Report
- Discharge Disposition
- Payor
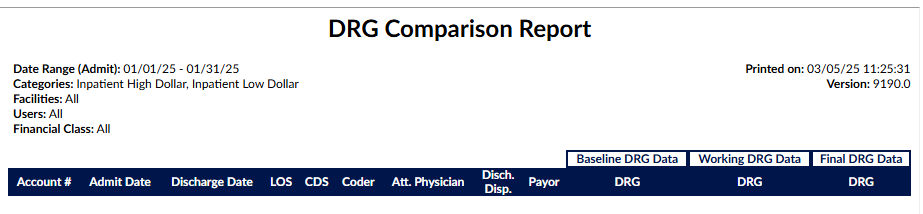
Allow Criteria to be edited
CACTWO-7034 (Important)
Criteria group names can now be edited in Workflow Management. The use of brackets in the name will now be rejected by a red toast message stating that brackets are not available for use, along with the name of the workgroup and criteria.
Multiple PCS occurrences are not showing correctly in Audit
CACTWO-7039 (Important)
If an Audit Worksheet is created on an account that has multiple occurrences of a procedure code, the editing arrows are not showing properly in the audit. This has been corrected.
DRG error occurring when Audit Worksheet viewer is popped-out
CACTWO-7041 (Important)
If an Audit Worksheet is popped-out to its own tab and the user then computes a DRG, while the DRG shows on the main screen, the pop-out continues to show a ‘DRG Required’ error message. This has been corrected.
Moving between viewers is erasing the audit subtype matches
CACTWO-7050 (Important)
When an Audit Worksheet is opened and the audit type is selected, the approved subtypes for that audit are in the subtype popdown. But if the auditor moves from the audit viewer to another viewer, like code summary, when the audit is reopened, the audit subtype list shows all subtypes, not just the filtered list for that audit type. This has been corrected.
Add state column to mappings for Medicare
CACTWO-7054 (Enhancement)
In Mapping Configuration, for the mapping MedicareProviderNumber, a new column has been added so that states can be assigned to each number. This is for sites with multiple facities across multiple states that use the TruCode Encoder. In order for sites to update their facilities without interface script changes, a “State” column should be added to the “MedicareProviderNumber’ mapping to indicate the geographic state of the facility. This field will be passed into TruCode if populated so that the state’s appropriate medical necessity edits are returned.
This is only relevant to TruCode Encoder.
Audit were being routed when other viewers were open
CACTWO-7061 (Important)
Audits were being routed without being saved when other viewers were opened. This has been corrected so that if a physician query or an encoder are open, an audit cannot be routed until those windows have been closed.
Allow users to be assigned to Physician Coder Managers
CACTWO-7068 (Enhancement)
New roles that contain the word ‘Manager’ such as Physician Coder Managers will now have the ability to have users assigned to them by an Administrator.
Show History legend has been updated with new fields
CACTWO-7063 (Important)
The legend window in a Show History viewer has been updated with more colors and indicators. There are now indicators for Payor, Financial Class, Admit Source, Admit Type and Discharge Disposition.
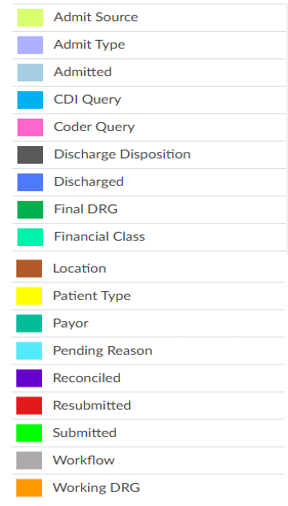
Rebuttal is not showing if the Coder has not routed to Auditor
CACTWO-7070 (Important)
If a Coder has rebutted an Audits, but has not sent that audit back to the Auditor, the rebuttal is not being seen by the Coder when they go back into the audit. This has been corrected. Rebuttal should always be seen whether or not the audit has been routed back to the Auditor.
Discrete value is copying over to CDI Alert query
CACTWO-7073 (Important)
This issue has now been prevented by only removing ICD-10 and CPT codes from evidence text that is linked to a document when the text is copied to a physician query.
Add Status Indicator (SI) to Code Summary and Charge viewer
CACTWO-7076 (Enhancement)
The Status Indicator has been add to the Code Summary viewer and will appear next to a CPT code that has resulted from an APC Computation. The indicator will also show in the Charges or Transactions viewers when the Status Indicator column has been added.

Allow Query reasons to be separated by role
CACTWO-7077 (Enhancement)
In Mapping Configuration, the mapping of PhysicianQueryReasons now has a column called roles, which will allow the user to assign reasons to specified roles.

TruCode™ standalone is not applying groupers by facility
CACTWO-7097 (Important)
If facilities have groupers assigned to them, the TruCode™ standalone is not applying that facility’s grouper when computing the DRG. This has been corrected.
TruCode™ Users Only
This fix only applies to TruCode™ users.
CDI Alerts query template is not being selected
CACTWO-7112 (Important)
If a physician query is opened from CDI/Clinical Alerts and the user has created a signature in their user profile, a chosen query template was showing as blank. This has been corrected.
Audit Subtype values is not being retained on multiple audits
CACTWO-7114 (Important)
If an Auditor selects an audit subtype on the latest Audit, then moves to another viewer, upon going back to audits, older audits no longer show an audit subtype. This has been corrected.
Physician Coder submits are removing account from Coder’s worklist
CACTWO-7130 (Important)
If an account routed to a coder by an Auditor is subsequently submitted by a Physician Coder, the account is being removed from the routed Coder’s worklist. This has been corrected.
Additional Configuration Required
Please contact Support to enable this feature.
Workgroup Assigned Data criteria needs additional functionality
CACTWO-7140 (Important)
In Workflow Management, the criteria Workgroup Assigned Data is missing an additional field that would allow the entry of the Workgroup name to send the account to. This has been added.
Edit Procedure Details is not allowing deletion of units
CACTWO-7147 (Important)
When using Edit Procedure Details and deleting the number of units, the units were not saving blank. This has been corrected.
CACTWO-7150 (Important)
When creating an Audit, the Workgroup data was no longer showing in the header. This has been corrected.
Autoload is copying TruCode™ edits to no code accounts
CACTWO-7151 (Important)
If Auto-load is turned on and an account with no codes is opened after an account with TruCode™ edits, those edits are not clearing and are showing for the account with no codes. This has been corrected.
This fix only applies to TruCode™ users.
Text change needed for PSI-08 algorithm output
CACTWO-7152 (Important)
The text in the PSI-08 algorithm shows ‘hip fracture’. This has been corrected to show as ‘other fracture’ when the code table is FXID instead of HIPFXID.
CACTWO-7153 (Enhancement)
In CAC 2, the help menu item of Fusion CAC Help has been renamed to Fusion CAC User Guide. The guide has been changed to a web page, rather than a pdf.
‘Exists’ operator is not working for Assigned Dx Codes
CACTWO-7180 (Important)
When using a criteria of ‘Assigned Diagnosis Codes with POA of N’ with the “Exists” operator, the criteria was not working. This has been corrected.
Multiple Audits were not showing proper color in Navigation pane
CACTWO-7181 (Important)
Completed audit changes the color in the Navigation pane from red to a brownish yellow. If another audit is added, the color is not changing to red to indicate an open audit; it is remaining in the completed color. This has been corrected.
CACTWO-7202 (Important)
When an account has a large number of documents, if the user clicks on an unopened document further down the roll, the scroll bar was jumping back up the document pane. This has been corrected.
Coder Scorecard was showing audits prior to last month
CACTWO-7203 (Important)
In the Coder Scorecard section of the Coder Personal Dashboard, audits were displayed that were opened or closed prior to last month. This has been corrected.
Drilldown columns are not showing in Scheduled Report
CACTWO-7216 (Important)
If a Scheduled report is created in Account Search using a search that includes a drilldown, the drilldown is not showing in the report when it is sent. This has been corrected.
DRG changes not showing in Audit Management
CACTWO-7218 (Important)
Changes to the MS-DRG and the MS-DRG Reimbursement were not being detected in an audit. This has been corrected.
V2.59 (Jun 2025)
V2.59.9302 Released 06/20/25
The notes below indicate changes and additions to the software. Please review these release notes
carefully when deciding to apply a software update to an installation.
Each note is related to an issue tracking assignment number (starting with CACTWO) in the heading.
Please refer to the change with this tracking assignment number when communicating questions or issues.
The heading also contains a parenthesized "Change Type", indicating the severity or importance of
the change. The severities used are:
- Critical - Recommended that this application be upgraded as soon as possible at all sites
running previous versions.
- Conditionally Critical - Recommended that this application be upgraded as soon as possible at
all sites running previous versions matching the stated conditions.
- Important - Recommended upgrading the application if the customer is experiencing the issue
denoted or currently applying a work-around for a specific non-functional feature.
- Enhancement - Recommended upgrading only if the specific functionality is desired.
Allow Validation Rules for Query Details
CACTWO-6102 (Enhancement)
A Validation Rule can now be created to trigger based on physician query details. The option of ‘Queries’ has been added in the For Each selection to allow this to be possible.
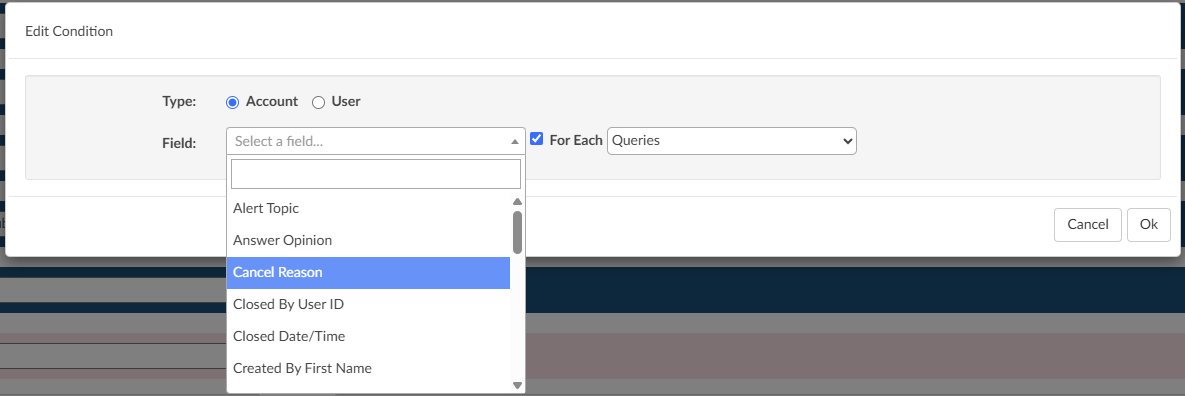
Add Column to Tuning Dashboard Code drill down
CACTWO-6508 (Enhancement)
In the Tuning Dashboard, clicking on a code to open it will now display a new column ‘Submitted By’, with the submitter’s full name.

Add Document Date to hover over
CACTWO-6777 (Enhancement)
In the Document tree, the hover over on the document name provides a physician’s name if it exists. The date of the document will now also show in the hover over if it exists.
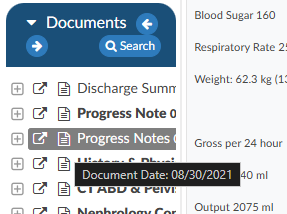
Change Mapping Values to Descriptions in Show History
CACTWO-6987 (Enhancement)
Show History shows the mapping value (key) in the Visual Difference column. This has been changed to use the description of the mapping (friendly name) so that the change is more easily understood.

Add Active CDI/Clinical Alerts as Selectable Criteria
CACTWO-7024 (Enhancement)
Active Alerts has been added as a Grid Column, and has been added to Workflow Criteria so that workflow can be created using Active Alerts as a property.
Add an Option to Factor in Estimated Reimbursement Differences During the DRG Reconciliation Process.
CACTWO-7055 (Enhancement)
A new configuration setting is now available that can require DRG Reconciliation when there is a discrepancy in the estimated reimbursement between the Working DRG and the Final DRG.
When a CDI performs reconciliation, a prompt appears allowing them to select which DRG to accept. A new “Reimb.” column has been added to display the estimated reimbursement amounts, assisting in the decision-making process.
Additional Configuration Required
Please contact Support to enable this feature.
Add new Columns for Denial Drill Down in Account Search
CACTWO-7058 (Enhancement)
Two new columns have been added to the Denial drill down in the Account Search menu:
- Denial – Created Date
- Denial – Closed Date
- will only populate if the “Denial Complete?” box is checked in the denial
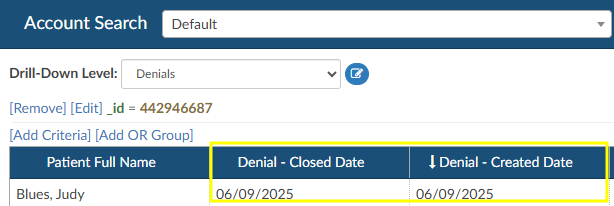
Allow Workgroups with a ‘0’ Count to Show in Account List
CACTWO-7118 (Enhancement)
A new setting has been created for those users that want to see their assigned workgroups that have a ‘0’ count in their Assigned To dropdown list.
Additional Configuration Required
Please contact Support to enable this feature.
Remove CPT Codes on Inpatient Accounts With LOS >= 5 days
CACTWO-7127 (Enhancement)
If an inpatient account has a length of stay equal to or greater than 5 days, suggested CPT codes will be automatically removed. The only CPT codes that will show in documents will be those manually added by a user.
Add Shift Reason column to Account Search Criteria
CACTWO-7134 (Enhancement)
A new option has been added to the dropdown list when adding criteria for an Account Search: Query Shift Reasons. This will show all shift reasons per query, including ‘other’ reasons that are based on a Mapping Configuration setting.
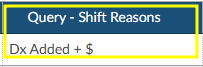
Add Field for Appeal Received Date to the Denial Worksheet
CACTWO-7154 (Enhancement)
In Denial Management in the Navigation tree of an account, a new field has been added called “Decision Letter Received Date” to each denial appeal indicated. The name of this field will change depending on if it is the First, Second, or Third appeal.

General TruCode™ Edits are now Accessible in Custom Rules Scripts
CACTWO-7158 (Enhancement)
General edits from TruCode™ can now be provided to validation rule scripts.
This is only relevant to the TruCode Encoder.
CACTWO-7160 (Enhancement)
When the submit button on an account is grayed out, hovering over gives data on that disabling; Errors exist on account. Added to that is that statement: Check Code Summary for Validation Results.
Add Columns to the Transfer Codes viewer
CACTWO-7191 (Enhancement)
Additional columns can been added to the Transfer Codes viewer when searching by MRN. If a user searches for an MRN and more than two accounts share that MRN, the MRN selection box will appear, now displaying the newly added columns.
Additional Configuration Required
Please contact Support to enable this feature.
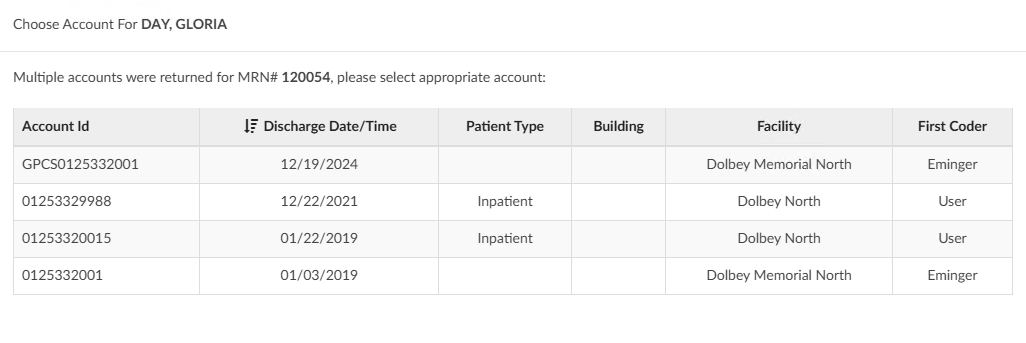
Audit and Denial Workflow Criteria Does not Work for Multiple Instances
CACTWO-7193 (Important)
Audits and Denials workflow criteria previously did not support multiple worksheet instances. While multiple Audit and Denial worksheets could exist, the workflow criteria only evaluated the first worksheet, ignoring subsequent ones. As a result, if the first worksheet was closed and a newer one was open, the workflow would incorrectly interpret the status as closed. This has been corrected—workflow criteria will now evaluate the most recent worksheet when multiple instances are present.
TruCode™ Real-Time Edits Were not Using ASC Groupers When Applicable
CACTWO-7238 (Important)
Outpatient accounts using a primary grouper of ASC were not computing real-time edits. This has been corrected.
This is only relevant to the TruCode Encoder.
Audit Management Dashboard is not Allowing Facility Filter
CACTWO-7230 (Important)
The Audit Management Dashboard was showing as blank or as spinning circles when using the Facility Filter at the top of the page. This has been corrected.
Audits Were Missing from the Audit Dashboards
CACTWO-7231 (Important)
The Audit Management and Aduit Personal dashboards were not taking multiple audits into consideration in some instances. Secondary audits were only considered if the secondary audit occurred within 30 days of the first audit. This has been changed to a default of 6 months.
Incorrect Values Showing in Timeline of Show History
CACTWO-7234 (Important)
If certain fields were changed by the user, the timeline hover-overs in Show History was not showing the update value, instead showing the previous value. This has been corrected for the following fields: Admit Source, Admit Type, Discharge Disposition, Financial Class, Patient Type, and Payor.
Force Autoload is not Providing new Accounts After a Workgroup Change
CACTWO-7244 (Important)
If a workgroup assignment was changed for a Forced Autoload user while they were working their list, when they clicked ‘Get Next Account’, there was a chance that autoload was not finding anything. This has been corrected.
Add Coder ID to the Recurring Account Productivity Report
CACTWO-7251 (Enhancement)
A column to display the Coder ID has been added to the Recurring Account Productivity Report when it is exported as an XLSX.
Error Assigning Account to a Workgroup
CACTWO-7257 (Important)
When in Account Search and assigning an account to a workgroup, if the account did not have any prior workflow assignment, an error could occur. This has been corrected.
Visual Difference Column is Showing Coding Data
CACTWO-7261 (Important)
In Show History, if a workgroup name had a change after the 50th character, it would show in the Visual Difference column with coding data in it. This has been corrected.
Display Issues with Mappings Configuration and Scheduled reports
CACTWO-7268 (Important)
In smaller monitor resolutions, the delete buttons of mappings and scheduled user reports could overlap text. This has been corrected.
Edit All Codes not Displaying Admit Diagnosis Change
CACTWO-7277 (Important)
When in the Edit All Codes window, if the user edited the Admit Diagnosis by clicking the pencil to open the encoder’s code book, the change was not displaying correctly within the window. This has been corrected.
Prevent Coder From Closing Account With TruCode™ Codebook Open
CACTWO-7281 (Important)
To stop the possibility of a lockup, if a user tries to close out of an account when the TruCode™ code book is open, they will see the same red bar alert over the Cancel, Save, Release buttons that they would see if the encoder was open.

This is only relevant to the TruCode Encoder.
Audit Worksheet Leaving Escalation box Open When Audit is Closed
CACTWO-7282 (Important)
Once an audit is closed, all fields should be read-only. The escalation response box was not following that rule, remaining open to the addition of text. This has been corrected.
Days not Showing for Schedules That are Hourly
CACTWO-7287 (Important)
When creating a scheduled report, if it was set as hourly and days were chosen, the days were not showing in the report data on the left. This has been corrected. Because there are 2 days that start with T and S, Thursday shows as R and Sunday shows as U.
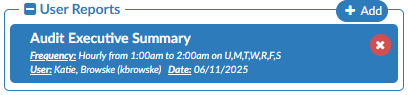
Scheduled Report Timing Changes Were not Displaying Properly
CACTWO-7288, CACTWO-7299 (Important)
After making a change to the timing of a scheduled report, the change was not showing on the report itself. This was happening whether the change was made via Account Search, or in the Scheduled Report page. This has been corrected.
Validation Rules are Showing Multiple Times When They Shouldn’t
CACTWO-7300 (Important)
A validation rule can show multiple times if it has a ‘For Each’ criteria in the rule. But when that For Each criteria was removed and the Validation Rule saved, it was still showing up multiple times in the Account. This has been corrected.
Correct Retrospective Followup Reviews Calculation
CACTWO-7301 (Important)
CDI reviews performed after a first submit when the DRGs match after reconciliation as retrospective follow up reviews on the CDI Activity and Detailed Activity reports were not being counted. This has been corrected so that they are now included in those calculations.
Show a Tertiary DRG if Applicable
CACTWO-7302 (Enhancement)
If there are 3 DRG’s on an account, all three will now show when printing the Code Summary page.
Add encoder computations from Baseline Working DRG to Account Search
CACTWO-7303 (Enhancement)
In Account Search, additional columns can be added to Account Search to provide information on Baseline Working DRG computations.
Additional Configuration Required
Please contact Support to enable this feature.
CACTWO-7307 (Important)
To improve application performance, the calculation of validation rules will no longer happen during the processing of a response from Solventum™. Validation rule computations will resume after the response is fully processed.
Note
This fix only applies to sites using the Solventum encoder.
Medication evidence from CDI Alerts may not linking correctly.
CACTWO-7308 (Important)
Medication evidence, when clicked on from the Clinical Alerts viewer, may not show the medication in the Medications viewer. This has been corrected.
Add new Column to the CDI Financial Benefit Report
CACTWO-7312 (Enhancement)
A new column for ‘CDI Queries’ has been added just before the Baseline DRG Data block in the CDI Financial Benefit report.
Audit is Able to be Saved Without a Coder of Record
CACTWO-7320 (Important)
In the case of a CDI being the last user in and the owner of an account before it is audited, the Coder of Record was blank. The audit should not be saveable if a coder is not selected. This has been corrected so that if an Auditor attempts to save or route an audit without a coder of record, a red error message will occur stating the coder of record needs to be set.
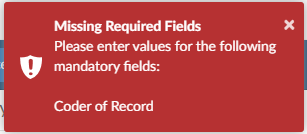
Description change for the Coder DRG Summary report
CACTWO-7322 (Enhancement)
The description for the Coder DRG Summary report has been changed to read:
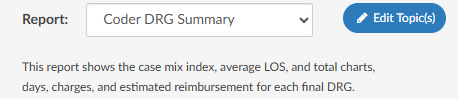
Display codes only present in physician queries in the Unassigned codes tree
CACTWO-7327 (Enhancement)
Codes that are added via the Pre and Post DRG computation within a Physician Query will now show in the Unassigned Codes Tree if the codes are not present elsewhere on the account. The codes will be identified with a question mark in front of them, and cannot be edited unless assigned to the account or added to a document.
Note
This fix only applies to sites using the Solventum encoder.s
User is unable to unassign account without the Router role
CACTWO-7330 (Important)
A user could not unassign an account if the user was not granted the privilege to route accounts from Roles Management. This has been corrected.
Dashboard experiencing slowness due to retrieval query
CACTWO-7332 (Important)
When the Admin Dashboard loaded, its performance was being slowed down due to how the discharged pended accounts data was retrieved. This has been updated for faster performance.
Number of discharged accounts is incorrect on CDI Query Scorecard reports
CACTWO-7334 (Important)
If multiple queries on an account fell in the same month, the number of the discharged accounts was being counted more than once. This has been corrected.
Update the description of the Physician Coding Activity report
CACTWO-7337 (Important)
The phrase “then the total number of Queries created” has been removed, since this report does not include the number of queries created by physician coders.
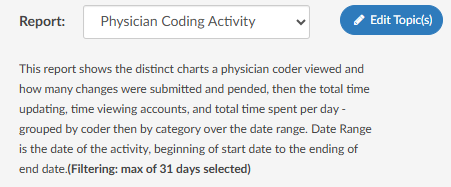
Default Search Field in Transfer Codes Viewer Updated to MRN#
CACTWO-7342 (Enhancement)
The default search field in the Transfer Codes viewer when accessed from the Navigation Pane within an account—has been updated to use the MRN# instead of the Account Number. If you prefer to revert the default back to Account Number, please contact Support to request a custom ticket.
Query Shift Reasons Now Display Mapping Friendly Descriptions
CACTWO-7343 (Enhancement)
Account Search, previously, when Query Shift Reasons were based on a mapping, the system displayed the mapping key instead of the user-friendly description. This has been updated so that the description from the mapping is now shown, improving clarity for users.
Audit Executive Summary Report is not Calculating Correctly
CACTWO-7348 (Important)
The number of Total Eligible Cases in the Audit Executive Summary report was being under counted. This has been corrected.
Physician Coder Manager Needs Access to the User Session Log report
CACTWO-7358 (Important)
The User Session Log has been updated to allow access to the physician coder manager as long as the privilege is checked in Role Management.
Denial Management is not Correctly Assigning the Coder Field
CACTWO-7365 (Important)
On a Denial, the coder field was not defaulting to the first submitting coder, or leaving as blank if not submitted. This has been corrected.
CDI Today’s Productivity Time in Chart Calculation
CACTWO-7371 (Important)
The time in the chart should be showing all the time spent, even if a working DRG is not calculated. It was not calculating time in chart that was worked and saved without a DRG. This has been corrected.
Change of Admit Source Should Clear DRGs
CACTWO-7386 (Important)
If a DRG is calculated and afterwards the Admit Source is changed, the DRGs should clear. This was not happening and has been fixed.
Physician Query Recipient is Being Overwritten by Responding Physician
CACTWO-7390 (Important)
When a different physician is set as the responder on a query, it was temporarily overwriting the recipient physician on the query. When saved, it was showing correctly in the physician query viewer, so the correct Physicians were being recorded. The appearance of the overwrite within the query has been corrected.
Changing Audit Type was not Clearing the Audit Subtype
CACTWO-7396 (Important)
With subtypes being attached to Audit Types through mappings, the subtype should be clearing in the audit if the type is changed. This was not happening and has now been corrected.
Pending Reason Historical Report is not Showing Correct Submitter
CACTWO-7392 (Important)
The Pending Reason Historical Report was showing the user that created the pending reason as the last submitter. This has been corrected.
Grid Column not Forcing a Save if a Title was Changed
CACTWO-7402 (Important)
If a user clicked in the Title field and made a change to the names, trying to move to another menu like Account List was not causing the ‘Do You Want to Save’ message to pop. This has been corrected.
The ‘Query For’ Checkbox is not Being Saved on the Template
CACTWO-7404 (Important)
When the ‘Query For’ box is checked on a query template worksheet, saving gave a green message, but if you went back into the template the checkbox was unchecked. This has been corrected.
Copy Row function for Flowsheet have ability to Copy to CDI/Clinical Alert
CACTWO-6767 (Enhancement)
Fusion CAC now supports copying an entire row of a discrete value from flowsheet viewer into CDI/Clinical Alerts, as outlined in the comment above. Any hidden columns will be excluded from the CDI/Clinical Alert evidence, enabling more precise control over which data is transferred.
Strike through Evidence if Document Code is no Longer Present
CACTWO-7132 (Enhancement)
Fusion CAC now enhances the CDI/Clinical Alerts experience by displaying evidence with a strike through in the viewer if the originally abstracted evidence is no longer present in the document. This typically occurs when a document has been amended and the evidence previously identified has been removed.
Use Friendly Document Name in Copy to CDI/Clinical Alerts Function
CACTWO-7241 (Enhancement)
When evidence is copied to a CDI/Clinical Alert from a document, the document type’s friendly name will be displayed instead of its interface name. Previously it was using interface name.
V2.60 (Sep 2025)
V2.60.9347 Released 09/15/25
The notes below indicate changes and additions to the software. Please review these release notes
carefully when deciding to apply a software update to an installation.
Each note is related to an issue tracking assignment number (starting with CACTWO) in the heading.
Please refer to the change with this tracking assignment number when communicating questions or issues.
The heading also contains a parenthesized "Change Type", indicating the severity or importance of
the change. The severities used are:
- Critical - Recommended that this application be upgraded as soon as possible at all sites
running previous versions.
- Conditionally Critical - Recommended that this application be upgraded as soon as possible at
all sites running previous versions matching the stated conditions.
- Important - Recommended upgrading the application if the customer is experiencing the issue
denoted or currently applying a work-around for a specific non-functional feature.
- Enhancement - Recommended upgrading only if the specific functionality is desired.
Add new Fields to Query Section of CDI Management Dashboard
CACTWO-6105 (Enhancement)
Two new fields have been added to the CDI Management Dashboard’s query section. There are now fields for Open Today and Open Yesterday.
New Operators of ‘Last Month’ and ‘This Month’ Added to Workflow
CACTWO-6139 (Enhancement)
Two new operators have been added to Workflow; Last Month and This Month. This would mostly be used in Auditing workflow, but can be used in any worklist. These should be used with Date fields such as ‘Admit Date Time is This Month’, etc.
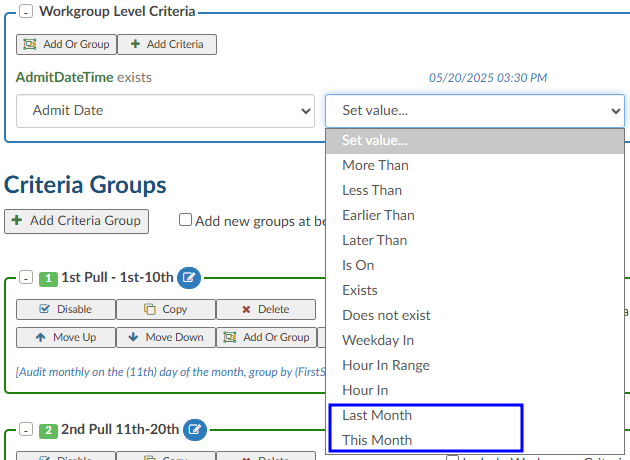
Add a CDI Auditor Module to the Navigation Tree
CACTWO-6412, CACTWO-7489, CACTWO-7534 (Enhancement)
We are introducing a new CDI Audit module, designed to bring formal auditing capabilities to CDI programs, which until now have largely relied on manual Excel tracking. This module will function as a dedicated viewer, similar in design to our coding Audit module, while incorporating concepts specific to CDI work.
Key features include:
- Dedicated Viewer & Roles – A separate CDI Audit Viewer with privacy controls for CDI of Record, CDI Auditors, and Management. A new CDI Audit role with role-based privileges will be added.
- Audit Criteria – Flexible audit framework supporting baseline DRG, working DRG, mismatch DRG rate, missed query opportunities, query compliance, correct claimed impact, and custom policies.
- Configurable Weighting – Mapping table options allow organizations to adjust terminology or emphasize certain criteria with higher weight, similar to coding incentive multipliers.
If opted in, a new role of ‘CDI Auditor’ will be available to be assigned to end users. This role will allow the assignee all the privileges of a CDI Specialist, plus the ability to audit inpatient accounts on a new CDI Audit Viewer.
Additional Action Required
Please contact your sales representative for pricing.
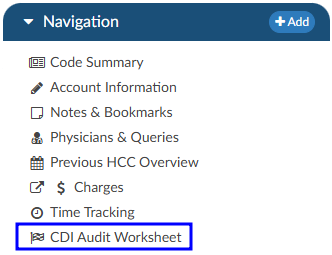
Allow Unassigned Codes to be Hidden From the User’s List
CACTWO-6587 (Enhancement)
A new option now appears in the right click menu of the Unassigned/All Codes lists called ‘hide unassigned code’. When used, a new icon will appear in the header, and when clicked it will open a list of all codes hidden by that user on that account. This functionality will allow the user to indicate that they have reviewed a code and they have determined it is not needed. This is different from deleting codes as code suggestions will still appear in documents and the user can un-hide codes that need to be re-evaluated. No other user opening that account will have the code hidden.

The user can un-hide by clicking on that icon to open the hidden codes list.
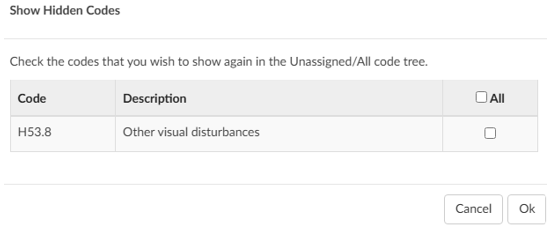
Display Late Document Names in Grids With Hover Over Action
CACTWO-6688 (Enhancement)
A new field has been added to Grid Configuration called Late Documents. When in use, it will list each distinct document type. If added to an Account List grid, if there are more than fit in the column, user can hover over to receive the entire list of document types.
Add new row to the CMI per Month Report
CACTWO-7006 (Enhancement)
The Case Mixed Index per Month report has been changed to show a Combined, Medical, and Surgical row.
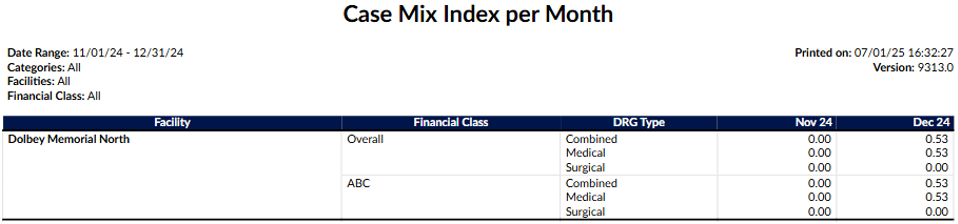
CACTWO-7059 (Enhancement)
In Worksheet Designer, shared forms have an ‘Editable’ dropdown in the Add Field box. Previously it only included All Users, Coder and CDI roles. This has been expanded to include Auditors Only, Auditors or Coders, Coding Managers Only, CDI Managers Only, and Administrators Only.
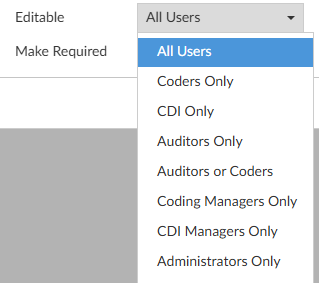
Track Time on Custom Worksheets
CACTWO-7082, CACTWO-7497 (Enhancement)
A new viewer has been created that will show time-tracking worksheets, the Denial viewer, and the Audit viewer. When opted in there is a start button. This start button allows time tracking. The timer will stop if the user clicks the Stop button, opens another viewer or worksheet that has time tracking, or exits the account. Users will be able to adjust their time in the Time Tracking viewer if necessary. Administrators will be able to see all time tracked on an account. The user will only see their own.
Additional Configuration Required
Please contact Support to enable this feature.

Add new Operators to Workflow to Check Date Properties
CACTWO-7116 (Enhancement)
Three new operators have been added to the operator dropdown in workflow criteria creation. ‘Weekday In’ allows the user to select the specific day of the week; “Hour in Range” allows the user to select a range of hours for the admit/discharge date; and “Hour In” allows the user to select a specific hour of the day.

Allow Addition of Manager Fields to Queries, Worksheets, and Grids
CACTWO-7120 (Enhancement)
Clients who use managers on their user profiles can opt in to have the First submitter’s manager and/or Last submitter’s manager fields to queries, worksheets and account grid columns. This is not retroactive.
Additional Configuration Required
Please contact Support to enable this feature.
Add E/M Charges to the Audit Worksheet
CACTWO-7136 (Enhancement)
E/M charges have been added to the Audit Worksheet. They will show in the Pre/Post Audit codes section, and then in their own E/M Charges section further down the worksheet.
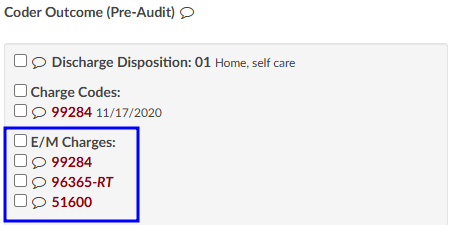
Additional Configuration Required
Please contact Support if fields are needed for calculation.
Allow Audit to be Hidden From the Coder of Record
CACTWO-7169 (Enhancement)
The ‘Route to Coder’ button on an Audit Worksheet can now have a drop-down option enabled to allow the Auditor to hide the Audit from the Coder of Record.
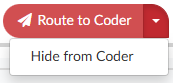
Additional Configuration Required
Please contact Support to enable this feature.
Allow Auditor to Audit Charge Quantity in the Worksheet
CACTWO-7170 (Enhancement)
The quantity field in the Audited Charges section of an Audit Worksheet has now been opened for editing by the auditor. Clicking in the field will present up and down buttons, or the Auditor can just type in the new quantity.
Allow Clients to Trigger Specific Account Types for Charge Auditing
CACTWO-7171 (Enhancement)
With a new script update, clients can set their Audit Worksheets to determine whether or not to audit charges based on Account type.
Additional Configuration Required
Please contact Support to enable this feature.
Add Field to E/M Coding Viewer for E/M Modifier
CACTWO-7184 (Enhancement)
A field for E/M modifier from the E/M viewer on ER accounts has been added to the account grid. This can also be used in Account Search and Validation Rules.
Add Symbols to Indicate Changes to Query Impact Codes box
CACTWO-7189 (Enhancement)
When going into a physician query that is in a Query Impact status, the computation window that pops-out will now show the plus, minus, and arrows next to any code changes.
Allow Accounts to be Reconciled a Second Time
CACTWO-7197 (Enhancement)
A new setting will allow an account’s reconciliation record to be set back to false if a coder re-submits the account. This will allow for a second reconciliation action.
Additional Configuration Required
Please contact Support to enable this feature.
Display Late Arriving Charges in Red and Bold Post Account Submit
CACTWO-7215 (Enhancement)
Charges that are imported AFTER an account has been submitted will now show in bold red text. This is only for clients that are set for an ImportDateTime on their incoming charges.

Additional Configuration Required
Please contact Support to enable this feature.
Add Rule Column to Validation Management Export
CACTWO-7220 (Enhancement)
When doing a ‘save and export’ in Validation Management, the spreadsheet will now show the headings of the columns capitalized and will show a Rule column with the number of the rule presented.
Allow Outpatient Queries to Track Impact and Shift Reasons
CACTWO-7224. CACTWO-7521 (Enhancement)
Currently, only inpatient account physician queries track the query impact and shift reasons. Outpatient accounts will now use the same processes to track query impact and shift reasons. The Shift Reasons for Physician Query box that pops-out after a query is closed will have much fewer reasons to set, and the codes columns will be headed by the Primary and Secondary APC.
Additional Configuration Required
Please contact Support to disable this option if it is unwanted.
Add Fields to the Physician Query Window and Allow Retention of Creator
CACTWO-7232 (Enhancement)
The Sender column will now say ‘Created By’; and a new column ‘Sent By’ has been added to differentiate between the creator and sender of the query. An optional setting has also been created to allow retention of the original creator in the event the query has a physician change.

Additional Configuration Required
Please contact Support to enable this optional setting.
CACTWO-7250 (Enhancement)
When working on a Denial, once the account is saved, whether the Denial was completed or not, the Delete button will no longer be displayed. Deleting can only be done on an unsaved Denial.
Add a Timer to the Account Details
CACTWO-7254 (Enhancement)
A new field showing the time in the account will now show in the Account Detail page next to the Dates of Service. This timer will restart any time the detail page is closed, with the exception of a refresh of the browser.

Allow Forced Autoload Users to Manually Select an Account
CACTWO-7256 (Enhancement)
With a new setting, forced autoload coders will now have the Account selection field at the top of the page, which will allow them to go back to an account they have already looked at. After selecting and working a manually searched account, the user will be taken back to their place in their assigned workgroups.
Additional Configuration Required
Please contact Support to enable this feature.
Allow Buttons to Remain at the top of an Audit Worksheet
CACTWO-7265 (Enhancement)
In an audit, as you work down the viewer, you lose the ‘Route to Coder, Cancel, Print’ buttons. These buttons have now been set so that no matter where you are in an audit, they will always show at the top of the viewer.
Make Worksheet Created By Details Available in Grid Columns
CACTWO-7292 (Enhancement)
Created By fields for a custom worksheet can now be added to the Grid Column Maintenance for the purposes of reporting created by details on custom worksheets.
- UserId
- First Name
- Last Name
- Middle Name
- Current Role
- Added Date Time
Additional Configuration Required
Please contact Support to enable this feature.
Change Name of an XLSX Report to Reflect the Schedule Name
CACTWO-7333 (Enhancement)
Currently, when a scheduled report comes into the user’s email, when it is opened it shows the attachment as ‘report csv.’ This has been changed to show the name of the schedule. If the user prefers to go back to ‘report’ or some other hardcoded name, that can be done through Support.
Additional Configuration Required
Please contact Support to enable this feature.
Add New Fields for Outpatient Accounts in Denial Management
CACTWO-7335 (Enhancement)
One field in Denial Management will change for outpatient accounts: “DRG Change Completed?” will change to “APC/ASC Change Completed?”, which will be a new field in Account Search. Two more fields have been added: “Total Claim Amount” which will be a new field in Account Search and “Overpayment Amount”, which will be in the Financial Outcome field in Account Search.
Add a Drill-Down of Worksheet History to Account Search
CACTWO-7340 (Enhancement)
A new drill-down called Worksheet History has been added to Account Search. This will automatically include fields based on the history of worksheets that are added/edited on an account’s detail screen.
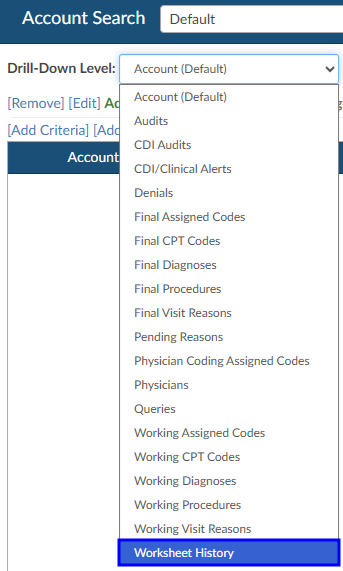
Add a Total Time Logged in Field to the Coder’s Personal Overview
CACTWO-7346 (Enhancement)
On the Coder Personal Dashboard, the Personal Overview section has an added extra line ‘Total Time Logged In’. Basically this is the total of the prior 3 lines.

Add new Display for Rev Code in the Audit Worksheet
CACTWO-7350 (Enhancement)
Revenue codes can be enabled to show in the Audit Worksheet.
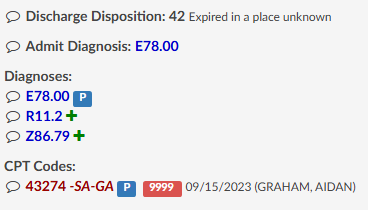
Additional Configuration Required
Please contact Support to enable this feature.
New Level and Navigation Options Added to Validation Rules
CACTWO-7359 (Enhancement)
A new level of ‘Informational’ has been added to the Validation Management page. When set, the rule will show as light blue on the Code Summary page, and will not interfere with saving or submitting an account. A new option for ‘Navigate to’ has also been added: Web Page. When using this option, a blank field will open up so the user can add the webpage URL. Note that this has to start with http:// or https://. When this validation shows in the Code Summary, clicking on it will open that URL in a new tab.

Alert User to Unassigned Code Being Linked to a CPT Code
CACTWO-7366 (Enhancement)
An update has been created so that if there is a link(s) of a diagnosis code to a CPT code, and that code is then unassigned, a new window will pop-out advising the user that there are unassigned links. The user will have drop down options of either deleting the link, or replacing that code with another in the list.
Additional Configuration Required
Please contact Support to enable this feature.
In the Edit All Codes Window, Display DX Codes Added to CPT Codes
CACTWO-7367 (Enhancement)
When a Diagnosis code is assigned to a CPT code by a Physician Coder, those codes will now show below the CPT code description in the Edit All Codes window.
Additional Configuration Required
Please contact Support to enable this feature.
In Edit All Codes, Allow DX Codes on CPT Codes to be Edited
CACTWO-7368 (Enhancement)
A new button has been created for the Edit All Codes window. It will appear below CPT codes to allow Diagnosis codes to be added or edited in the Edit All Codes Screen. These codes will be shown in the order they are selected. This button can also be opened up to other roles, not just physician coders.
Additional Configuration Required
Please contact Support to enable this feature.
Make CDI/Clinical Alert Strike Through Automatically Unchecked
CACTWO-7377 (Enhancement)
Document Evidence that no longer exists in a CDI Alert shows as stricken through with a checked box. This has been updated so that the box is automatically unchecked when a document no longer exists.
Add Columns to the Inpatient/Outpatient Coder Scorecard Reports
CACTWO-7400 (Enhancement)
Two new columns have been add to the Inpatient/Outpatient Coder Scorecard reports for auditing data. The columns are ‘Audit Opened Date’ and ‘Training Recommendations’.
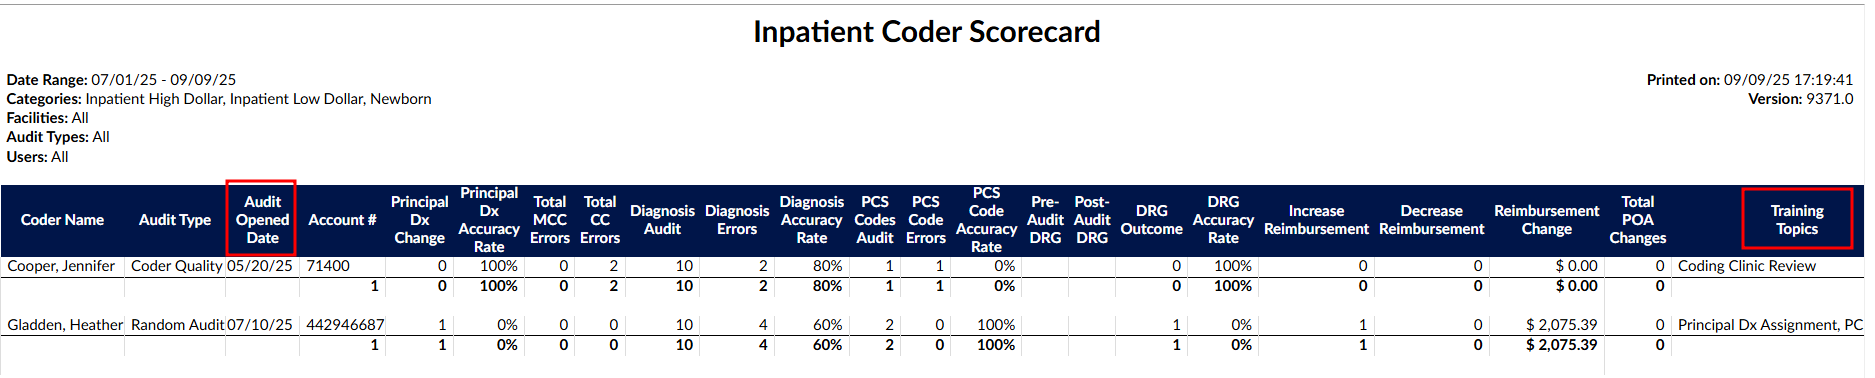
Create an is Add-On Field for CPT Codes in Validation Management
CACTWO-7423 (Enhancement)
A new field of ‘Is Add-On’ will now show when doing a ‘for each’ CPT code criteria in Validation Management. This will be triggered IF the CPT code is a designated Add-On code by CMS.
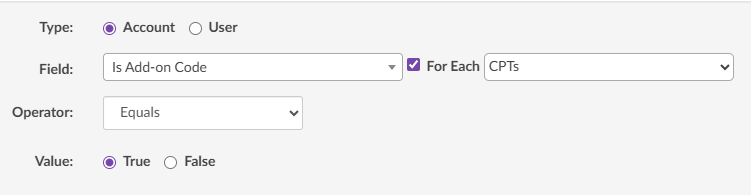
Add Assistant Surgeon Column to Account Search
CACTWO-7428 (Enhancement)
For clients that have implemented or would like to implement an Assistant Surgeon field on Procedure Codes, Fusion CAC will now add an Assistant Surgeon column to the Procedure Code drill down in Account Search. The criteria for that drill down will also include criteria for Asst Surgeon ID and Asst Surgeon Last Name.
Add Columns for Query Reporting
CACTWO-7431 (Enhancement)
In Grid Column Configuration two new column options have been added:
- APR-DRG Weigth Difference (Final APR-DRG Wgt - Baseline APR-DRG Weight)
- DRG Impact (Final DRG Est Reimb - Baseline DRG Est Reimb)
Columns have also been added to the Queries drill down in Account Search: Query-Impact Percent, Query-Impact Dollars, and Query-Impact Weight.
Blank Query response Date Showing in Query Reports
CACTWO-7440 (Important)
Blank query response dates were showing in query reports. If a query is manually responded to and there was no response date defaulted in, the data then shows as blank in query reports. This has been changed so that if the date is blank, upon saving the response today’s date and time will be defaulted in for reporting purposes.
CACTWO-7442 (Enhancement)
Two new fields have been added to each Appeal section in Denial Management: “HIMS Received Date” and “Response Due Date per Letter”. Another field has been restored: “Decision Letter Received Date”. Both of the new additions will be available in Account Search; the Response option is shortened by the removal of ‘per Letter’.

Change how “hideCPTonInpatientAccounts” Works
CACTWO-7443 (Enhancement)
Fusion CAC will no longer remove CPT Code suggestions from inpatient accounts with a length of stay of 5 days or more if the appsetting “hideCPTonInpatientAccounts” is set to false. Now, the removal will only occur if “hideCPTonInpatientAccounts” is set to true.
Change CDI Activity Reports Calculation of Queries
CACTWO-7445 (Enhancement)
The CDI Activity Report and the CDI Activity Detail Report will no longer count cancelled queries in the queries total.
Reports are Missing From the User Reports List
CACTWO-7446 (Important)
If a site did not have the Physician Coder or Auditor role authorized, then those reports that were open to those roles were missing in the User Report list for all users. This has been corrected.
Additional Configuration Required
Please contact Support to enable this feature.
Add the Coder Scorecard to the Forced Autoload Dashboard
CACTWO-7454 (Enhancement)
Clients now have the ability to update their Forced Autoload users to see the Coder Scorecard at the bottom of their Dashboard.
TruCode™ Codebook is Leaving Red Bar in the Account After Being Closed
CACTWO-7455 (Important)
If the TruCode™ codebook is closed using the X at the top instead of being minimized, it was leaving the red bar that crosses the Save/Submit buttons on an account intact, leaving the user unable to leave the account. This has been corrected.
This is only relevant to the TruCode Encoder.
Add Fields for Pre-Bill DRGs During DRG Reconciliation
CACTWO-7461 (Enhancement)
New fields have been added for specific groupers concerning Pre-bill DRGs determined at the time of the DRG Reconciliation. This is only for sites that need this kind of detailed reporting.
Additional Configuration Required
Please contact Support to enable this feature.
TruCode™ Panel does not Update when Used for Edits Only
CACTWO-7464 (Important)
When Solventum™ was used as the primary encoder and TruCode™ was set to function as a partial encoder for edits only, updates made in Solventum™ were not reflected in the TruCode™ panel. This issue has now been resolved.
Account Search is not Handling Non-Numeric Units Properly
CACTWO-7465 (Important)
When using commas or decimals in the units field of a CPT code, they were not showing in Account Search’s CSV file properly. This has been corrected so that quotes will appear around the field. When using Solventum™, if a comma is being used it will not be seen in the CRS, but decimals will be properly rounded to a whole number.
CACTWO-7470 (Important)
If the mappings order on one of the below Account Information dropdowns was changed, Account Information was still showing the dropdown in alphabetical order. This has been corrected to show the order set in Mappings Configuration. The four corrected fields are: Payor, Facility, Gender, and Discharge Disposition.
Add CDI Audits to the Time Tracking Module
CACTWO-7474 (Enhancement)
If the Time Tracking viewer has been added, an additional setting will add the CDI Audit viewer to the tracking.
Additional Configuration Required
Please contact Support to enable this feature.
Remove Disabled Work Groups With No Assignments From Account List
CACTWO-7475 (Enhancement)
If the user has the site_configuration “DisplayEmptyWorkgroups” set to true, their account list will show work groups that have 0 assignments, even if the work group is disabled. This has been changed so that if a work group is disabled and has 0 assignments, it will not show in the Account List.
Capitalize all Columns in Scheduled Reports
CACTWO-7477 (Enhancement)
The name of all column headers in a scheduled report will now be capitalized.
Convert Birth Weight to a Whole Number
CACTWO-7494 (Enhancement)
Currently, birth weight is not converted when entered as a decimal on a GPCS account, which can cause a validation error. The conversion method has changed to round up a decimal number, and if the number cannot be converted, to return it as a zero (0).
CDI/Clinical Alerts Showing as a Strike Through When Manually Added
CACTWO-7499 (Important)
When adding pasted data to a CDI/Clinical Alert, it is pasting in with a strike through. When saved, the strike through is gone. This has been corrected so that the strike through never occurs.
Closing Code Book is Removing Code From Code Editor
CACTWO-7501 (Important)
If a code is opened in code editor, and the Edit button is clicked, if the code book is then closed without change, the code is being removed from the code editor. This has been corrected. Closing the code book will no longer remove the original code from the editor.
Inactivity Messages not Occurring if Browser is Minimized
CACTWO-7505 (Enhancement)
If Fusion CAC is minimized, and during that time is timed out due to inactivity, that inactivity is not being logged to the User Audit Log. Inactivity messaging has been updated to include this scenario.
Preserve DX Code Order Selected on a CPT Code
CACTWO-7507 (Enhancement)
The order that diagnosis codes are selected when adding them to CPT codes will now be respected in the Edit All Codes window. Formerly the diagnosis codes showed in alphabetical order.
Add Weight Change and Difference to Audits and Account Search
CACTWO-7509 (Enhancement)
When an auditor makes a code change, calculates the DRG and the updates the codes in the coding Audit Worksheet, weight change and weight difference fields will show in the DRG section of the worksheet.
Additional Configuration Required
Please contact Support to enable this feature.
CACTWO-7510 (Important)
If Document Search is opened and the user clicks on a document in that search, then does a right-click on the document to open the action menu, the user will be unable to re-access that right-click menu on any other areas of the document search results. This has been corrected.
Allow for Users Working in a Timezone Different than the Server
CACTWO-7526 (Enhancement)
Fusion CAC will now allow date/times in all grids to remain static to the timezone when the user’s operating system is in a different timezone than the server.
CDI/Clinical Alert was not Updating When Applying an Edit
CACTWO-7546 (Important)
When editing a CDI/Clinical Alert, doing the edit and clicking the Apply button was not updating the list. It was only updating after Save had been clicked. This has been corrected so that the list shows the edit upon clicking Apply.
Forced Autoload was Returning to a Limited Workgroup
CACTWO-7554 (Important)
If a Forced Autoload user worked through a group that had a limit on it, if an account was then added to a group that preceded it, the user would be taken to that and then back through the limited group. This has been changed so the the cycle of accounts always obeys the limit on any workgroup.
V2.61 (Jan 2026)
V2.61.9477 Released 01/09/26
The notes below indicate changes and additions to the software. Please review these release notes
carefully when deciding to apply a software update to an installation.
Each note is related to an issue tracking assignment number (starting with CACTWO) in the heading.
Please refer to the change with this tracking assignment number when communicating questions or issues.
The heading also contains a parenthesized "Change Type", indicating the severity or importance of
the change. The severities used are:
- Critical - Recommended that this application be upgraded as soon as possible at all sites
running previous versions.
- Conditionally Critical - Recommended that this application be upgraded as soon as possible at
all sites running previous versions matching the stated conditions.
- Important - Recommended upgrading the application if the customer is experiencing the issue
denoted or currently applying a work-around for a specific non-functional feature.
- Enhancement - Recommended upgrading only if the specific functionality is desired.
Add Ability to Schedule a Report per day of the Week
CACTWO-5976 and CACTWO-7233 (Enhancement)
When creating a scheduled report, the user will now have the ability to schedule a report for a certain day of the week such as ‘first Tuesday of the month’ or ‘last Friday of the month’. This has also been added to the scheduling window of the Account Search, along with the ability to report hourly.

Replace PSI 04 with a new Failure to Rescue Measure
CACTWO-6787 (Enhancement)
A new failure to rescue code of ISCMR will now show concurrently with PSI 04 when it applies, but it will be completely replacing PSI 04 in the future.
Allow Scheduled Reports to be Restricted to Particular Domains
CACTWO-7138 (Enhancement)
A new setting will now stop scheduled reports from going out to emails that are not in the configured domain. As an example, if the setting is marked for ‘dolbey.com’, and an aol.com address is entered in the email for a scheduled report, the user will be alerted that the address is not valid for the domain.

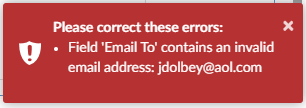
Additional Configuration Required
Please contact Support to enable this feature.
Make Mapping Titles more Noticeable
CACTWO-7274 (Enhancement)
Mapping table titles are now in blue to make them stand out better when a user is browsing a long list. Previously they were grey and did not stand out.
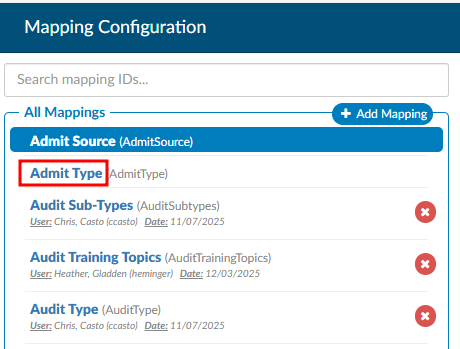
Enable Columns in Account Search to be Filterable
CACTWO-7319 (Enhancement)
The columns button in Account Search now has a filter field at the top of the list. Clicking on Columns brings up the column list as it is currently, and clicking the arrow lets you either select the list as ‘Select All’ or ‘Unselect All’. No matter how columns are pulled up, a filter box is presented at the top and will filter down the list as characters are typed.
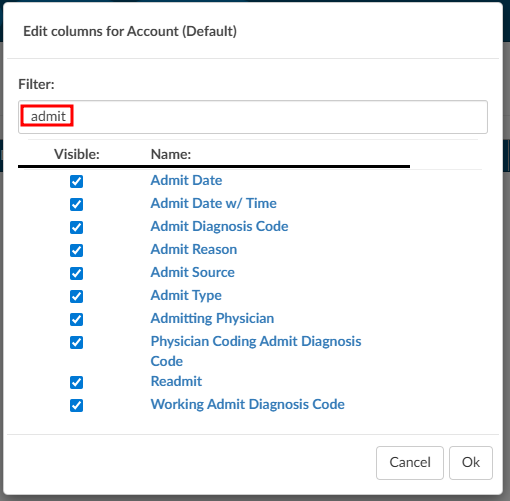
In Audit Worksheet, add APC Calculation Display
CACTWO-7515 (Enhancement)
For accounts with charges, the Audit Worksheet will now show APC calculations to the left of each code in the Audited Charges section, if configured.

Remove Trailing Blank Spaces in Pending Reason Note
CACTWO-7525 (Enhancement)
Currently when adding a note to a pending reason, any trailing blank spaces are being saved to the record. This has now been changed to discard trailing blank spaces upon saving the note.
Add ‘Total’ Column to the CDI Metric Score Card Report
CACTWO-7551 (Enhancement)
A new ‘Total’ column has been added to the CDI Metric Score Card which calculates the combined statistics for all months within the report. By comparison, the Average column calculates the average statistics per month within the report.
Dashboard will not Display Audit Sections if There is no Data
CACTWO-7570 (Enhancement)
On the Coder Personal Dashboard:
- If both Inpatient and Outpatient audit data are available, both section headers will appear on the user’s Dashboard, each displaying its corresponding audit details.
- If no audit data exists at all, both headers will still display, but instead of data, each section will show the message: “No audits performed since last month.
- If audit data exists for only one category (e.g., Inpatient audits are available but Outpatient audits are not), the Dashboard will display only the header(s) with available data, along with the corresponding audit information.
Add User Name to CDI Metric Score Card When Sent as XLSX
CACTWO-7575 (Enhancement)
If the CDI Metric Score Card report is run as XLSX and has multiple users on it, it will now split the names out on separate tabs in the XLSX report.
Added ‘Audit - Modifiers’ columns to the Audits drilldown in Account Search
CACTWO-7581 (Enhancement)
Two new total columns have been added to the Audits Drilldown in Account Search:
Audit- Modifiers Post Audit
Audit-Modifiers Pre Audit
These will record the total based on the number of modifiers on the CPT codes or Charges.
PC-06 Designation Updated for January 2026
CACTWO-7584 (Enhancement)
The PC-06 algorithm has been updated for January 2026 changes. This allows for a PC-06 designation for accounts that have a Discharge Disposition of ‘Transfer’ as well as ‘Expired’.
Remove the ‘No’ Option From the Final DRG Reconciliation box
CACTWO-7588 (Enhancement)
An option has been added to hide the ‘No’ answer from the Final DRG Reconciliation prompt window within the DRG Reconciliation viewer. The user will then only have the options to agree or cancel during reconciliation.
Additional Configuration Required
Please contact Support to enable this feature.
Add Total Time Line to Forced Autoload Dashboard
CACTWO-7597 (Enhancement)
For the sake of continuity, the line for ‘Total Time Logged In’ has been added to the Forced Autoload dashboard to match the other user dashboards.

When Moving Between Viewers they were marked as read-only
CACTWO-7604 (Important)
Under specific circumstances, when moving back and forth between viewers, audits were being marked as read-only and user was unable to reopen and edit. This has been corrected.
TruCode link to crosswalks was not opening
CACTWO-7604 (Important)
While the link for accessing crosswalks in TruCode was present, it had yet to be implemented. That has now been added so that users can use the crosswalks.
Updates Made to Description of Several Reports
CACTWO-7616 (Enhancement)
The descriptions of the CDI Query Score Card and the CDI Query Score Card by Admission Month have been updated.
Sync Between Workgroup Criteria Changes was not Working
CACTWO-7619 (Important)
When multiple users were in the same workgroup criteria, the ‘sync change’ ability was not working. This has been corrected.
Mass Edit is not working for ‘All’ when adding Dx codes to CPT codes
CACTWO-7630 (Important)
If a user checked the ‘ALL’ button at the top of the CPT column in Mass Editing and added a DX code to the first CPT code, it was not being carried down to all of the CPT codes like it should. This has been corrected.
Add new Working DRG Fields in Account Search
CACTWO-7631 (Enhancement)
4 new fields have been added to Account Search to be used as search criteria:
- Baseline Working CC Total
- Baseline Working HAC Total
- Baseline Working HCC Total
- Baseline Working MCC Total
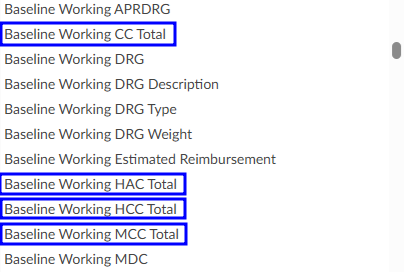
Mappings not Showing all Columns When Using CSV Option
CACTWO-7632 (Important)
When exporting a CSV in Mappings, some of the newly added columns were missing from the report. This has been corrected.
Add Check Mark Next to Codes in Inpatient Accounts
CACTWO-7634 (Enhancement)
A checkmark will now appear to the right of the diagnosis and procedure code(s) that affect the DRG (according to Solventum™ or TruCode™) in these places in Fusion CAC:
Additional Configuration Required
Please contact Support to enable this feature.
Session Expiration is Locking User in Account
CACTWO-7635 (Important)
If a user is in an account and goes away from their session long enough for the session to expire, the user is receiving a red error message and is not being taken out to the Login Screen. This has been corrected.
Receiving an Error When Using Invalid Characters in Document Search
CACTWO-7644 (Important)
If an invalid character is used in Document Search, ie .^$*+-?{}/|, then an invalid pattern error was showing in the Fusion CAC log. This has been updated so that no error occurs, and the Document Search works as expected.
Accounts assigned to Audit Workgroups not Leaving the Workgroup
CACTWO-7648 (Important)
If an auditor finished an audit and then did a Save/and route on the account to route to a custom workgroup, the account was not leaving the Audit workgroup. This has been corrected.
Update the way Diagnosis Codes can be Added to CPT Code Charges
CACTWO-7653 (Important)
The ‘add’ table has been changed to allow better usablilty and readablity of diagnosis codes that are added to a CPT charge on an outpatient account.

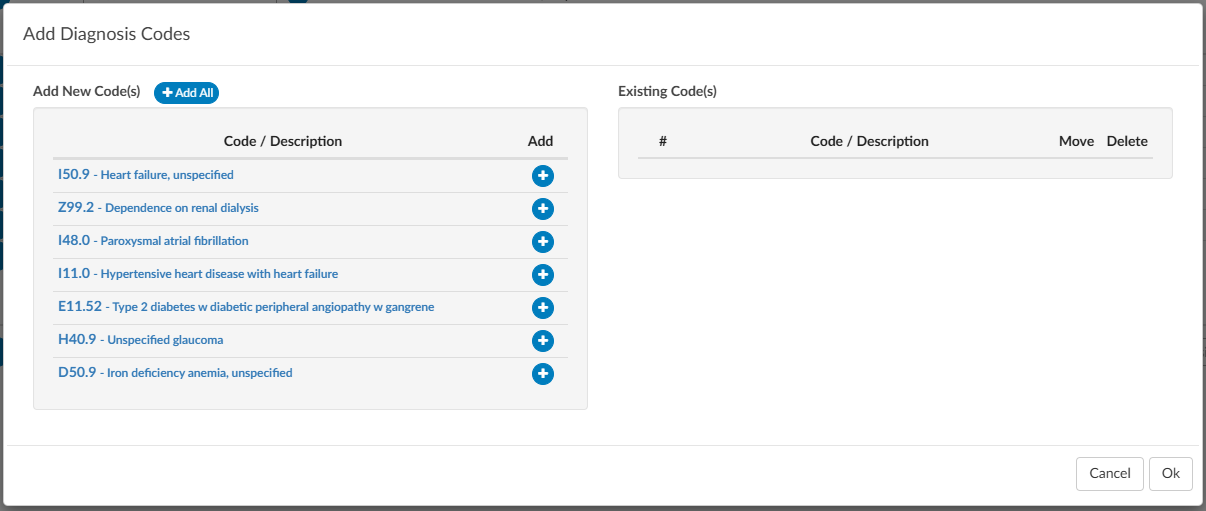
E/M Charge Handling and Comment Entry Fixes
CACTWO-7658 (Important)
When a client changes an account from an E/M-coded account to a non-E/M account, the system will now prevent Auditors from pulling in E/M charges. Additionally, an issue where the comment bubble on E/M charge codes did not allow remarks to be entered has been resolved.
TruCode™ Encoder is Deleting PCS Codes After Clicking the ‘Submit Codes’ Link
CACTWO-7659 (Important)
If a user has the TruCode™ encoder open and adds multiple codes via the code book, a code was being dropped when the ‘Submit Codes’ link was pressed to bring those codes to the Assigned codes tree. This has been corrected.
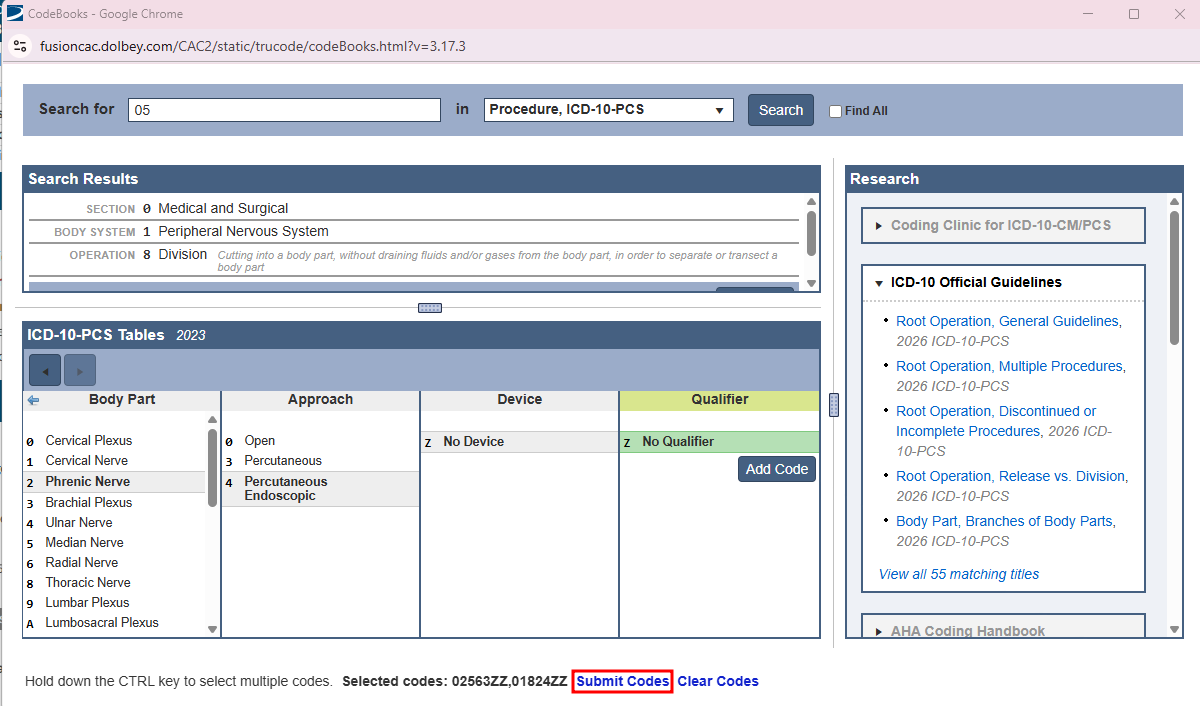
CACTWO-7660 (Important)
If a user changes the zoom on the TruCode™ encoder from 100%, the scroll bar sometimes does not go all the way to the bottom of the viewer. This has been corrected.
TruCode™ encoder has Drag and Drop Issues
CACTWO-7661 (Important)
In the codes section of TruCode™ encoder, when using drag and drop, the codes were getting stuck. This has been corrected.
TruCode™ encoder links are not working
CACTWO-7662 (Important)
When working in the TruCode™ encoder, if an edits icon appeared on a code indicating that additional codes should be added, clicking the “other codes” link did not open the Code Book in the Edits panel. This has been corrected.
TruCode™ Encoders Need a Units Field for CPT codes
CACTWO-7663 (Enhancement)
A new field has been added to the TruCode™ encoder. A units field will now show at the end of each CPT code line in Outpatient runs. It will default to a count of 1.
CACTWO-7664 (Enhancement)
In TruCode™ encoder, the current modifier button was a circle with a link icon located at the end of the CPT code line. This has been changed to a gray square with a plus sign, and relocated next to the code’s edit button for consistency.

CACTWO-7665 (Enhancement)
Since a right-click print command does not work, a new Print button has been added to the top right of the TruCode™ Standalone page.
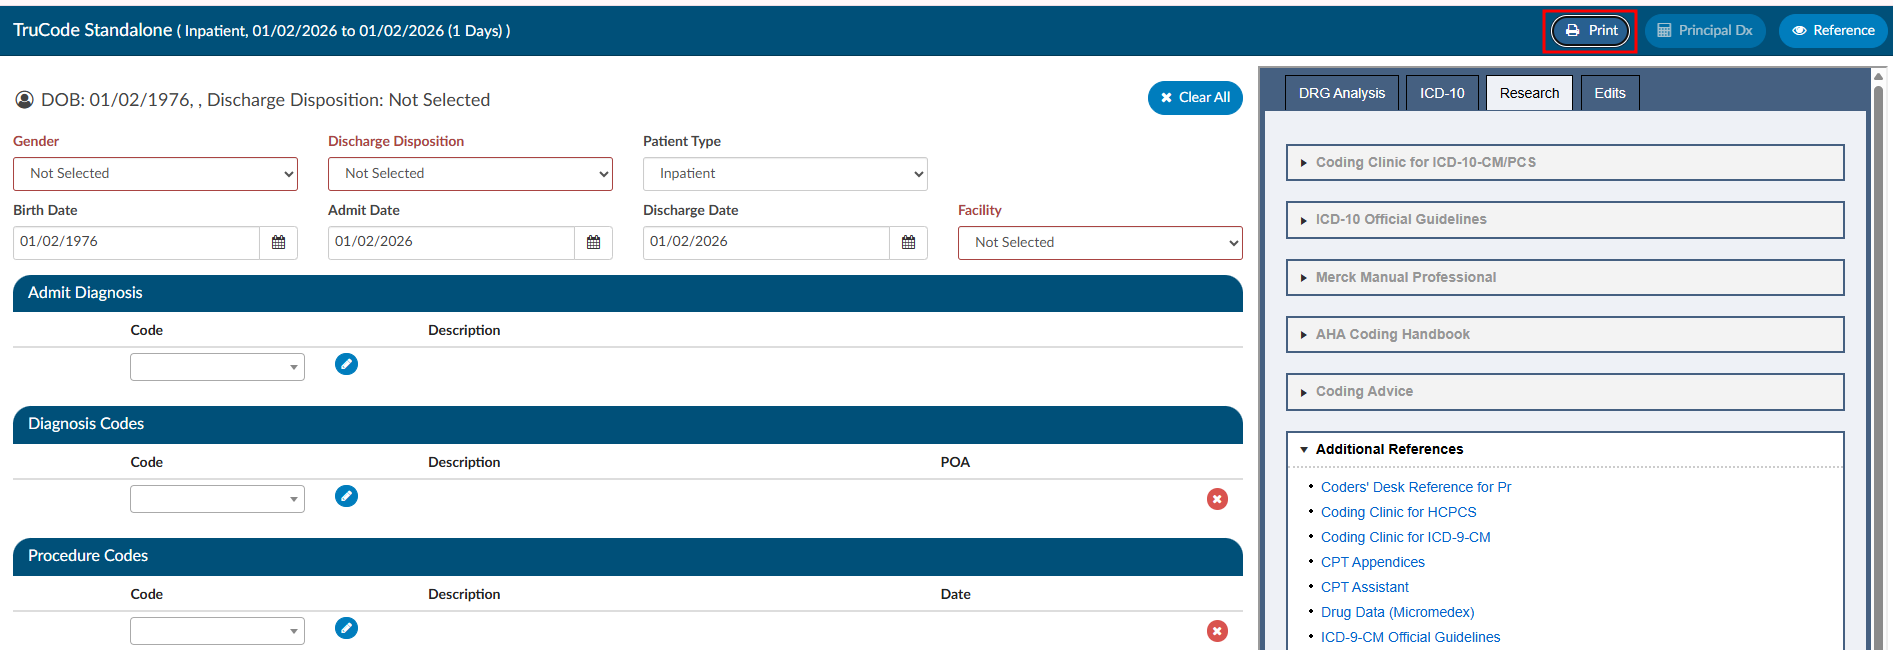
CACTWO-7667 (Important)
When there is an informational warning on the Code Summary page, if the account was subsequently submitted, a warning box is popping asking the user if they want to go ahead with the submission, which should not be happening. This has been corrected.
CACTWO-7669 (Enhancement)
When using the Principal DX Analysis button when computing a TruCode™ DRG, the diagnosis changes, but the DRG has to be recomputed. This has been changed so that if a different diagnosis is selected from the Principal DX Analysis dropdown, the DRG will automatically compute in the banner bar.
Add More Date Options to Audit Workflow
CACTWO-7679 (Enhancement)
When setting time for Audit workflow to run, the days of the 29th, 30th and 31st have been added. If a month occurs that does NOT have the date set (such as setting for the 31st) the month will not run an Audit workflow.
Auditor cannot close audit if account type is changed
CACTWO-7683 (Important)
If an Audit was started and left open on an account that then had its type changed from inpatient to outpatient, when the Auditor went back in to the audit, it was unable to be closed. This has been corrected.
CDI Alert Links to Document not Working
CACTWO-7684 (Important)
If a document was archived (which occurs when a Coder saves or submits a chart), CDI Alert links from the viewer to that document could break because the document was archived. This has been corrected, and the links will now continue to work even after the document is archived.
Drafted Queries are not Being Counted Correctly
CACTWO-7686 (Important)
This release corrects an issue where physician query drafts were not accurately reflected in Account Search results and grid columns. In certain situations, the system was counting sent physician queries instead of physician query drafts, which could cause accounts to appear as having drafts when none existed.
With this update, physician query draft counts and filters now correctly reflect only true draft queries, ensuring accurate Account Search results and reporting.
Please note that this correction is not retroactive. Existing accounts will reflect the updated behavior after the account is re-saved or re-submitted.
Add hierarchical user-to-manager assignments for dashboard and user reports
CACTWO-7689 (Enhancement)
Dashboards and User Reports have been enhanced to better support multi-level management hierarchies. Managers will now see data for:
- Direct reports
- Indirect reports (staff managed by their direct reports)
- Themselves (when applicable)
This ensures Dashboards and User Reports display only data relevant to a manager’s full reporting structure, rather than all users in the system.
Important Behavior Change for Administrators
Previously, Administrators always saw data for all users in dashboards and reports. With this update:
- If an Administrator also has the Manager role and assigned staff, Dashboards and User Reports will only reflect the management hierarchy.
- Administrators who need visibility into all users should not be assigned the Manager role.
Create new Locked in Use Messaging in Accounts
CACTWO-7690 (Enhancement)
If an account is ‘Locked in Use’, beside the message that pops when a second user tries to open that account, there will now be a line in the Summary of User Actions. This line will show an Action of Locked in User, along with the User who has the account locked and their role.

Additional Configuration Required
Please contact Support to enable this feature.
Account Search not finding CDI Alerts in certain cases
CACTWO-7695 (Important)
If a non-CDI Alert Matched Criteria was assigned to an account ahead of CDI Alerts, the Account Search did not display those CDI Alerts in the CDI/Clinical Alerts Drill-Down. This has been corrected.
Changing patient type in TruCode™ Standalone left partial computations
CACTWO-7698 (Important)
When changing a patient type from Outpatient to Inpatient (or vice versa) in the TruCode™ Standalone, the banner bar was not completely clearing during the computation process. This has been corrected.
Audit Workflow is not recognizing role-based criteria
CACTWO-7699 (Important)
When using a role based criteria in a workflow, such as ‘First Coder Roles’, the criteria was not looking at user roles. This has been corrected.
Dates in Specific XLSX Reports are off by one day
CACTWO-7706 (Important)
The latest version of JS Reports handles XLSX in a different way than previous, which caused some report dates to be off by one (1) day when run as an XLSX report. This has been corrected.
The correction ensures that dates shown in XLSX reports now match the dates displayed in the corresponding HTML and PDF versions of the same reports, providing consistent and accurate date values across all formats.
Affected Reports:
Corrects Length-of-stay (LOS) Calculations Across Multiple Reports
CACTWO-7709 (Important)
This update corrects length-of-stay (LOS) calculations in several reports to ensure LOS is calculated consistently and accurately based on the standard formula.
Specifically, this release addresses the following issues:
- Same-day discharges are now correctly calculated with an LOS of 1 day instead of 0.
- Timezone-related discrepancies have been resolved so admit and discharge dates reflect the correct local date, preventing LOS from being under counted when dates fall late in the evening.
- Over counted LOS values have been corrected where reports were previously adding an extra day.
These fixes ensure LOS values are accurate and consistent across affected reports.
Affected Reports:
Error Occurring when Using Queries Drill Down for Account Search Reports
CACTWO-7721 (Important)
If an account has physician queries and impact query data is recorded for any query on the account with the “Impact Queries” viewer, any scheduled account search with the “Queries” drill down that would include that query will produce an error.
With this change, the scheduled account search will no longer error, and the three “Query - Impact” fields (Query - Impact Percent, Query - Impact Dollars or Query - Impact Weight) should be populated.
Audit Subtype is Cleared when Closed Audit is Popped out
CACTWO-7722 (Important)
In a particular instance where a user popped out the Audit Worksheet, then closed the original account page and reopened it, popping the Audit Worksheet back out was resulting in a blank Audit Subtype.
This was occurring with these conditions, which has been corrected:
- In a single browser, log in as an Auditor.
- Load an account with a closed audit (preferably just one audit).
- Click on Audit Management in the main window to examine the audit’s subtypes.
- Click the pop-out button on Audit Management to examine the audit in a separate browser tab. The audit subtype should still be correct. Do NOT drag the tab to a separate window (problem can’t be replicated if you do). Do NOT close the tab (problem can’t be replicated if you do).
- Click back on the main tab and cancel out of the account. Return to the Account List page.
- Reload the same account from Recent Views.
- Click the pop-out button on Audit Management, then click on the second browser tab (which should already be present) to view it. Note that the audit subtype is erroneously blank. You are also able to go back to the main tab and save the account with a blank audit subtype on a closed audit.
Pre-Bill DRG Data is not Being Written on Certain Accounts
CACTWO-7729 (Important)
Discharged inpatient accounts that are submitted for the first time from the v2.60 release with a Working DRG and a Final DRG are not recording a PreReconciledDRG property on the account, when the Working DRG and Final DRG matched, affecting some reports. This has been corrected.
Additional Configuration Required
Please contact Support to check if you need a manual change.
E/M Coding is Retaining E/M Levels when No Charge is Changed
CACTWO-7734 (Important)
If a user initially sets up an E/M Coding worksheet to have a No Charge set as None, they get E/M levels. These show in the Summary at the bottom. If later that No Charge option is changed to any other dropdown, the E/M Level section is being hidden, but is still showing in the Summary. This has been corrected.
‘Select an item’ is Being Saved in Fields that Should be ‘null’
CACTWO-7737 (Important)
If a user selects a dropdown item in a worksheet, then ‘deselects’ it by going back to the top of the dropdown and selecting ‘Select an item’, those words are being saved in the field when it should be saved as ‘null’. This has been corrected.
Add a Refresh Button to the Scheduled Reports page
CACTWO-7752 (Enhancement)
A refresh button has been added to the Scheduled Reports page, and will appear next to the name of the report. Pressing this will update that report page for any changes, and will also update the Run History.
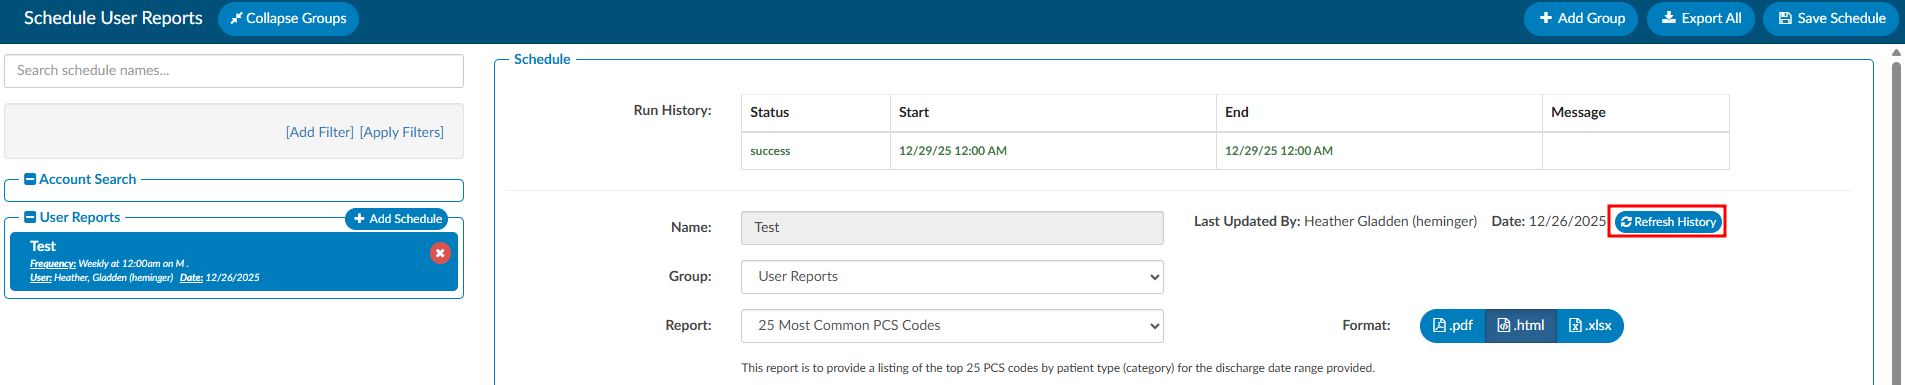
The Audit Abstract Report is Erroring when Using a Filter
CACTWO-7787 (Important)
The Audit Abstract Report errors when filtered by Category and/or Facility. This has been corrected.
CDI Alerts Report Showing no data Under Certain Situations
CACTWO-7788 (Important)
When running the CDI Alerts report, if it was filtered by Catetory/Facility, it resulted in no data being returned. This has been corrected.
Denial Worksheets are Showing Blank
CACTWO-7792 (Important)
An issue was occurring where if a user went back to add data to an old Denial Worksheet, such as an appeal, the sheet was showing with no data unless the user tabbed to another denial and back. This also caused issues with the calendar in the appeal section. Everything has been corrected.
Invalid Codes are Able to be Transferred to Other Accounts
CACTWO-7772 (Important)
When using the Transfer Account Codes option in the Navigation Pane, it is allowing codes that are invalid to be transferred to a newer account. This has been changed. A new red toast message will appear showing the code and stating it is invalid and cannot be transferred.
Open CDI Audits Were not Showing the Correct Color
CACTWO-7796 (Important)
In the Navigation Pane, an open CDI Audit on a multiple audit account should show as red lettered, but it was showing as tan, for an earlier closed audit. This has been corrected.
V2.62 (Apr 2026)
V2.62.9575 Released 04/06/26
The notes below indicate changes and additions to the software. Please review these release notes
carefully when deciding to apply a software update to an installation.
Each note is related to an issue tracking assignment number (starting with CACTWO) in the heading.
Please refer to the change with this tracking assignment number when communicating questions or issues.
The heading also contains a parenthesized "Change Type", indicating the severity or importance of
the change. The severities used are:
- Critical - Recommended that this application be upgraded as soon as possible at all sites
running previous versions.
- Conditionally Critical - Recommended that this application be upgraded as soon as possible at
all sites running previous versions matching the stated conditions.
- Important - Recommended upgrading the application if the customer is experiencing the issue
denoted or currently applying a work-around for a specific non-functional feature.
- Enhancement - Recommended upgrading only if the specific functionality is desired.
New “User Login” Report has Been Created
CACTWO-5478 (Enhancement)
A new report titled “User Login” has been created. This will show the login/logout activity of the user. If an inactivity reason was recorded by the user, then the prior logout will be listed as ‘inactivity’ instead of logout and the inactivity reason will be recorded in its own column. Date range available is 31 days, the report will never show the current day’s activity.
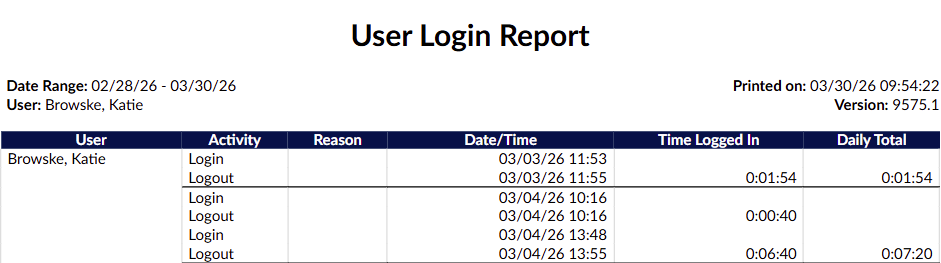
Allow a Secondary Sort in Workflow Management
CACTWO-5569 (Important)
A new enhancement has been added to Workflow Management that allows for a secondary sort order within workflows. When configuring a workflow’s list on the user’s Account List page, items will first be organized by the primary sort, and then further refined using the secondary sort within those results.
Allow Deleted Pending Reasons and Notes to be Viewable
CACTWO-6727 (Enhancement)
A new checkbox has been added to the Code Summary viewer to allow the user to view pending reasons (and any applicable notes) to be seen. A marker number next to the checkbox will show the number of currently deleted pending reasons. When checked, the deleted pending reasons will show beneath the list of active pending reasons, and the red delete button will be grayed out to indicate this is an already deleted pending reason.
The number and checkbox will only display if there were previously deleted pending reasons.

Add the Ability to Collapse Criteria in Workflow Management
CACTWO-6896 (Enhancement)
In a workflow management, a new checkbox has been added under the Criteria Groups heading; Collapse all criteria groups.

When the box is checked, all criteria under that workflow will close, only showing the name of the criteria:
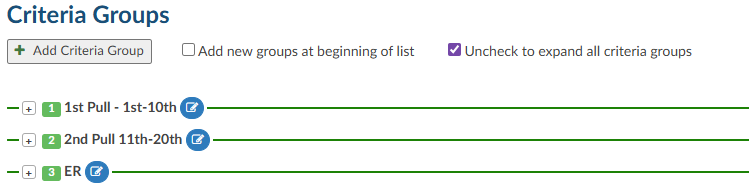
Unchecking the box will reopen all the criteria.
Allow Managers to set Grid Columns to Only be Seen by Manager/Admin
CACTWO-7164 (Enhancement)
Managers can now restrict certain grid columns so they are visible only to users with Manager or Administrator roles.
A new “Managers Only” option has been added in Grid Column Maintenance. When this option is selected for a column, it will be hidden from all users except those assigned a Manager or Administrator role in their User Profile.
For example, if enabled, only users with one of these roles will be able to view the Workgroup column in their grids.
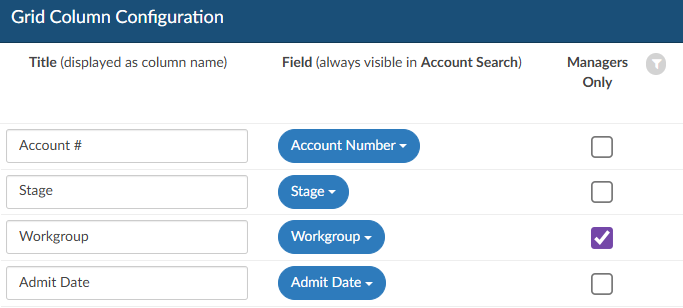
Identify Transferred Codes in the Show History
CACTWO-7240 (Enhancement)
Codes that have been added to an account via the Transfer Account Codes viewer will now have a ‘download’ icon next to them in the Show History viewer. When hovering over the icon, the use will see a statement that indicates which account the codes were transferred from.
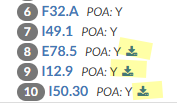
Display HAC Designation in Banner Bar
CACTWO-7344 (Enhancement)
To make an assigned diagnosis code with an HAC designation more noticeable, an HAC text will now appear in the banner bar, similar to a PSI or QI designation. The HAC designation will still appear next to the assigned code in the Assigned tree.
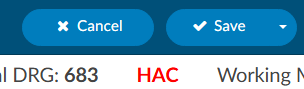
Add Queries Sent Column to CDI Personal Dashboard
CACTWO-7345 (Enhancement)
A new column has been added to the CDI Personal Dashboard’s Personal Stats pane. The column is Queries Sent and will count any physician query created by a CDI Specialist or a CDI Auditor that is not cancelled. All numbers except zero will show drill-down when the number is clicked. This change is retroactive.
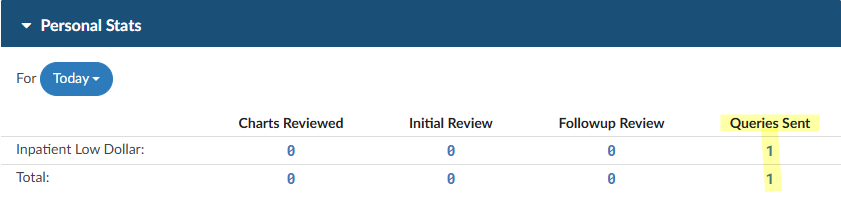
Force Autoload is Receiving Incorrect “No Accounts” Message
CACTWO-7579 (Important)
An issue was identified where using browser navigation controls (such as the Back or Refresh buttons) during Forced Autoload could cause the session to fall out of sync. This sometimes resulted in an incorrect “There are no accounts…” message, even when accounts were still available.
This has been resolved. The system now detects when the Forced Autoload session becomes out of sync due to unexpected actions or network interruptions and will automatically reset and reload accounts in the background. If accounts still cannot be retrieved after retrying, the message will display as expected. This enhancement helps ensure a more consistent workflow and reduces interruptions during Forced Autoload processing.
Add Sorting to “Work Available Queue” Admin Dashboard Panels
CACTWO-7582 (Enhancement)
The three administrative dashboards (Administrative, CDI Management, Audit Management) will now have a sort button at the top of each column under the Work Available Queue heading.

The unsorted buttons will show in blue, and when a sort is put on one of the columns, it will turn green and show which sort it is, ascending or descending. In this case, the Workgroup Name column is sorted in Ascending order. The sort will flow through to all three administrative dashboards, and will remain in place during the session. Once logout occurs, the sort will clear.
Add Default Create Time (descending) Sorting Within Notes and Bookmarks
CACTWO-7585 (Enhancement)
If a user changes the sort to a different column or order withing Notes and Bookmarks, that preference will persist while navigating between accounts. Upon logging out or restarting Fusion CAC, the sort will reset to the default Create Time (descending) setting.
A new “Change Auditor” Option has Been Added to Editable Audits
CACTWO-7625 (Enhancement)
When accessed, a selection dialog will display available auditors based on the audit type. This change was made for both Coding Audits and CDI Audits. The ability of an auditor (or cdi auditor) to change the auditor of record has been added to the Audit (and CDI Audit) worksheet. When the button is clicked the dropdown list of users that have the audit role will be displayed. In either audit type a new button will appear, similar to the one for changing the coder (or CDI) of record:


AG-Grid had Been Updated to the Latest Version
CACTWO-7636 (Enhancement)

AG-Grid has been updated and have several new abilities to be aware of:
- The ‘hamburger’ symbol is replaced by a right click menu and the filter icon now handles filtering only.
- Improved filter search allows users to locate values by searching any part of the text, not just the first word.
- The Reset button in the right click menu will reset the entire grid back to match how Grid Column Maintenance is set, so use with caution.
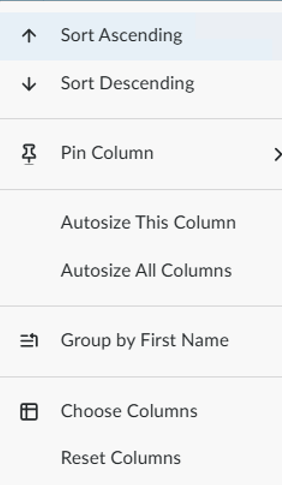
On the right hand side of the viewer, there is now a Columns and a Filters grid.

Clicking on Columns allows you to select and deselect columns, plus group rows at the bottom of the list which can be dragged and dropped:
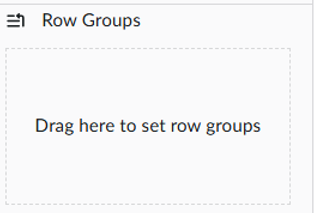
With the Filters option, as you filter, those will be added here, so that you can see all your filters at once. You can also add a filter here:
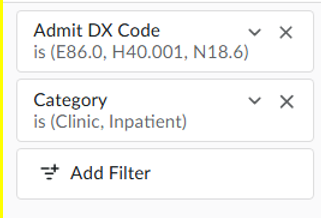
Enable Time Zone Entry for Specific Reports
CACTWO-7637 (Enhancement)
A new mapping called ‘Timezone’, will allow for timezone entry on 4 reports: User Audit Trail, User Detail, User Login Report and User Session Log. This will be helpful for clients who have coders that work across time zones.
Additional Configuration Required
Please contact Support to enable this feature.
Add Modifier Column to Outpatient Coder Scorecard Report
CACTWO-7641 (Enhancement)
A new column has been added to the Outpatient Coder Scorecard report; CPT Modifier Count. This is the total number of modifiers involved in the audit of an outpatient account. This is a retroactive change.
Add HCC to Outpatient Shift Reasons
CACTWO-7647 (Enhancement)
‘HCC’ has been added to the shift reason dialog for outpatient physician queries.
Retain Minimized Encoder when Editing an Assigned Code
CACTWO-7651 (Enhancement)
If the Code Editor is minimized when editing an assigned code, it will not close if the user moves to other areas of an account’s detail. But if the code is edited from the document or document code list, the editor will be closed if the user moves to another document.
Allow Custom Roles to Populate the Change Dropdown in Audits
CACTWO-7708 (Enhancement)
Custom Roles can be created that will be seen in the ‘Change Coder of Record’ dropdown in an Audit, and the ‘Change CDI of Record’ dropdown in a CDI Audit.
For “Coder of Record” in Audit Management, in addition to users with the role of “Coder” or “Auditors”, users with roles enabled with the following privileges are now included:
- Audit accounts as an Auditor
- Edit accounts as a Coder
- Edit accounts as a Single Path Coder
For “CDI Specialist of Record” in CDI Audit Management, in addition to users with the role of “CDI Specialist” or “CDI Auditor,” users with roles enabled with the following privileges are now included:
- Audit accounts as a CDI Auditor
- Edit accounts as a CDI Specialist
Add Pending Reasons to the User Audit Trail Report
CACTWO-7710 (Enhancement)
The User Audit Trail will now show two additional message lines; a line for if a pending reason was added, and a line for is a pending reason has been deleted.

Add CDI Query Count to CDI Management Dashboard
CACTWO-7716 (Enhancement)
Two new lines of data have been added to the CDI Management dashboard under the CDI Summary pane; CDI Queries Sent Today, and CDI Queries Sent in Last 7 Days. These will also have a drill-down leading to detailed pages for those statistics.

CACTWO-7756 (Enhancement)
A plus sign has been added to the left of the codes in the DRG Reconciliation Viewer to allow for easy additions to the Working DRG and Final DRG.
Add new Field of “Pending Reason Date Added (First)”
CACTWO-7758 (Enhancement)
A new field has been added to Grid Maintenance, ‘Pending Reason Date Added (First)’. This will also show as a choice in the Account Search and Workflow Criteria dropdowns.
Increase Amount of Accounts Account Search can List
CACTWO-7763 (Enhancement)
In Account Search, there will no longer be a page restriction for the amount of accounts that can show on one page. All accounts will now be seen on the first page, and they will be streamed into Account Search, allowing for thousands of accounts before memory is compromised.
Make User Management Work the Same as Account Search Detail
CACTWO-7769 (Enhancement)
User Management has been updated to work similarly to how Account Search detail returns work.
- If a user is being edited, once it is saved or cancelled, the return to the Management screen will highlight and focus on that user.
- If using the ‘Add’ button to add a user, when the user is saved, the return back to the Management screen will highlight and be focused on that new user.
- If the copy button is used on an already existing user, once the copy (or copies) are saved, the return to the Management screen will highlight and be focused on the last new user created from the copy.
- If the copy button is used and the copy is cancelled, not saved, the return to the Management screen will highlight and be focused on the user that was being copied.
Change Dashboard to not Show ‘5,000+’ as Total
CACTWO-7771 (Enhancement)
The Work Available Queue on the Dashboard shows any total over 5000 as 5000+. This has been changed to show the exact number of accounts.
The Validation Management Display and CSV Export have been Updated
CACTWO-7800 and 7801 (Enhancement)
For consistency within Fusion, the Validation Management page has been updated to look and act like the Workflow Management and Scheduled Reports pages. The functionality of adding, deleting, editing and copying all remain the same. The csv report has also been updated for better usability.
Allow Submitted Accounts to Remain in Submitted Status to Audit
CACTWO-7813 (Enhancement)
When using Save and Route to send a submitted account directly to an Auditor or an Audit workgroup, the account will now remain in Submitted (Stage A).
Previously, routing a submitted account to a user or workgroup would automatically change its stage to QA Review (Stage Q), as the system assumed the account was being sent for updates and resubmission. With this update, routing through Save and Route to an audit destination is recognized as an audit-only action, so the account status will no longer change unnecessarily.
Add Fields to Validation Management for Denials
CACTWO-7819 (Enhancement)
In Validation Management, when using the ‘for each’ option and selecting Denials from the list, a list of Denial options will be opened to complete the validation rule.
Add Column to the CDI Alerts Impact Report
CACTWO-7820 (Enhancement)
A new column, ‘Query Template’ has been added to the CDI Alert Impact Report, and it appears to the left of the Account Number column. The Date range of the report has also been updated to pull from the Admit Date, not the Query Created Date.

Add Column to the Query Impact Report
CACTWO-7822 (Enhancement)
When the Query Impact Report or Query Impact Report by Discharge Date is exported as an XLSX file, a ‘Query For’ column will show next to the Query Template. This new column will NOT show if a Query For has not been recorded.
Add Drill Down for E/M Charges in Account Search
CACTWO-7823 (Enhancement)
A new drill down for E/M Charges has been added to the Account Search page, which will include columns associated with the charges field in an E/M worksheet.
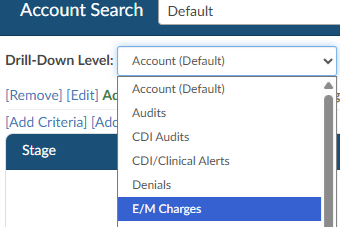
Add new Columns to Inpatient and Outpatient Coder Scorecards
CACTWO-7833 (Enhancement)
Two new columns have been added to the Inpatient and Outpatient Coder Scorecard reports. These come directly after the account column and are called D/C Disp Change and D/C Disp Accuracy rate. This change is retroactive.
Error Occurring when Running the Outpatient Coder Scorecard
CACTWO-7835 (Important)
An error occurred when running the Inpatient or Outpatient Coder Scorecard reports if an auditor performed several audits with the same audit type and recorded large amounts of text in Training Recommendations. This has been corrected.
Create Hover Over to Active Alerts Name Column
CACTWO-7836 (Enhancement)
The Active Alerts Name column will now have a hover over so that the user can see the full list of alerts when the field in that column ends in ellipsis.
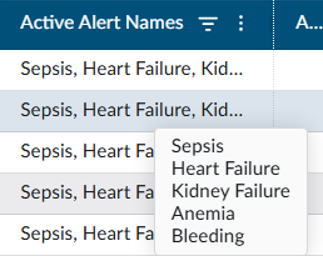
Make the Archived Documents Symbols Easier to see
CACTWO-7840 (Enhancement)
The eye symbol that appears on the Documents panel header to alert the user to an archived document will now have a black background to make it more noticeable.
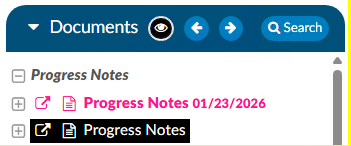
Add new Column to the Query Drill Down in Account Search
CACTWO-7842 (Enhancement)
A new column of Queries Created by Role column will now appear when Queries is selected as the Drill-Down Level in Account Search.
Add ‘Loading’ Bubbles to Calendar View
CACTWO-7843 (Enhancement)
In the case of a very large return on a Calender View day, users were unable to tell if the request was working or not, since it took a long time for the page to load. To remedy that, three pulsing dots, or bubbles, have been added to the screen to show that the screen is in the process of loading.
Change Orientation on the CDI Query Score Card Reports
CACTWO-7854 (Enhancement)
The CDI Query Score Card and CDI Query Score Card by Admission Month reports will now show in Letter (Portrait) mode for PDF, rather than Landscape (Legal) mode.
Correct Calculation of Oldest D/C Date in Work Available Queue Panel
CACTWO-7855 (Important)
Today’s date was showing as the Oldest Discharge Date in the Dashboard Work Available panel if an account did not have a discharge date. The Oldest Populated discharge date will now appear for each Work Available Queue even if there are blank discharge dates within that queue.
Quantity Resetting to Zero in E/M Viewer
CACTWO-7870 (Important)
In the instance of a soft CT code being assigned to a document on an E/M account, if the user then went into the E/M viewer and added a quantity of 1 to the “Charges for Assigned CPT Codes”, the 1 was not being retained upon saving the account. This has been corrected.
Inpatient Coder Scorecard is not Displaying Audit DRGs
CACTWO-7886 (Important)
The Pre-Audit and Post-Audit DRG columns in the report are showing as blank. This has been corrected so that the columns are now populated with the correct DRGs. This fix is retroactive.
CACTWO-7888 (Enhancement)
When a user adds a code comment, their name should appear in the Commented By column of the Notes and Bookmarks viewer if a secondary user opens and either clicks cancels or OK without adding text. It was being replaced by the secondary user. This has been updated so that the Commented By ID is only changed if a secondary user actually adds more data to the comment.
Create new Report Coding TAT per Patient Type
CACTWO-7892 (Enhancement)
This new report was created for a coding management view to show work entering and completing for the selected Discharge Date range. It includes incoming and completed volume, remaining backlog, and average turnaround times. This report needs at least a minimum of one category selected and can only use a maximum of a 31-day range.
Workgroups are Skipped During the Second Round for Forced Autoload
CACTWO-7900 (Important)
Forced Autoload now properly follows a round-robin order when assigning work across multiple workgroups.
Previously, if all assigned workgroups had limits, the system could stop assigning work as expected after the first pass.
With this update, once all workgroup limits are reached, the system will reset the limits and continue assigning work in order, ensuring a consistent and balanced distribution across workgroups.
The Plus Sign in the Final DRG Viewer is not Working Properly
CACTWO-7901 (Important)
If the plus sign on an already assigned code is clicked in a Final DRG viewer, the code was being removed which is not correct functionality. Clicking a plus sign should not remove a code; this has been corrected.
Create a Privilege for Creating and Editing E/M Configuration
CACTWO-7902 (Enhancement)
A new privilege has been added to Role Management called ‘Create/Edit E/M Configuration. If given to a role, it will add the ER E/M Configuration page to the Tools menu.
Allow Assigned Codes Tree to Show SOI and ROM Numbers
CACTWO-7909 (Enhancement)
As long as there is an APR-DRG on an account, the Assigned codes tree will now show code-level SOI and ROM numbers divided by a slash in a blue box next to the code. Hovering over that will give the descriptors; in the first example of this list the hover over would say SOI 2 / ROM 1.
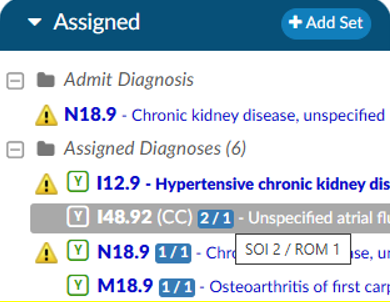
Change how the E/M Page Determines Critical Care Date
CACTWO-7913 (Enhancement)
Currently the Critical Care date on the E/M viewer is defaulting to today’s date. This has been changed to default to the date of the E/M page, which is the Admit date.
Stop Users from Being able to add a Duplicate Worksheet to an Account
CACTWO-7914 (Enhancement)
In order to stop a worksheet from being added multiple times to an account, a new checkbox has been added in Worksheet Designer. When checked, once that worksheet has been added to an account, it will then appear in italics in the worksheet dropdown and will be unable to be selected. Worksheets that have the checkbox left blank will be able to be added multiple times.


Allow Images to be Pasted into the Rebuttal Areas of Audits
CACTWO-7915 (Enhancement)
Currently, the rebuttal comment section of the Audit Worksheet and CDI Audit Worksheet only support text. This has been updated so that images can be pasted into the field.
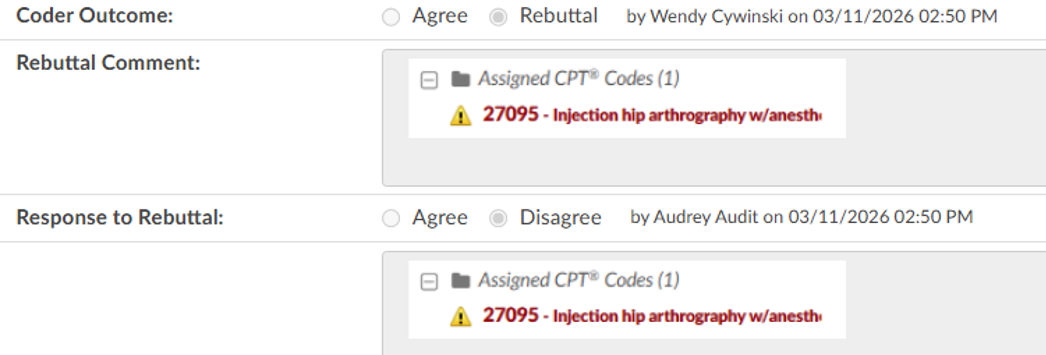
Secondary Cardiac Dysrhythmia with POA Y was not Excluding PSI 10
CACTWO-7920 (Important)
When a secondary cardiac dysrhythmia code with POA N is on an account with other criteria that will create a PSI 10 designation, and the POA on that code is later changed to a Y, the PSI 10 designation should be removed, but is not. This has been corrected.
Allow Browser tab to Display Personalized Setting
CACTWO-7921 (Enhancement)
A setting that allows the browser tab to display personal text in the browser tab has been modified to show that text first, before the Fusion CAC wording, like this:
Users already having this setting will see the change, users that do not currently have this setting can contact Support to have it enabled.
Physician Queries were Allowed to be Changed on Locked in use Accounts
CACTWO-7924 (Important)
If an account was locked in use, the second user that opened it was still able to make changes to queries, assigned physicians, etc, just as if the account was not locked. This has been corrected. No changes can be made on a locked account.
Coder Should be Unable to add Codes in CDI History when Locked
CACTWO-7926 (Important)
If an account is locked and a coder clicks on a plus sign in the CDI History worksheet, the code can be added. Account cannot be saved, but the coder should still not be able to do this. The plus sign has now been removed from locked accounts.
Split a Current Privilege in Role Management into two Privileges
CACTWO-7930 (Enhancement)
Currently, in Role Management there is a single privilege ‘Exclude Saves From First Coder, Next Review, Ownership, and Workflow updates’. This has been split out into 2 privileges for better exclusion work:
- Exclude Saves from First Coder, Next Review, and Ownership
- Exclude Saves from Triggering Workflow
Do not Allow all Codes Editor and Code Editor to be Open Together
CACTWO-7931 (Important)
When the Code editor was opened and minimized, the All Codes editor could still be opened, which is not correct. Now, the user will see a blue toast message over the red ‘restore’ bar that a code editor is already open.
Stop Multiple Instances of Validation Rule from Showing
CACTWO-7933 (Enhancement)
If a Validation Rule was a ‘for each’ CPT code, and an account had several instances that matched that, the Validation Rule would be listed for each time in the Code Summary. A new checkbox for ‘Display Distinct Rules Only’ has been added for the ‘for each’ type fo rule, which will then only allow 1 instance of the rule to show for each distinct result. In the below example, if an account had 3 instances of CPT 44100, the rule would previously show 3 times in the Code Summary. With the new checkbox it will now only show once.

Change DRG Display on Pre/Post Queries
CACTWO-7935 (Enhancement)
Physician Queries will now display the billing grouper within inpatient physician queries if “BillingGrouper” is configured. The continued default is for inpatient physician queries to display the primary grouper.
Forced Autoload Users are Being Given out of Order Accounts
CACTWO-7941 (Important)
In the event of very large loads in the assigned workgroups, because it is taken extra time to load the next account, if a user clicks on a Pending account and it opens, the assigned workgroups can lose their work order. The three blinking dots symbol has been added to Dashboard to indicate the system is working, and this will prevent any user from clicking on a pending account or Load Next Account during that action.
Autoload Dashboard is not Dropping Down Lists from Pending Accounts
CACTWO-7945 (Important)
If a Forced Autoload user has the Coder Scorecard on their dashboard, then if they did a drop down from the ag-grid on their Pending Accounts (hamburger icon in the right of each column) , the dropdown was appearing under the Coder Scorecard banner bar, causing part of the list to be unviewable. This has been corrected.
Default the ER E/m Date to the Account’s Admit Date
CACTWO-7947 (Enhancement)
When opening the E/M Management viewer for the first time on an account, the ER E/M date will now default to the account‘s Admit Date.
Audit Workflow is mot Triggering for Charts
CACTWO-7968 (Important)
If an Audit Workflow uses criteria involving a type of user’s role and uses a grouping that includes the same type of user, the workflow was not triggering. As an example if a criteria included “First Submitter Roles” and the grouping included “First Submitter User Id” an exception in the MongoDB would occur. This has been corrected.
Auditor Worksheets are not Automatically Being Applied
CACTWO-7974 (Important)
If an Auditor Worksheet was marked for Auto-Add from within worksheet designer, it was not being added when an account was opened. This has been corrected.
The User Detail Report is not Allowing a Full Month of Data to be Pulled
CACTWO-7980 (Important)
The maximum days set on the User Detail Report is 30…this causes an issue when running a report that runs between a 31 day month and a 30. The maximum has been changed to 31 days and the description has been updated.
In Workflow Management, the Audit Workflow is not Running
CACTWO-7980 (Important)
In Workflow Management, when working with an Audit workflow’s scheduling, the ‘restrict’ field was allowing alpha entry when it should only have accepted numeric entry. This caused the workflow to not run. The ‘restrict’ field has been changed to a drop down field for selection to prevent this issue.
Scorecard Reports not Showing Properly in XLSX
CACTWO-8000 (Important)
The Inpatient and Outpatient Coder Scorecard reports were showing extended characters, like ellipsis or bullet points, as symbols when the reports were run in XLSX. This has been corrected.
Unable to Delete Physicians Using “Edit Procedure Codes”
CACTWO-8002 (Important)
On the Assigned code tree, right clicking on PCS or CPT codes and selecting ‘Edit Procedure Code’ from the list was allowing the user to delete the physician assigned, but when clicking save the physician was re-applied. This has been corrected so that if the ‘x’ is used to remove the physician, saving was saving the deletion.
CACTWO-8008 (Important)
It was confirmed that if a filter summary exceeded one line in length, the lower scroll bar would be unviewable. This has been corrected.
CACTWO-8058 (Important)
When Account Search is using the Queries dropdown, the Shift Reason Comments column was always blank. This column is now properly populated if the query has a shift reason comment.
V2.63 (Jul 2026)
V2.63.9680 Released 07/06/26
The notes below indicate changes and additions to the software. Please review these release notes
carefully when deciding to apply a software update to an installation.
Each note is related to an issue tracking assignment number (starting with CACTWO) in the heading.
Please refer to the change with this tracking assignment number when communicating questions or issues.
The heading also contains a parenthesized "Change Type", indicating the severity or importance of
the change. The severities used are:
- Critical - Recommended that this application be upgraded as soon as possible at all sites
running previous versions.
- Conditionally Critical - Recommended that this application be upgraded as soon as possible at
all sites running previous versions matching the stated conditions.
- Important - Recommended upgrading the application if the customer is experiencing the issue
denoted or currently applying a work-around for a specific non-functional feature.
- Enhancement - Recommended upgrading only if the specific functionality is desired.
CACTWO-6029 (Enhancement)
Comment bubbles have been added next to each input field in the Audit Management viewer and the CDI Audit Management viewer. This allows auditors to add a comment alongside any individual input to provide context or explanation for a value entered or changed. The comment bubbles function the same way as the existing comment bubbles on codes; they display as a standard icon when empty and turn red when a comment has been added. This gives auditors a consistent and familiar way to annotate their work throughout the entire audit record.

CACTWO-6049 (Enhancement)
An “X” clear button has been added to the end of each filter input box in Workflow Management. Clicking the X will immediately clear the contents of that field, allowing users to quickly reset a filter without having to manually select and delete the text. This restores functionality that was previously available in the classic workflow view.

Redesign the Worksheet and Query Template pages
CACTWO-6142 (Important)
The Worksheet Designer and Query Designer pages have been redesigned to match the look and feel of other administrative pages in the application. Previously, these pages had inconsistent styling, an unnecessary filters section, and a hide left column toggle that would obscure the navigation panel. With this update, the pages now present worksheet and query groups in a fixed, logical order with the left panel always visible.
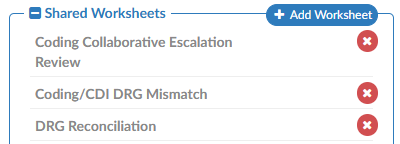
Restrict Worksheet Creation by Role
CACTWO-6151 (Enhancement)
A new Roles field has been added to CDI, Coding, and Shared worksheets in Worksheet Designer. When one or more roles are assigned to a worksheet, only users who have at least one of those roles assigned to their profile will be able to add that worksheet to an account. Users without a matching role will not see the option to add the worksheet, though they will still be able to view worksheets that have already been added. This role restriction is based on the full list of roles assigned to a user’s profile, not just the role they are currently signed in under. The Roles field does not apply to Documentation Review or Physician Query templates and will not appear for those template types.

Assign Audit Training Topics by Account Type
CACTWO-6582 (Enhancement)
A new Account Type column has been added to the AuditTrainingTopics mapping in Mappings Configuration. This allows administrators to specify whether each audit training topic is available for all accounts, inpatient accounts only, or outpatient accounts only. When an auditor is working on an inpatient account, only training topics designated for all accounts or inpatient accounts will appear as selectable options, and likewise for outpatient accounts. This feature applies to Audit Management only and is not implemented in CDI Audit Management, as CDI audits are exclusively applied to inpatient accounts.

CDI Alerts Link Now Displays Active Alert Count in Bold Red
CACTWO-6943 (Enhancement)
The CDI Alerts and Clinical Alerts links in the account navigation tree will now display in bold red with a count of active alerts when any active alerts are present on the account. This behavior mirrors how open queries are indicated in the navigation tree.
The count and red bold formatting will persist regardless of whether the viewer has been opened, and will only revert to standard black text once all active alerts have been closed or auto-resolved. If no alerts have ever existed on the account, the link will continue to not appear in the navigation tree, consistent with existing behavior.

Display Creator Name and Date on Scheduled Reports
CACTWO-6999 (Enhancement)
The Scheduled User Reports page and Account Search schedules will now record and display the name of the user who originally created a scheduled report, along with the date it was created. This information appears below the report in the list beneath the Frequency field. If the report is subsequently edited and saved, a “Last Updated By” user and date will also be displayed. The creator information will not change when a report is modified by another user, preserving the original author’s identity. Please note this change is not retroactive; only reports created after this update will display the “Created By” stamp; previously existing scheduled reports will not show this information.
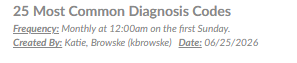
Add Query Shift Reason Codes Column to Query Drilldown
CACTWO-7531 (Enhancement)
A new column called “Query - Shift Reason Codes” has been added to the Query drill-down in Account Search.
This column displays a comma-separated, alphabetically sorted list of all codes selected in either the Before Query or After Query section of the Shift Reason dialog when a query is closed.
The column is also supported in scheduled account search reports, allowing users to include it when scheduling and distributing Account Search results.
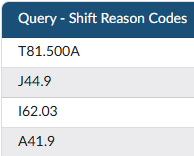
Add Modifier Support to ER E&M CDM Table Import
CACTWO-7764 (Enhancement)
The Edit CDM Table within E/M Configuration now supports modifiers as part of the CDM import process. When importing the CDM table, modifiers should immediately follow the CPT code with no space (for example, “30903RT”).

A new Modifier column has been added to the CDM table, which is populated automatically when performing a Reset to import the spreadsheet, or can be entered manually.
When a coder assigns a CPT code in the E/M Viewer that matches a CDM entry with a modifier, the modifier will automatically be applied to the charge. This allows sites that use hard-coded modifiers such as RT or LT on specific charges to have those modifiers carried forward without requiring coders to add them manually.

Add CDI/Clinical Alert Fields as Searchable Criteria
CACTWO-7824 (Enhancement)
Six new CDI/Clinical Alert fields have been added as searchable criteria in Account Search, allowing users to filter accounts based on alert-level data. The new fields available are: Alert Name, Alert Subtitle, Alert Category, Alert Outcome, Alert Other Outcome, and Alert Query Template. Because multiple alerts can exist on a single account, these fields are string-based and search across all alerts associated with the account.
CPT Codes Now Optional for Additional Charges
CACTWO-7837 (Enhancement)
The CPT Code field for “Additional Charges” in E/M Management has been made optional. Previously, a CPT Code was required to save an Additional Charge entry, which presented a challenge for sites that use charges without an associated CPT Code.
The CDM field remains mandatory for all Additional Charges, and CPT Codes continue to be required for all other E/M charge types. When an Additional Charge without a CPT Code is added to an account from the E/M Viewer, it will be added to the E/M Summary normally without generating an error.
Modifier from Assigned CPT Code Now Applies When Matching CDM Entry
CACTWO-7858 (Enhancement)
When a coder assigns a CPT code to the code tree that is attributed to the ER and matches a charge in the E/M Viewer CDM table, any modifier on the assigned CPT code will now be used to locate the appropriate CDM entry and automatically applied to the charge.
Previously, only the CPT code was used for matching and modifiers were ignored, resulting in the modifier not carrying over into the E/M page. If the CPT code matches a CDM entry but the modifiers do not align, a warning will be displayed. Note that modifiers present on the assigned CPT code take precedence over modifiers defined in E/M Configuration via the Edit CDM Table feature.
Add Configurable “Other” Section to CDI Audits
CACTWO-7865 (Enhancement)
CDI Audits can now be extended with a configurable Other section, allowing organizations to include additional audit questions for evolving review areas such as CDI alerts, reconciliation, workflow compliance, or other site-specific processes. This provides the flexibility to expand audit criteria without requiring product changes.
The feature is enabled by creating a CdiAuditOtherQuestions mapping in Mappings Configuration. Each mapping entry becomes a question in the Other section when a CDI Audit is started, with response options of Criteria Met, Education Opportunity, and Not Applicable. Responses automatically contribute to Other Opportunities and Other Errors where applicable, and the results are available in the CDI Audit drill-down within Account Search for reporting and analysis.
Additional Configuration Required
Please contact Support to enable this feature.
Add Modifier Support to Options Charges
CACTWO-7893 (Enhancement)
A new Modifiers column has been added to the Options section of E/M Management, allowing administrators to configure modifiers for each charge listed there.
Modifiers are optional, but when populated on a charge in E/M Configuration, they will automatically carry over to the E/M Viewer when that charge is used on an account. Configured modifiers are displayed as comma-separated text on each charge row, with an “Edit Modifiers” button that opens the standard modifier editing dialog. For Additional Charges, the Modifiers field will only be available when a CPT Code is also present on the charge.
Reporting - Coder Activity Reports Now Use Account’s Current Category
CACTWO-7918 (Enhancement)
The Coder Activity Report and Coder Detailed Activity Report have been updated to reflect an account’s current category, facility, and (for the Coder Activity Report) hospital service, rather than the category that was in effect at the time of the activity.
This change benefits sites where an account’s category can change after a chart is submitted, such as when a coder’s productivity calculations rely on the category being up to date. Filtering by Category, Facility, and Hospital Service on these reports now uses the account’s present-day values as well. Totals are unaffected by this change; only the breakdown of activity by category may shift to reflect each account’s current classification.
CACTWO-7946 (Enhancement)
The E/M Viewer will now remember the scroll position for each account during a session. Previously, navigating away from the E/M Viewer and returning to it would reset the view to the top of the page, requiring the user to scroll back down to their previous location.
The scroll position is now retained per account for the duration of the session. If a different account is loaded, the E/M Viewer will reset to the top for that account. Once the user exits the application entirely, scroll positions are cleared for all accounts.
Add Mass Unassign and Assign Visit Support for Diagnosis Codes
CACTWO-7951 (Enhancement)
The Mass Edit dialog has been updated to support the “Unassign Diagnosis Code” and “Assign as Visit” actions when multiple codes are selected using the checkboxes or the “All” checkbox.
Previously, these actions only applied to the individual code on which the action was taken, rather than all selected codes. Users can now unassign diagnosis codes in bulk, or assign multiple codes as Visit reason (up to the maximum of 3). If more than 3 codes are selected for the Assign as Visit action, no codes will be assigned and a warning message will be displayed, preventing a partial or unintended assignment.
Coder Scorecard Blank for Users with Facility Restrictions
CACTWO-7976 (Important)
For coders whose user profiles included facility constraints, the Coder Scorecard on the Coder Personal Dashboard was always displaying blank, even when qualifying audits had been closed within the current or prior calendar month.
The query has been corrected so that the Coder Scorecard now displays audit data filtered to only the facilities the coder is authorized to access. This fix is retroactive and applies to existing audits.
Create a CDI Query SOI Impact per Month Report
CACTWO-7978 (Enhancement)
A new “CDI Query SOI Impact per Month” report was requested to help CDI leadership evaluate monthly query performance and its effect on patient Severity of Illness (SOI) metrics.
This new report provides CDI teams with a monthly view of query activity and the resulting impact on patient SOI for submitted inpatient accounts. It tracks accounts where a CDI Specialist established a Baseline APR-DRG and a Coder’s Final APR-DRG reflected a higher SOI, allowing teams to monitor documentation improvement trends and measure the effectiveness of their query practices.
Users can filter results by either Admit Date or Discharge Date, with a maximum range of 12 months. When exported to Excel, the report includes four tabs; a cover sheet, a details tab, a summary, and a bar chart visualization; while PDF and HTML exports display the summary only.
Role Management now supports View Only permissions for Audit and CDI Audit Management
CACTWO-7981 (Enhancement)
Previously, there was no way to provide users with read-only access to audits. Any user with auditor permissions could modify audit data, making it difficult for managers, supervisors, and other stakeholders to review audits without the risk of unintentionally changing information.
To address this, two new privileges have been added to the Chart – Editing section of Role Management:
- Only View Audits as an Auditor [HG21.1]
- Only View CDI Audits as a CDI Auditor
When either of these permissions is enabled, the corresponding audit viewer becomes fully read-only. Users can review audit information but cannot edit any fields, including stopwatches. If a role is assigned both edit and view-only permissions, the view-only permission takes precedence, ensuring the audit remains read-only.

Highlight Row Yellow When a Value is Changed
CACTWO-7991 (Enhancement)
Rows in the E/M Viewer will now be highlighted in yellow when any value on that row is modified.
This makes it easier for coders to quickly identify which lines have been updated within the viewer. The highlight is triggered by a change to any control on the row, including quantity, duration, date, or notes.
Modifiers are excluded from triggering the highlight, as they may be automatically applied via E/M Configuration. The highlight applies to all charge types displayed in the E/M Viewer, including Medications and Additional Charges.
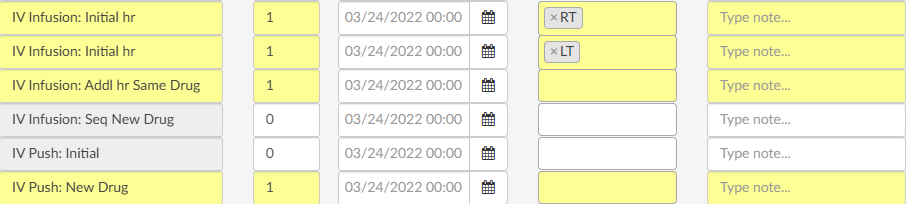
Increase Bookmark Icon Size
CACTWO-7994 (Enhancement)
The bookmark indicator icon in the Account Detail document viewer has been increased to 20px in size to improve visibility.
Users were having difficulty spotting bookmarks while skimming through documents. The color and icon style remain unchanged; only the size has been enlarged. Note that this change may slightly increase the spacing between lines of text where a bookmark is present.

Encoder now Blocks DRG/APC Computation for Facilities not Explicitly Licensed in the Medicare Provider Number Mapping
CACTWO-7997 (Enhancement)
For sites using multiple facility licensing with GPCS, if a facility was not listed in the MedicareProviderNumber mapping, the encoder would silently fall back to using the default customer ID, allowing unlicensed facilities to use another facility’s license.
With this update, if a facility is not explicitly listed in the MedicareProviderNumber mapping, users will receive an error message stating the facility is not licensed to use the feature when attempting to compute DRG or APC.
This change ensures that encoder computations are restricted to only those facilities with an explicit license, while the Code Book and TruCode edits window remain unaffected as they do not require a Medicare Provider Number.
Mapping Configuration now tracks and displays a history of changes
CACTWO-8015 (Enhancement)
The Mapping Configuration page previously provided no way to see what had changed within a mapping category, making it difficult to diagnose issues caused by inadvertent configuration changes.
When a mapping was altered incorrectly, administrators had no record of what was changed, by whom, or when - requiring manual investigation to identify and resolve the problem.
With this update, a “Show History” button now appears in the upper right corner of any mapping that has been modified. Clicking it opens a dialog displaying a before-and-after comparison of all changes made to that mapping, listed in reverse date order. Additions are highlighted in green, deletions in red, and changes in yellow, making it easy to quickly identify exactly what was modified and when.


Create a Configurable Document Background Display
CACTWO-8035 (Enhancement)
Users reported difficulty reading documents due to the grey background, prompting a request for a high-contrast white background option. This change adds a per-user right-click menu option in the Coder Application to toggle document backgrounds between default grey and high-contrast white. The setting persists across sessions for each individual user.
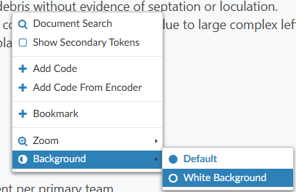
Account Search now includes Remaining Impact Dollars, Percent, and Weight fields from the Impact Viewer
CACTWO-8038 (Enhancement)
Account Search) previously had no way to report on unassigned CDI query impact, when the impact viewer was used to assign impact per query, making it difficult for teams to identify charts where impact had not yet been fully allocated.
Three new fields, Remaining Impact Dollars, Remaining Impact Percent, and Remaining Impact Weight, have been added to Account Search and Workflow. These fields are updated whenever a CDI Specialist or CDI Auditor closes a physician query, and reflect the outstanding impact as shown in the Impact Queries viewer.
A Remaining Impact Percent greater than zero indicates there is still impact to be assigned on an account. Note that these fields are not retroactive and will only populate for accounts updated after this change.
Audit Management no Longer Displays Redundant Values
CACTWO-8054 (Enhancement)
In Audit Management, when custom abstractions were enabled for a field that had a mapping configured, both the friendly value and the interface value were displayed even when they were identical, resulting in unnecessary and confusing duplication.
With this update, the interface value is now suppressed when it matches the friendly value, so only one value is shown. When the two values differ, both continue to display as before. This change applies retroactively to all existing audits without requiring them to be resaved.
Sort Order Resets After Page Refresh
CACTWO-8084 (Important)
Sorting a column in Account Search was lost whenever the page was refreshed, causing users to lose their place. The fix ensures that column sort and filter settings are preserved when clicking Refresh. Note that changing the filter or drill-down will still intentionally clear the sort.
Server Error When Auto-Saved Account No Longer Exists
CACTWO-8085 (Important)
If an account was auto-saved due to inactivity, and while the user was logged out, the account was deleted by an interface message, the user should be able to log back in without issue. This has been fixed.
Validation Rules Causing Infinite Loop
CACTWO-8097 (Important)
In the Validation Editor, a validation rule configured with both a criterion that checks for pending reasons (such as “Pending Reason Does Not Exist”) and a pending reason set to be automatically added by that same rule could cause an infinite loop, locking up the browser when an account was loaded.
This occurred because the rule would trigger itself repeatedly; adding the pending reason, then re-evaluating it, then adding it again. The fix prevents this loop by excluding a rule’s own auto-added pending reason from its own criterion evaluation.
CACTWO-8104 (Important)
In System Search, clicking the up or down arrow on a numeric date criteria field caused the number to spin rapidly and continuously in the selected direction, with no way to stop it other than clicking outside the field.
This made it impossible to use the arrows to set a precise value. The issue was isolated to System Search, as Account Search and Workflow were not affected. The arrows now increment and decrement the value as expected, advancing one step per click and stopping when the mouse button is released.
CACTWO-8107 (Enhancement)
When a document was popped out and the window was reduced in size, the Print button could shift down and overlap the document action bar, rendering the Add Codes, Encoder, and Start/Stop buttons un-clickable.
The issue was intermittent and depended on the length of the document title, which affected how much the window could be resized before the Print button was displaced. The navbar control for the popped-out document page has been updated to prevent wrapping, so the Print button now remains anchored in its position in the document header regardless of window size, keeping all action bar controls accessible.
Add Optional Time Entry for Date Fields to ER E/M Viewer
CACTWO-8109 (Enhancement)
A new site configuration option has been added to enable time entry in the ER E/M Viewer. When enabled, a time attribute will appear alongside the date fields in the Emergency Room E/M section, the Options section, and the Summary section.
This feature is off by default so that existing sites will experience no change to their current workflow. Sites that require time entry for billing purposes can have a new setting activated by Support. When the setting is disabled, the standard date picker with the single-day increment buttons remains in place as before.
Additional Configuration Required
Please contact Support to enable this feature.
Document Type Numbers Displaying Incorrectly
CACTWO-8121 (Important)
In Document Types Management, document type group numbers were incorrectly displaying as “Invalid Number”, even when valid values existed in the database.
This was a display-only issue, and the fix corrected the code to ensure group numbers render correctly.
Update the Code Set Management Page
CACTWO-8128 (Enhancement)
The Code Set Management page was the last admin page in the application still using the original layout, creating an inconsistent user experience.
The page was redesigned to match the modern style used by other admin pages throughout the application, bringing it into visual and functional consistency with the rest of the admin interface.
Account Search does not Retain Applied Filters or Sorts
CACTWO-8132 (Important)
When filters or sorting were applied in Account Search and a user opened a record via “View Account Detail,” returning to the search results would reset the view to the full unfiltered list, forcing the user to reapply their search criteria.
The fix changed how Account Detail records load; rather than navigating away from Account Search, the record now loads within the Account Search page itself, hiding the grid while the record is open and restoring it upon exit. This eliminates the need for a page refresh and preserves all previously applied sorts and filters.
The Impact Viewer loops indefinitely and never loads
CACTWO-8133 (Important)
When a CDI Specialist attempted to open the Impact Viewer for the first time on an account with completed, non-cancelled queries, the viewer would continuously load without ever rendering results.
The fix resolved the issue, restoring the Impact Viewer to load correctly under these conditions.
Collaboration chat Added to Grid Column Configuration, Role Management, and Mapping Configuration pages
CACTWO-8160 (Enhancement)
Several admin pages were missing the collaboration chat functionality that was already available on other pages in the application.
Chat rooms have been added to the Grid Column Configuration, Role Management, and Mapping Configuration pages. Each of these pages has its own dedicated chat room, separate from those shared by other admin pages, allowing teams to collaborate directly within the context of those specific configuration areas.
Physicians Could not be Edited or Deleted in the Transactions Viewer
CACTWO-8161 (Important)
In the Transactions Viewer, users were unable to edit or delete a physician on an existing transaction; changes appeared to save but the original physician remained, with no update occurring in the database.
This issue affected only the Transactions Viewer (not the Charges Viewer) and only when editing or deleting an existing physician, not when adding one for the first time. The fix restored the ability to edit and delete physicians in the Transactions Viewer, and an additional display issue where a deleted physician was not visually removed from the viewer was also corrected.
Deleting a Note in Notes & Bookmarks did not Refresh the Display
CACTWO-8175 (Important)
When a user deleted a note, the Notes & Bookmarks viewer did not update right away; the note appeared to remain until the user navigated away from the screen, making it seem as though the deletion had not worked.
The fix corrected the viewer to refresh immediately upon deletion, so the note is removed from the display as soon as it is deleted.
Account Searches Using Query Date/Time Filters Caused Extreme Slowness
CACTWO-8197 (Important)
When an Account Search included a filter on Query Created Date/Time or Query Closed Date/Time, the date filter was not being applied to the database query, causing the search to scan every account in the database rather than limiting results to the specified date range.
This resulted in extremely slow search performance, with some queries taking nearly 47 minutes to complete. The fix corrected how these date filters are applied during account search execution, ensuring they properly narrow the result set and significantly improve performance.
Copy Row Commands Now Respect Active Column Filters[
CACTWO-8189 (Enhancement)
The “Copy Row as Table” and “Copy Row as Text” functions in the Flowsheet viewer have been updated to only include values from columns that are currently visible.
Previously, these copy commands would include the entire row’s data regardless of any date range filters or hidden columns applied by the user, requiring manual cleanup after pasting. The behavior now matches that of the existing “Copy Row to CDI Alert” function, ensuring consistency across all three copy commands. This is particularly beneficial for long-stay patient encounters where Flowsheet rows may contain extensive historical data and users only need to copy a targeted subset of values for a specific timeframe.
TruBridge MUE Edits not Displaying in the Standalone Encoder
CACTWO-8202 (Important)
The Standalone Encoder was not displaying MUE edits, while the same codes entered in Account Detail would show them correctly.
The cause was that the Units field for CPT procedures was not being passed to TruBridge when running the Standalone Encoder. The fix corrected this so that CPT code units are now properly sent to TruBridge, and MUE edits display as expected.
Account Search Group rows Missing Total Charges Subtotals
CACTWO-8203 (Important)
When accounts in Account Search were grouped by a column, the grouping rows previously displayed a subtotal of Total Charges for the accounts within each group.
This functionality was lost due to changes made to the Account Search page. The fix restored the Total Charges subtotal on grouping rows, which displays whenever the Total Charges column is visible in the grid and is hidden when the column is unchecked.
Denial Management Root Causes Field was Clearing due to a Validation rule
CACTWO-8204 (Important)
When a validation rule using “For Each” was enabled on the Root Causes field of a denial worksheet, the field would not populate previously saved root causes when navigating to the worksheet, and any changes made would be cleared when navigating away and back.
Additionally, the multi-select input intermittently allowed only one value at a time, and on save the Root Causes array in the database was being cleared entirely. The fix corrected the interaction between the For Each validation rule and the Root Causes multi-select field, restoring proper display, editing, and saving behavior.
Document Types Management Displayed Engine Handling Incorrectly
CACTWO-8207 (Important)
In Document Types Management, the Engine Handling configuration was being displayed at the document group row level, even though this setting is only configurable and applicable at the individual document level.
This was a display-only issue; Engine Handling is not used by the application at the group level. The fix corrected the display so that group rows now show only the Group Name and Group Order, removing the misleading Engine Handling values from the grouped row view.
Black Border Appearing Around Focused Links in Chrome and Edge Browsers
CACTWO-8210 (Enhancement)
A black border began appearing around links when clicked or focused in Chrome and Edge browsers, most noticeably around workflow groups in Workflow Management and suggested codes in the document viewer, reducing readability by overlapping the text.
The fix updated the application’s CSS to suppress the unwanted focus border, restoring the previous clean appearance across all pages of the application.
Workgroup Selector Breaks when Workgroup is Removed from User Profile
CACTWO-8216 (Important)
An error was corrected where the Account List workgroup selector would stop functioning properly if the currently selected workgroup was removed from the user’s profile while still active.
This caused the selector to appear truncated, the removed workgroup to remain displayed with no accounts loading, and in some cases the loading indicator would spin endlessly. The Account List will now automatically fall back to the “You” queue when a workgroup is removed from the user’s profile, and the removed workgroup will no longer appear in the selector.
Destination Account Banner Displays Incorrect Patient Type
CACTWO-8224 (Important)
A bug was corrected in the Transfer Account Codes viewer where the banner bar was displaying the Patient Type of the source account rather than the destination account.
This caused confusion when combining accounts of different types, such as merging an ER account into an Inpatient account. Additionally, minor formatting issues in the viewer have been resolved, including the “Room” field not appearing in bold and the “Bed” field displaying as a dash instead of the correct value.
CACTWO-8227 (Important)
An error was corrected with the “Edit Group Name” right-click context menu option in Document Types Management. The option had stopped applying name changes to individual documents that did not already have a group assigned, and was instead behaving inconsistently when reassigning groups.
The functionality has been restored so that right-clicking on a Document Type Group and choosing “Edit Group Name” updates the name for all document types within that group, while right-clicking on an individual document type and choosing the same option updates only that document type’s group, regardless of whether it previously had a group assigned.
Newly Added Grid Columns Auto-Adding to Saved Searches
CACTWO-8293 (Important)
An error was corrected where new fields added through Grid Column Maintenance were automatically being appended to previously saved Account Search filters. New columns added in Grid Column Maintenance will continue to be added to the end of the “Default” account search, but will no longer be automatically added to any other previously saved searches.
Note that this problem does not occur with scheduled account searches delivered by email from Jsreport.


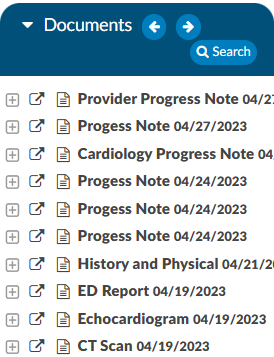


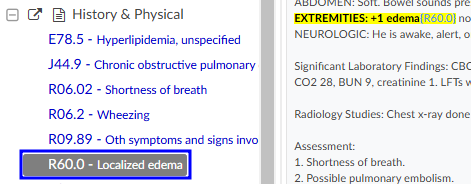
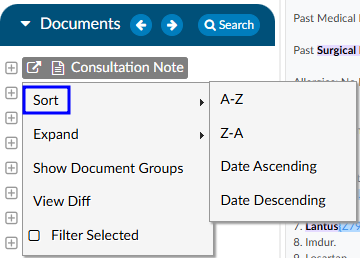


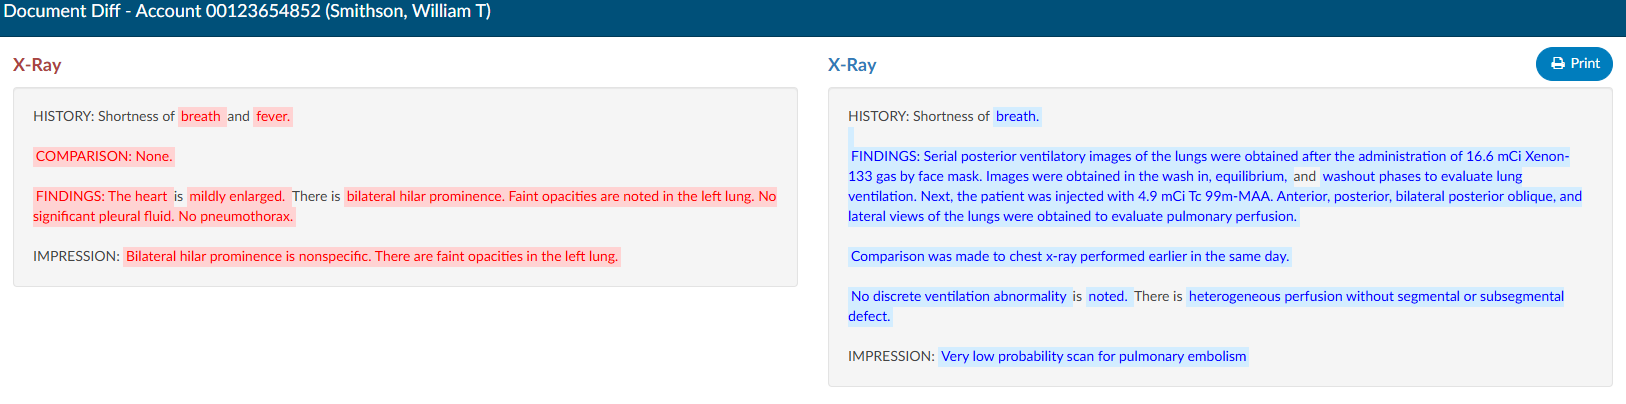

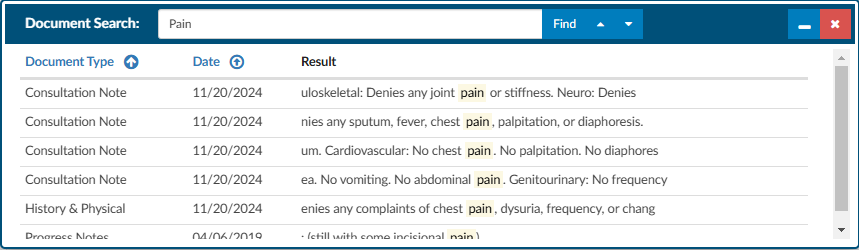


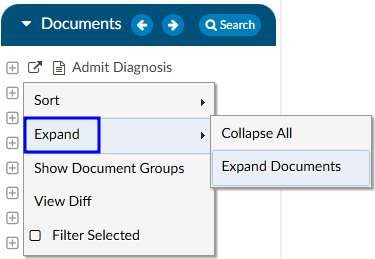

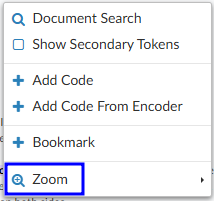
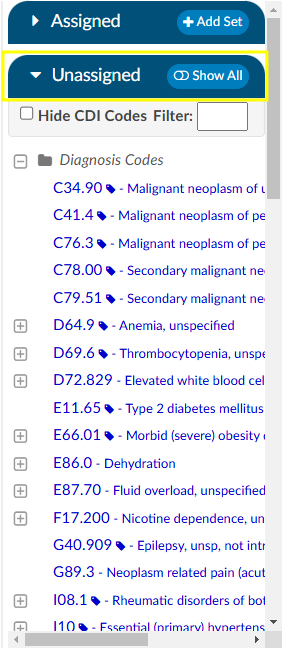


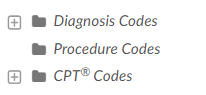


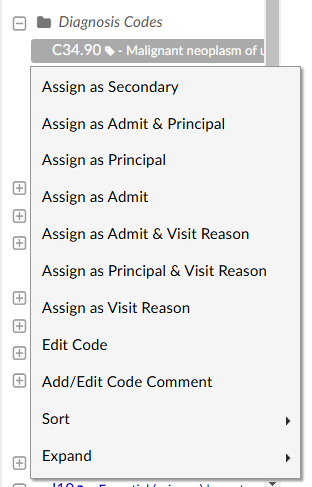


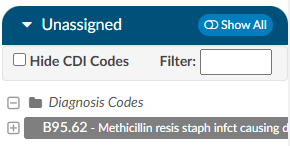
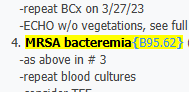


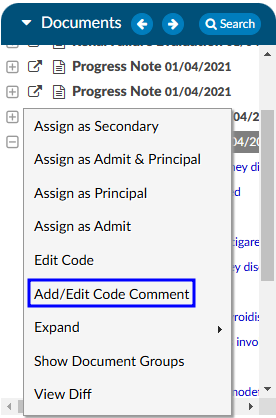


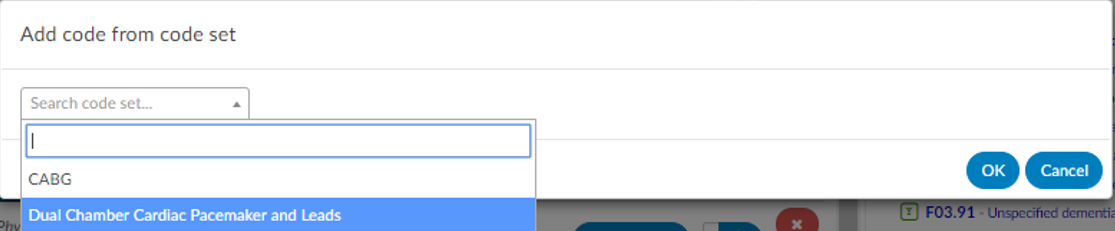

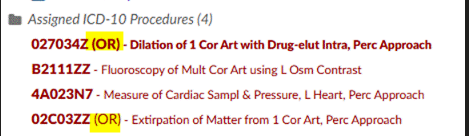


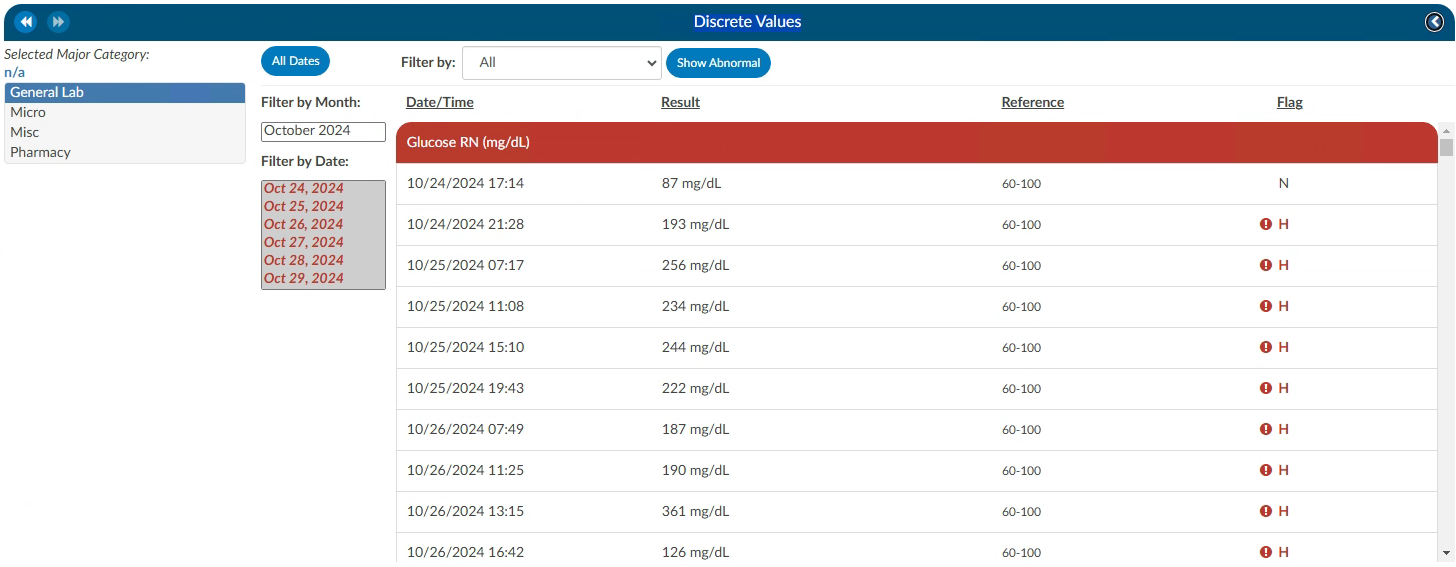


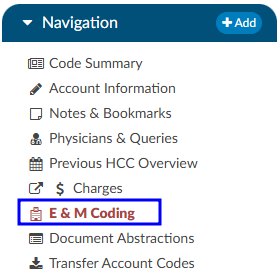

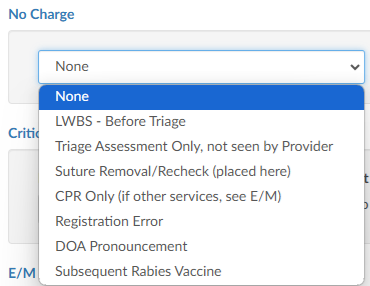


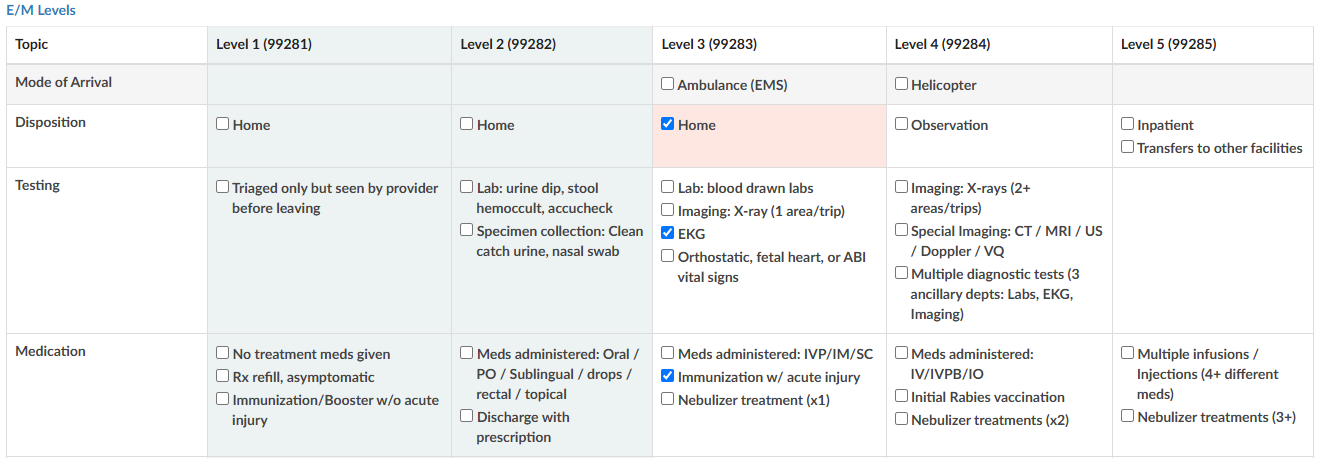
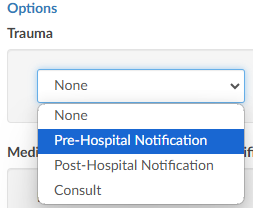


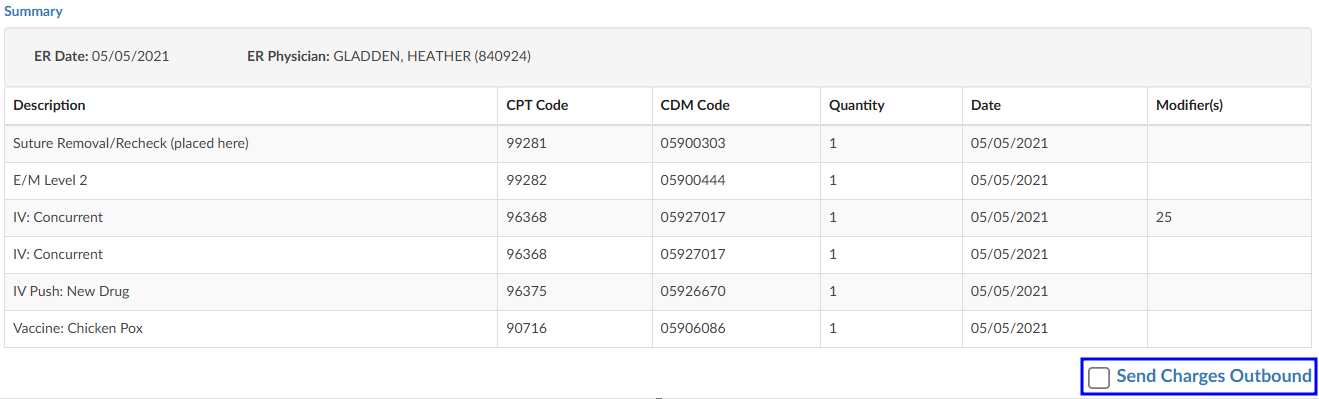


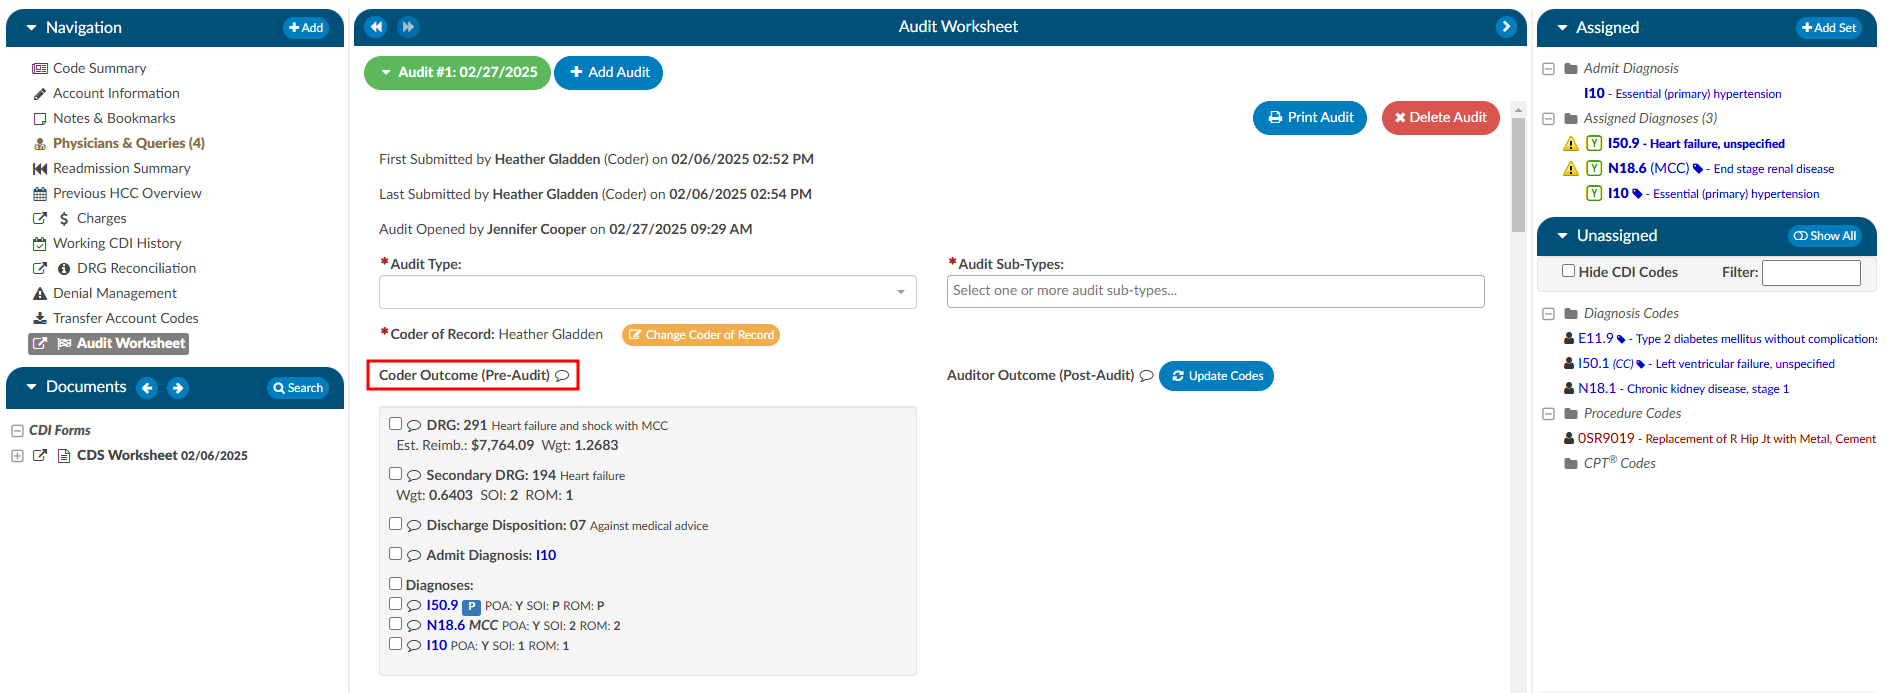

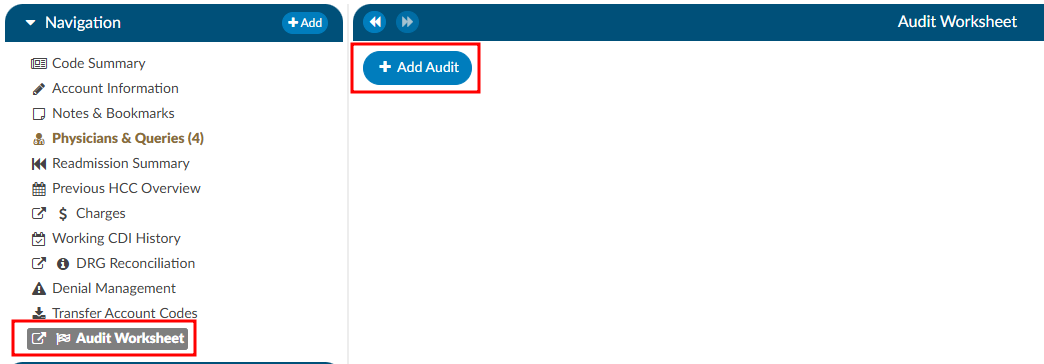
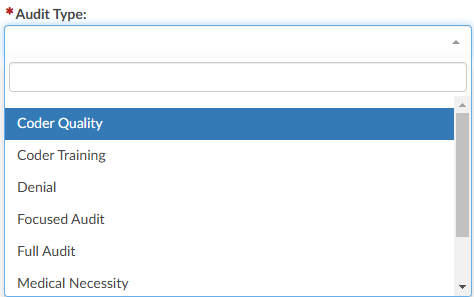


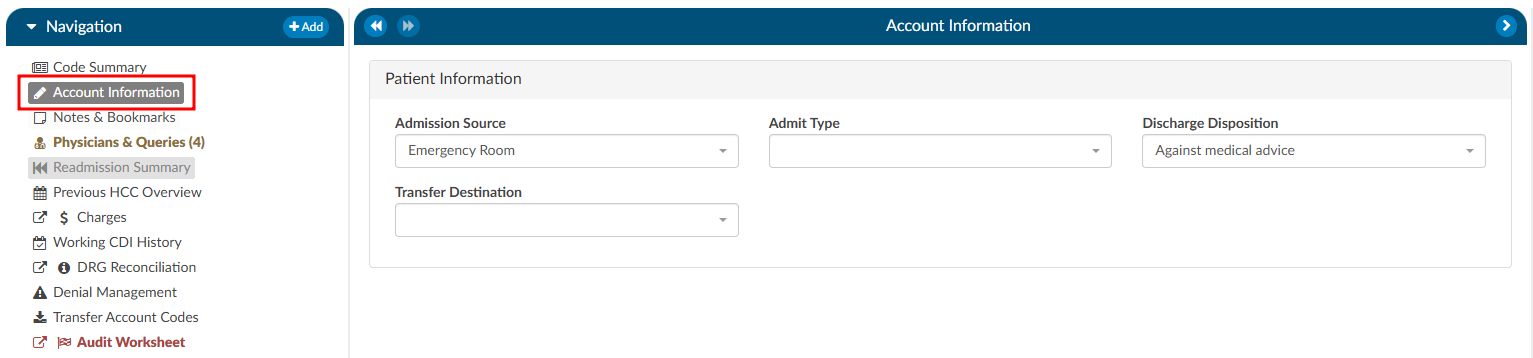
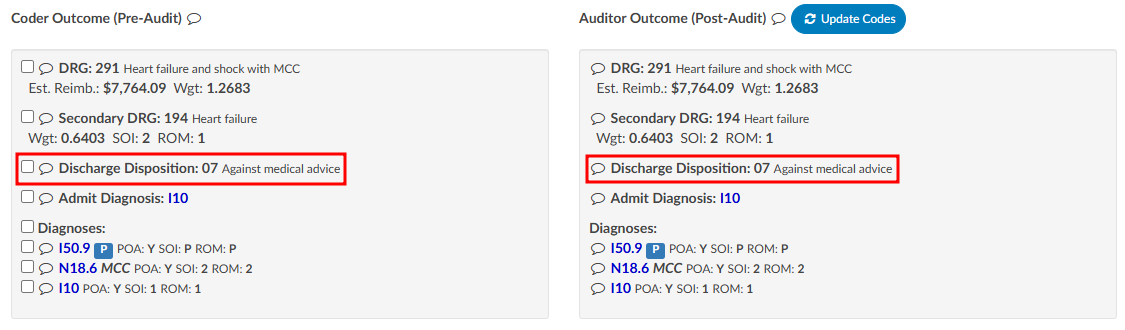
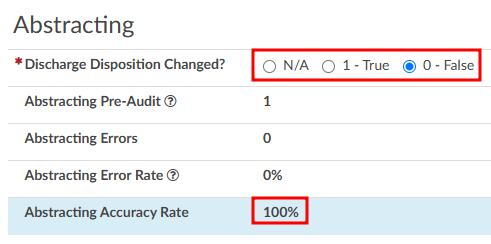
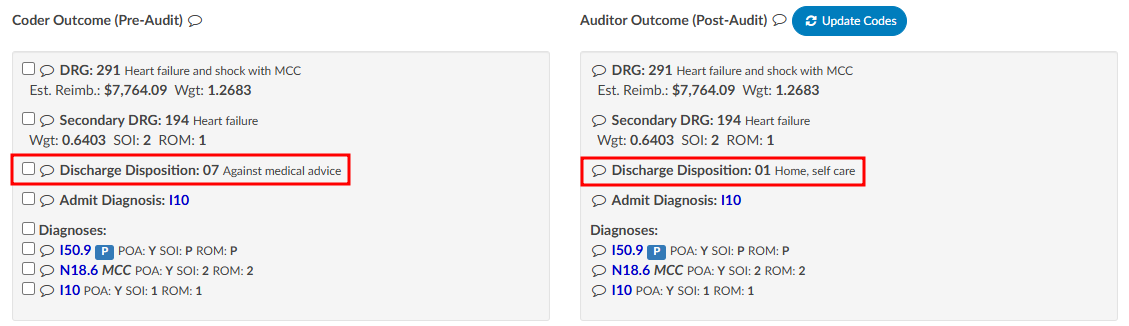
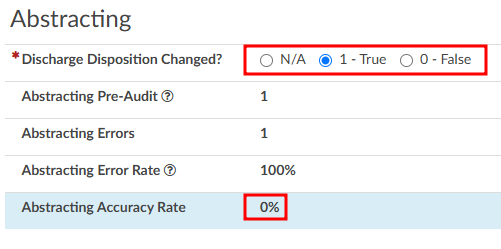
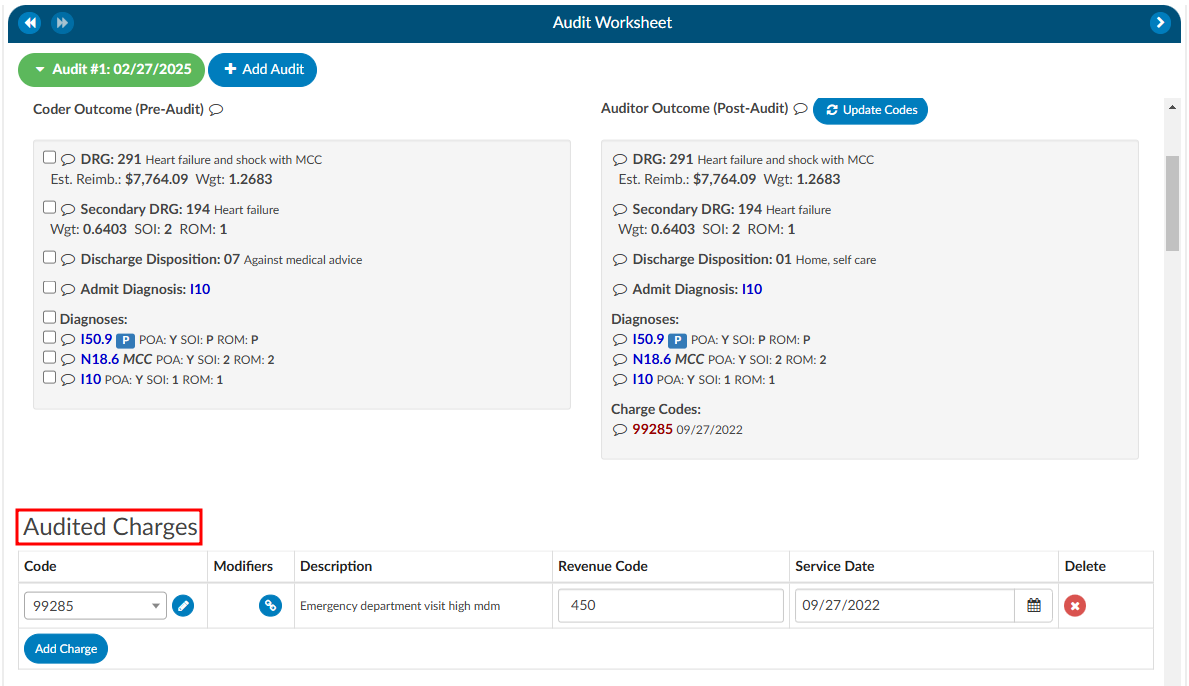
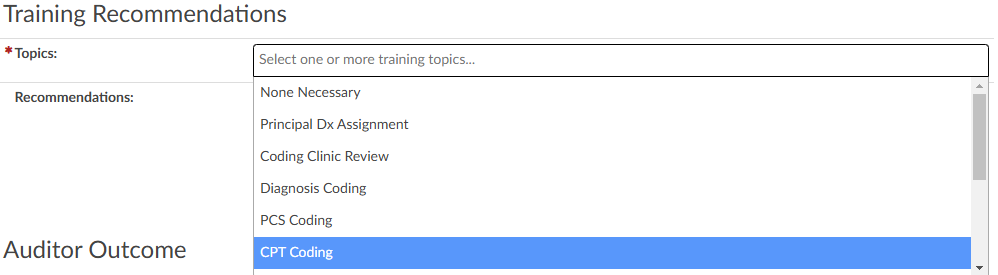


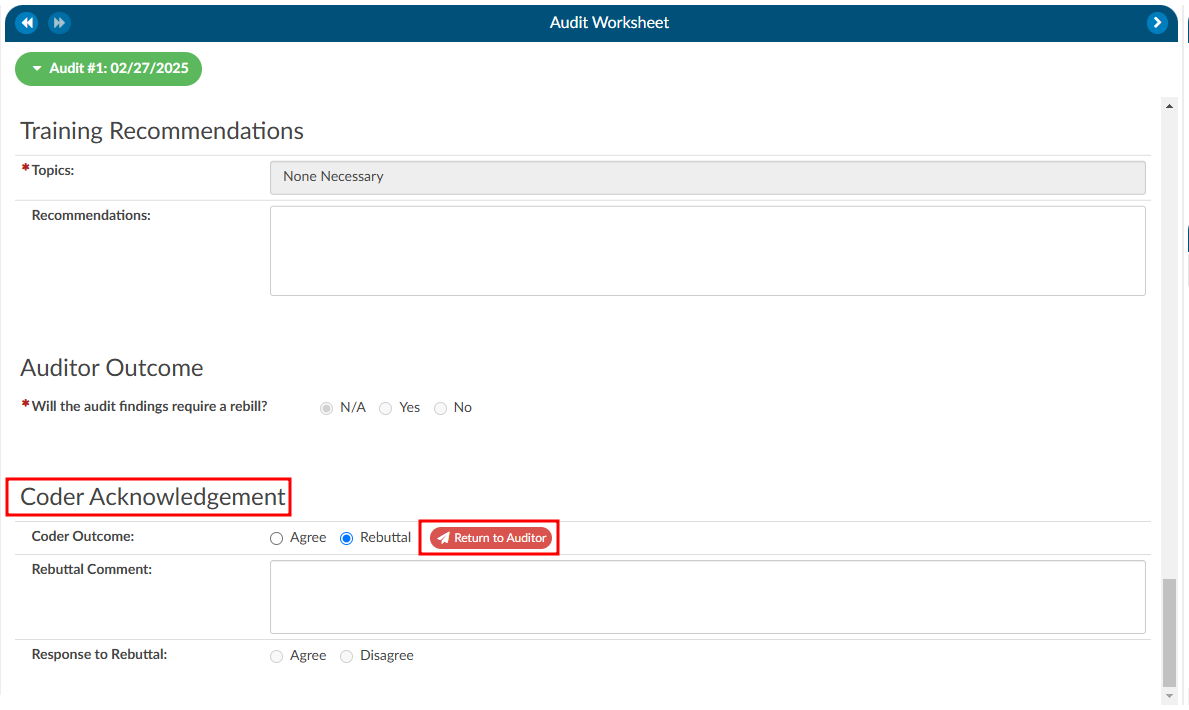
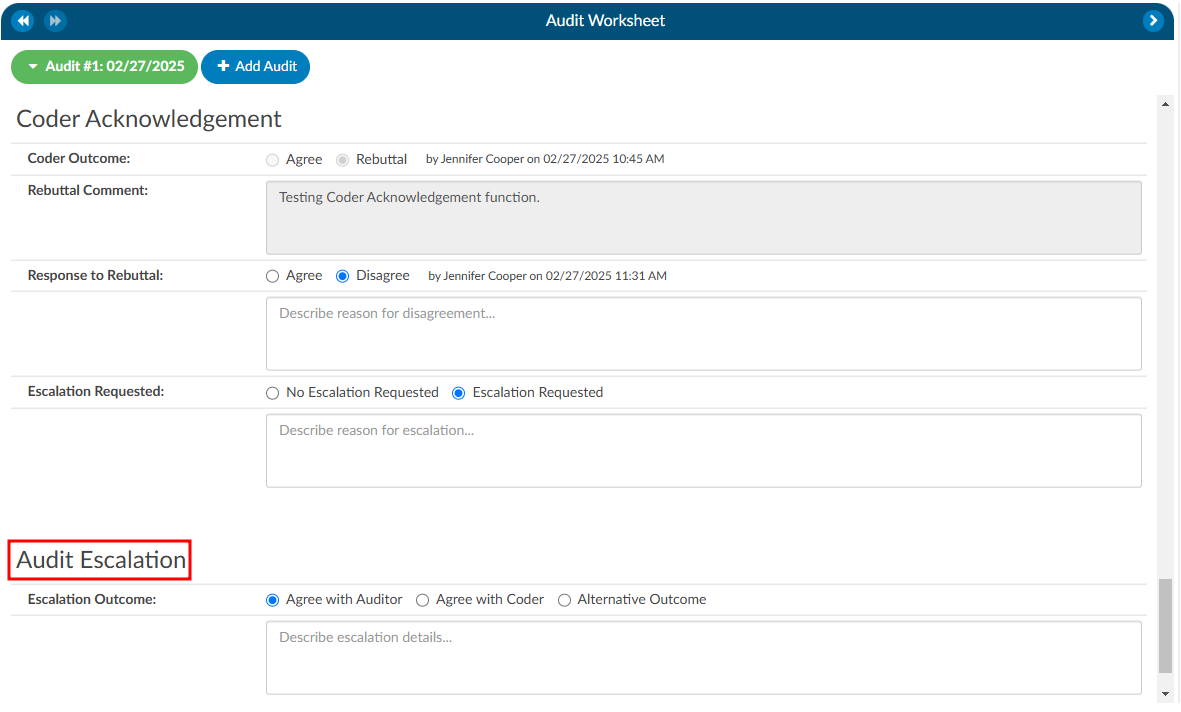


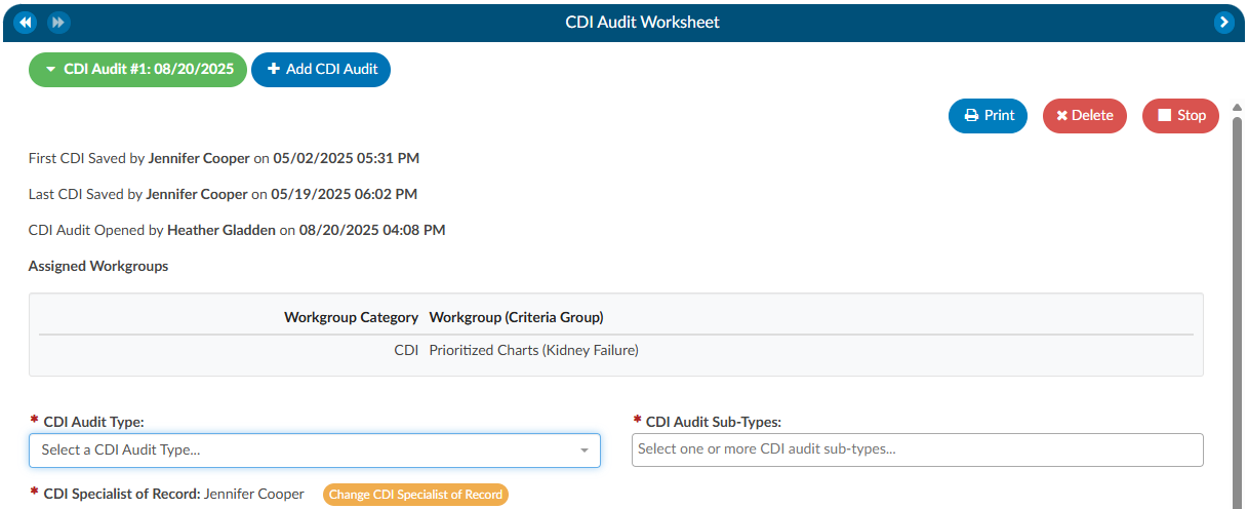
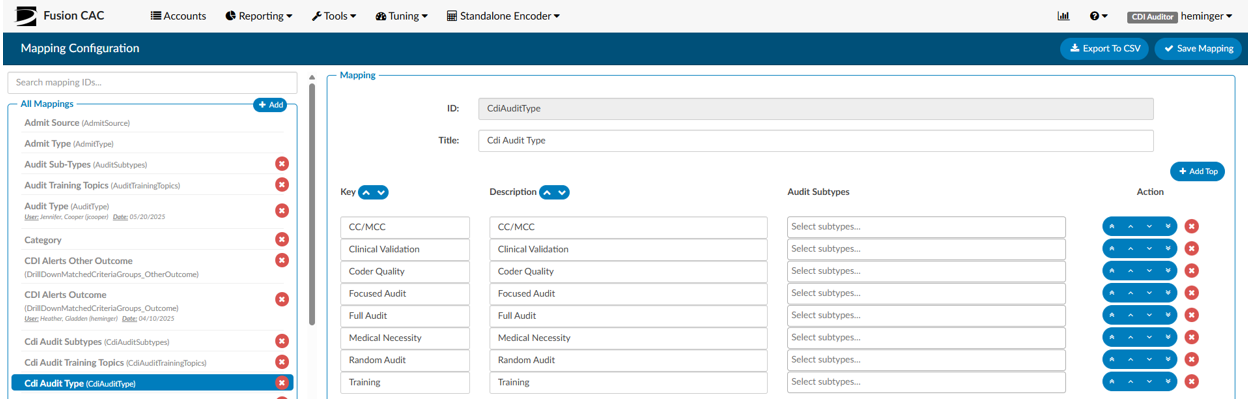
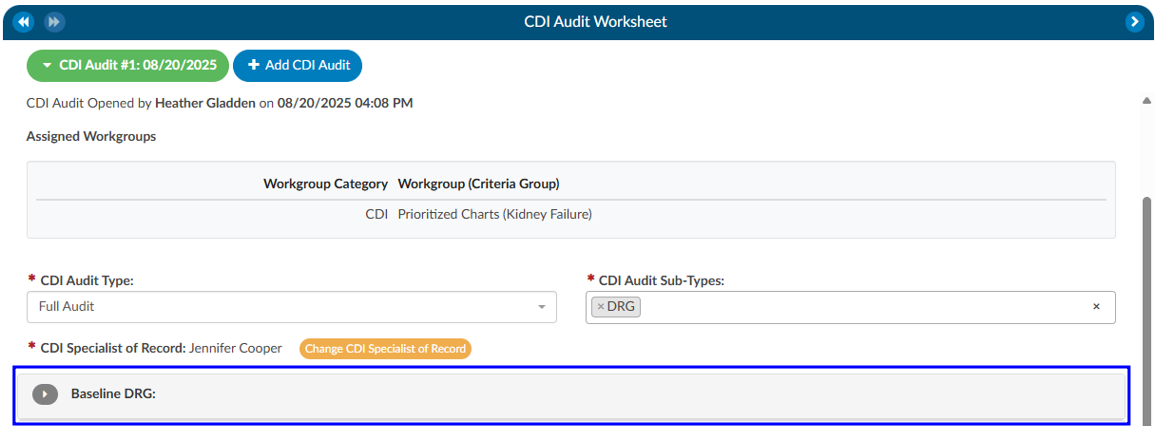

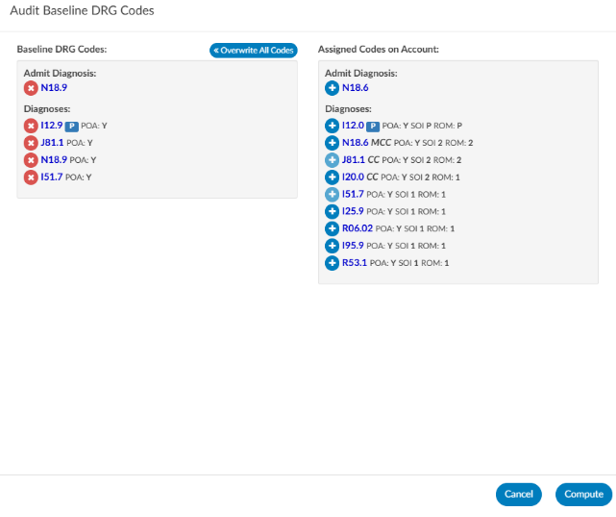
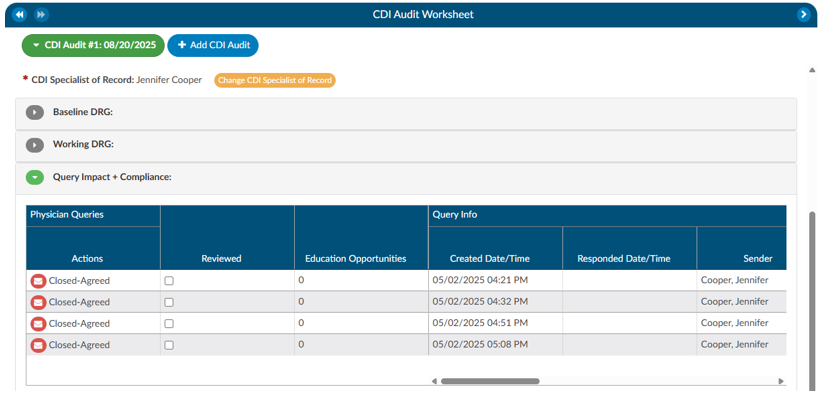
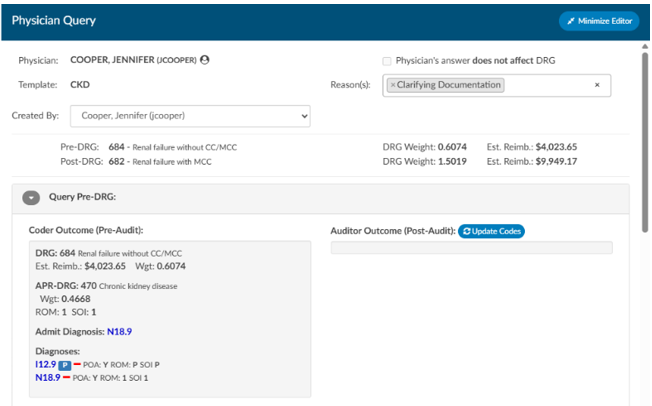
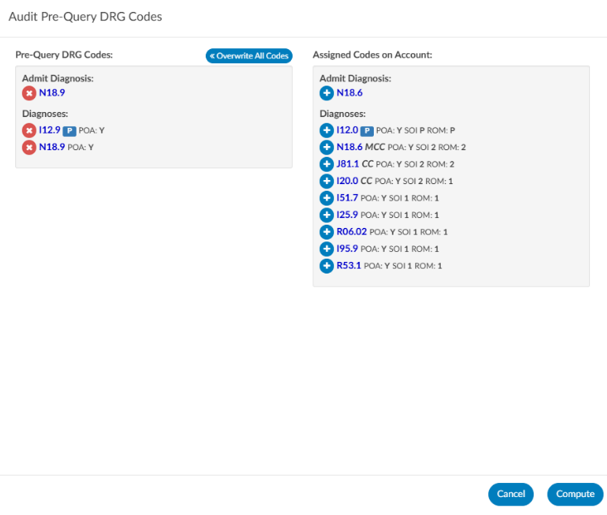
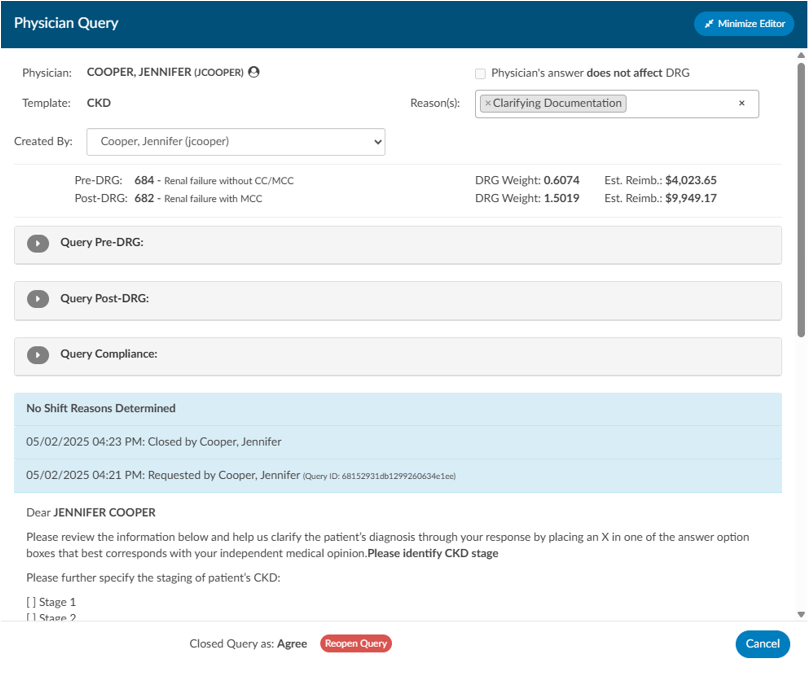
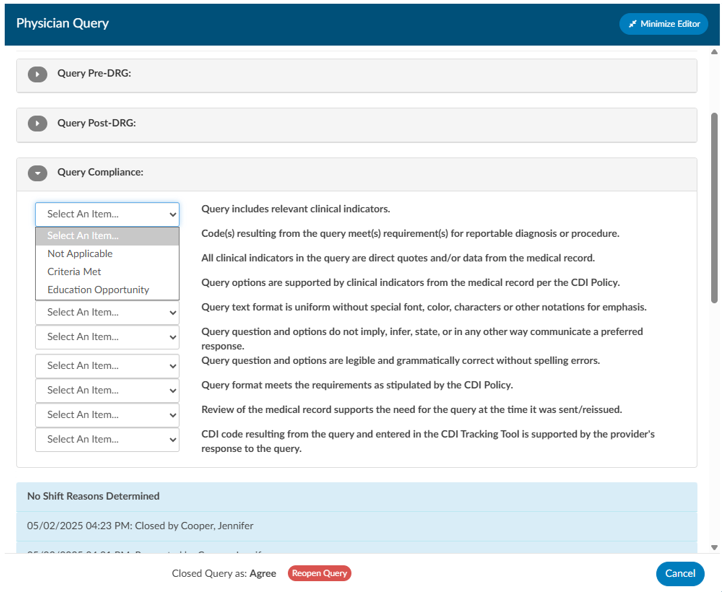
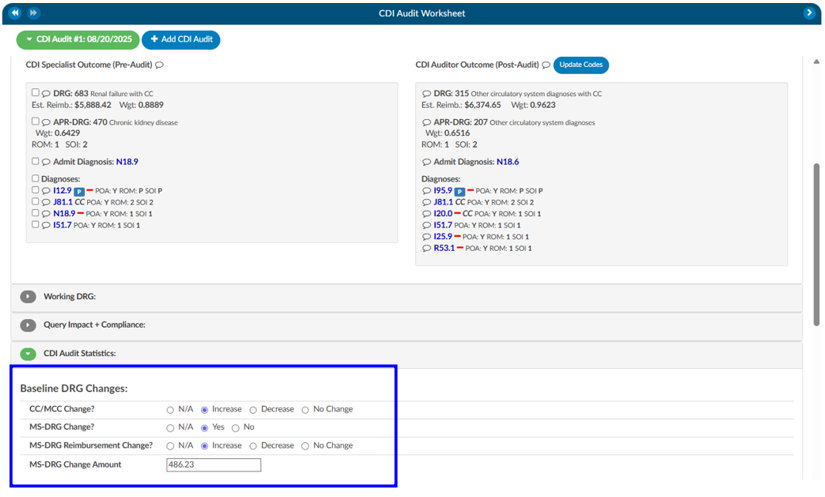
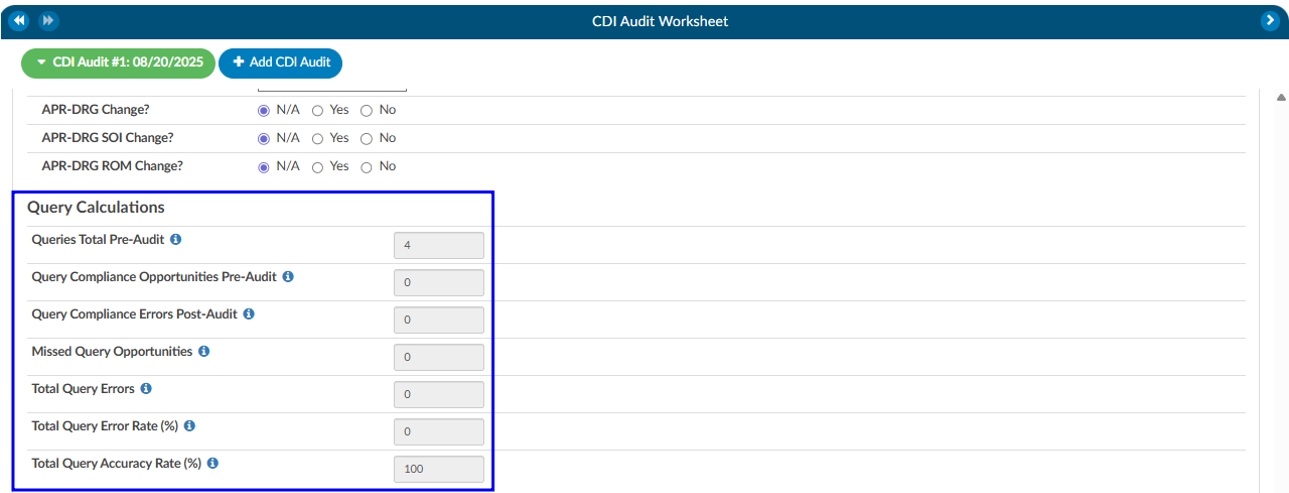
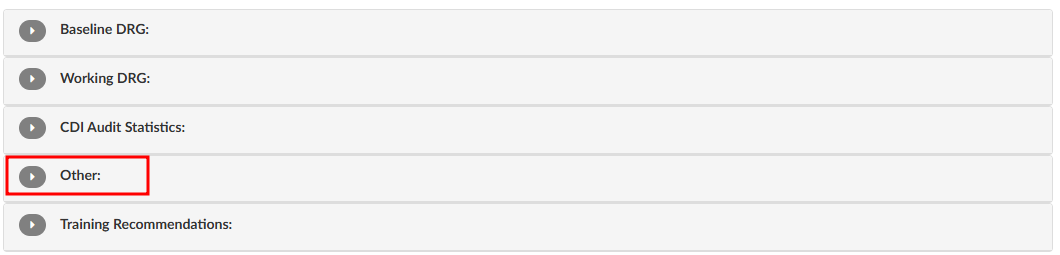


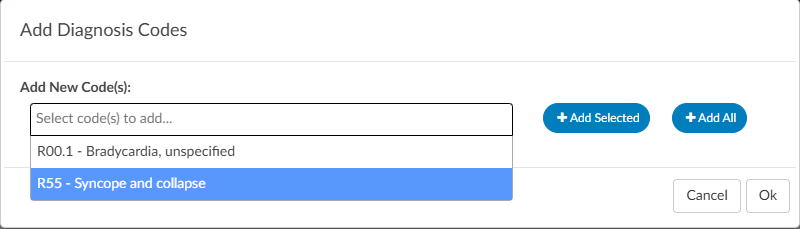
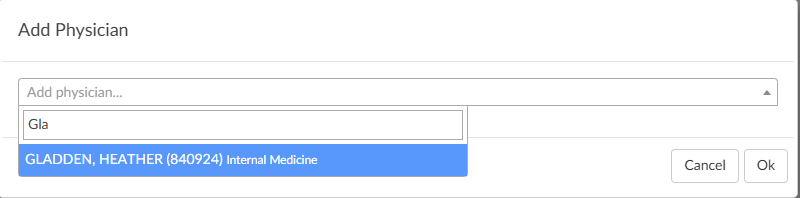

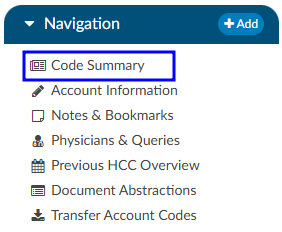

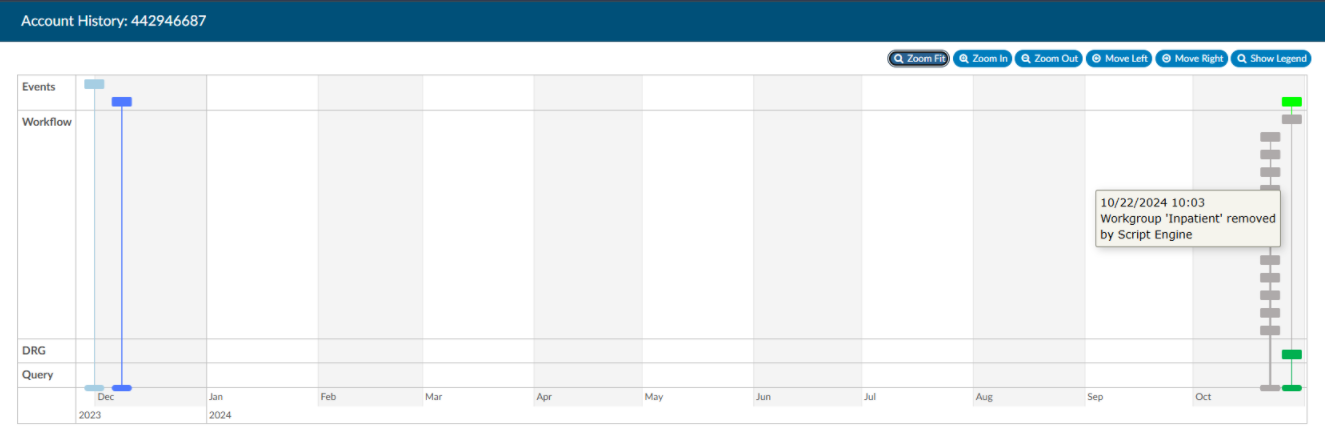

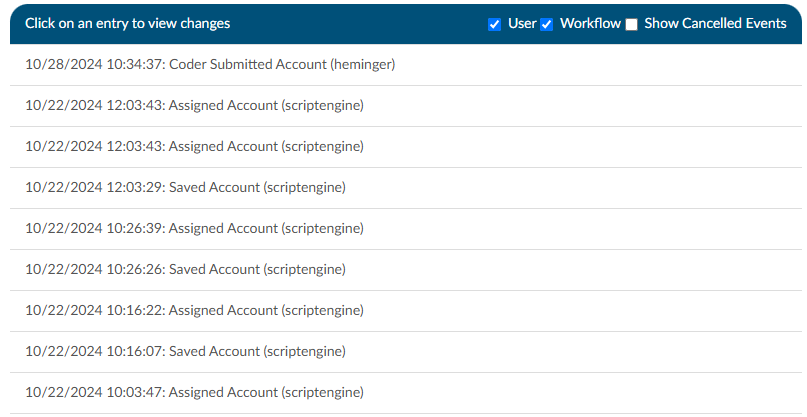


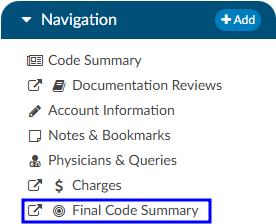


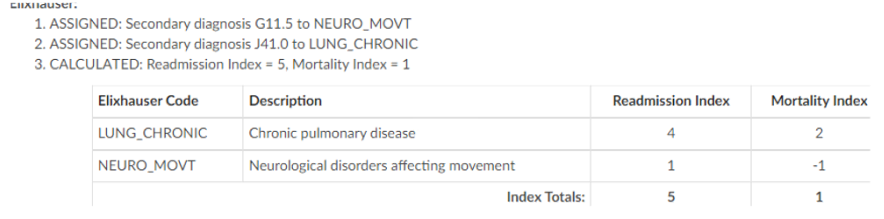


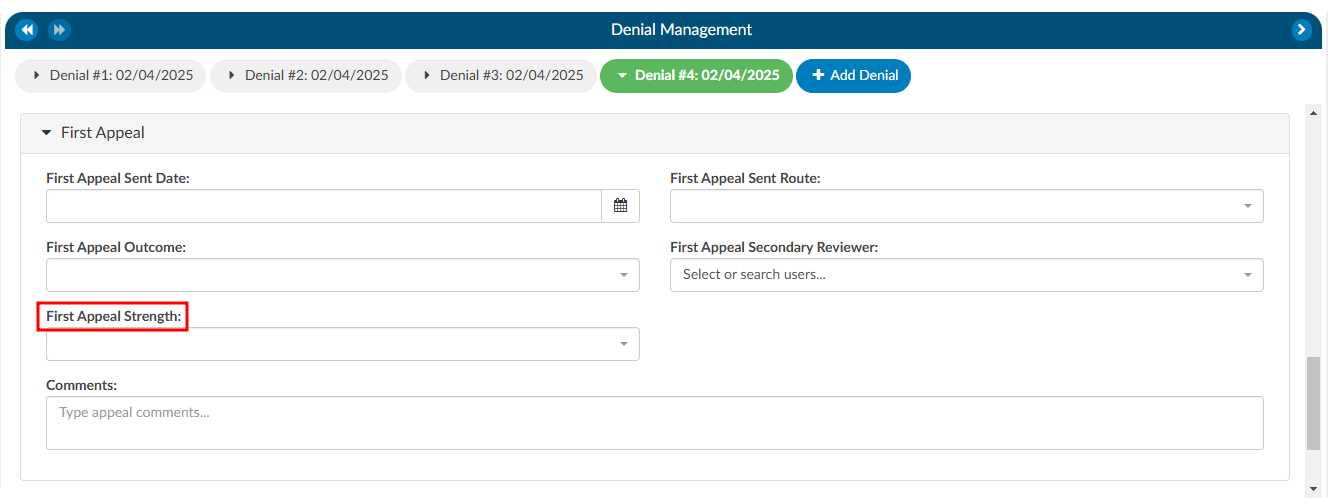


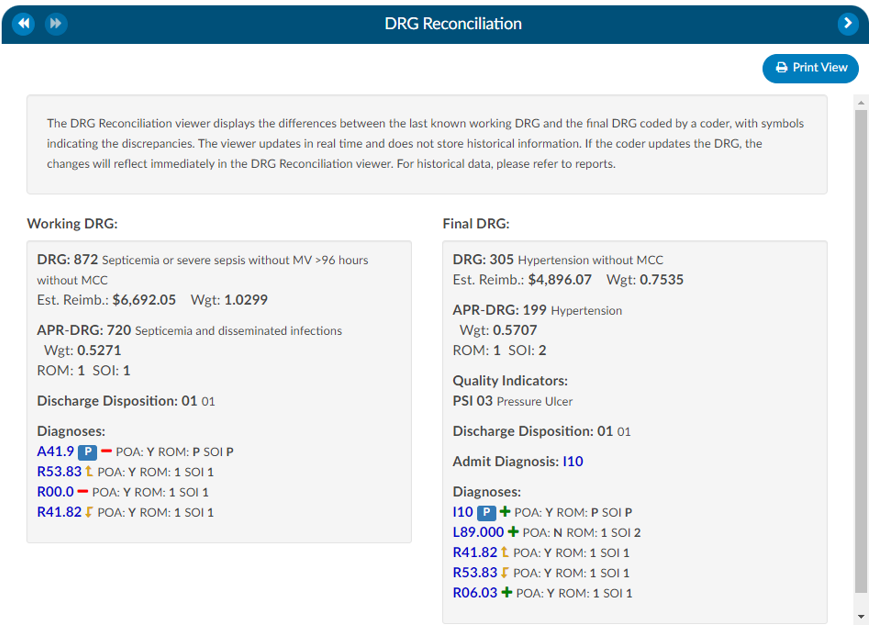


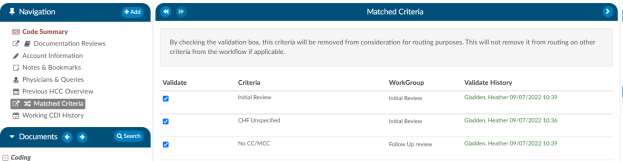


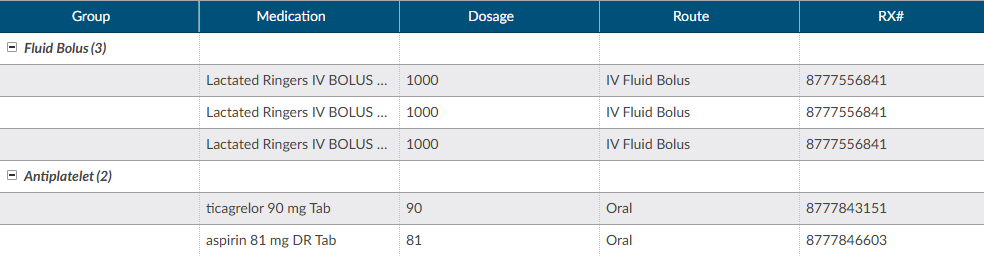
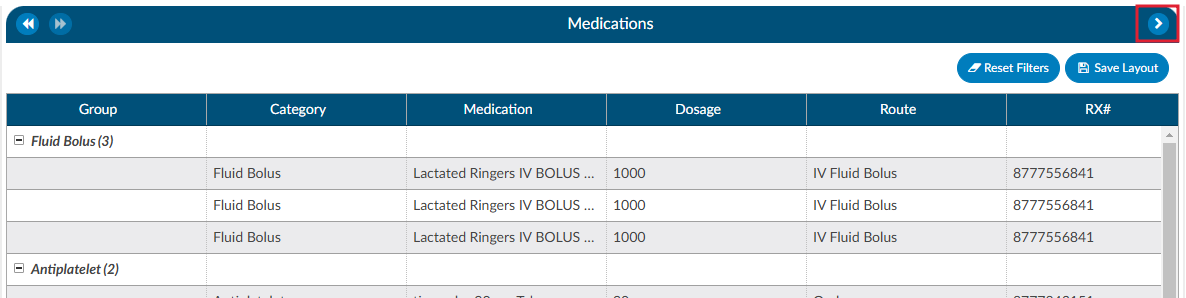
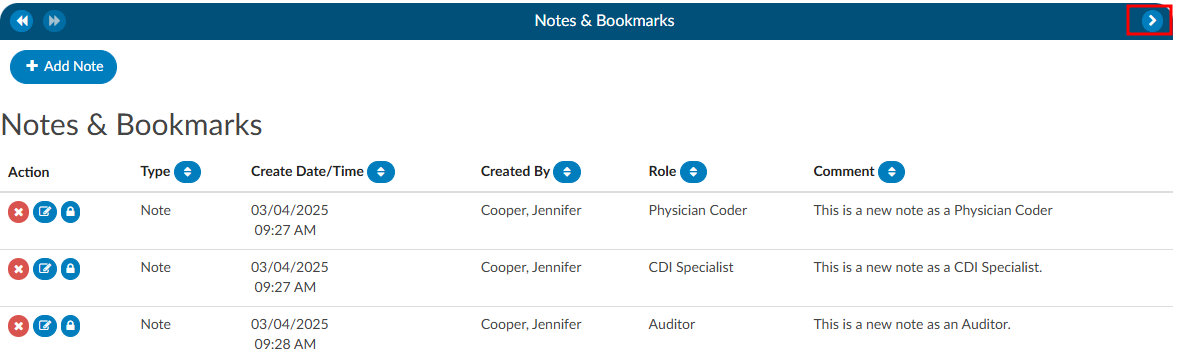


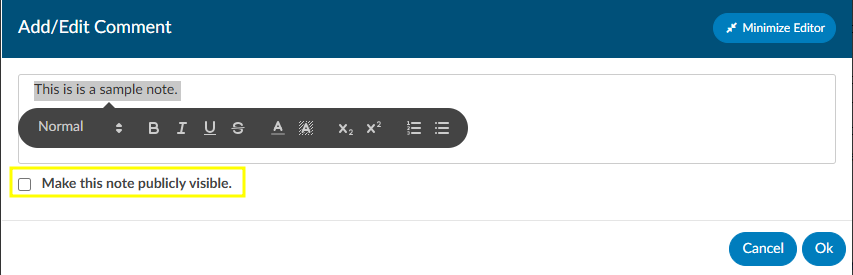


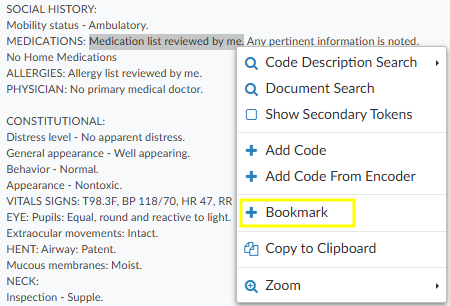

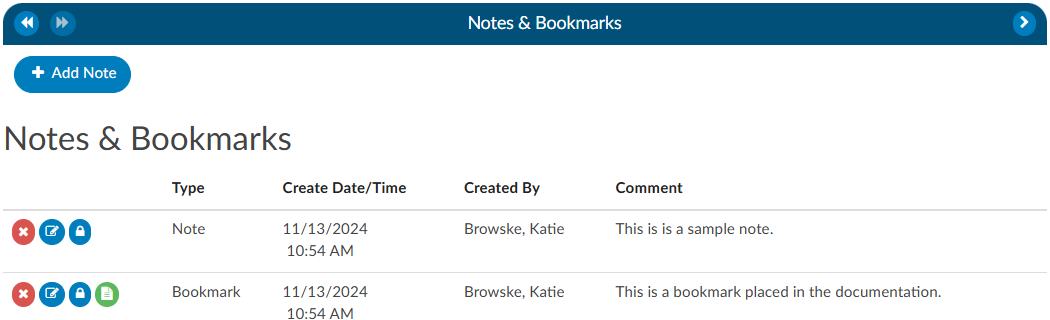
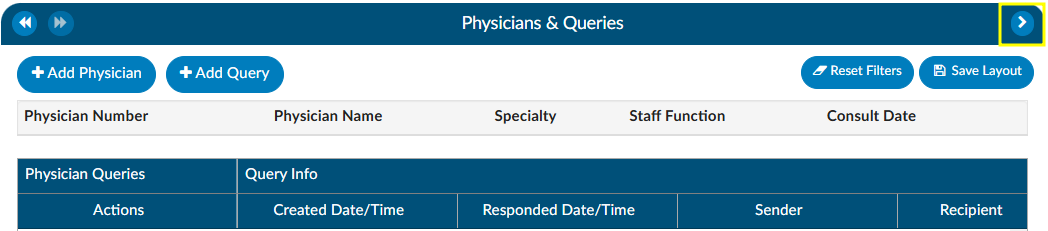
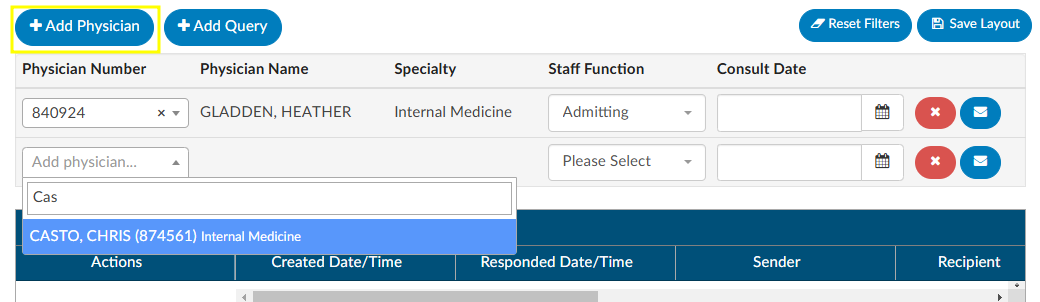

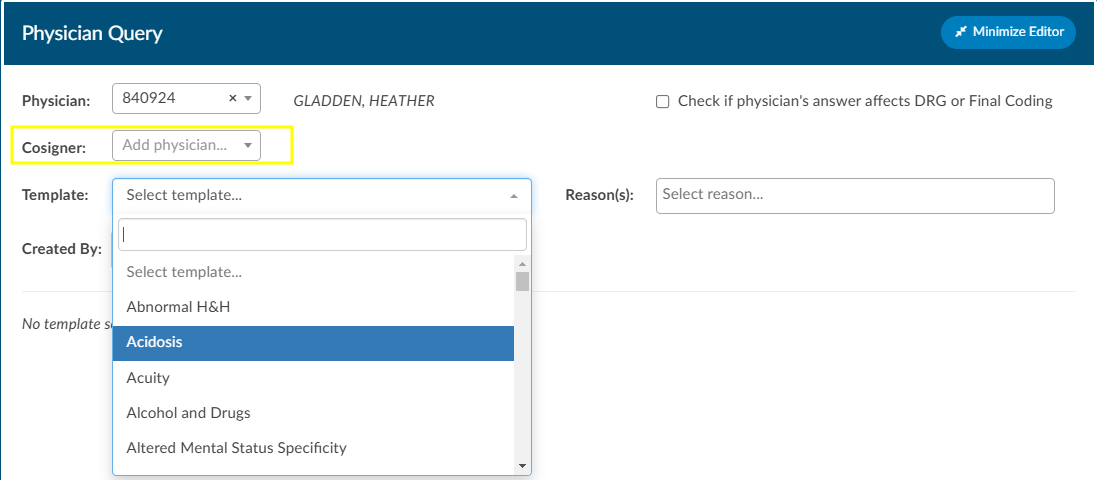
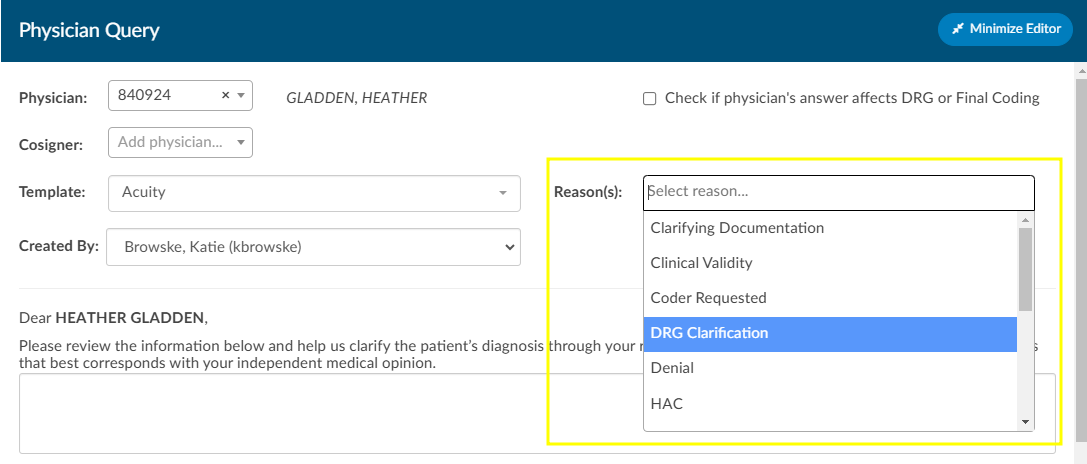


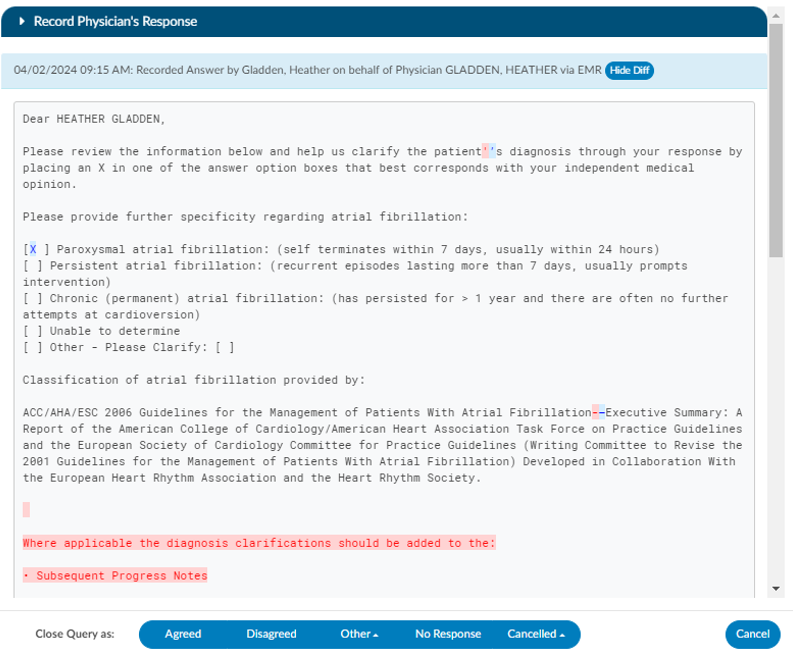

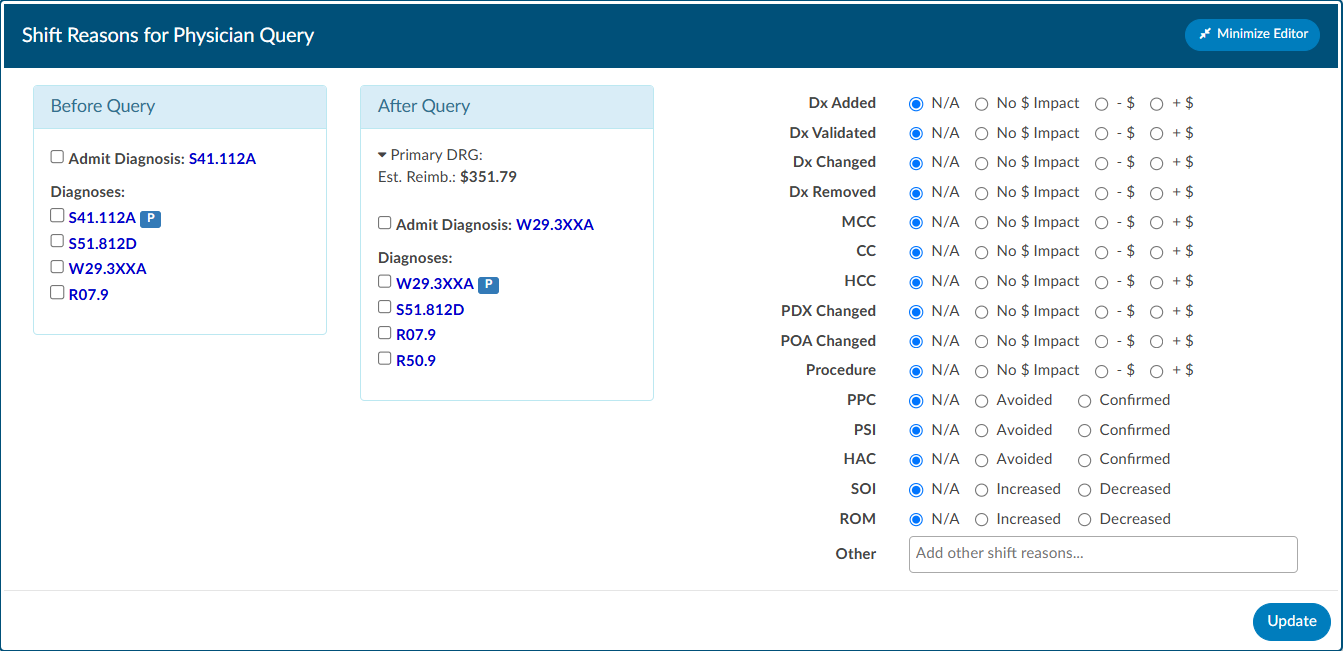

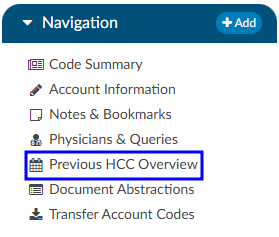

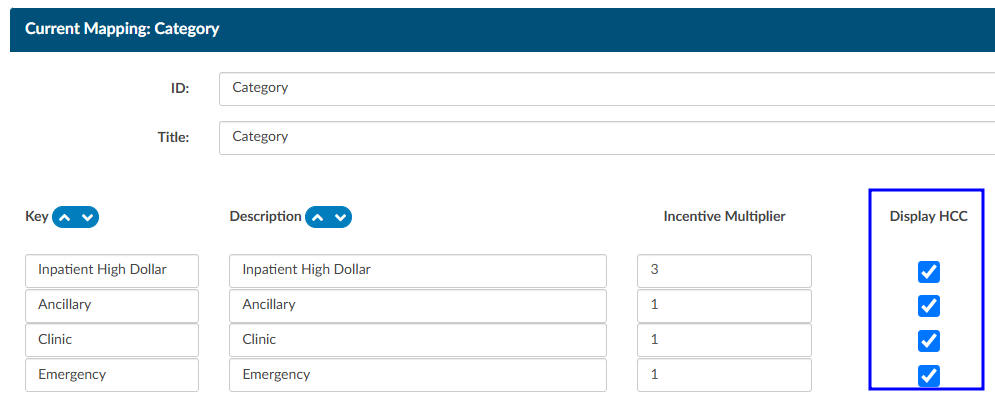
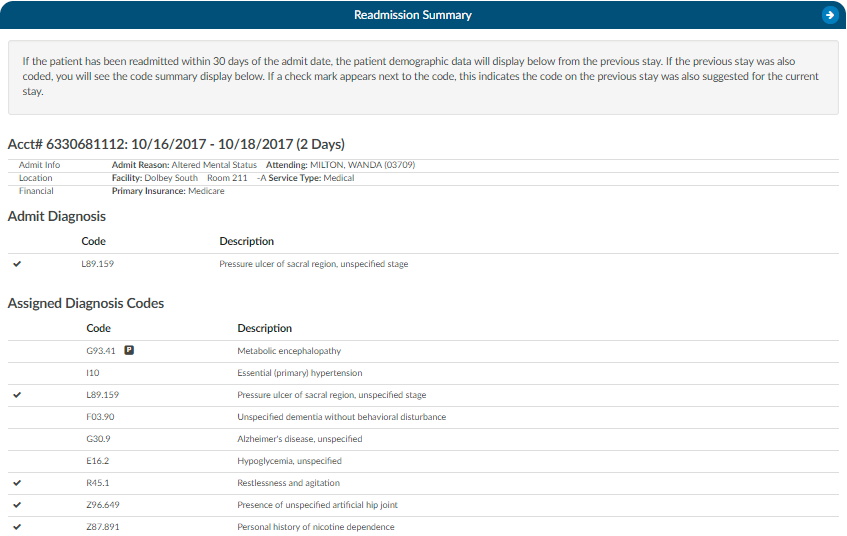


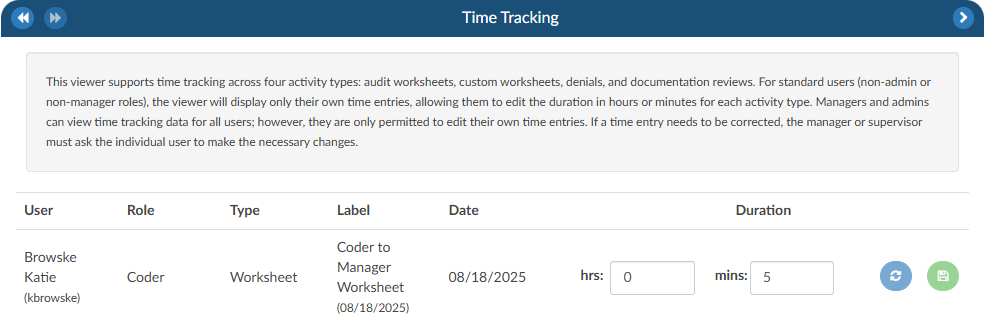
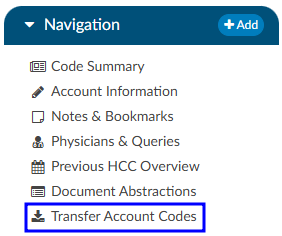
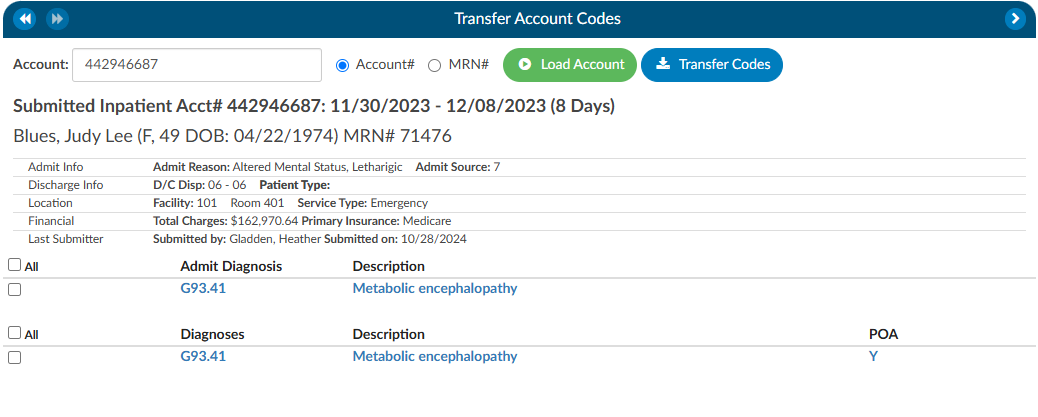


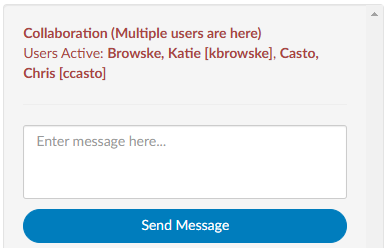

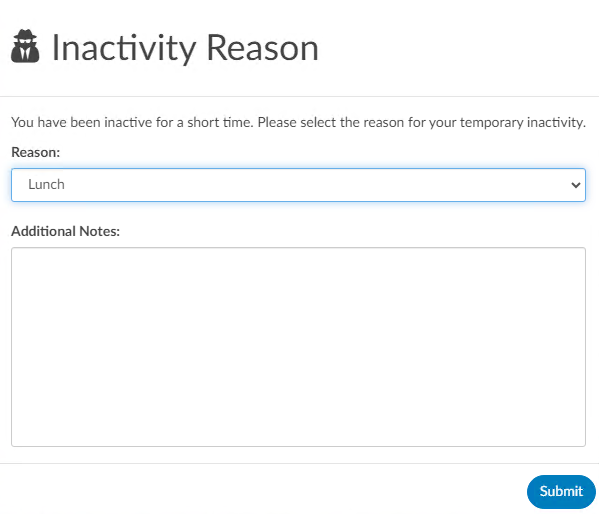


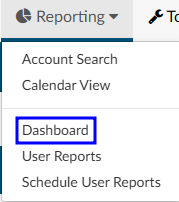
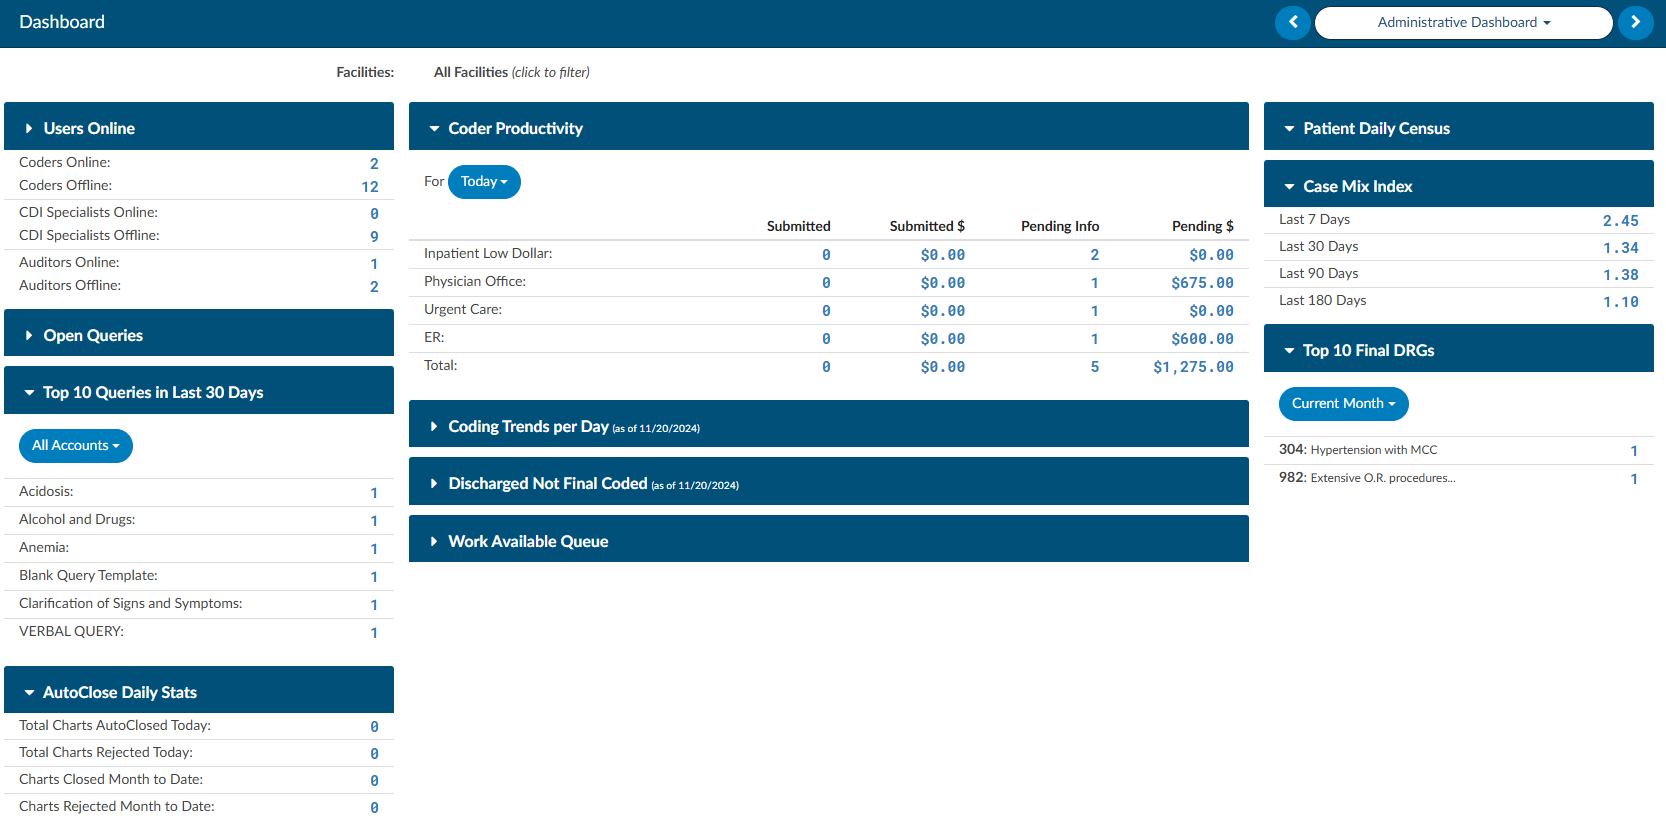

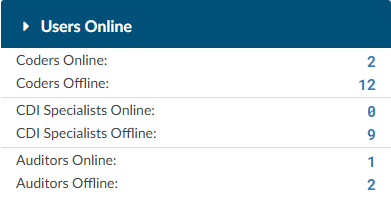

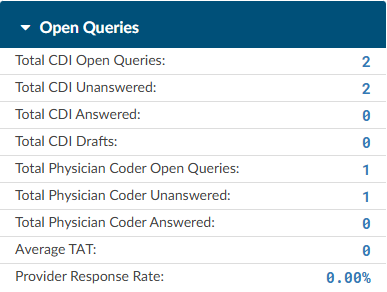

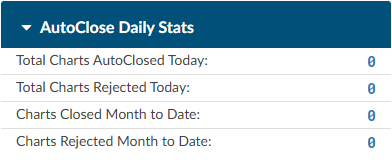
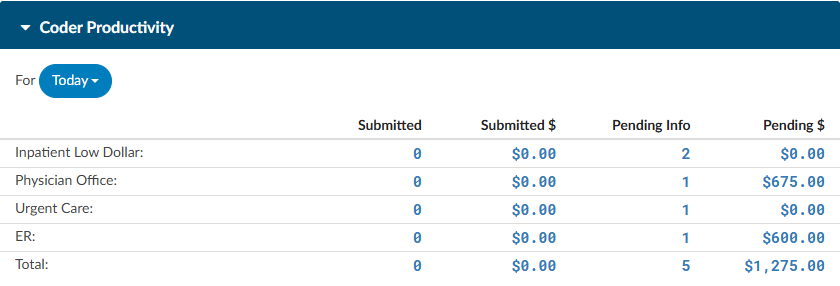
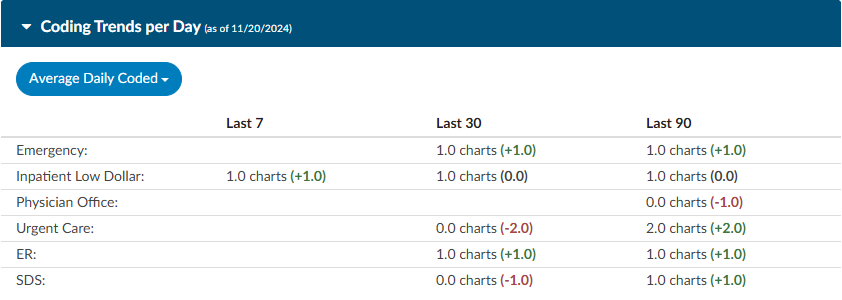
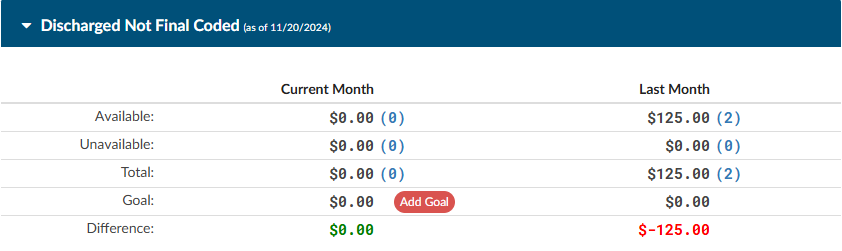
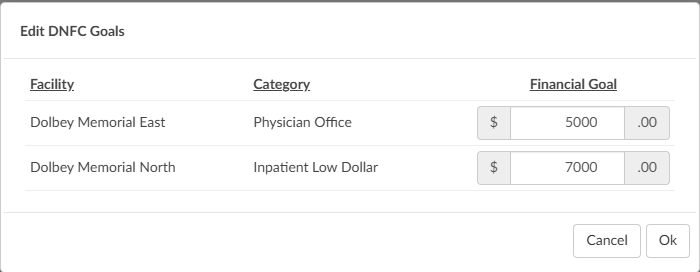
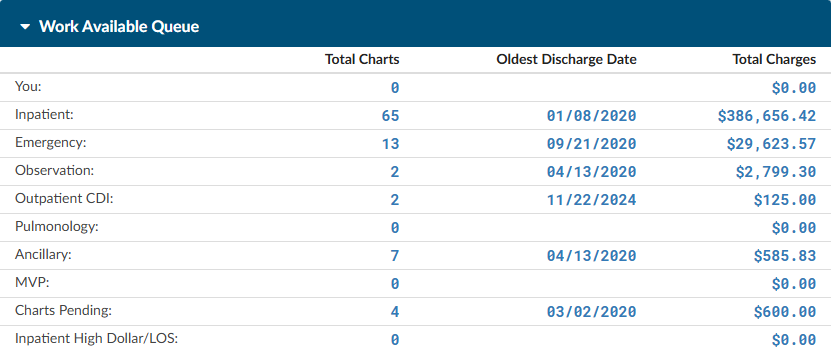
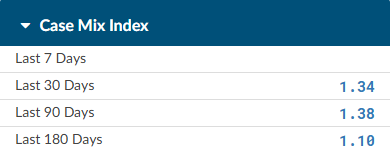

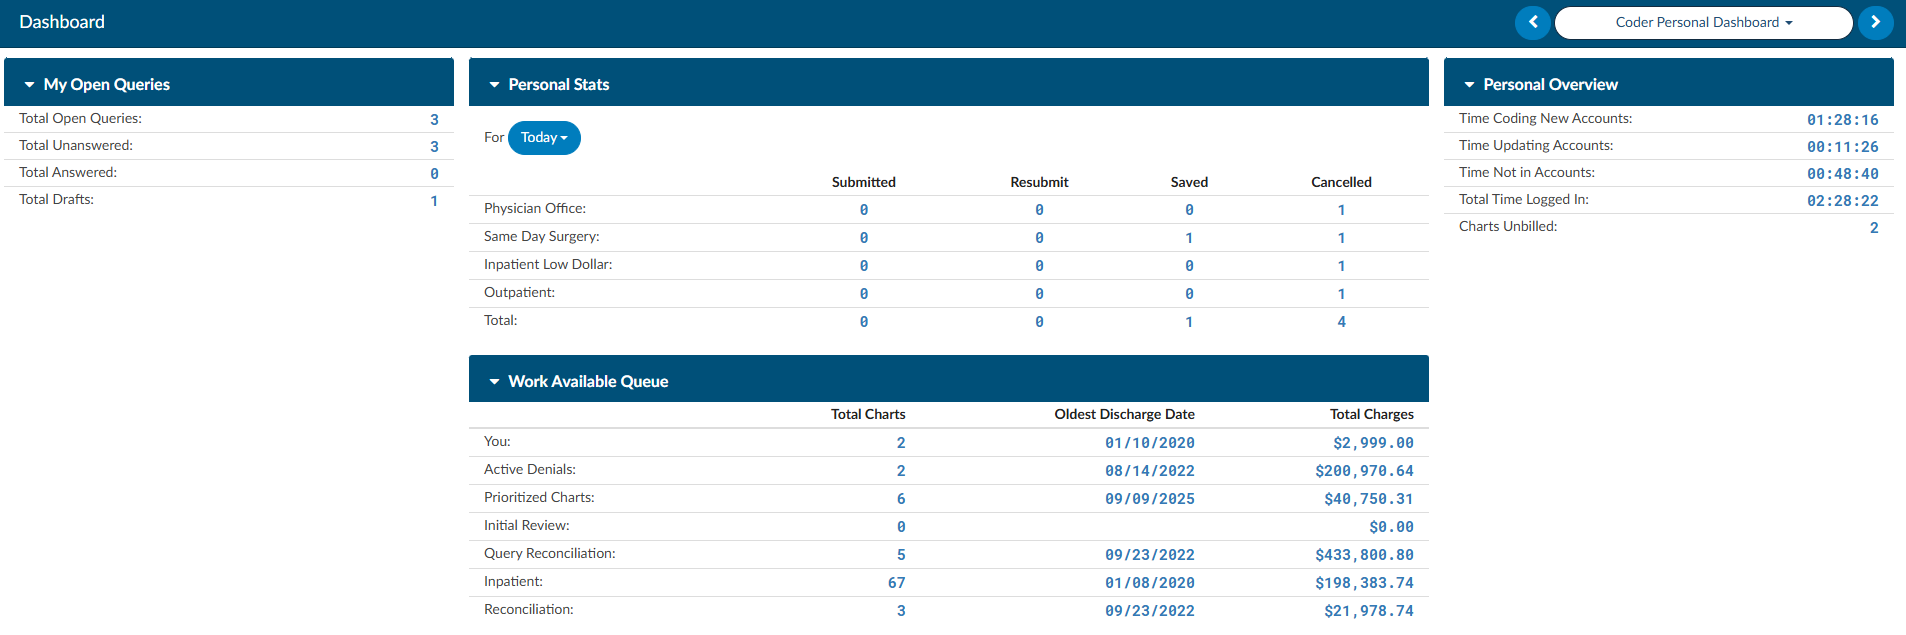
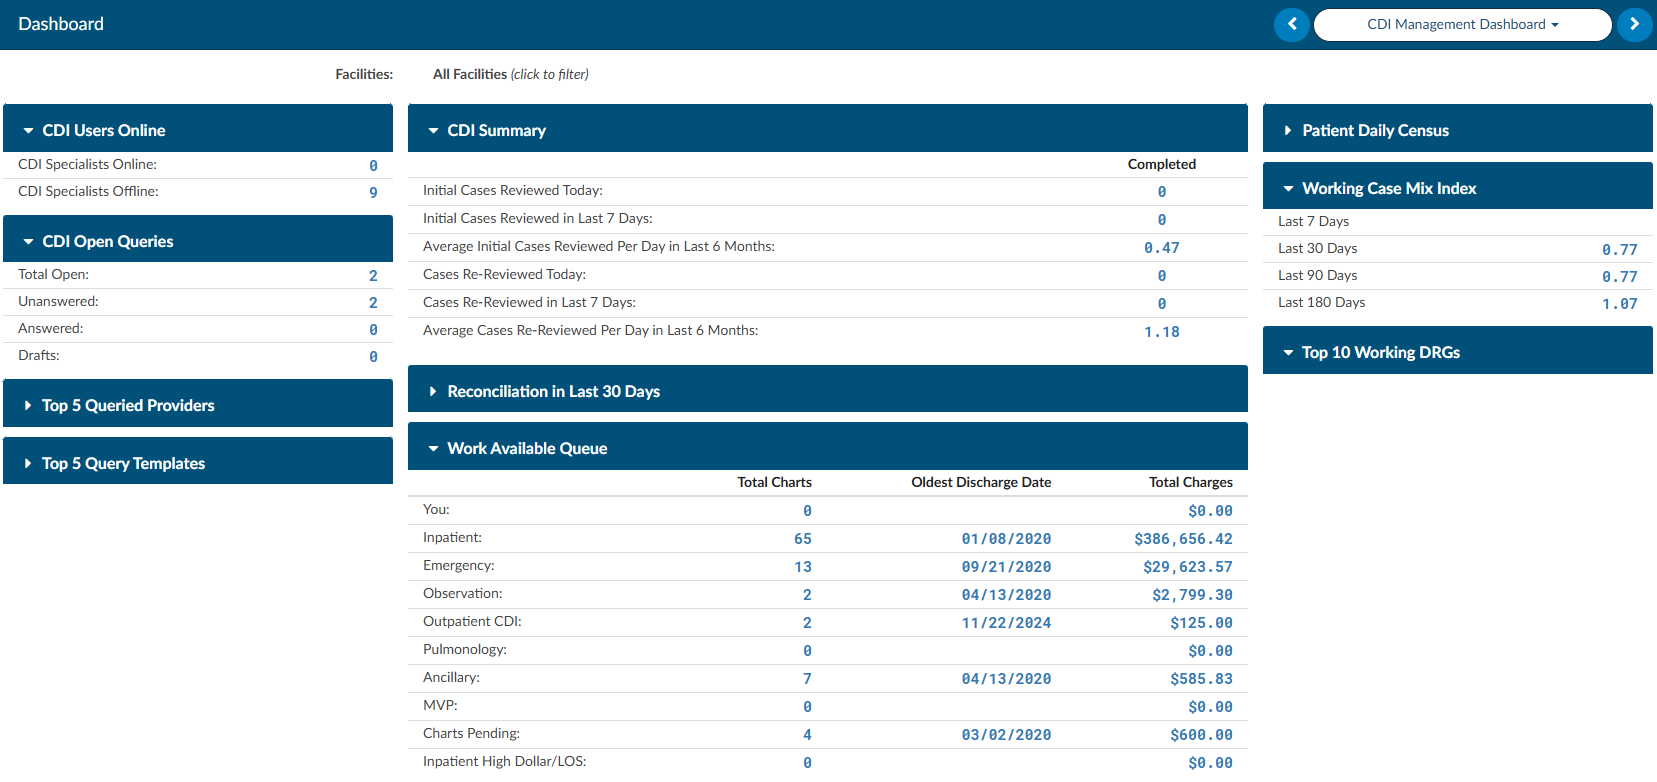
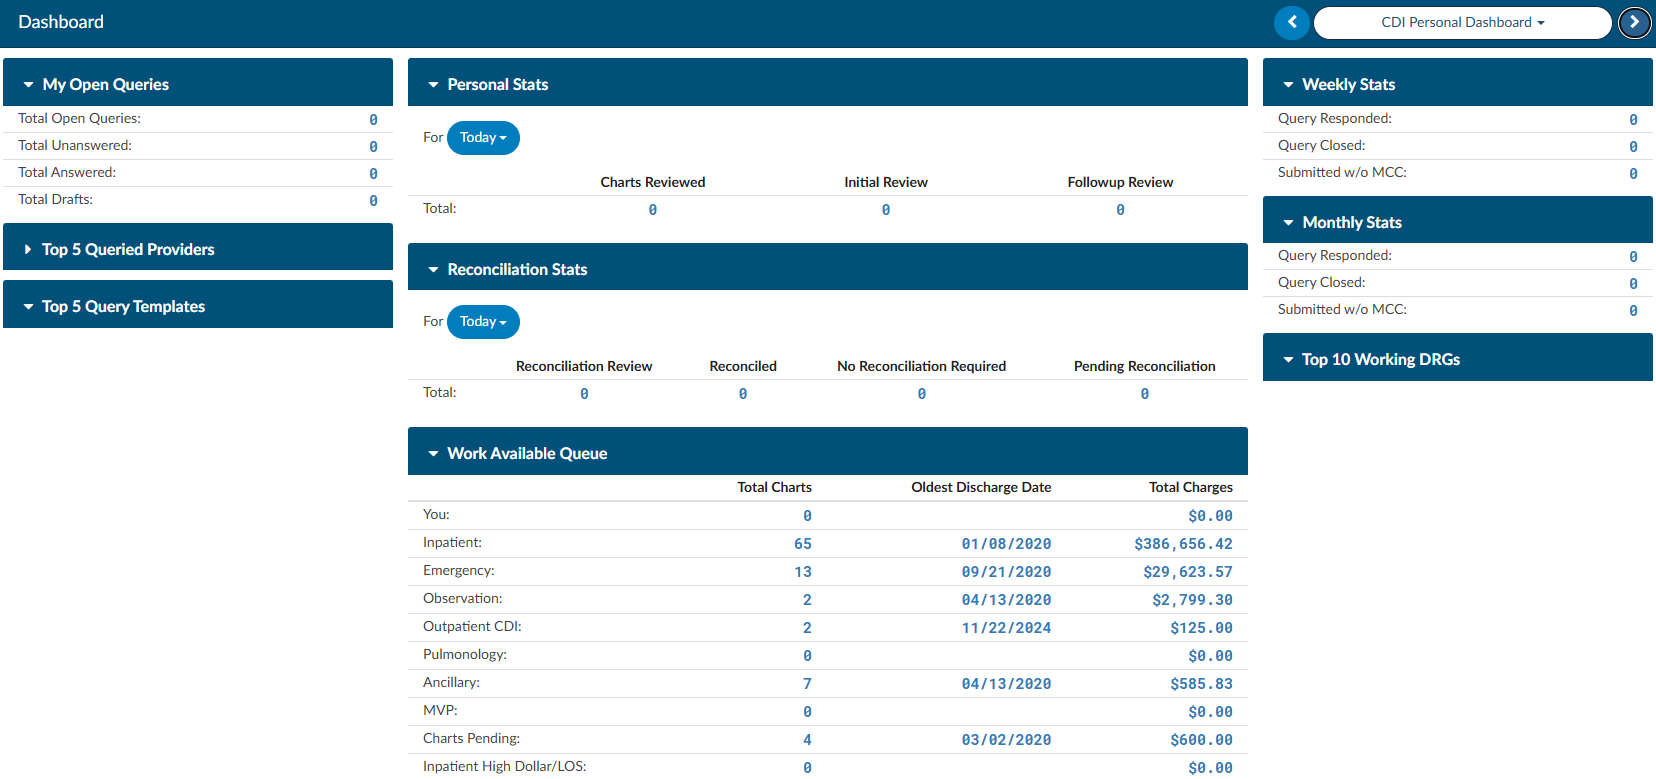
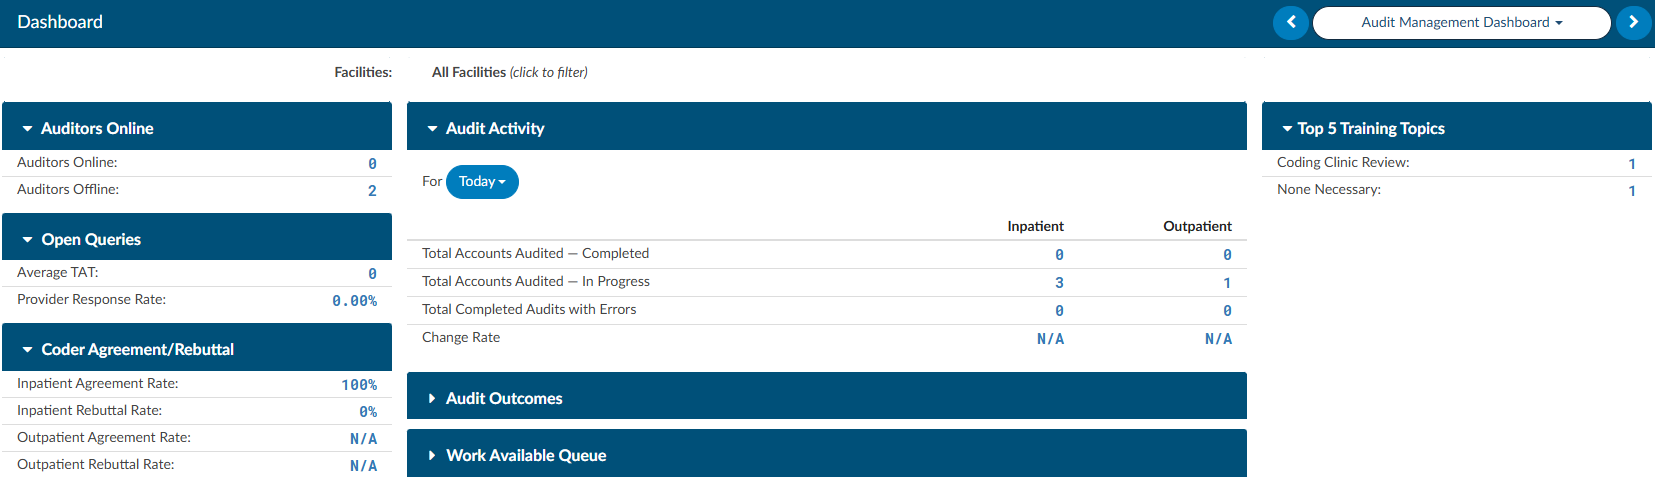
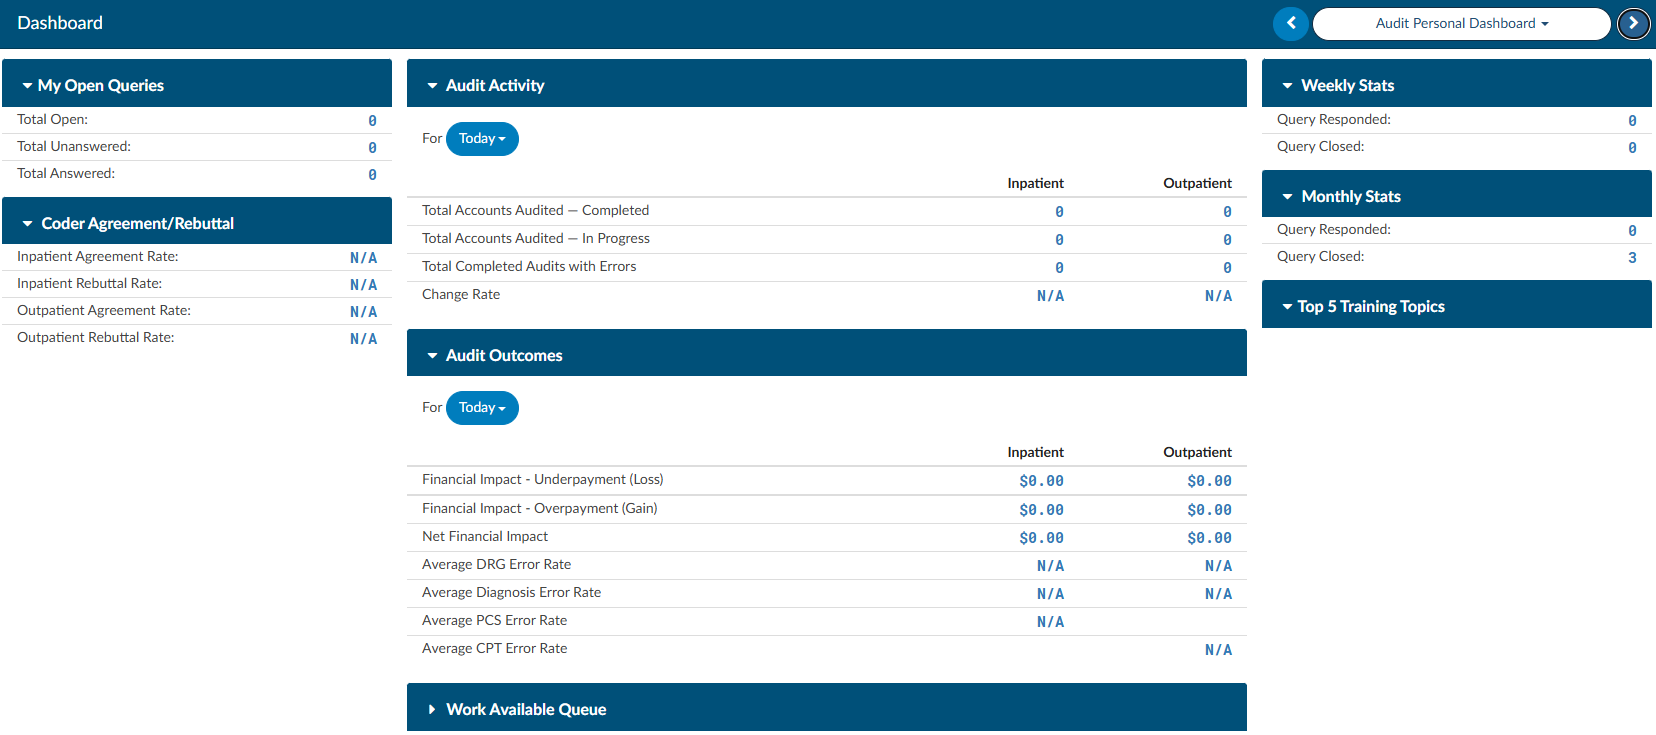
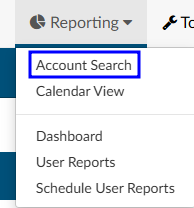

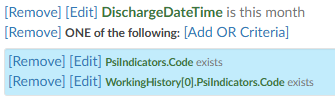

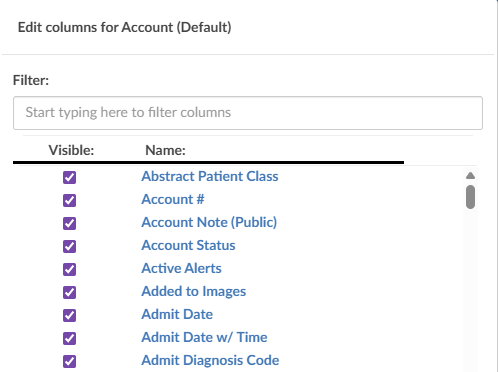
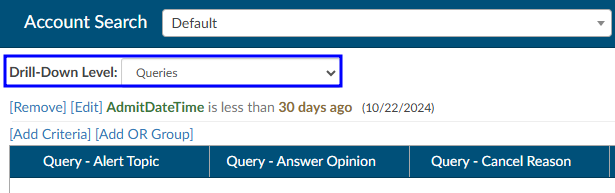


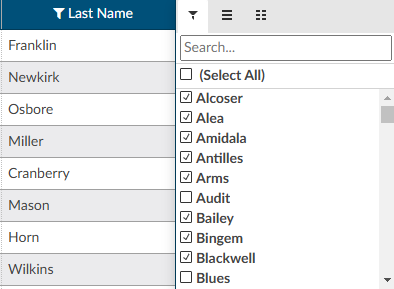

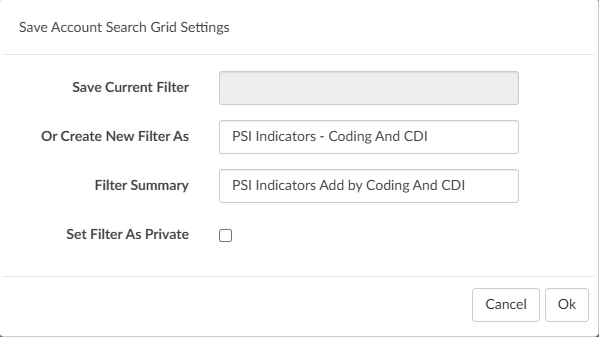
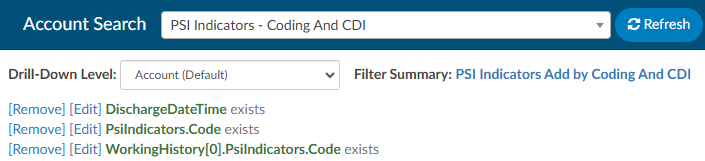

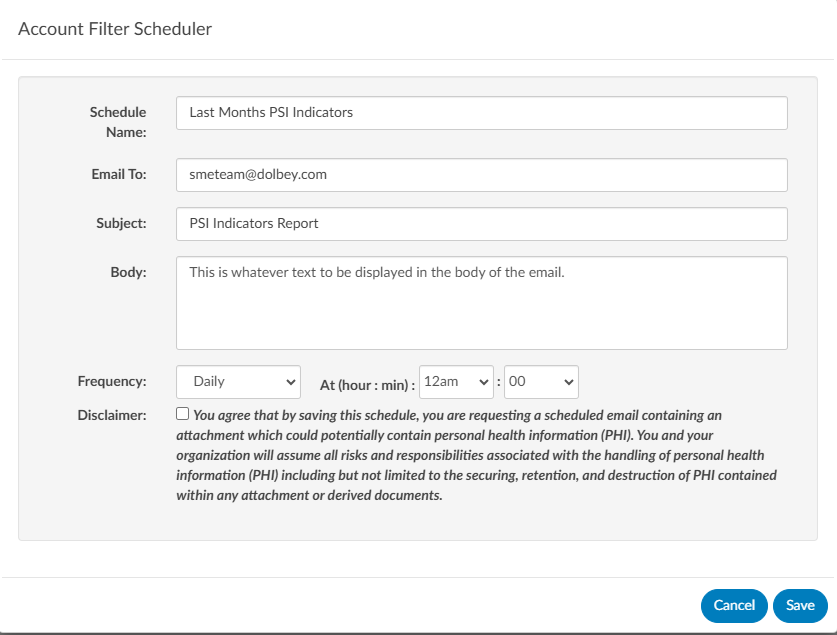

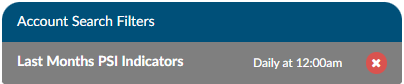
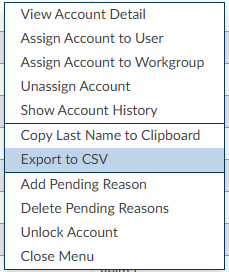
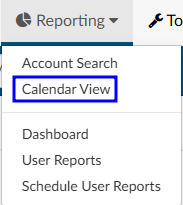
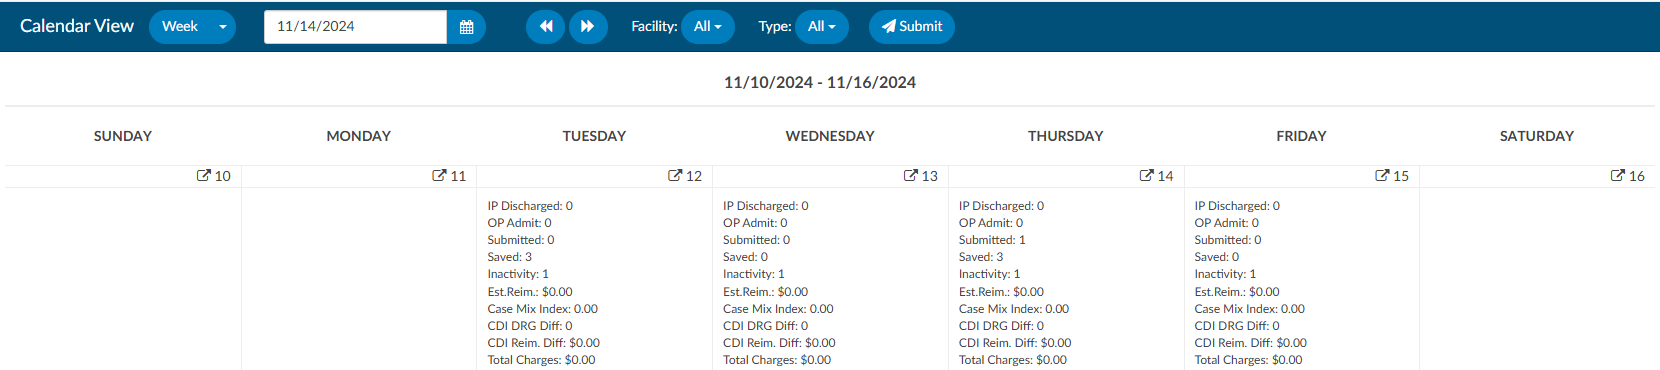


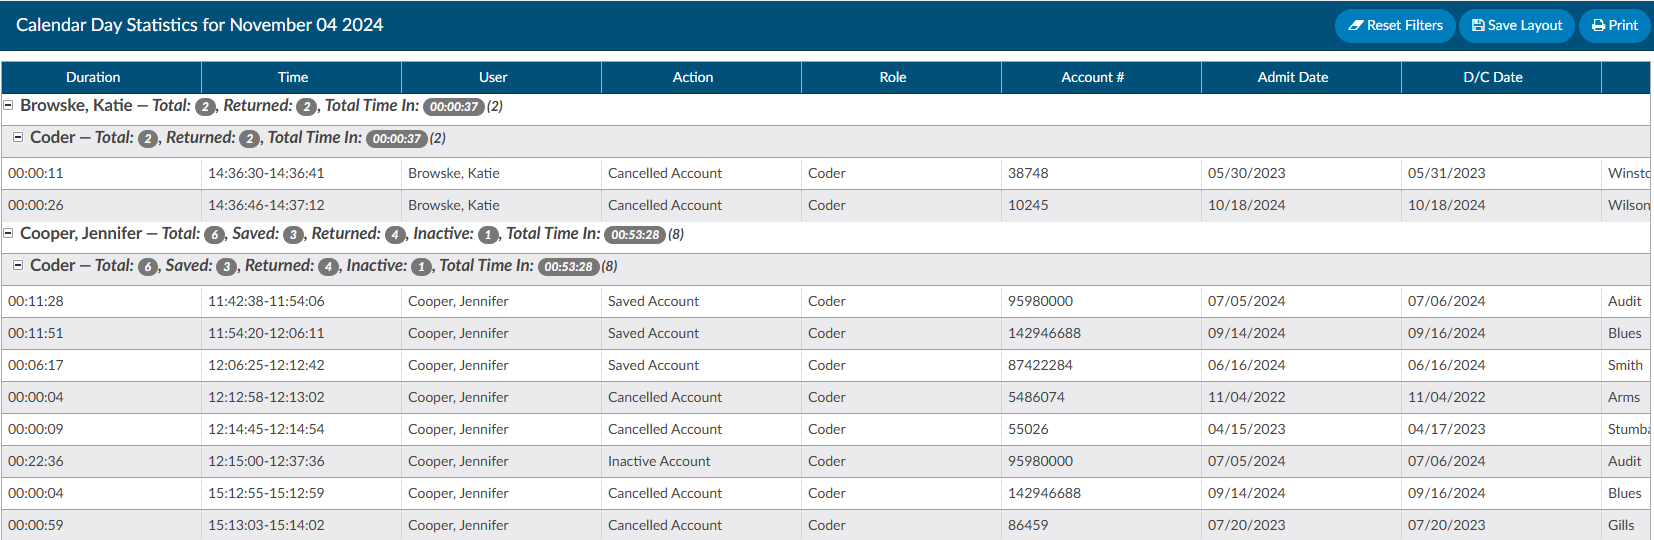

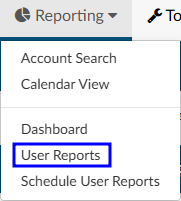
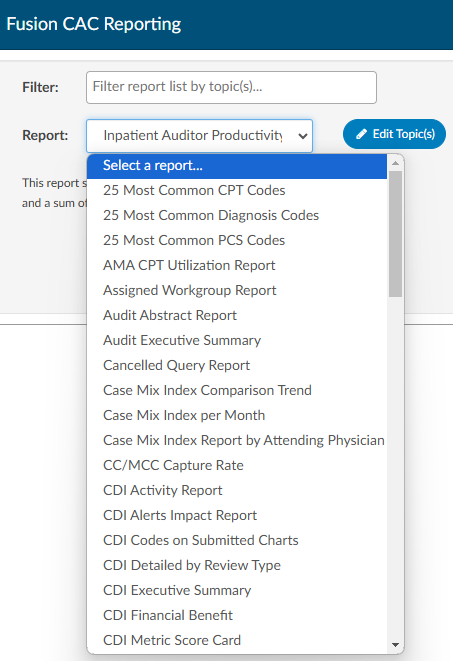
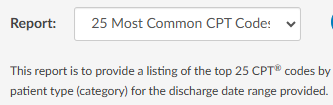
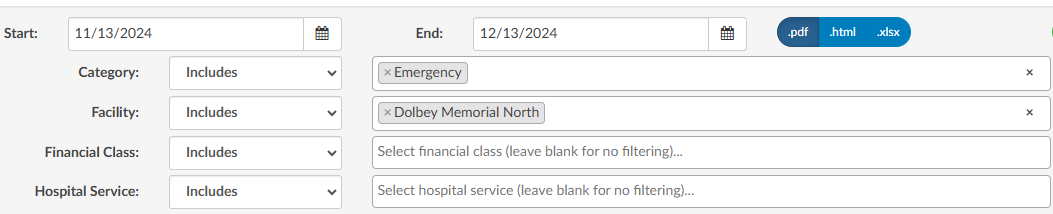


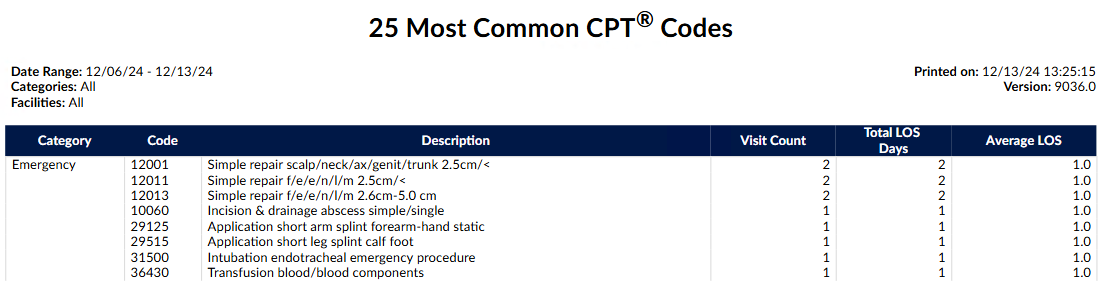

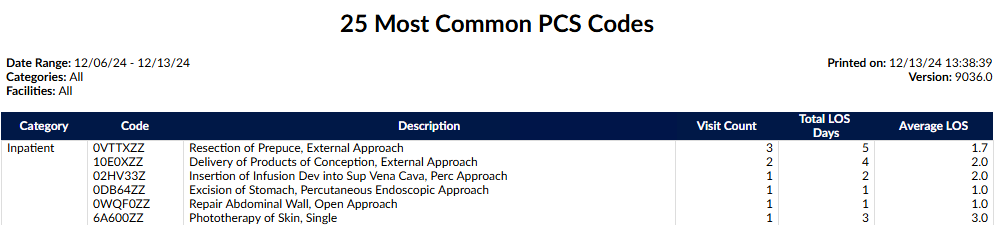
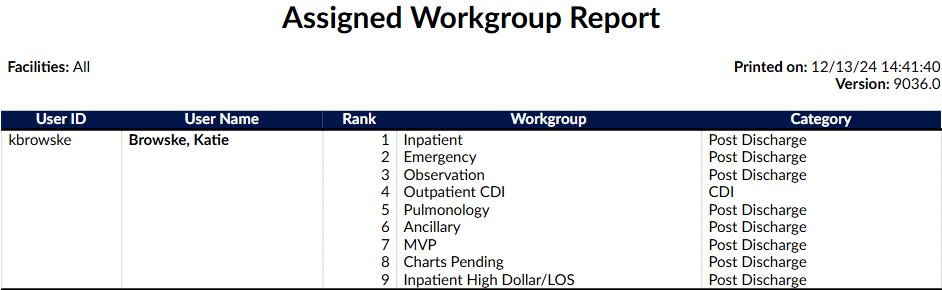
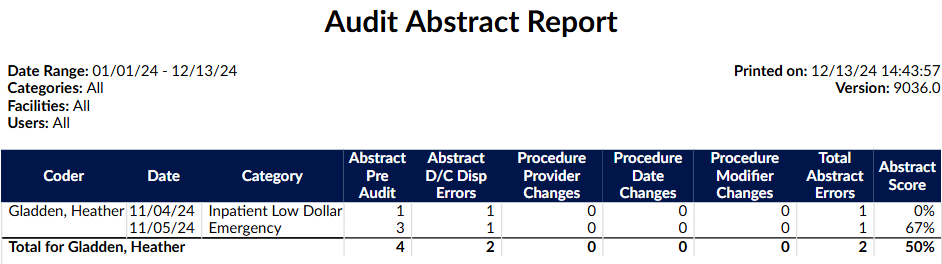
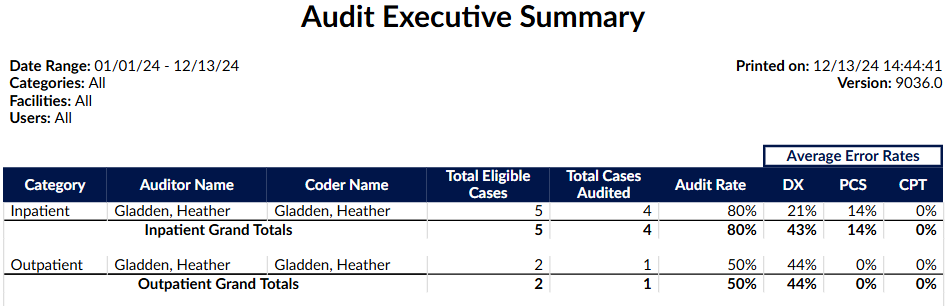
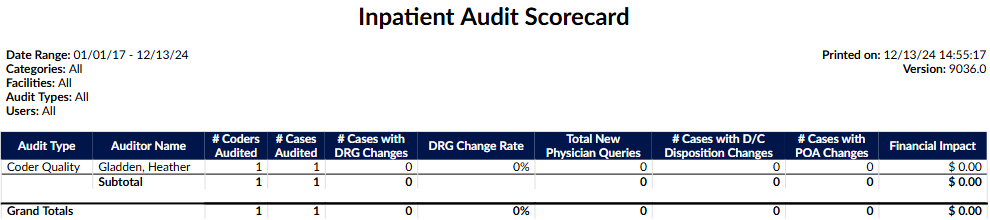
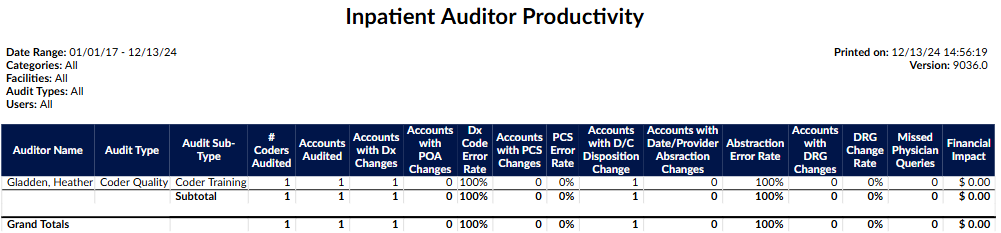

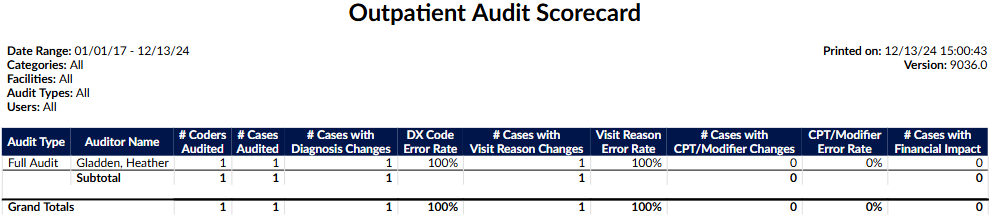
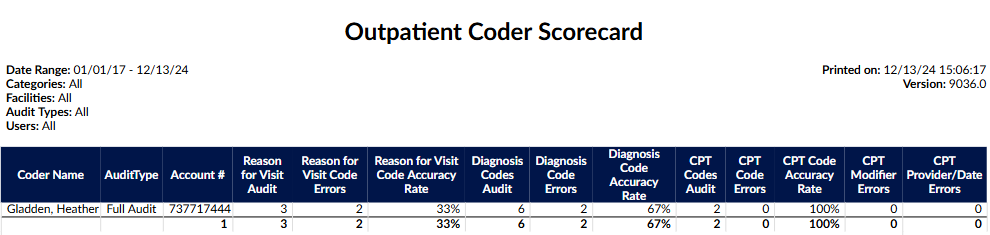

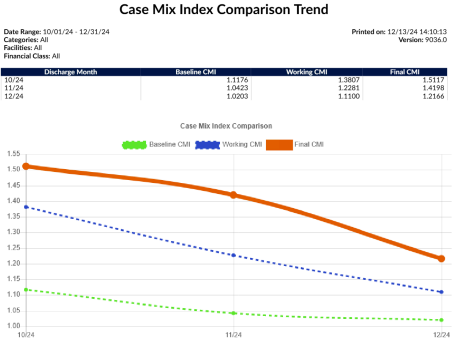
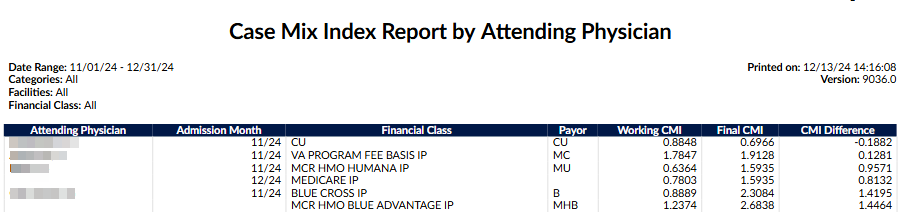

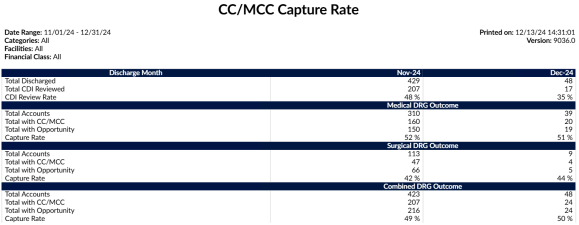
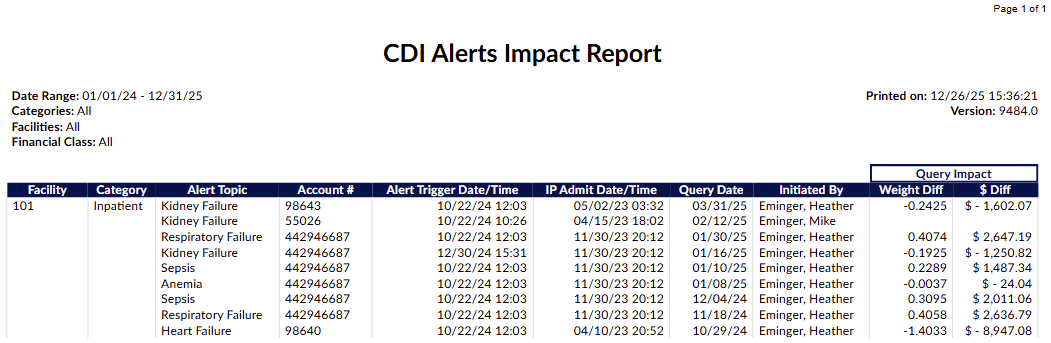
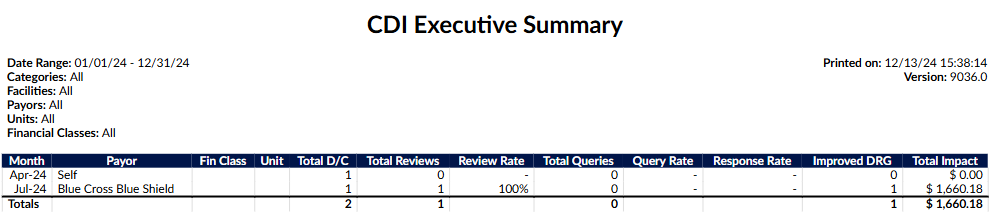

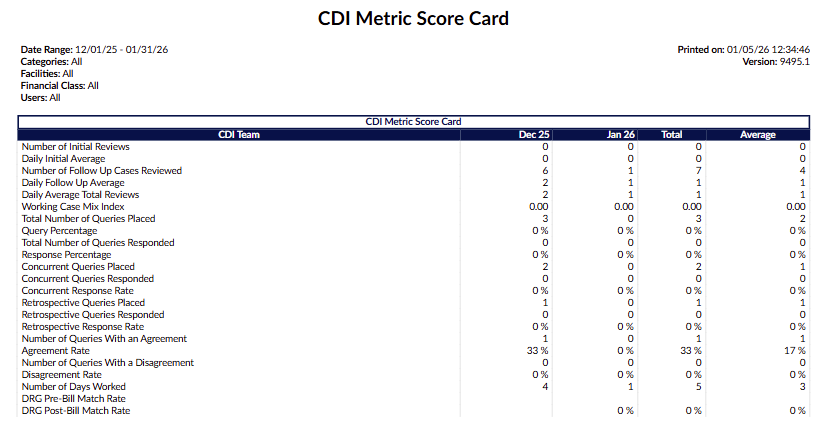
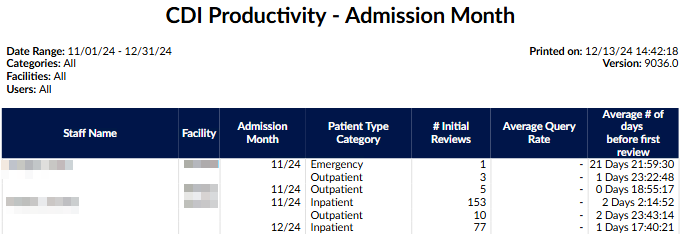

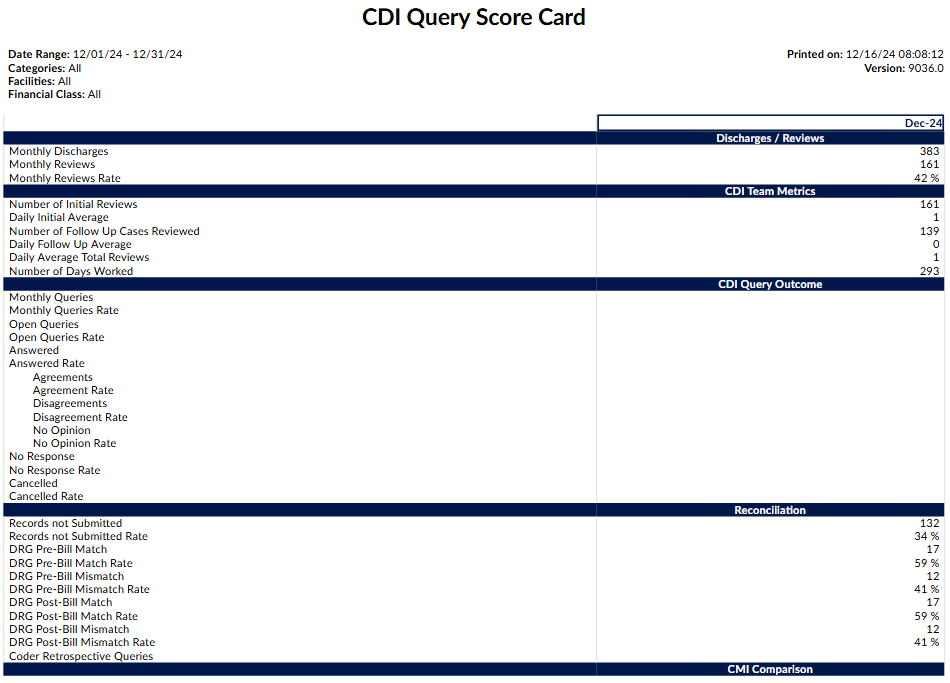
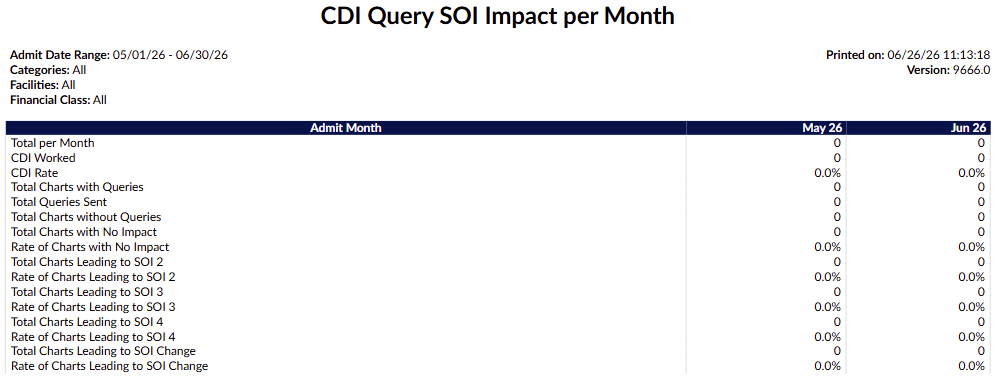

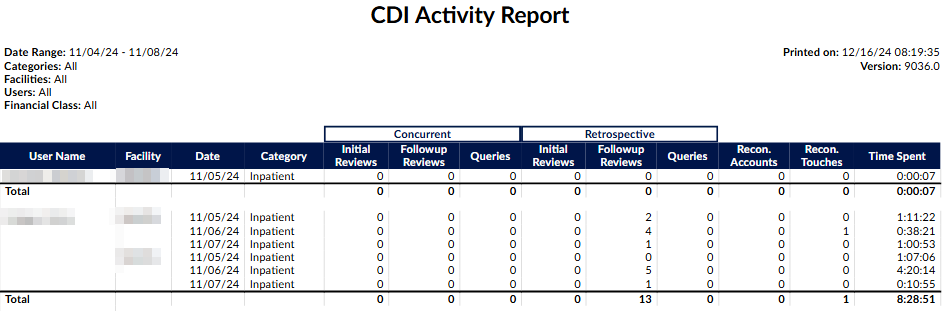

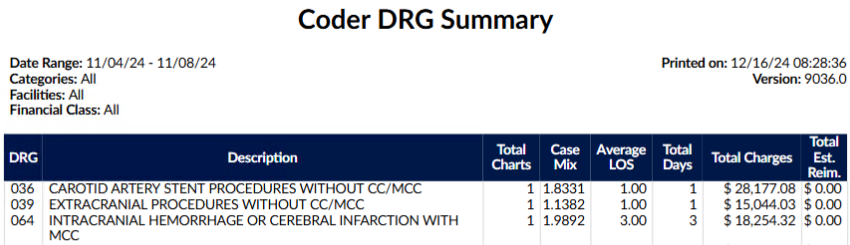
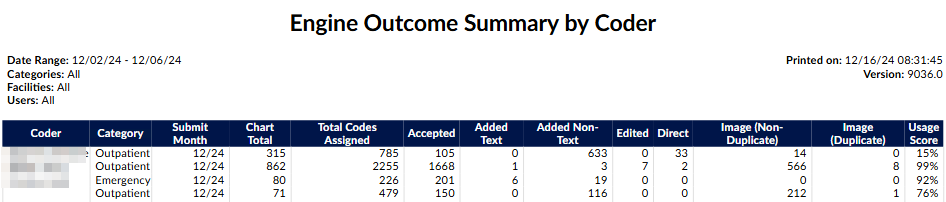


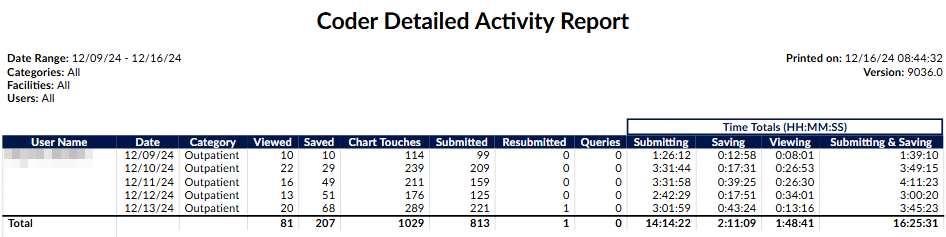
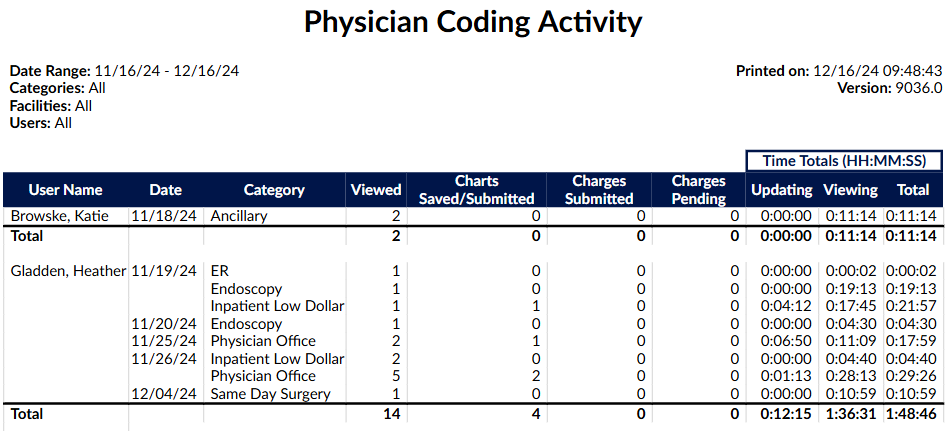
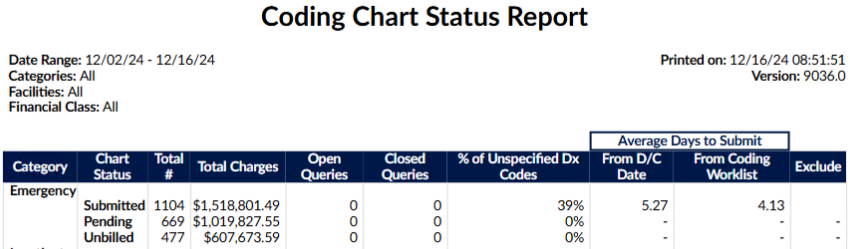
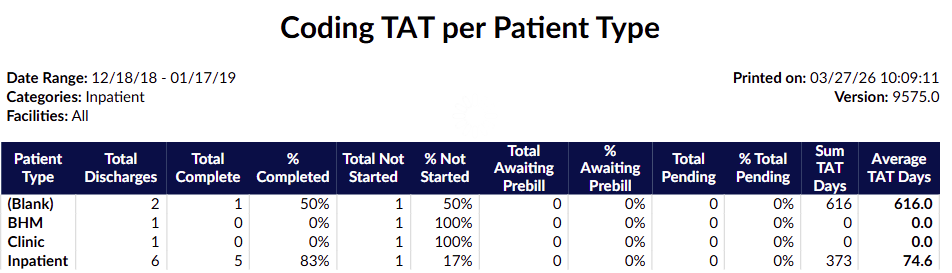
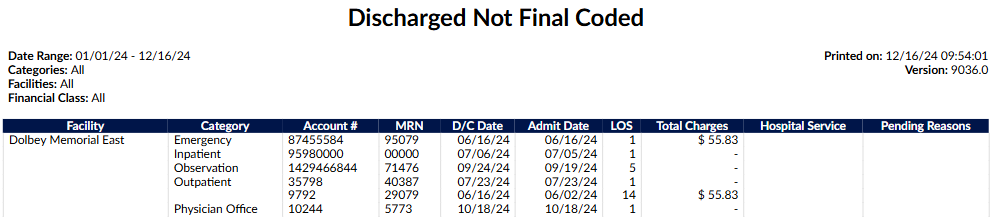
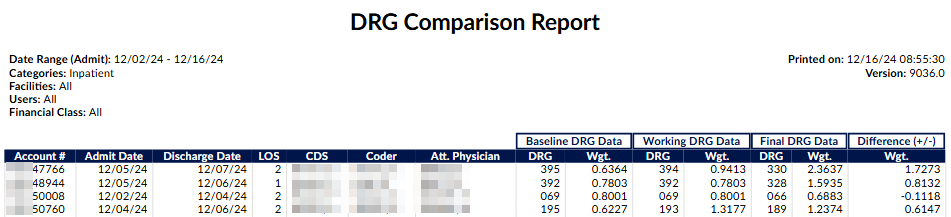
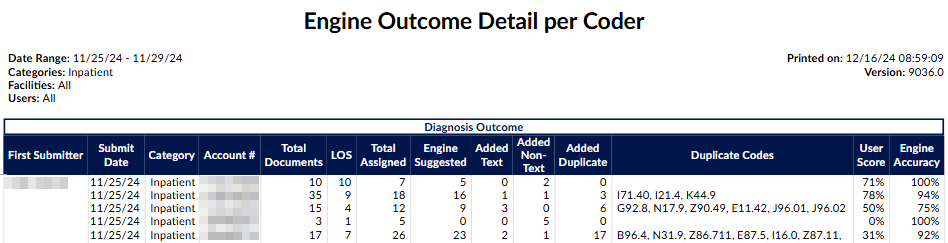
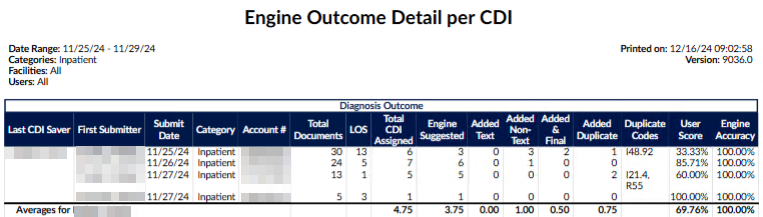

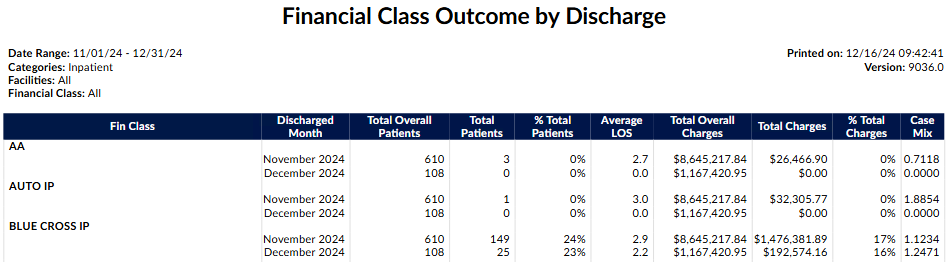

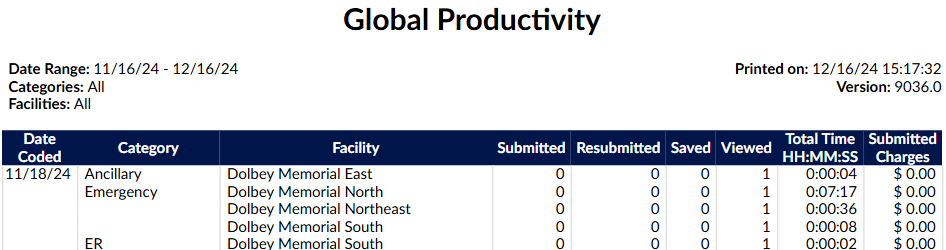

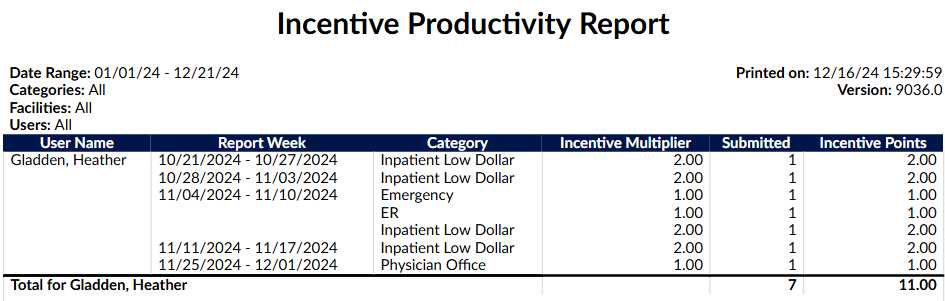


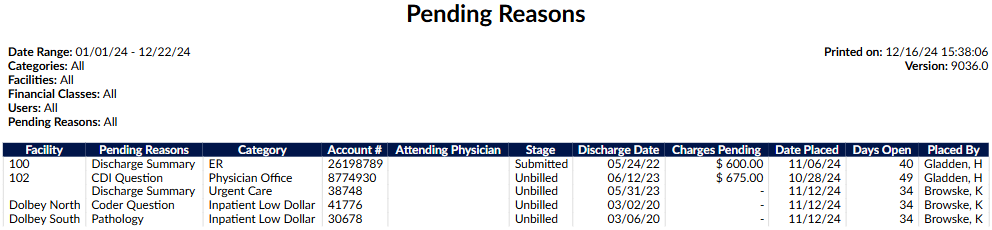


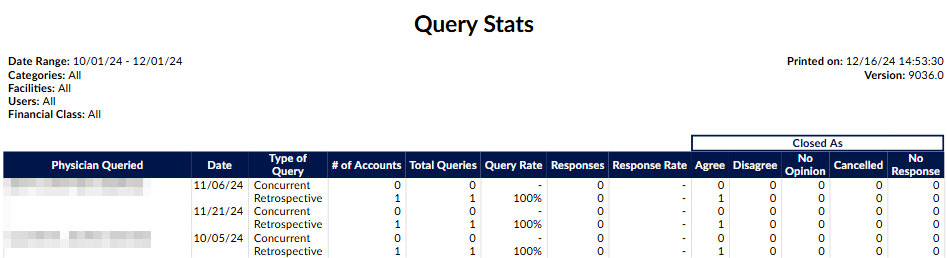

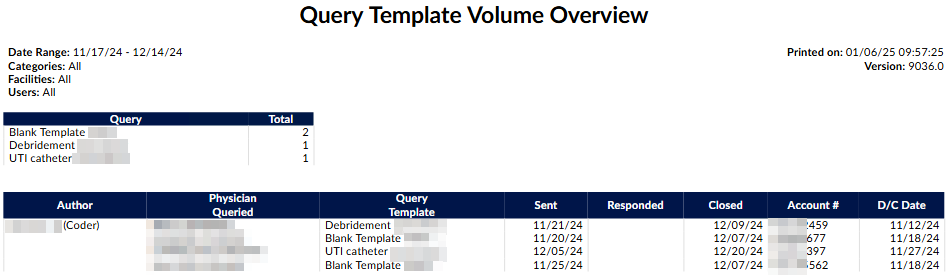
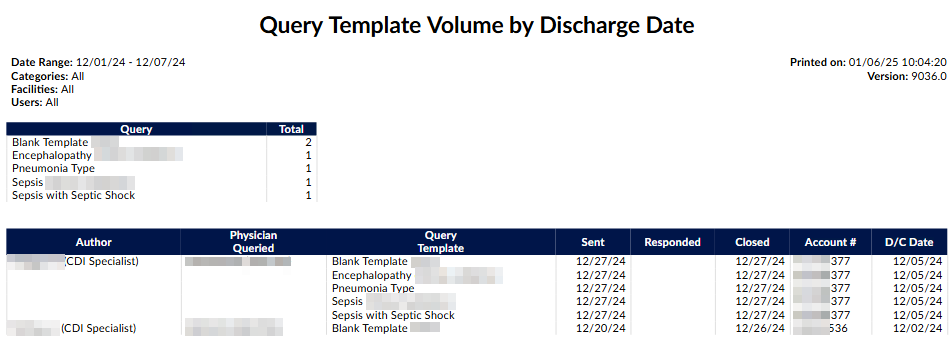

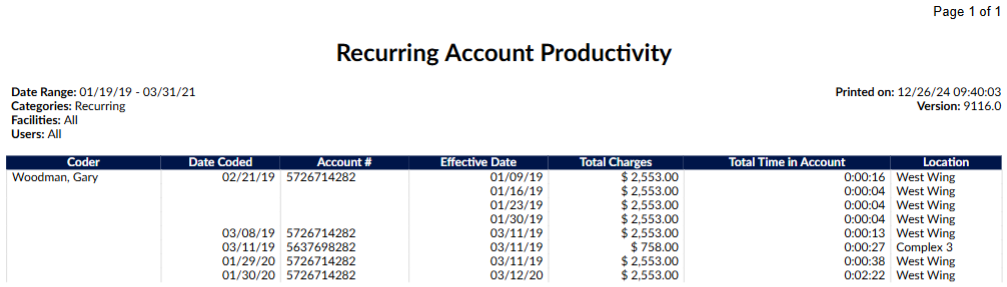
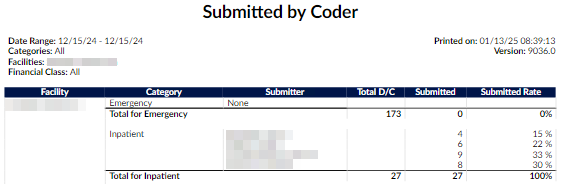
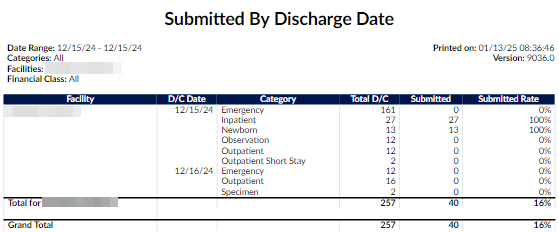

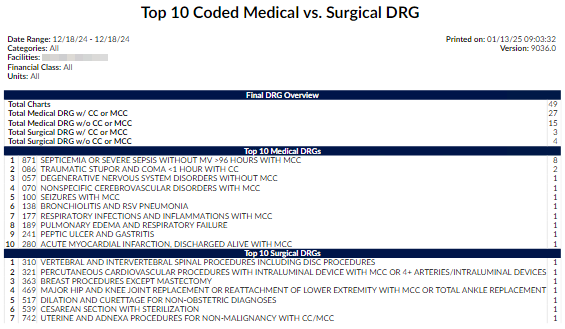
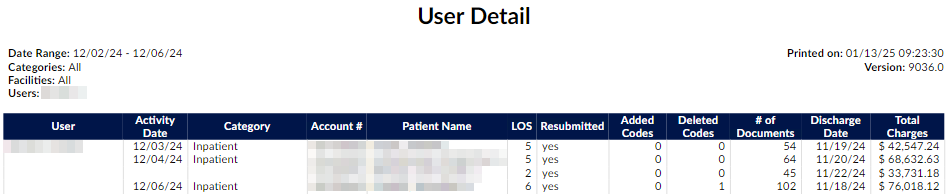

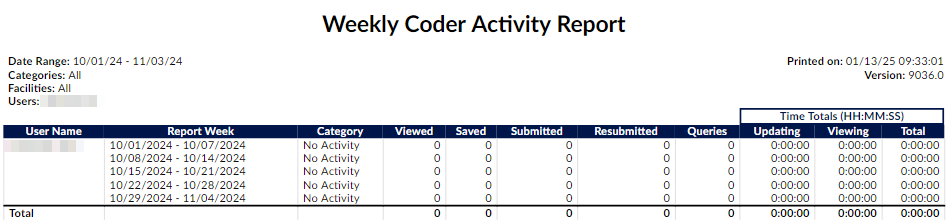

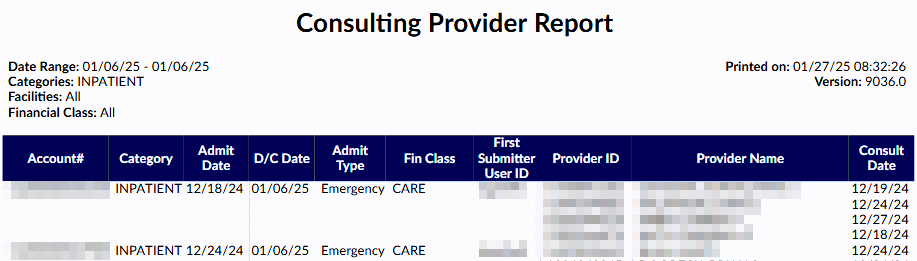
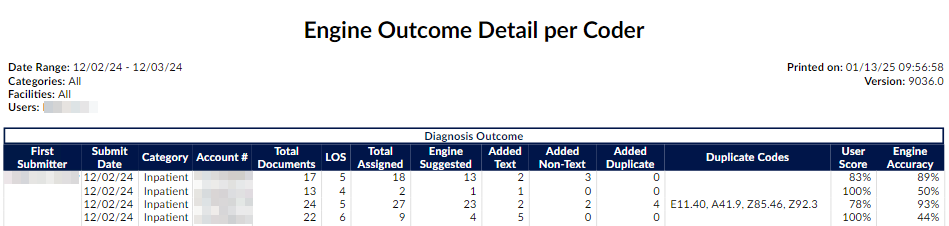

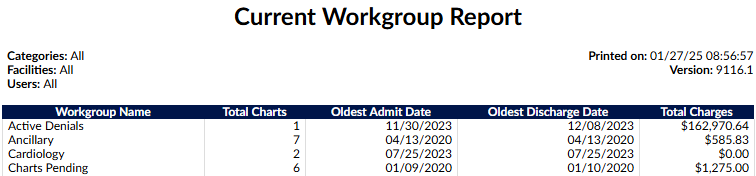
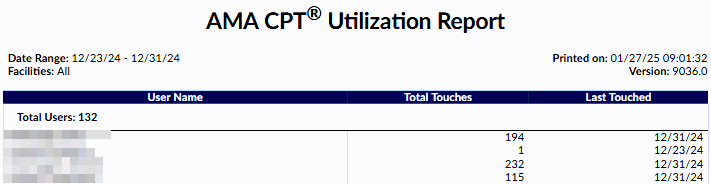
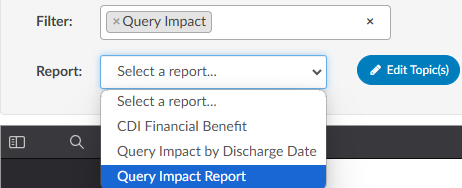
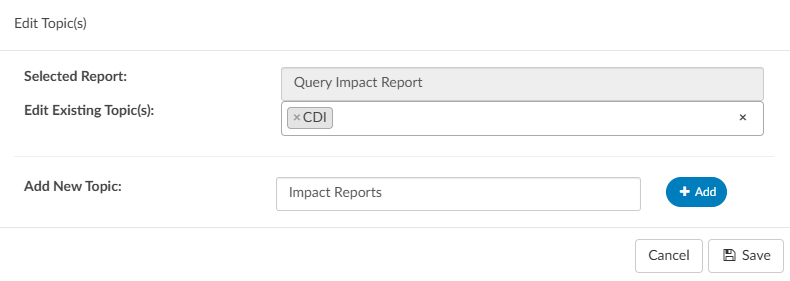
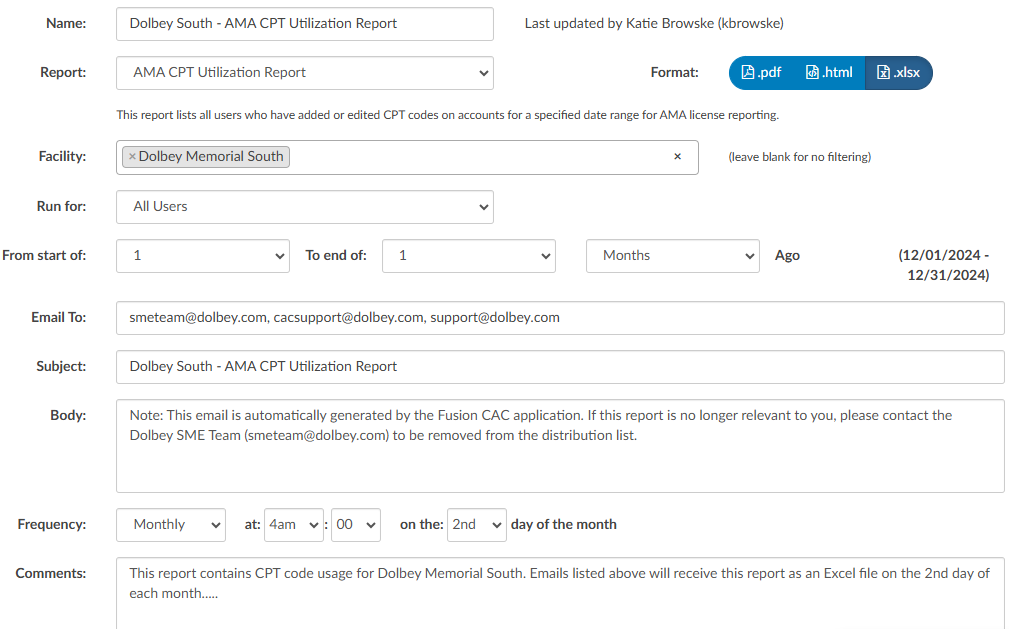
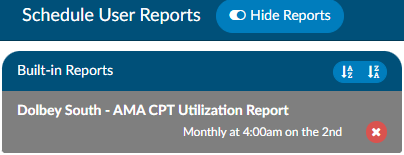


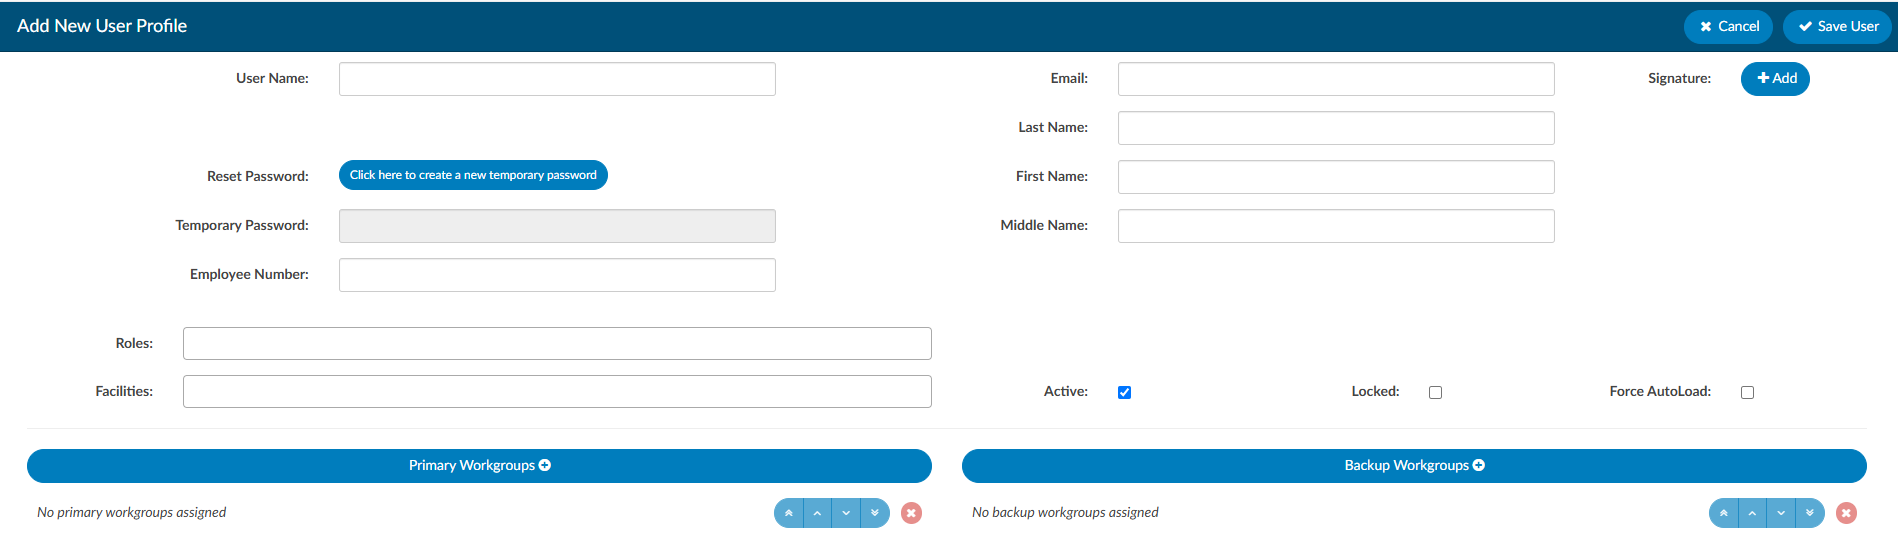


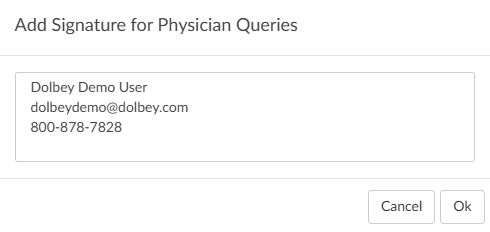

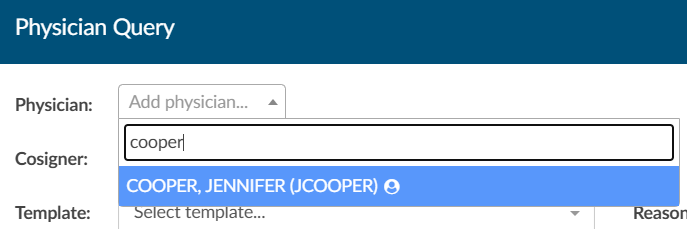

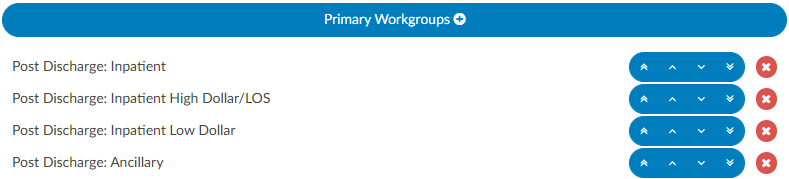


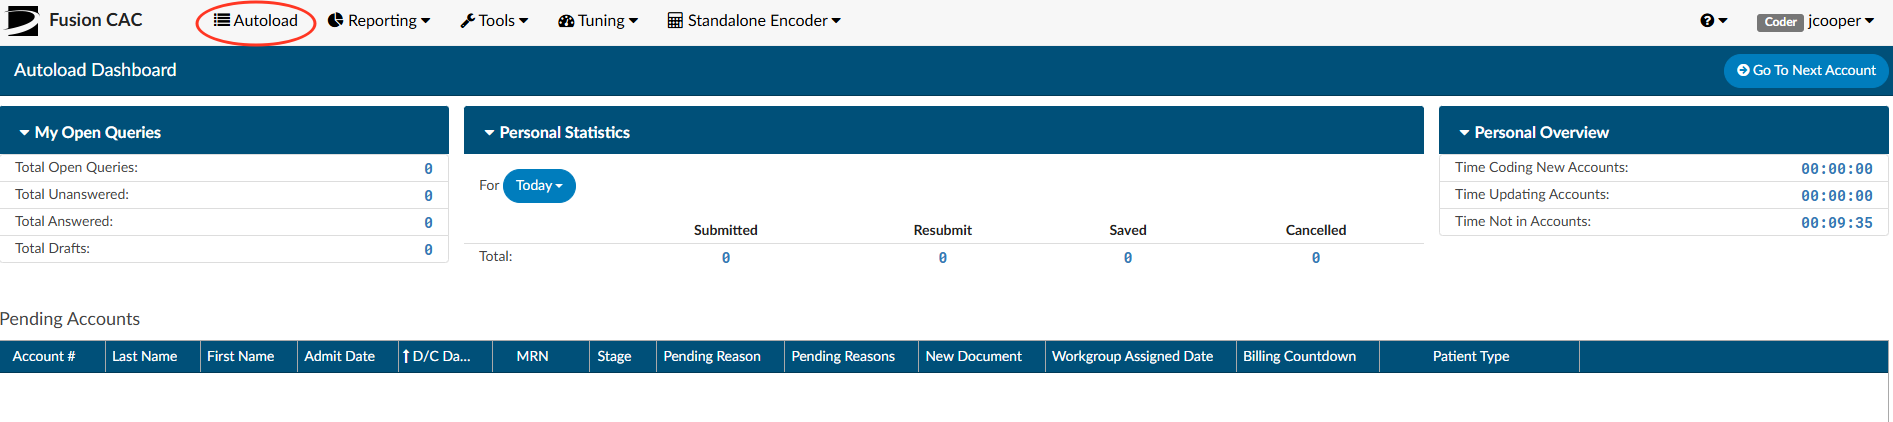

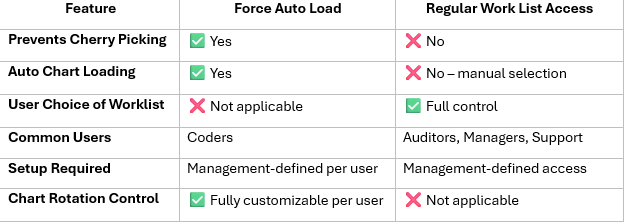
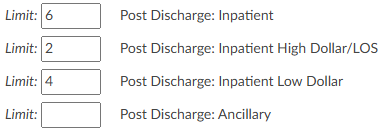


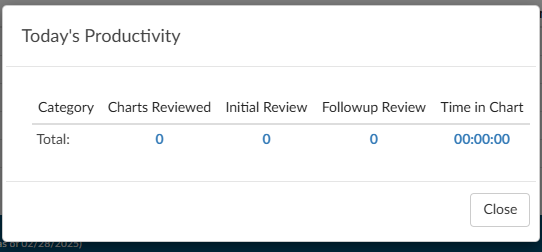
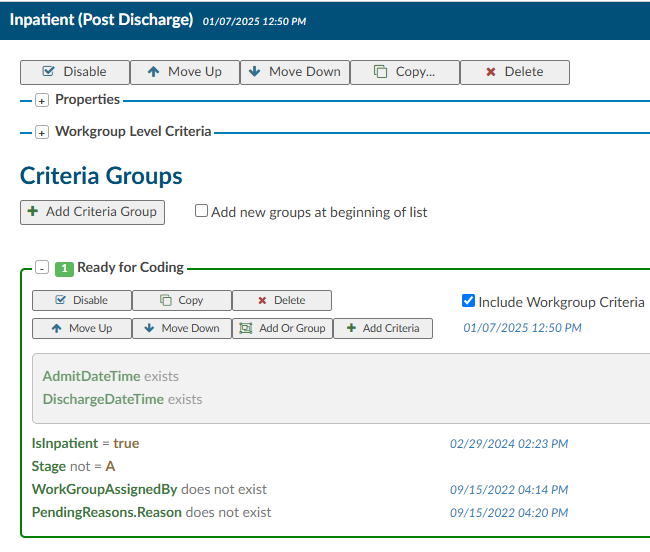
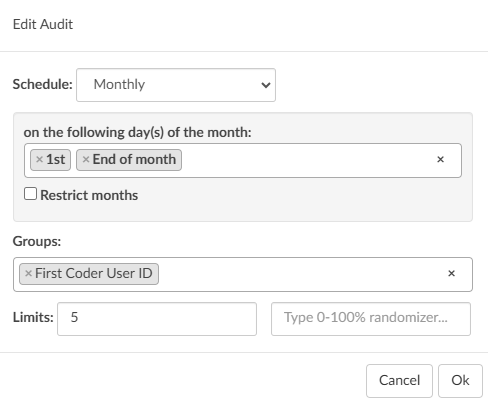

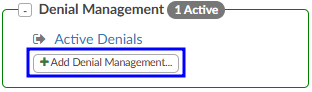
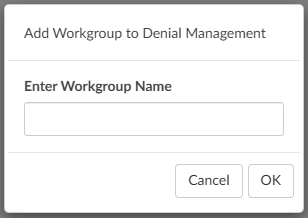
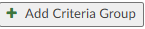

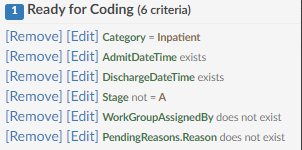
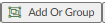
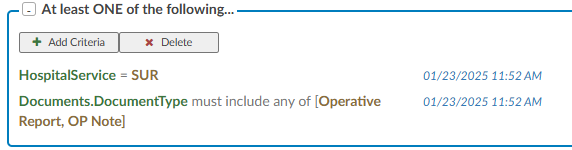
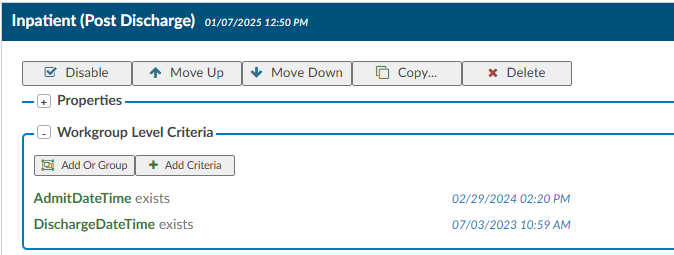

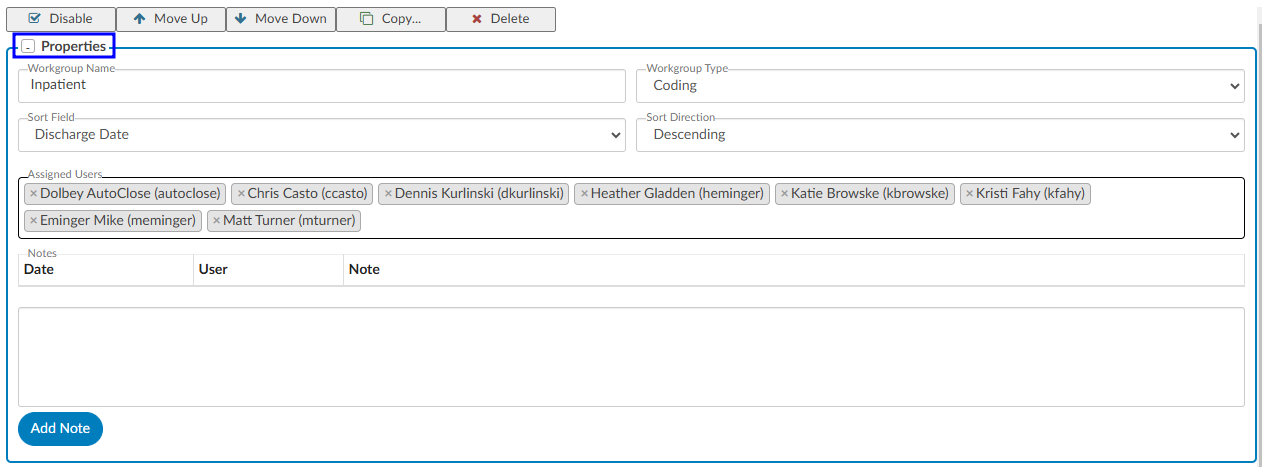


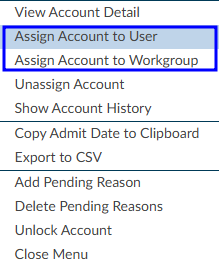
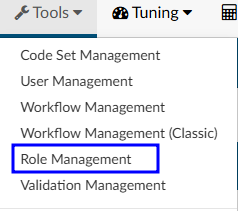


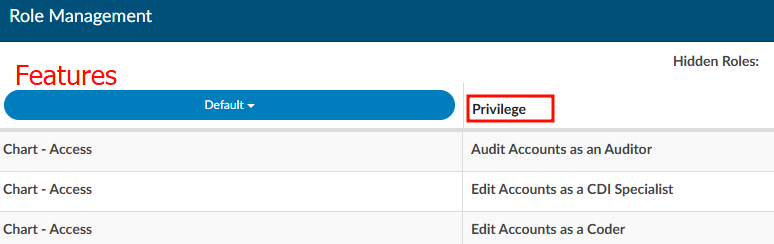


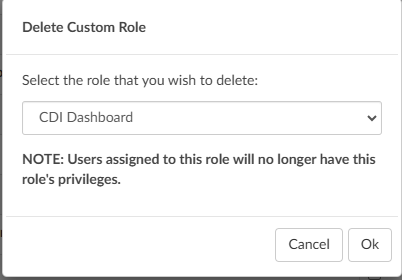

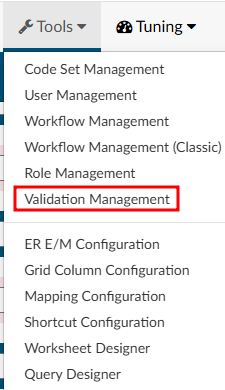

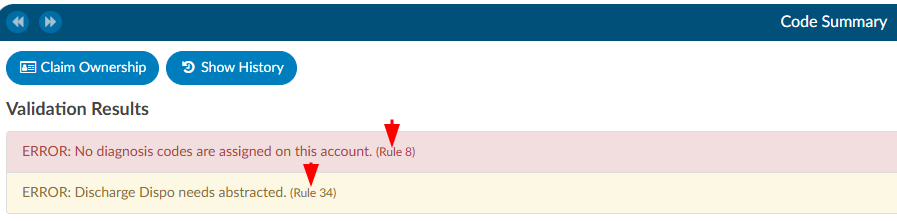

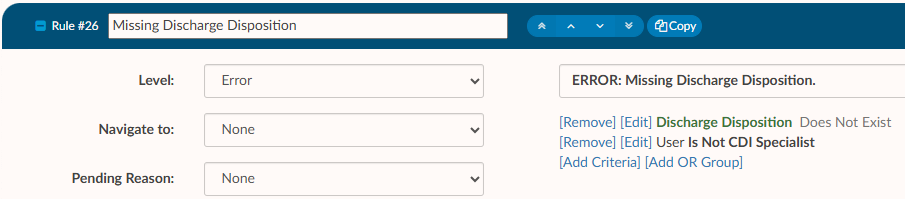
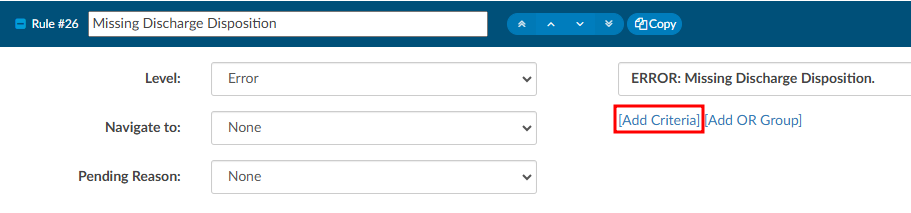
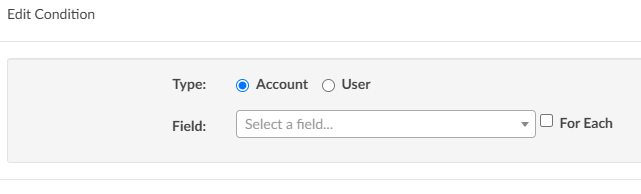
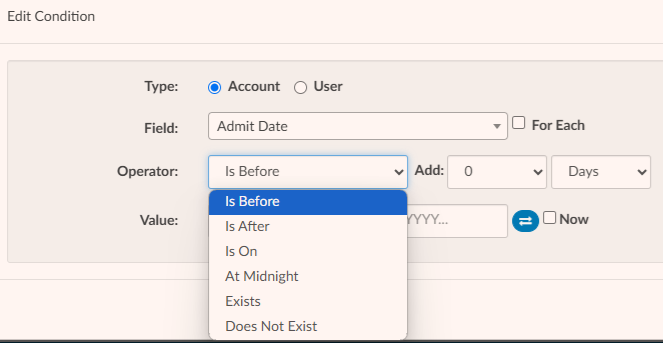
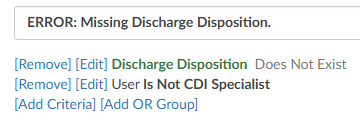
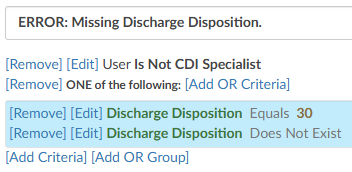
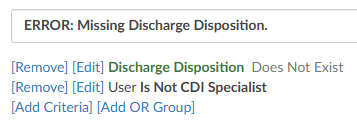
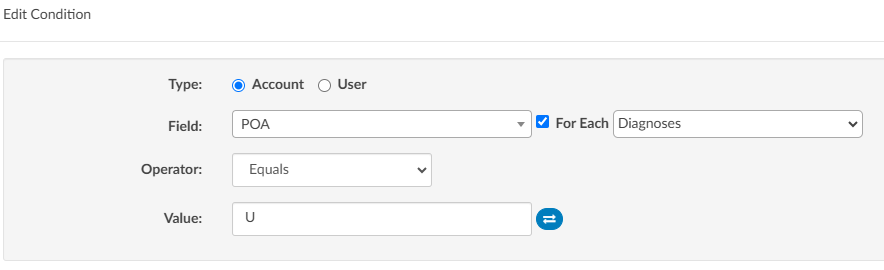
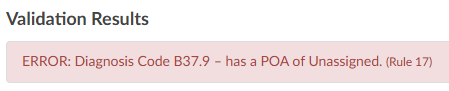
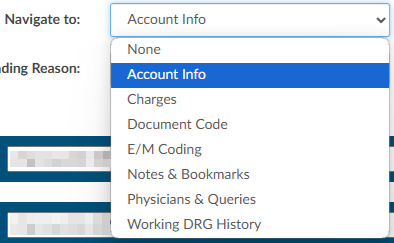

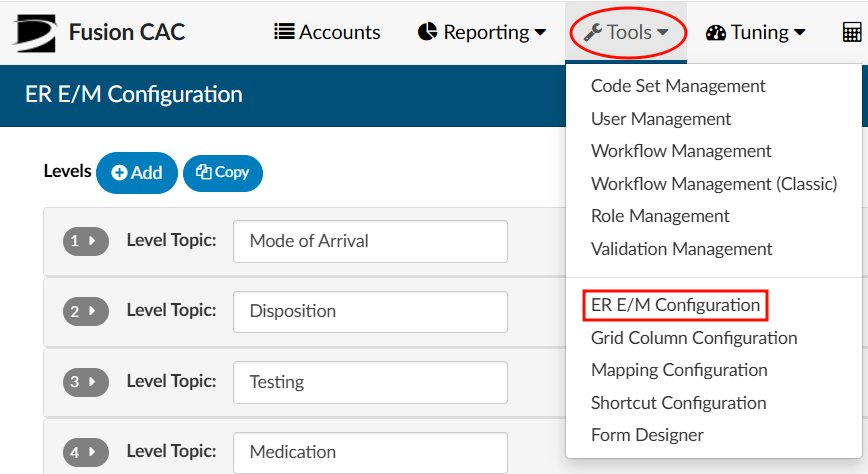
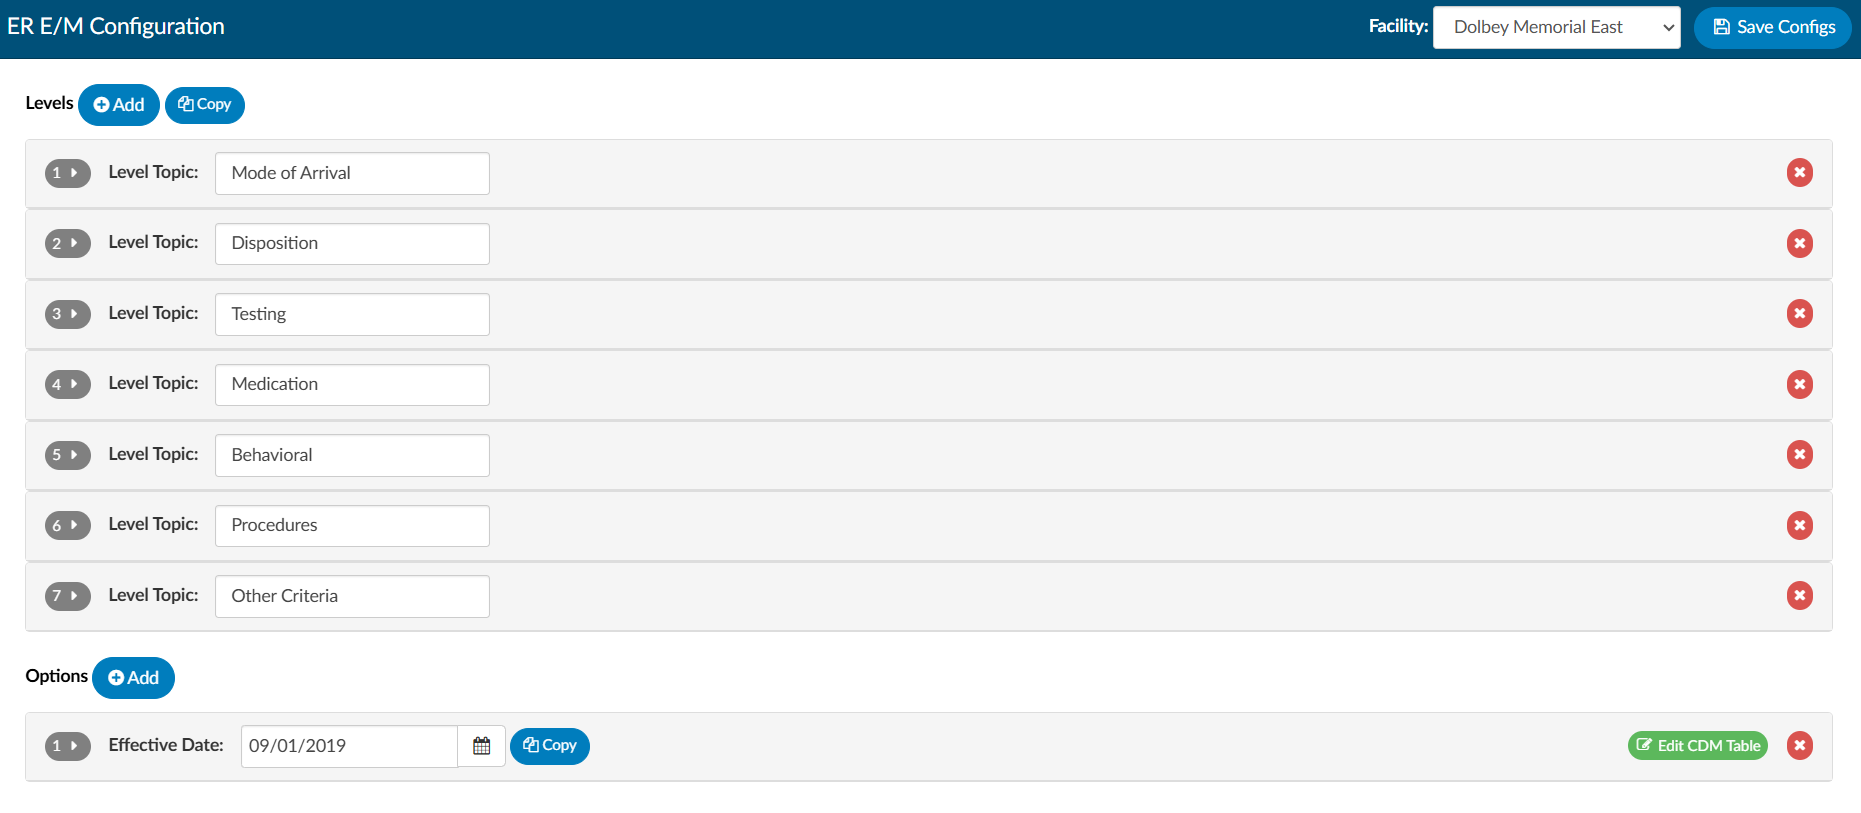

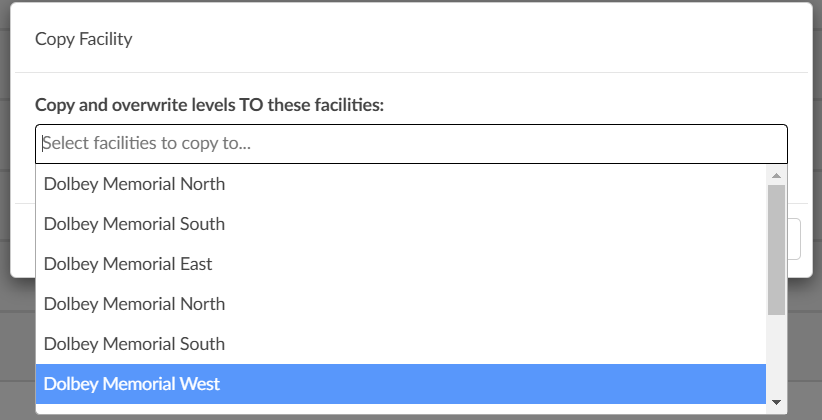
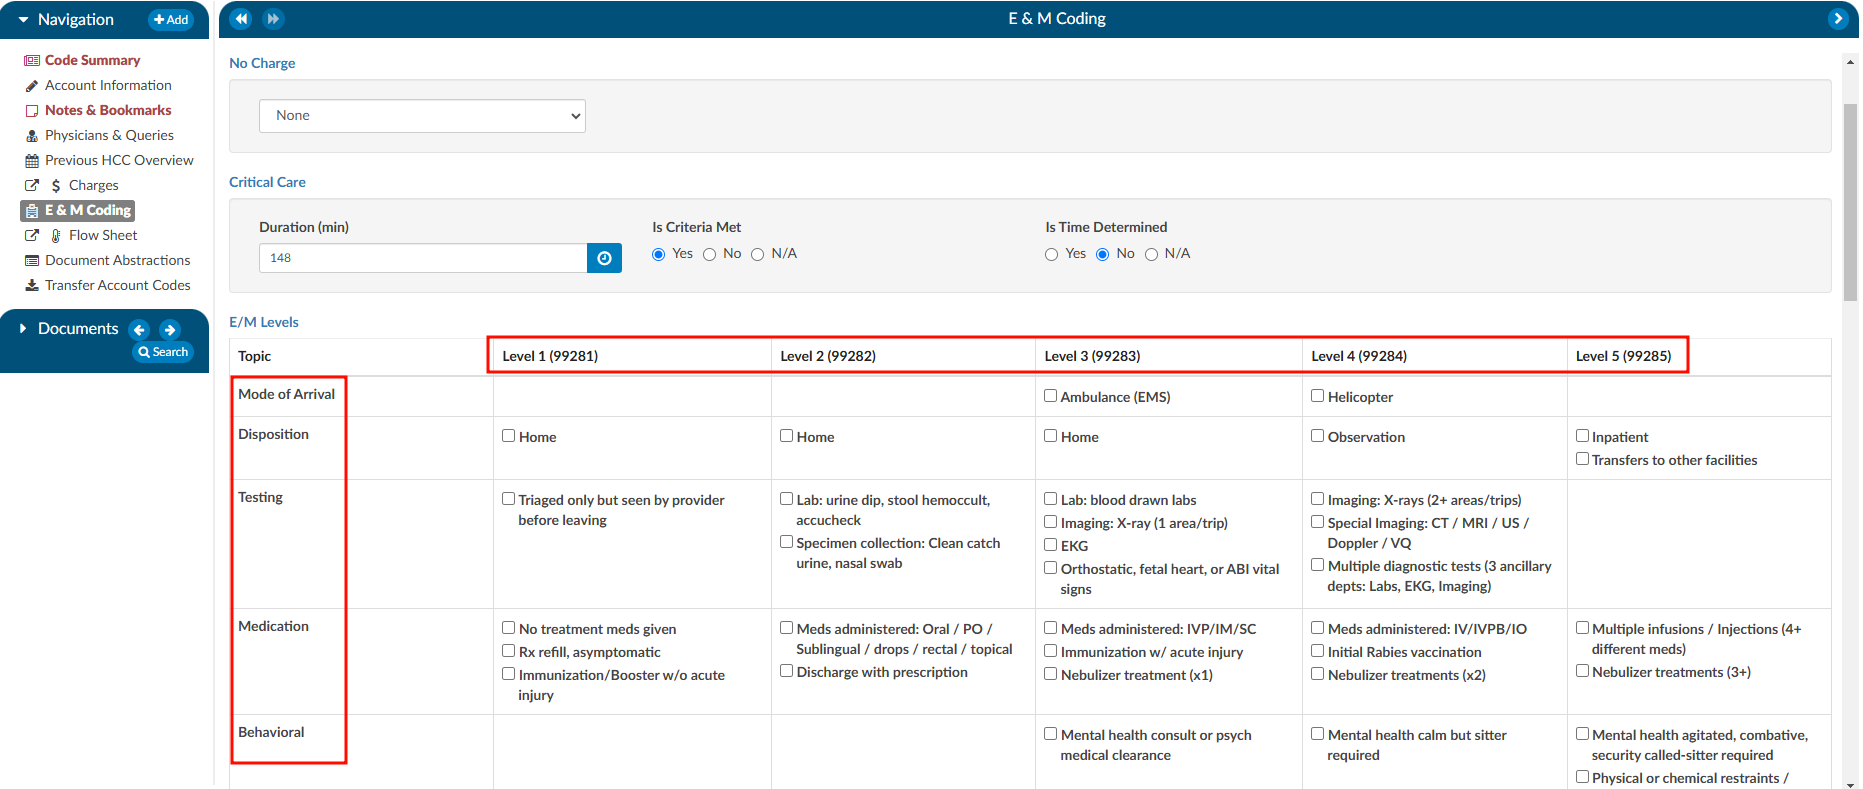
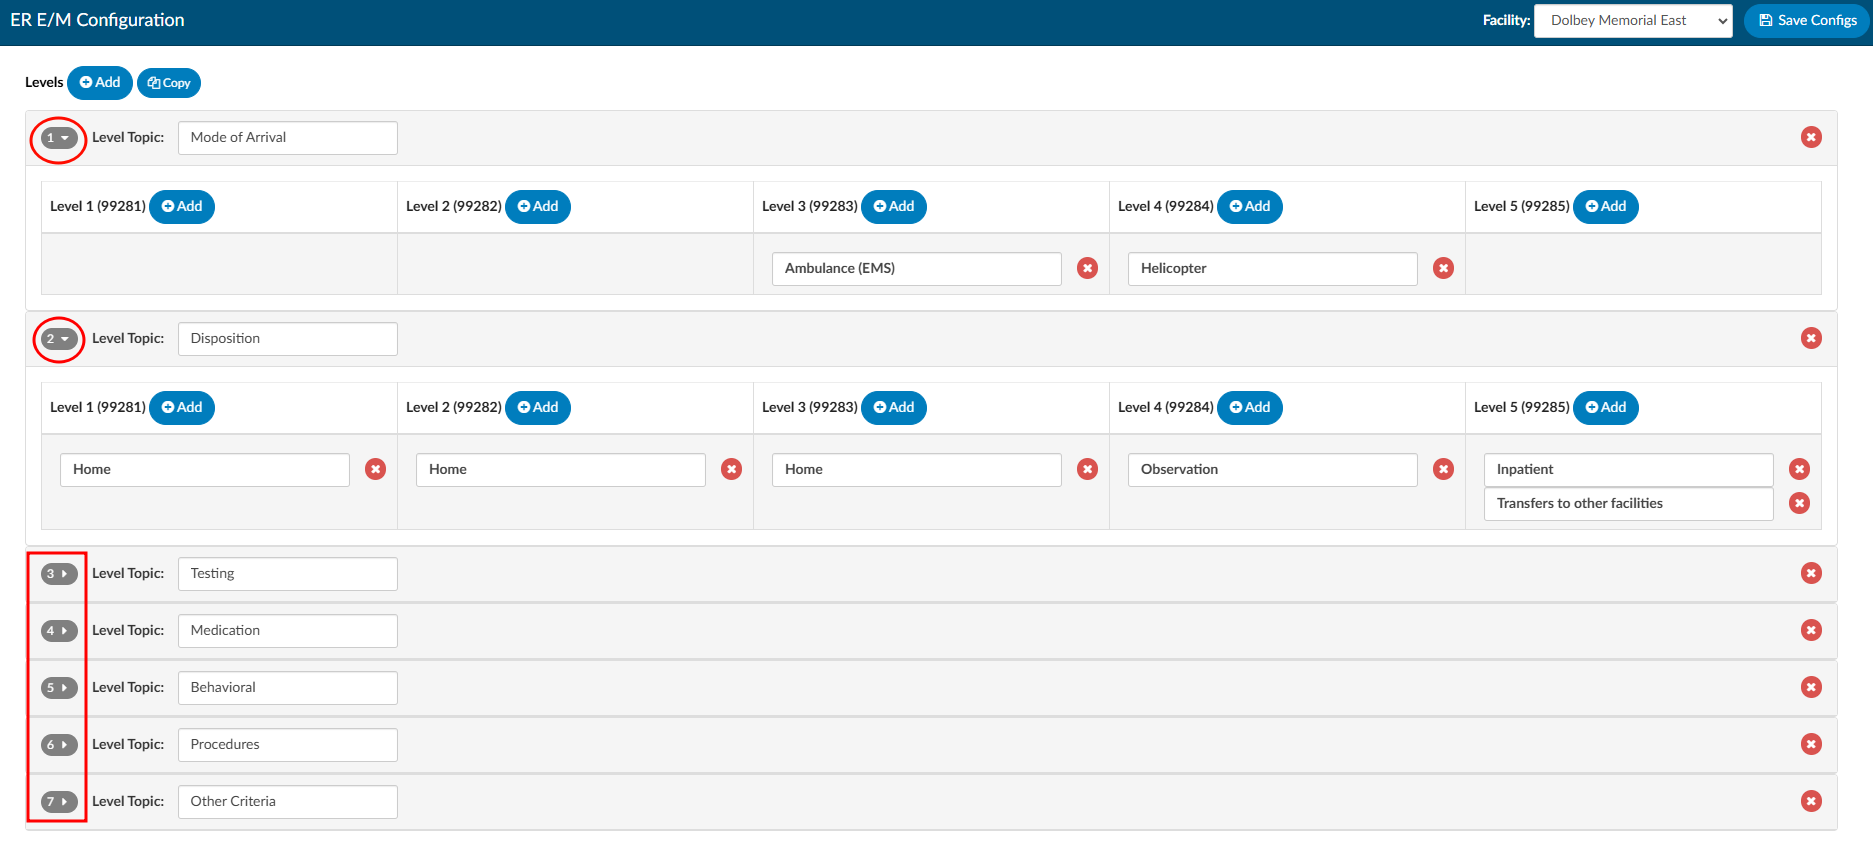
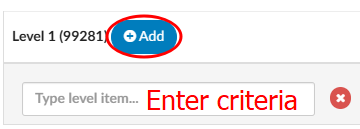
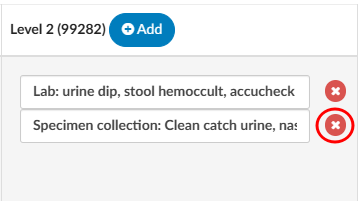
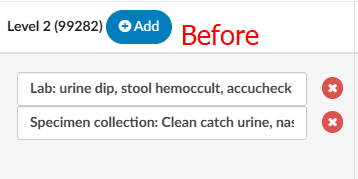


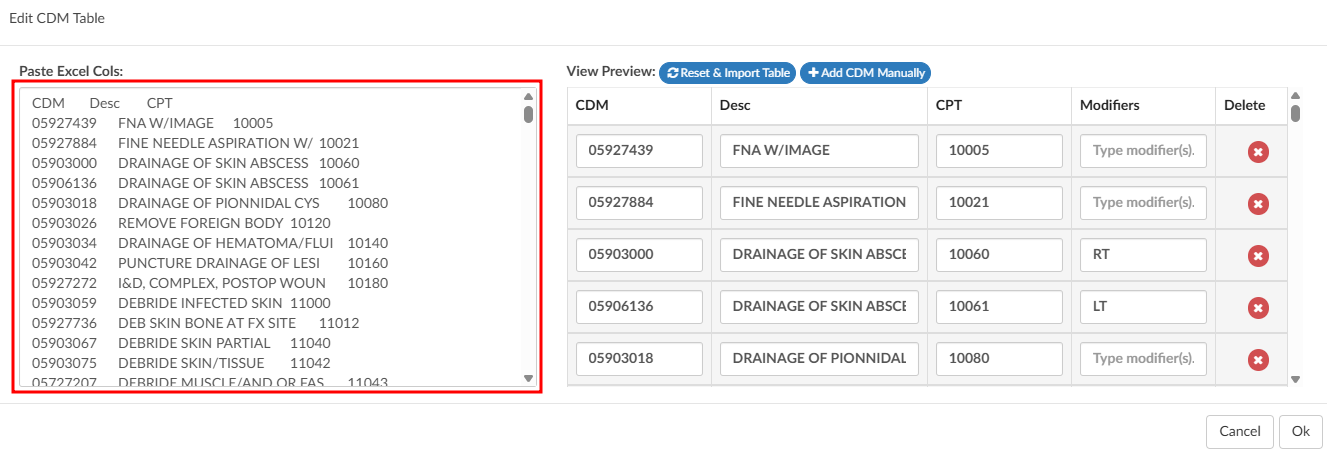


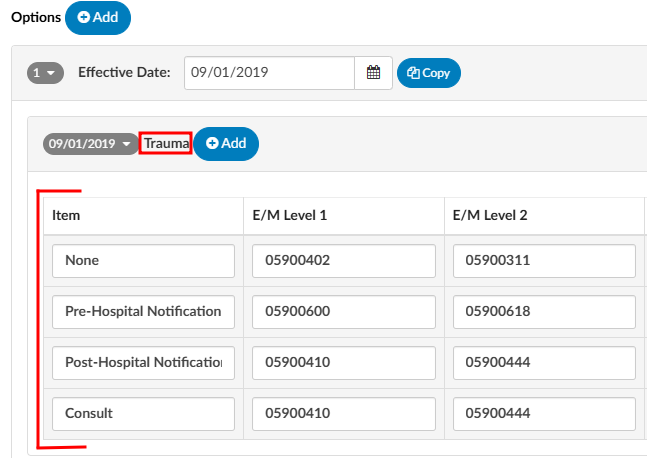
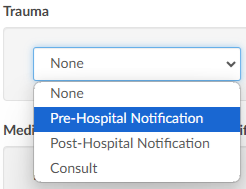

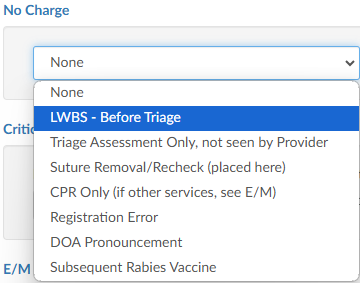


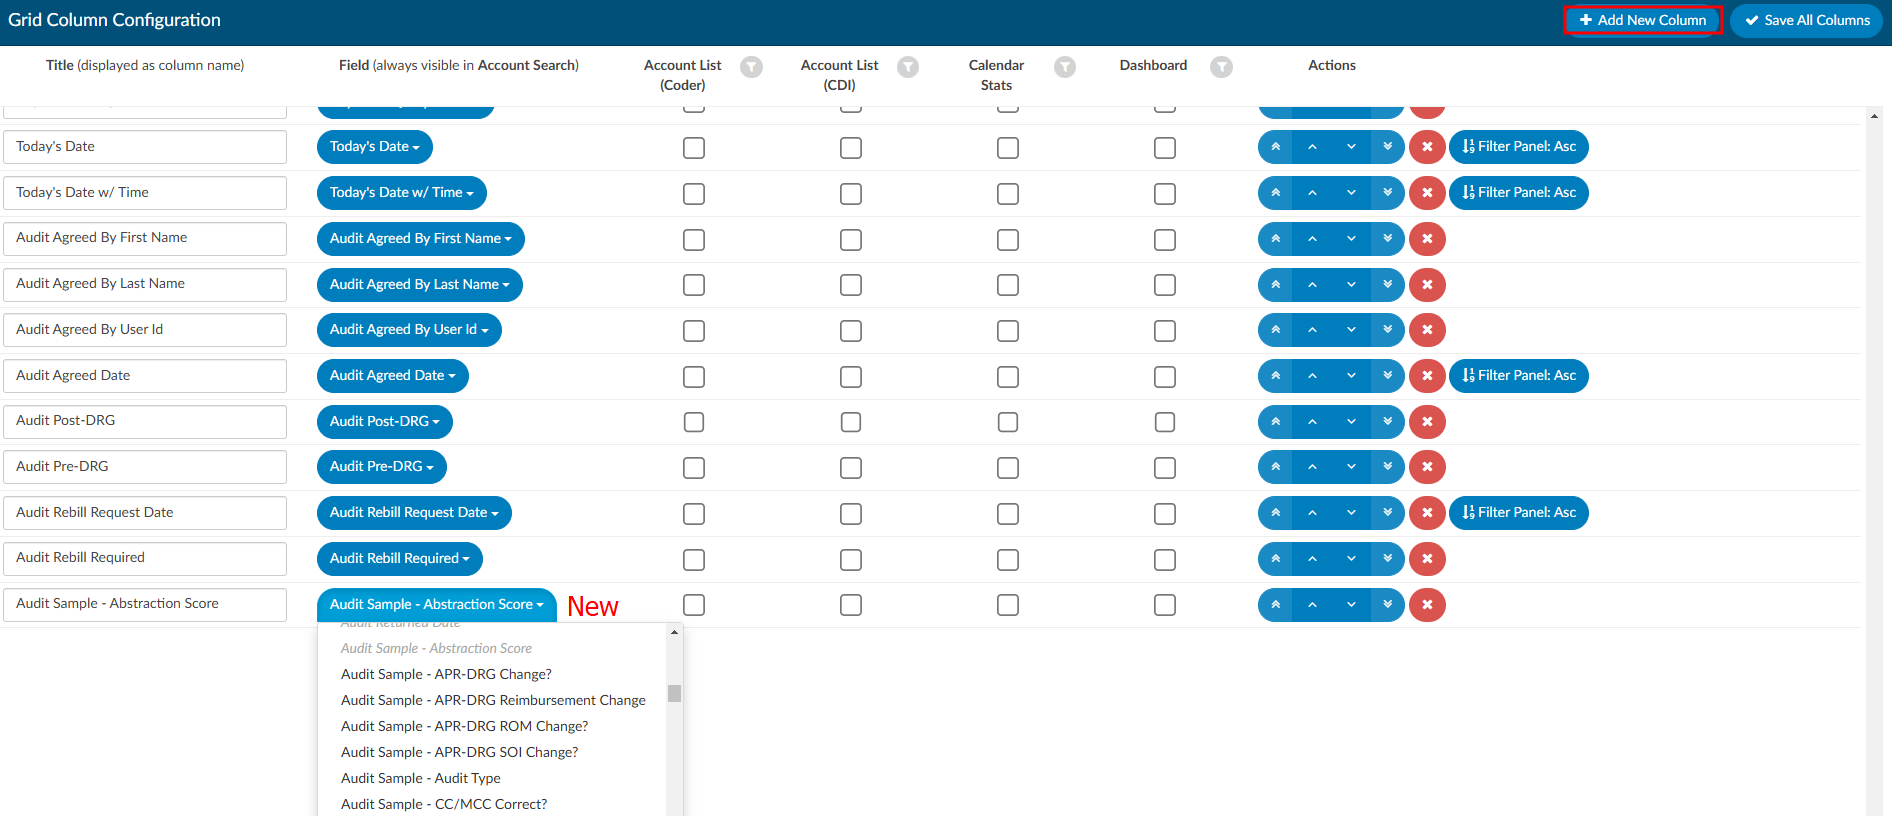
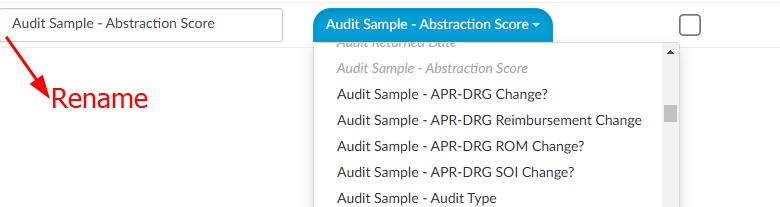


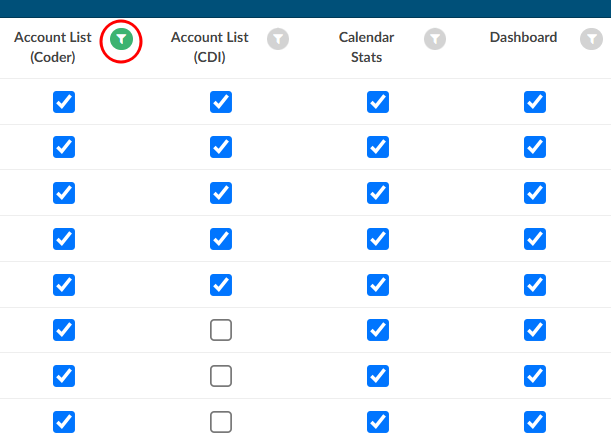


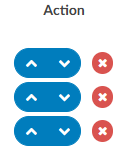
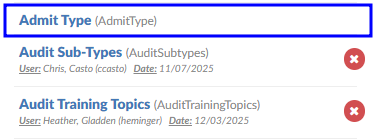

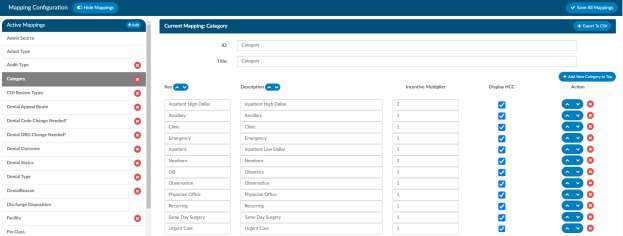
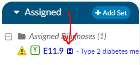
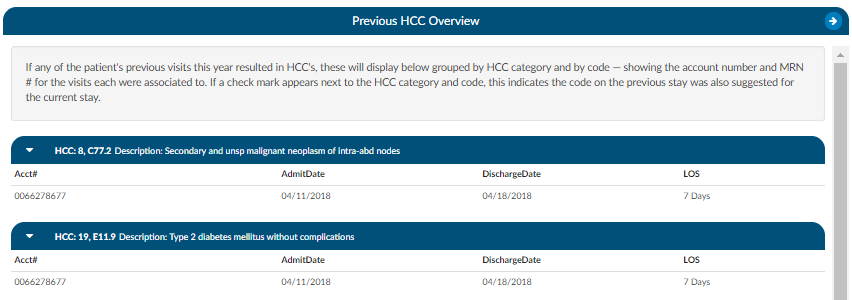
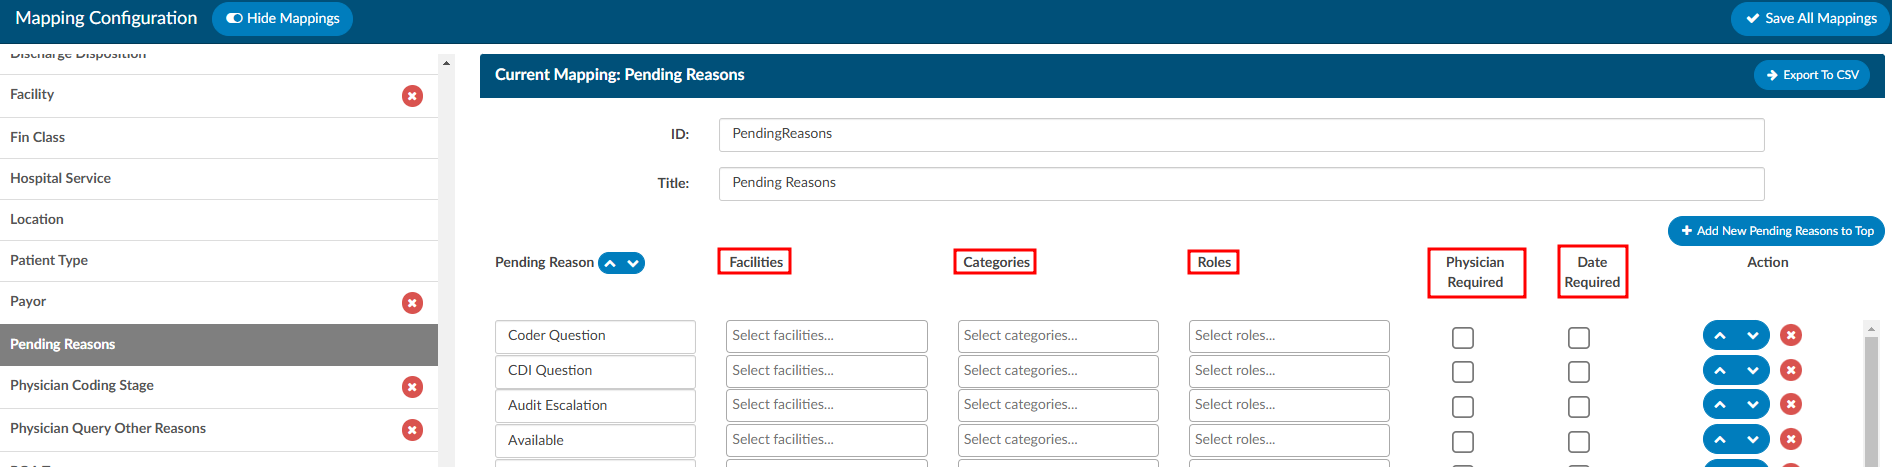

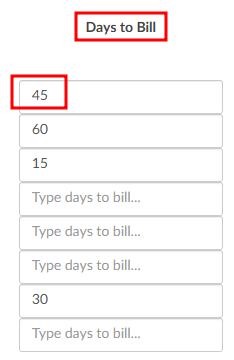
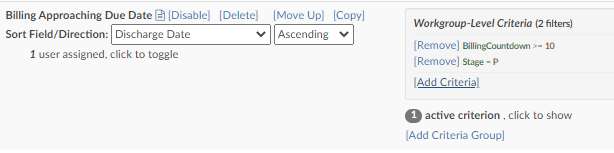


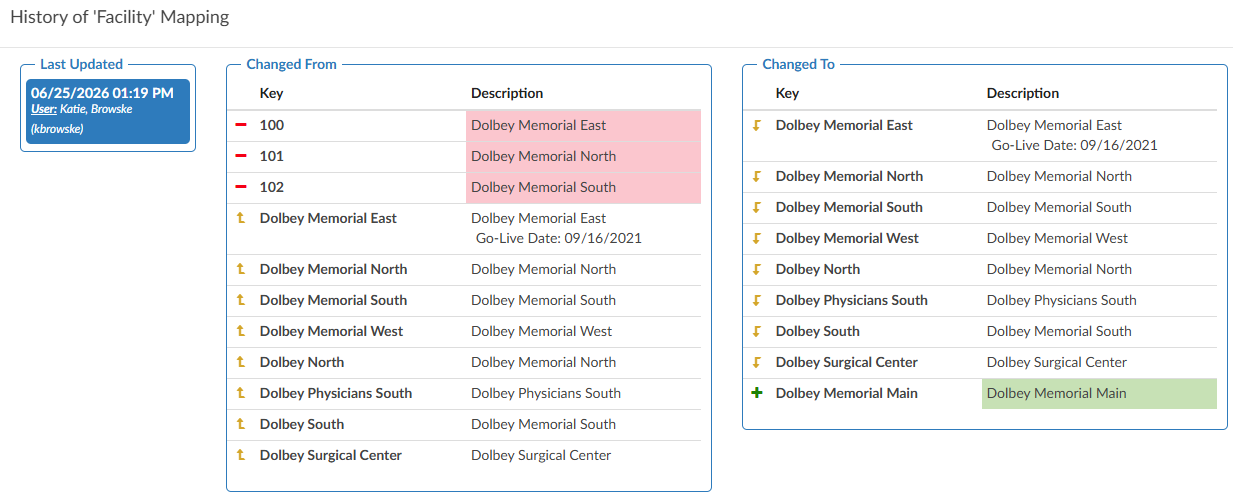
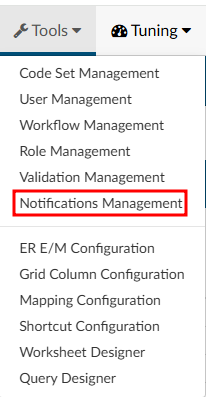


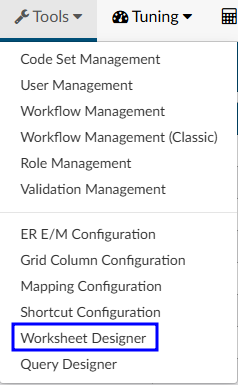
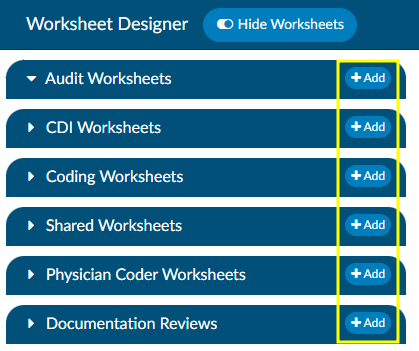
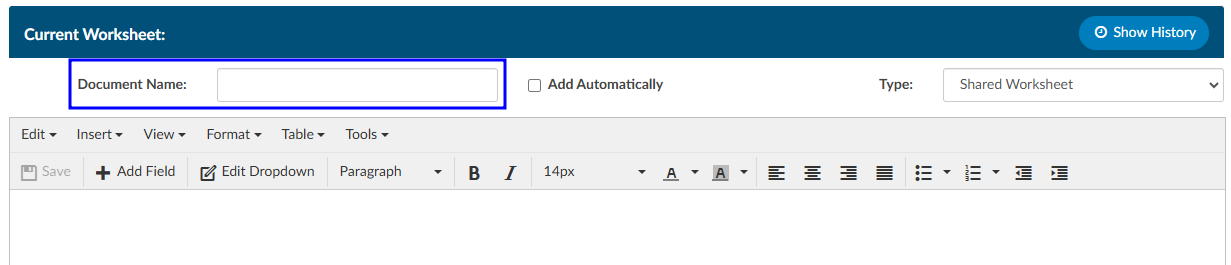


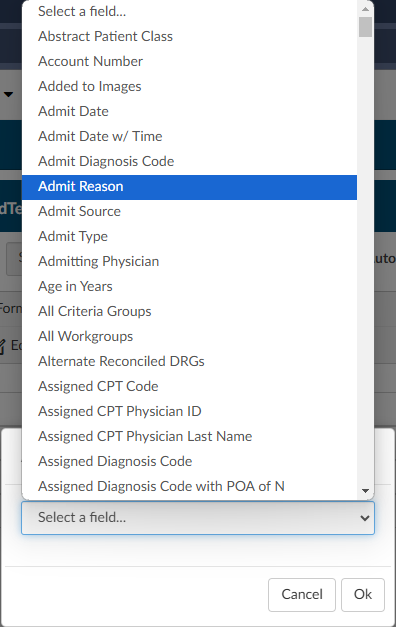


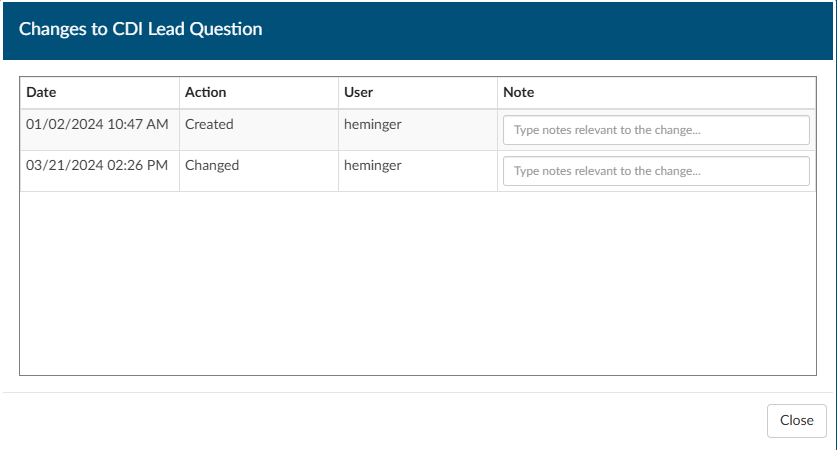


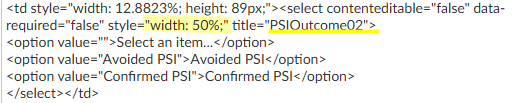
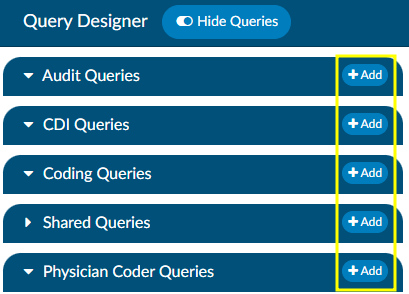


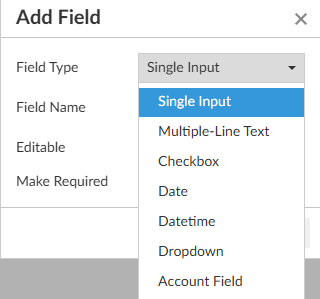


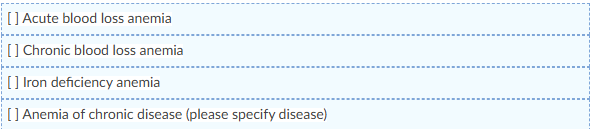

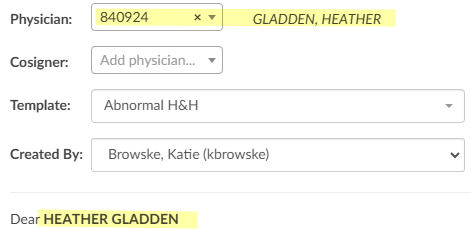


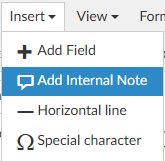


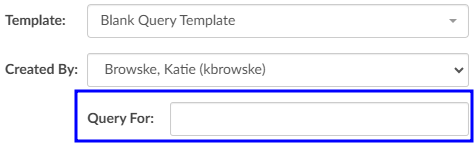


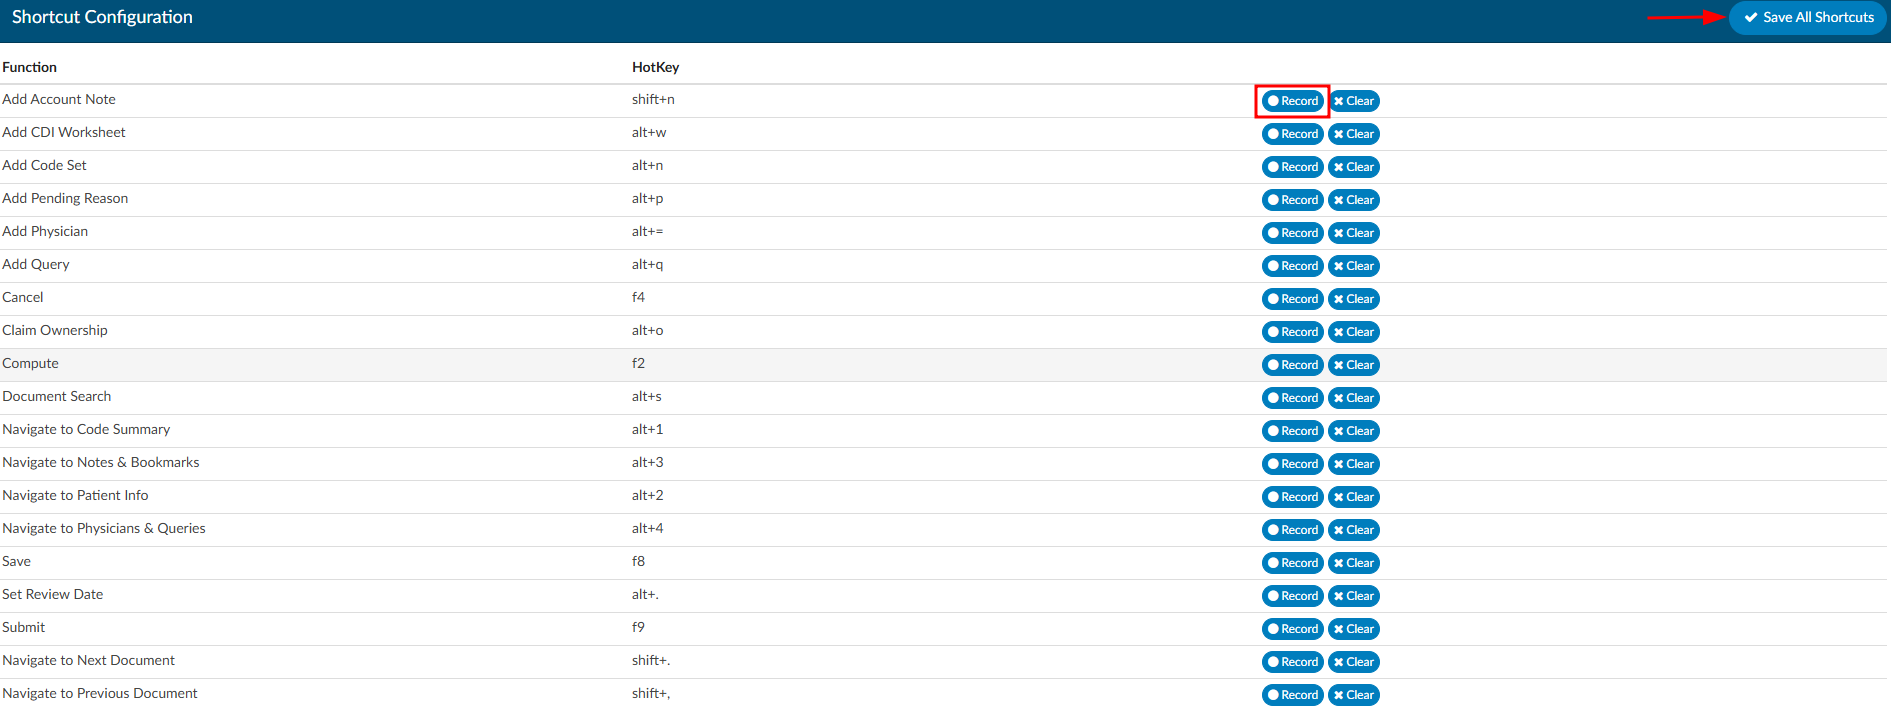
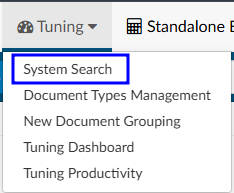
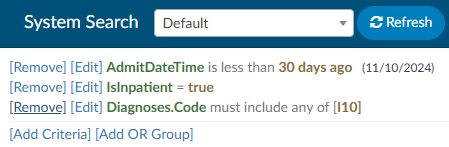


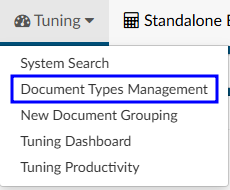

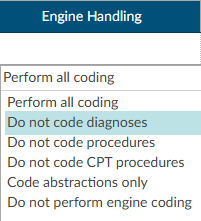


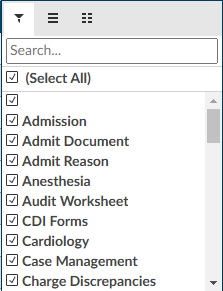
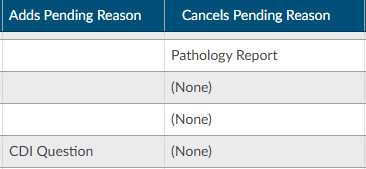
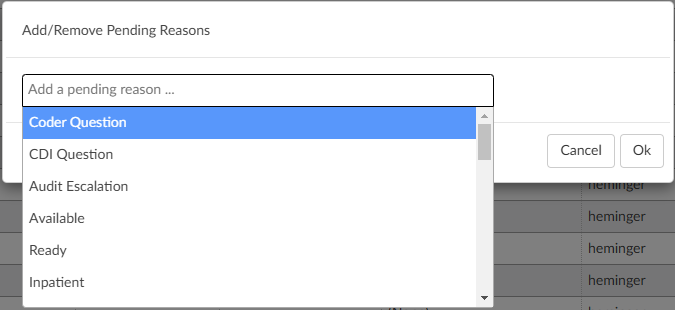

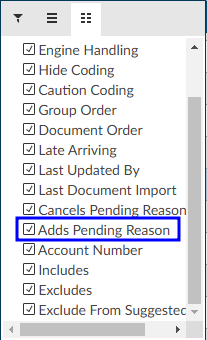
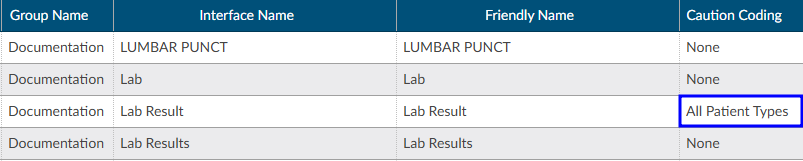
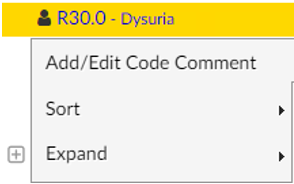

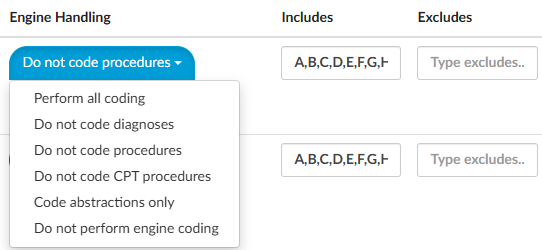
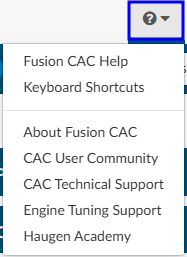
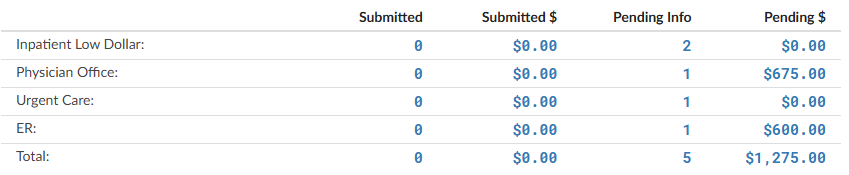


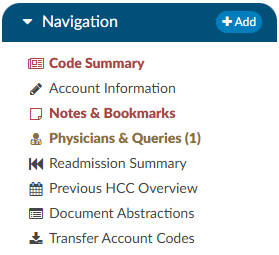


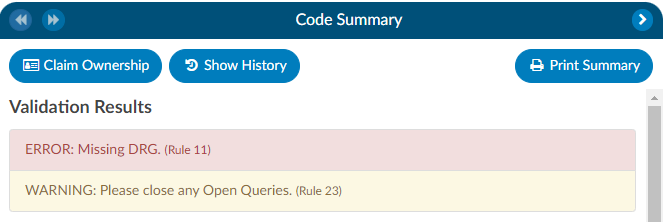

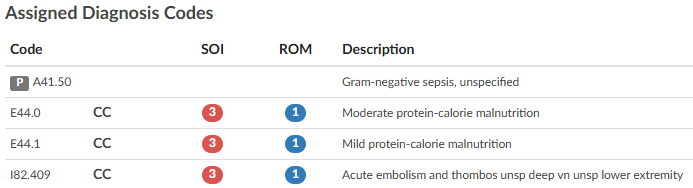
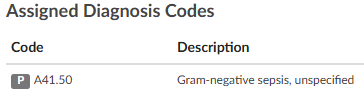


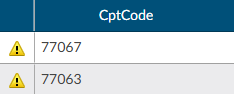


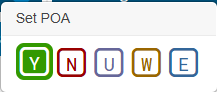
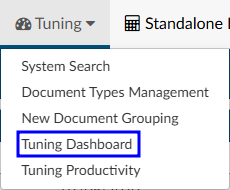
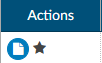

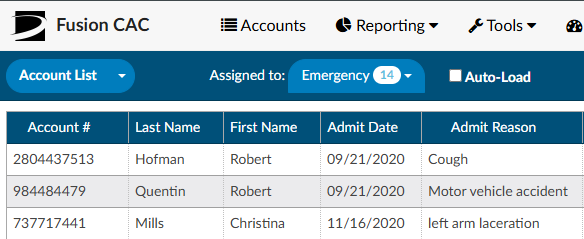


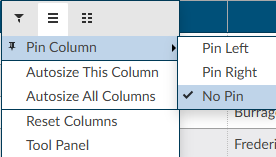
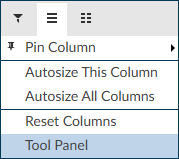
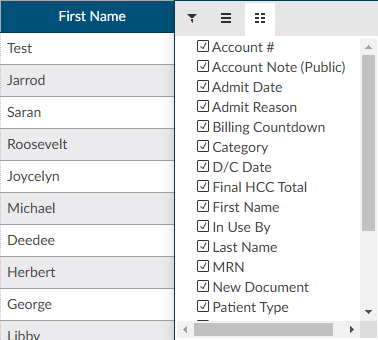

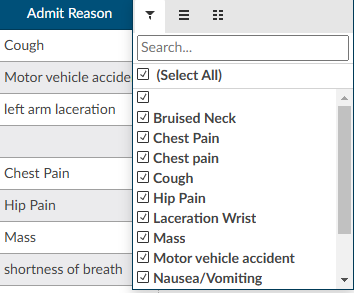
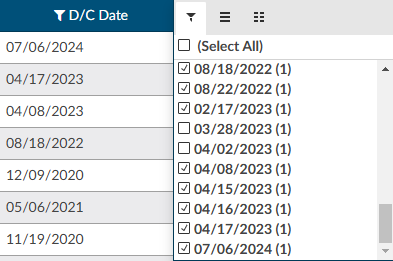


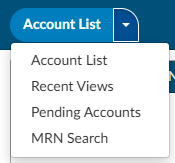
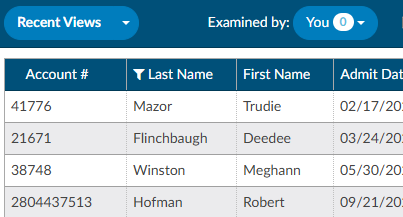
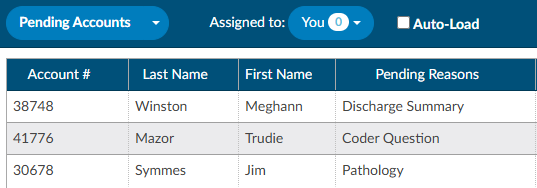


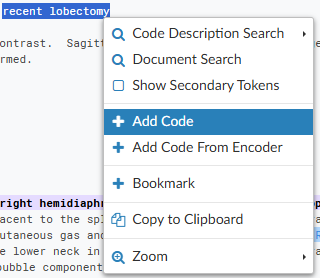

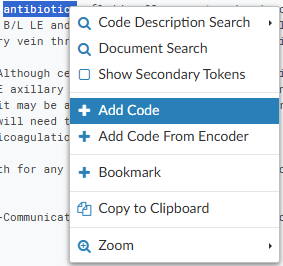
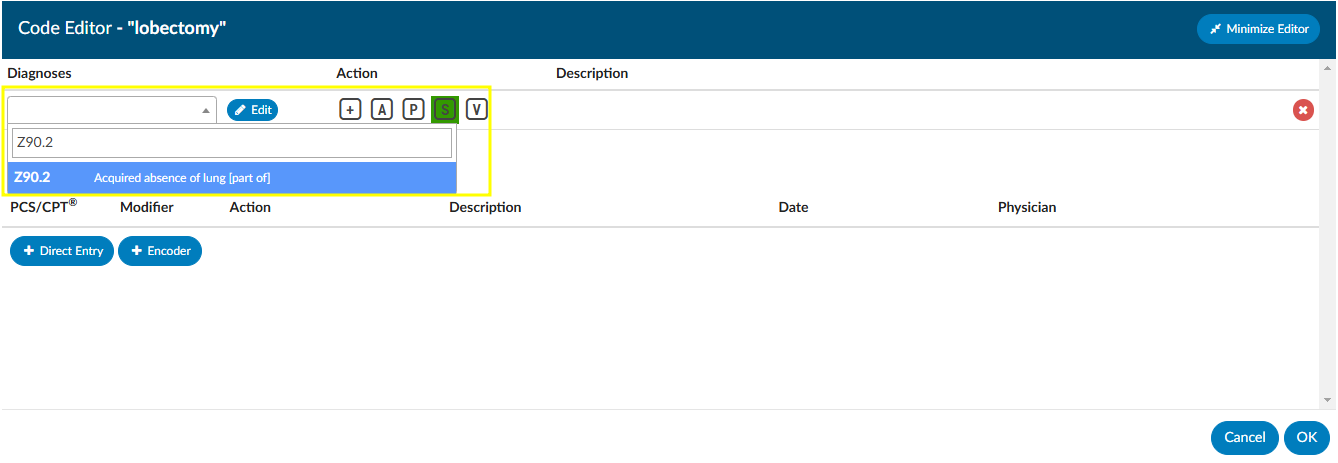
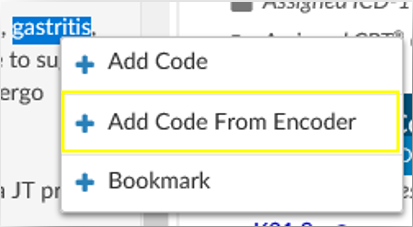
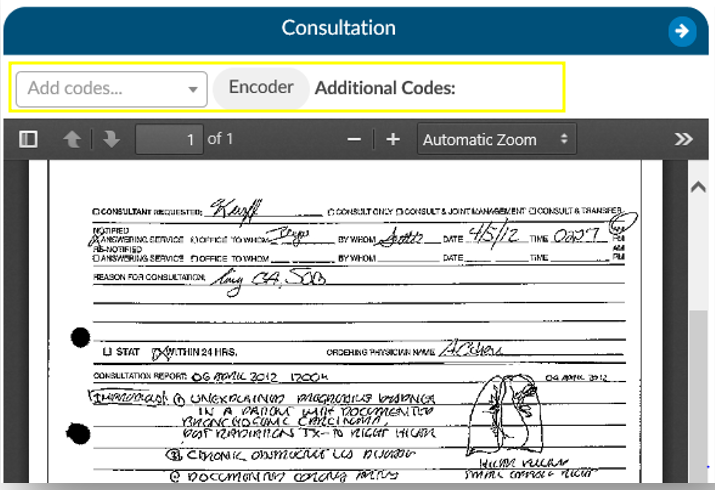
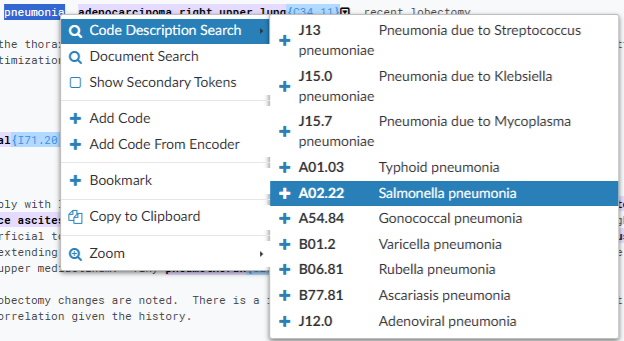
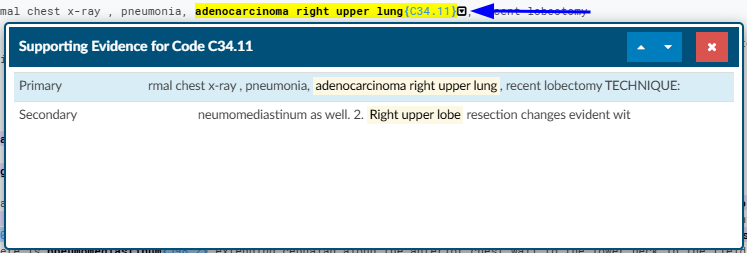
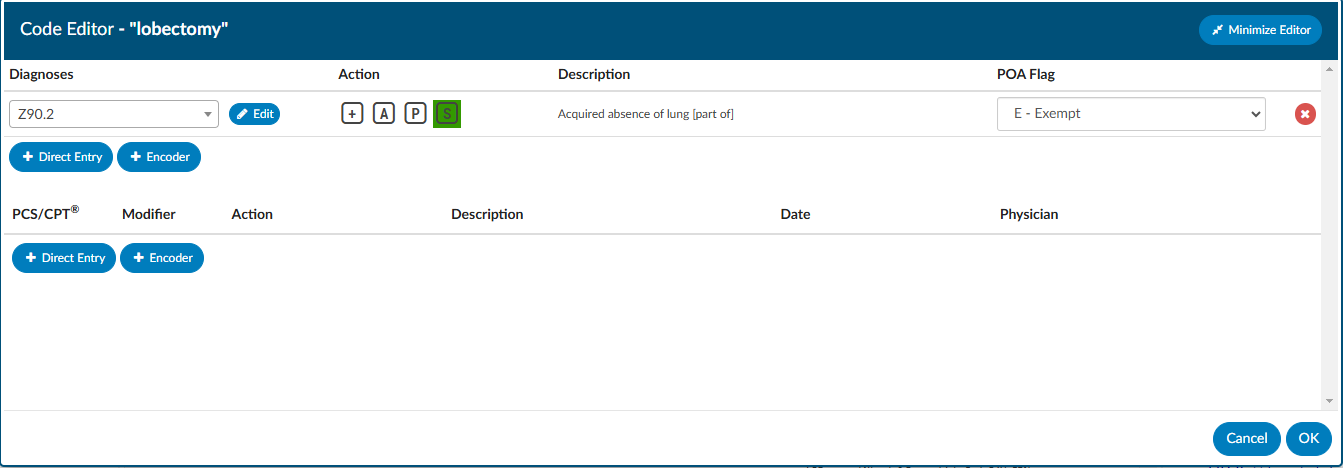


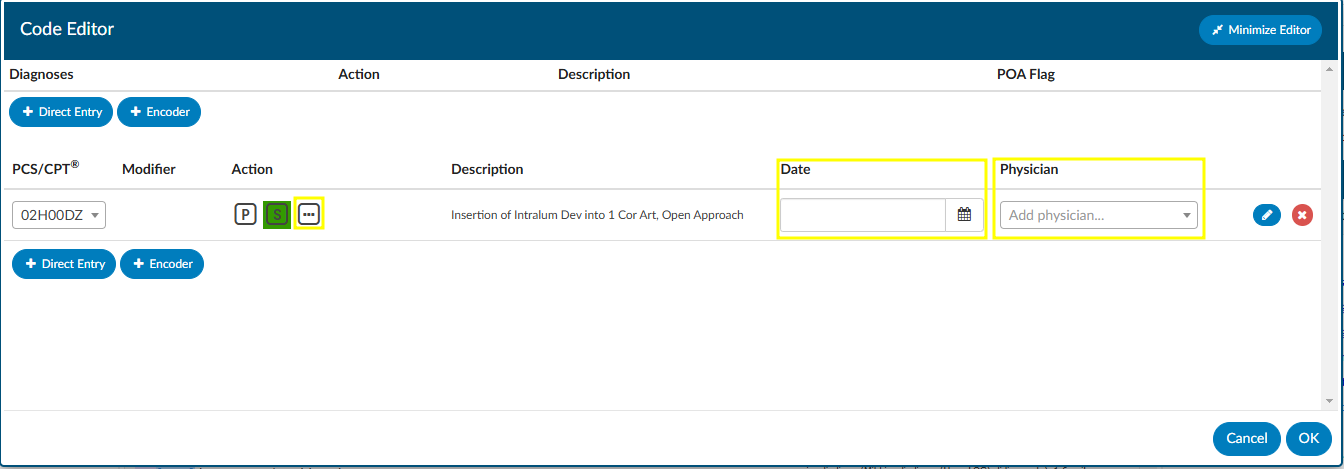
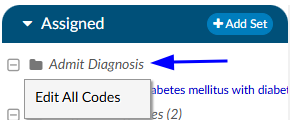
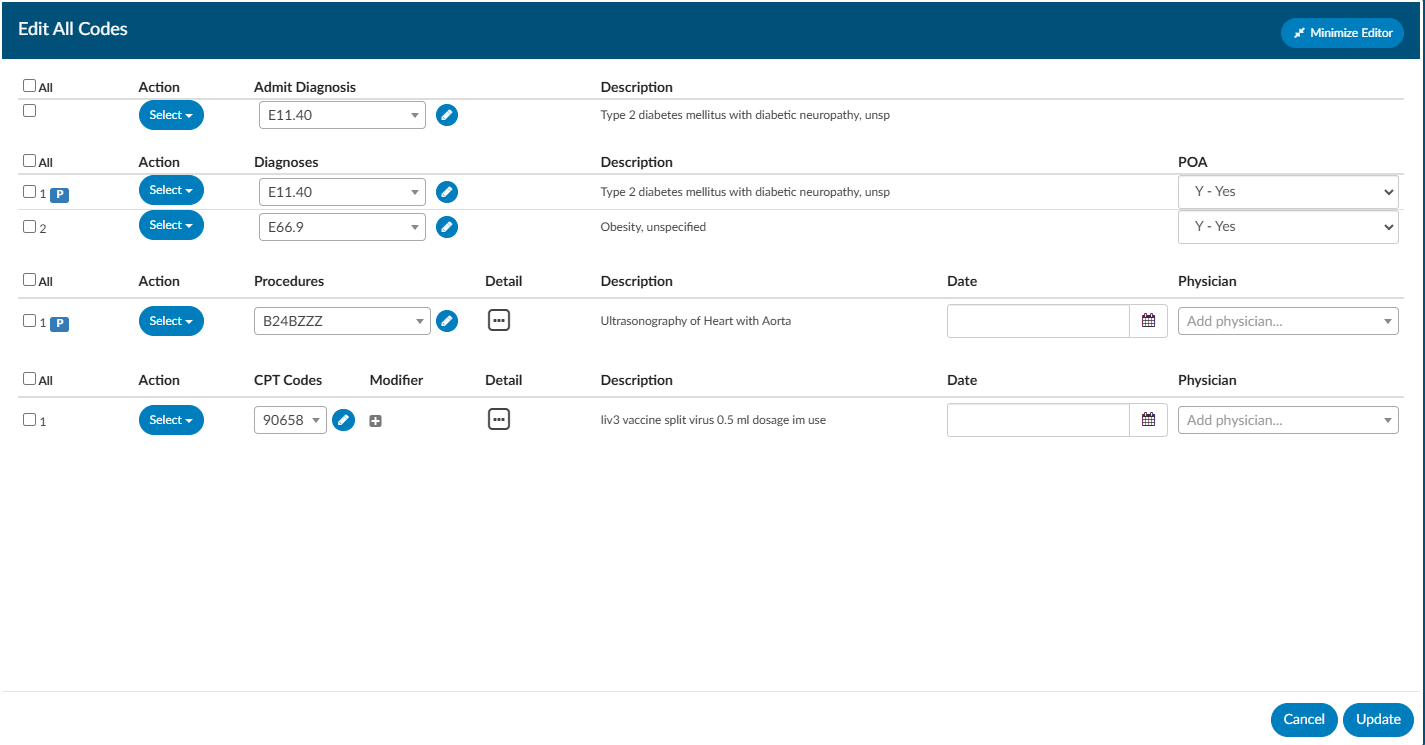
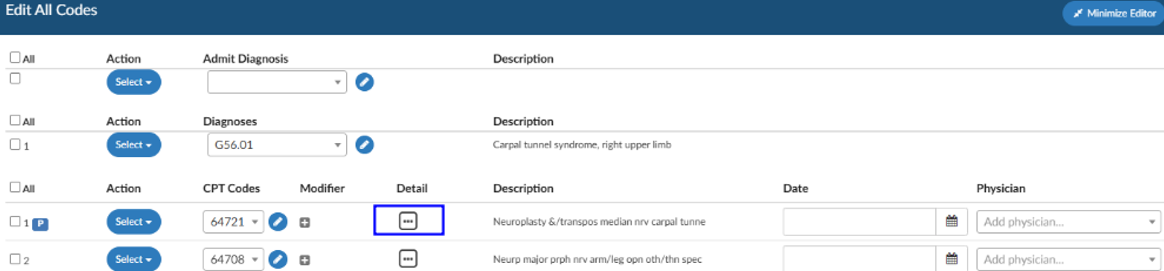
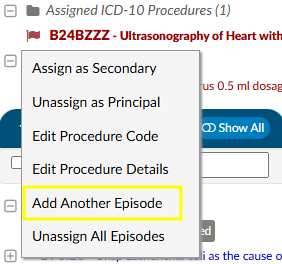

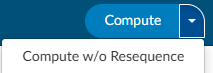


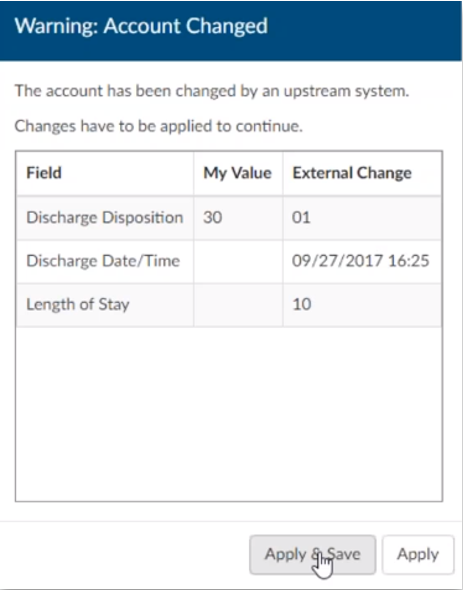
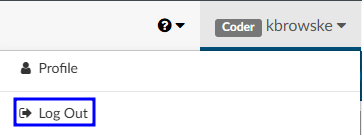

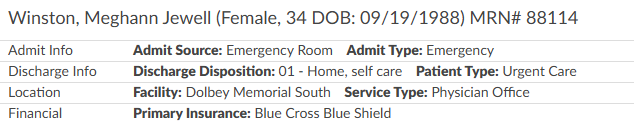


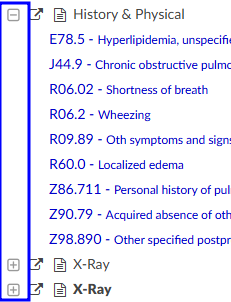


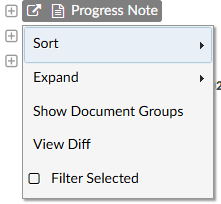


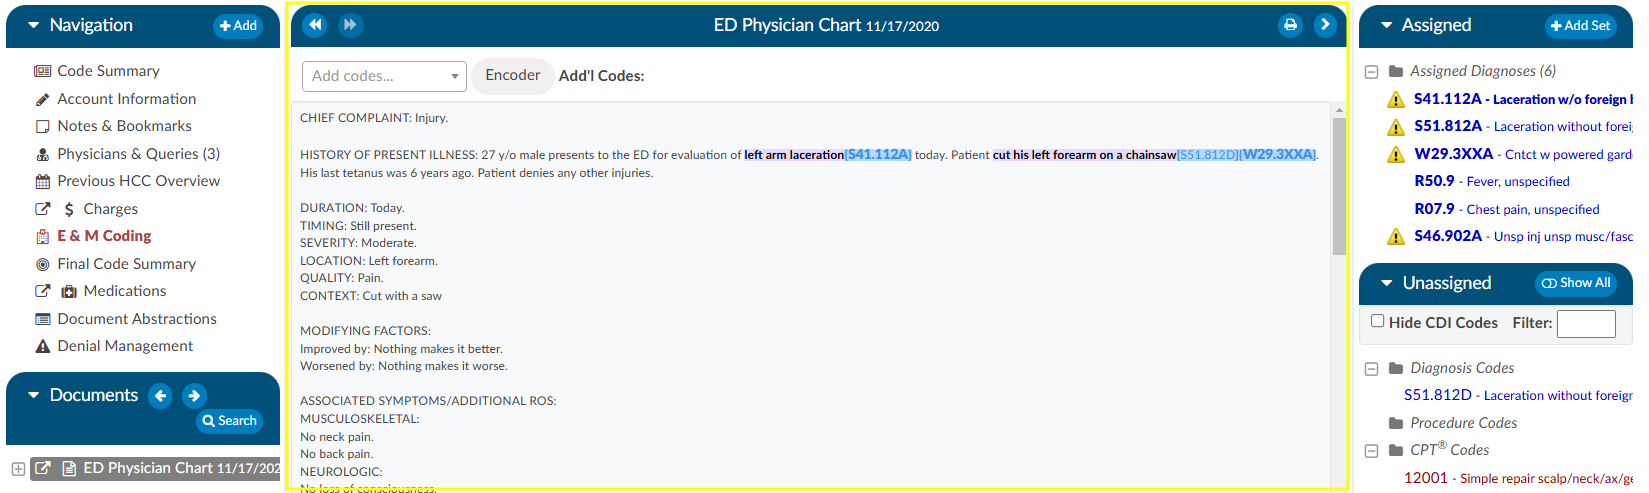


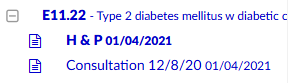
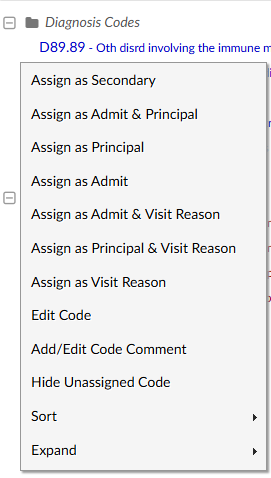
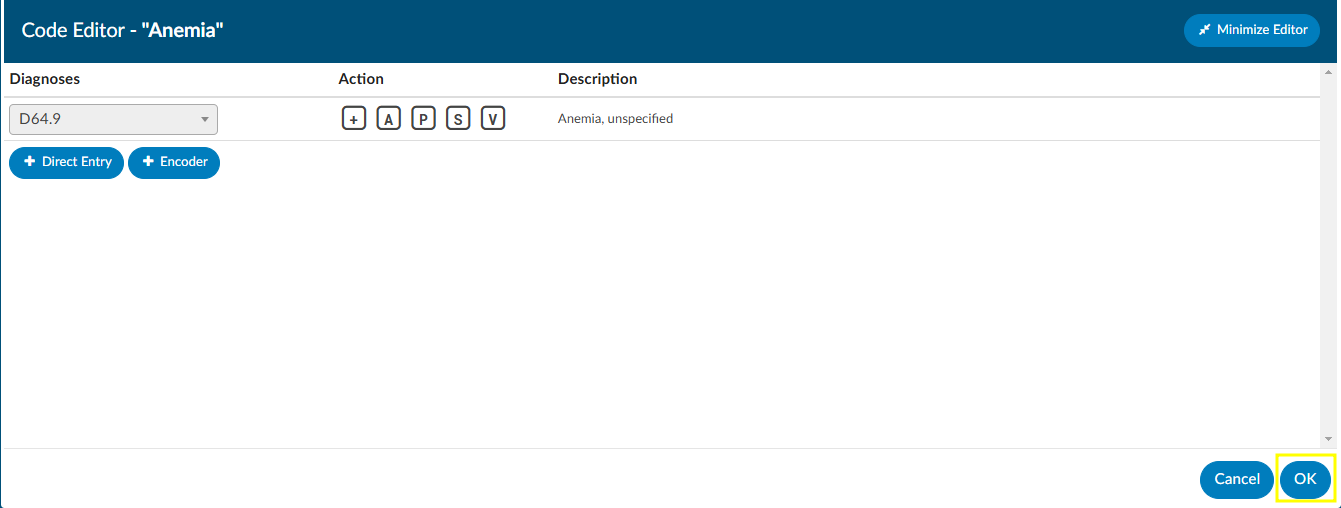
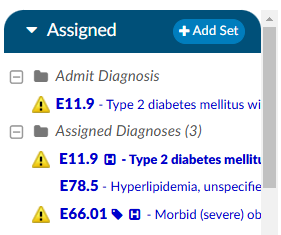


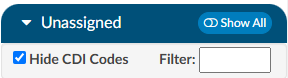
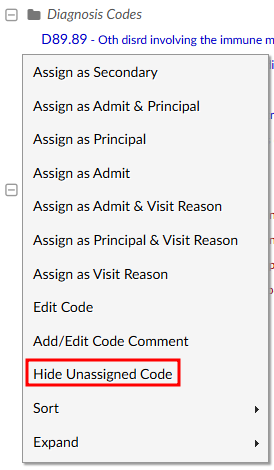
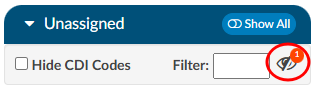
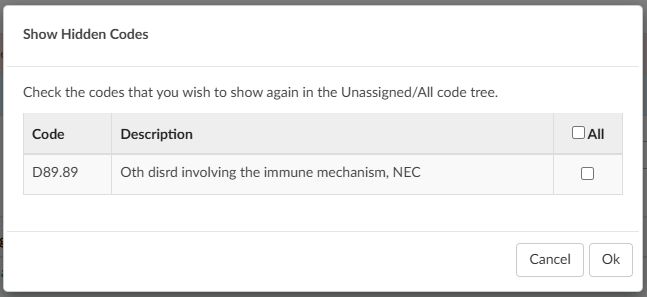
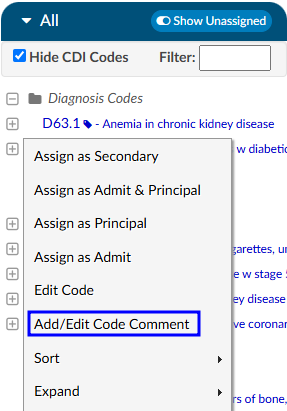


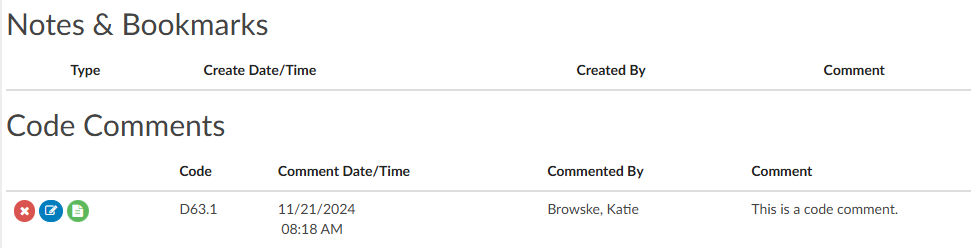
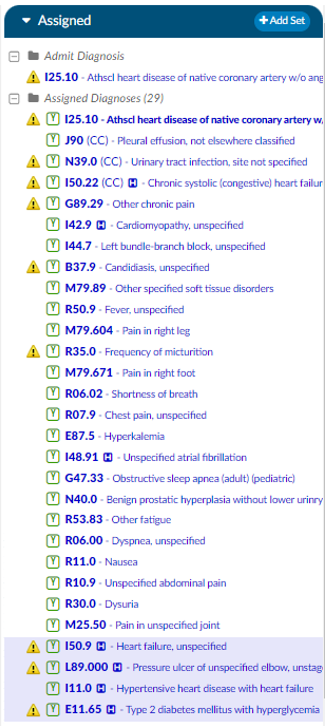
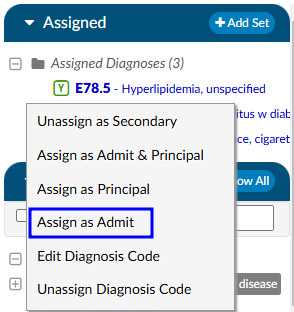
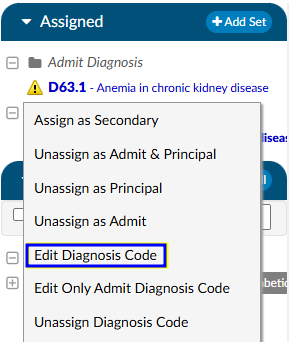


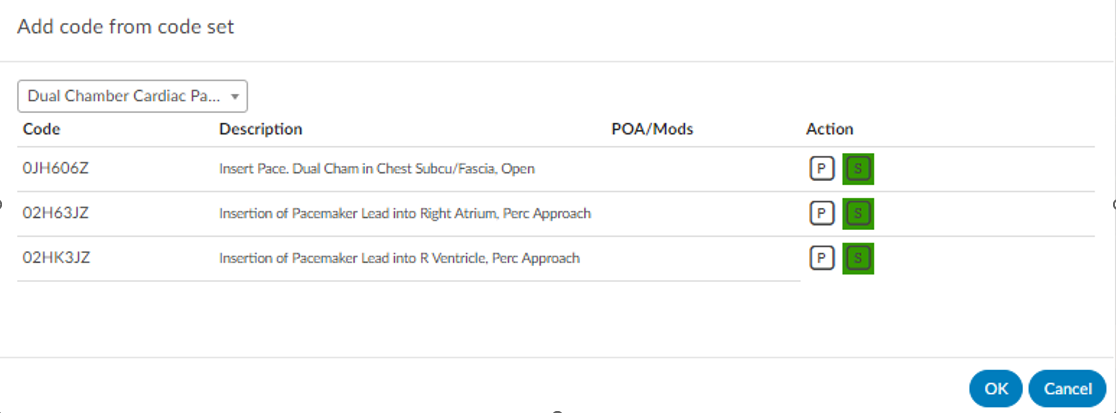
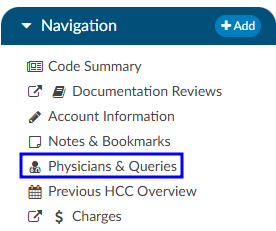


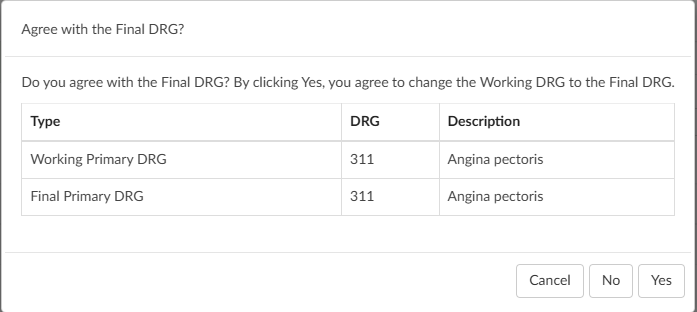

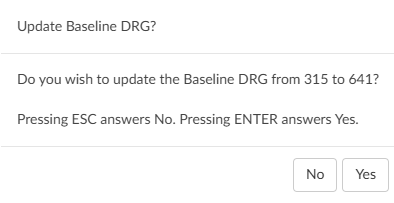


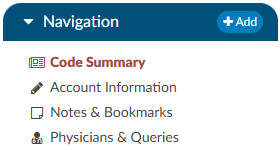
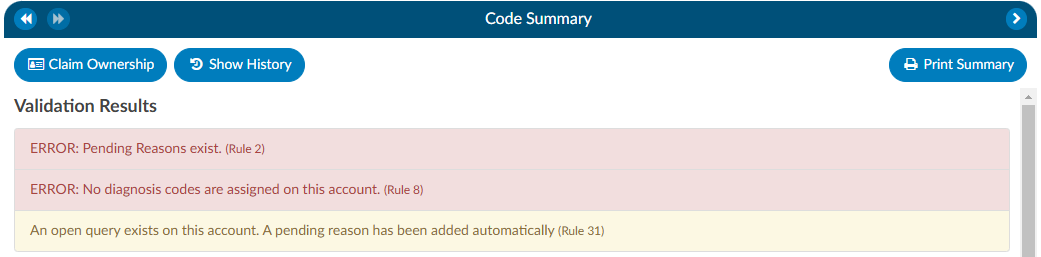


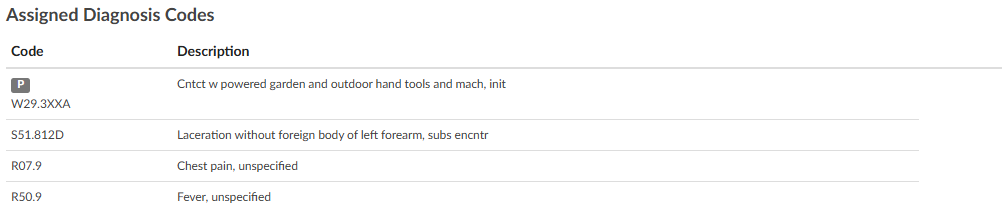


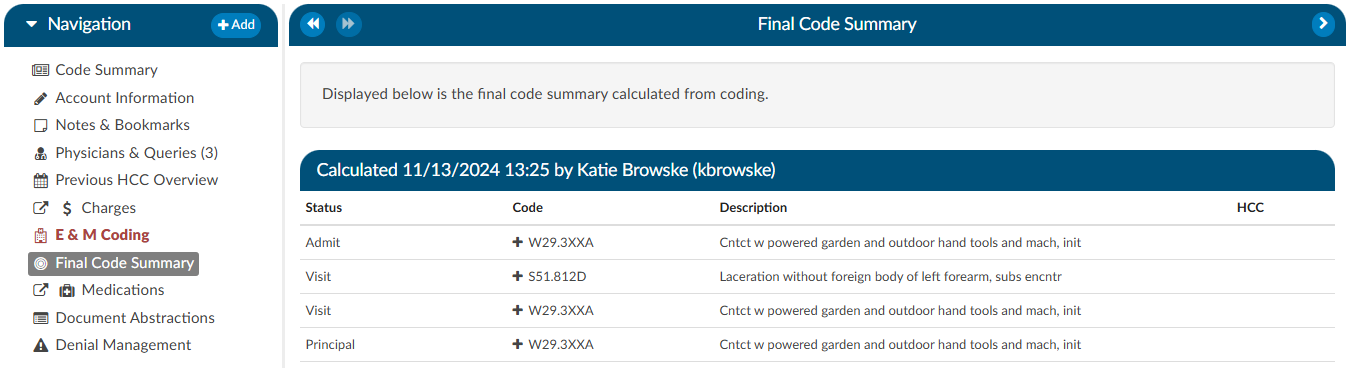
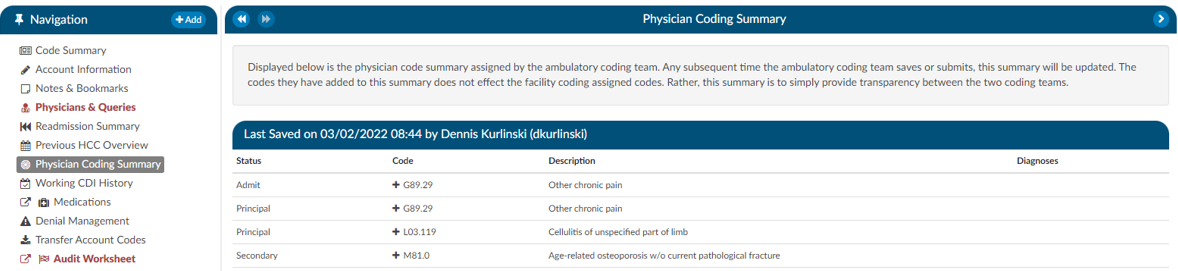

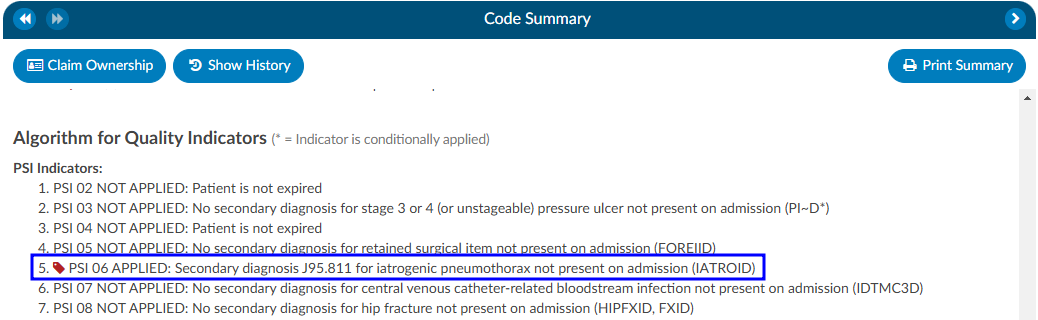

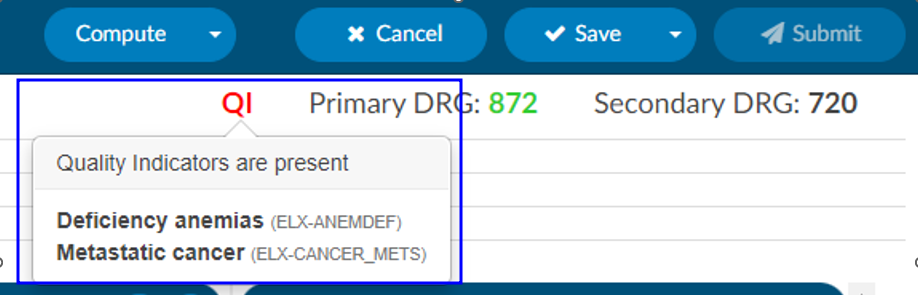


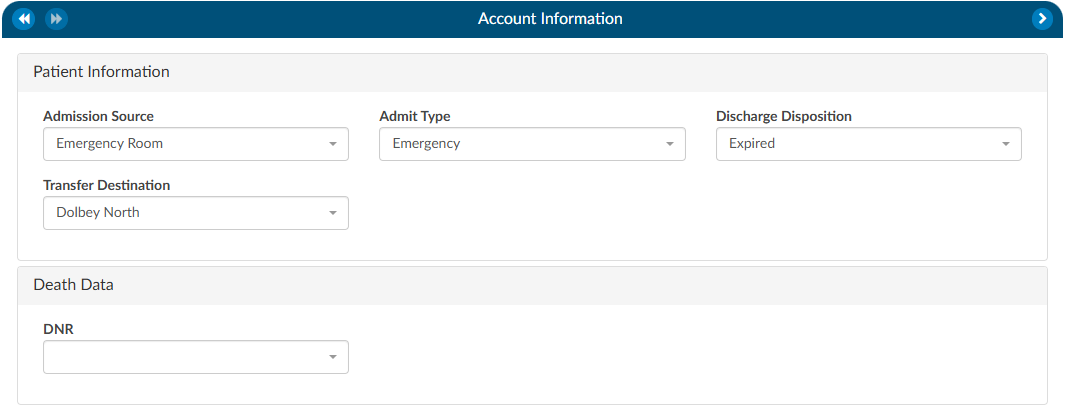

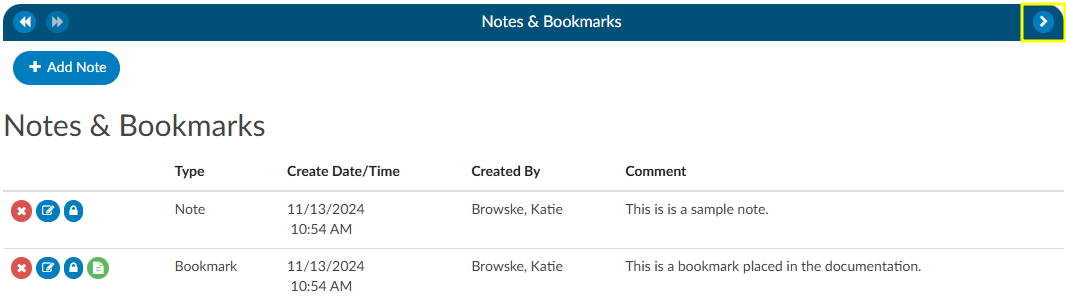

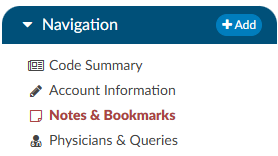


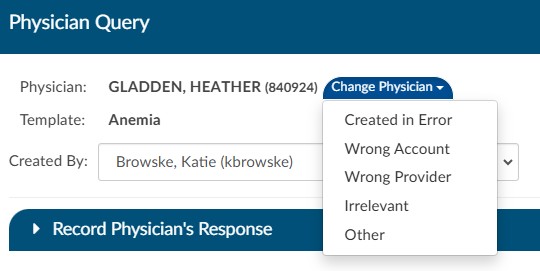


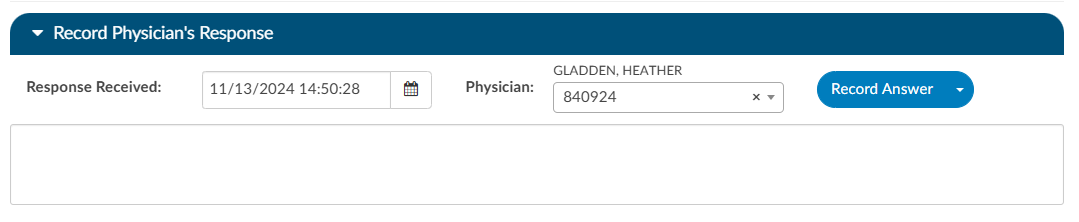

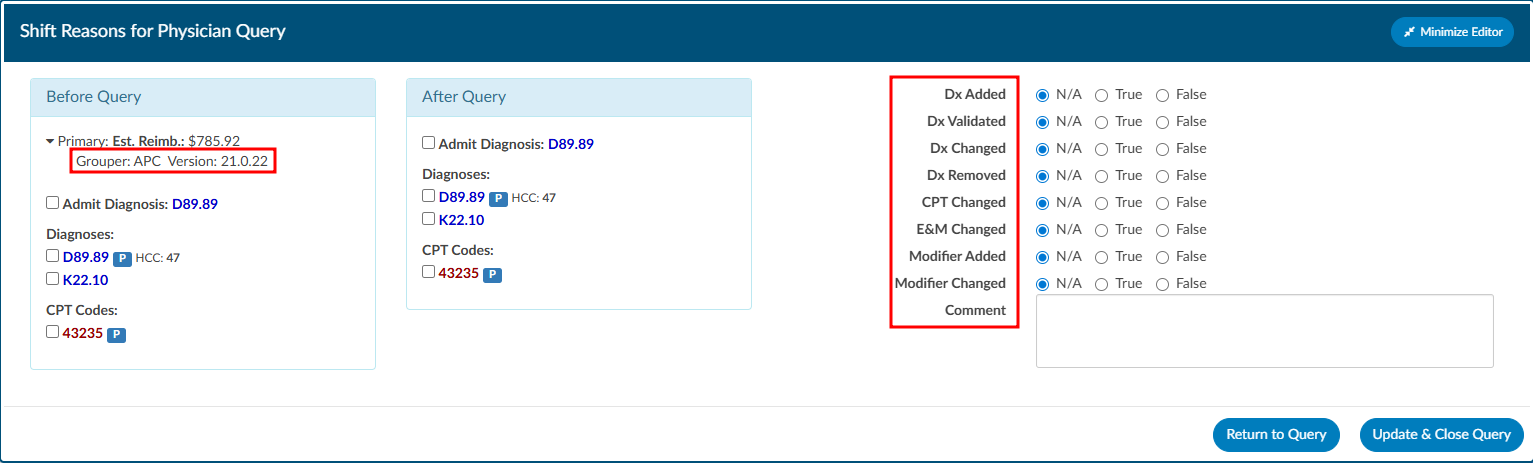
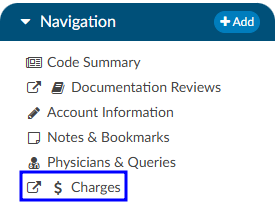

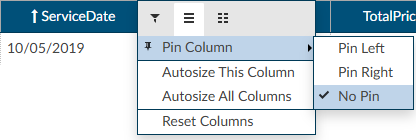
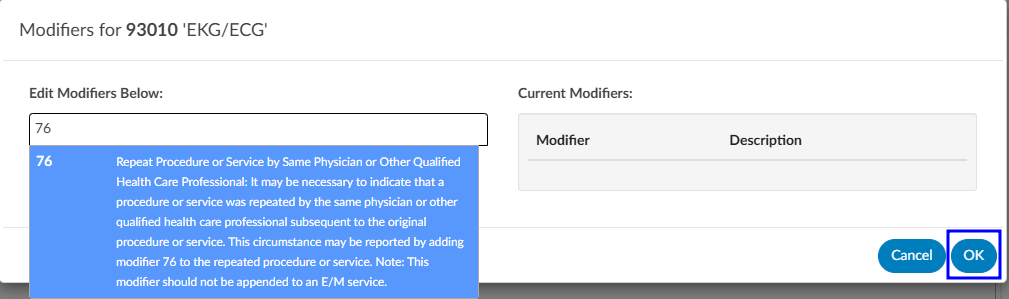


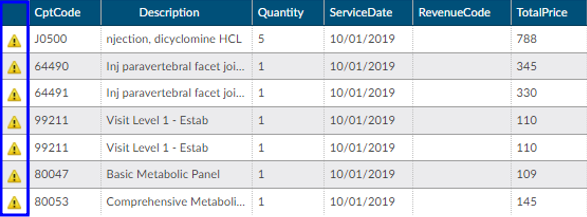
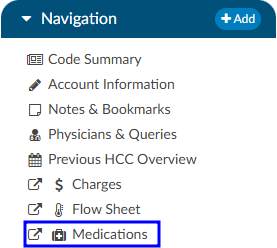


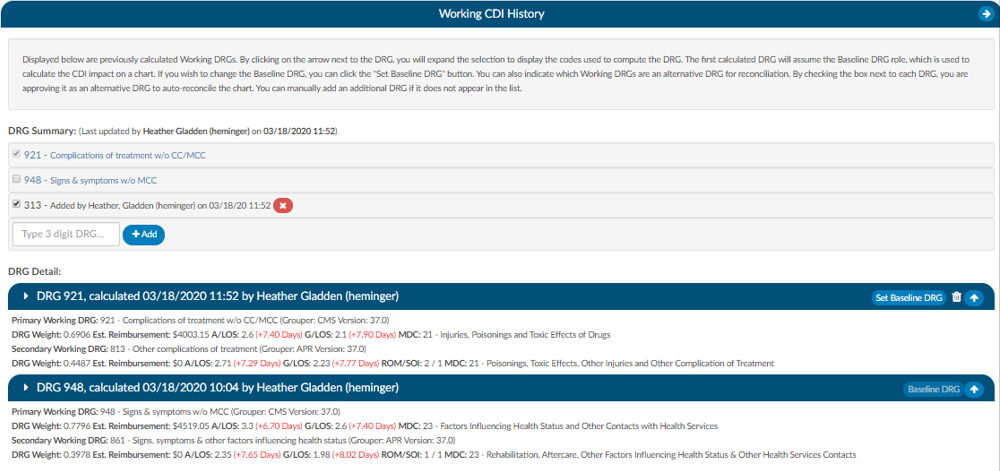
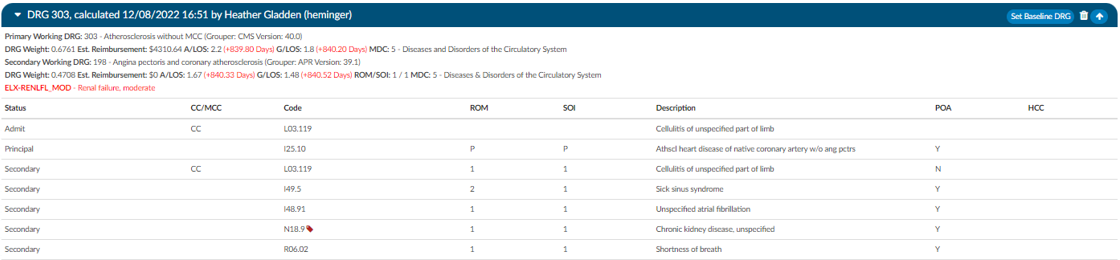

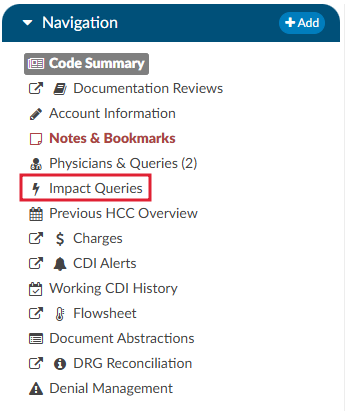


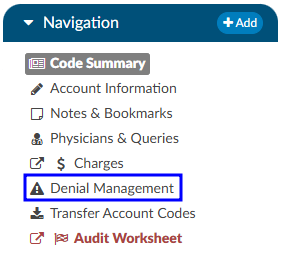

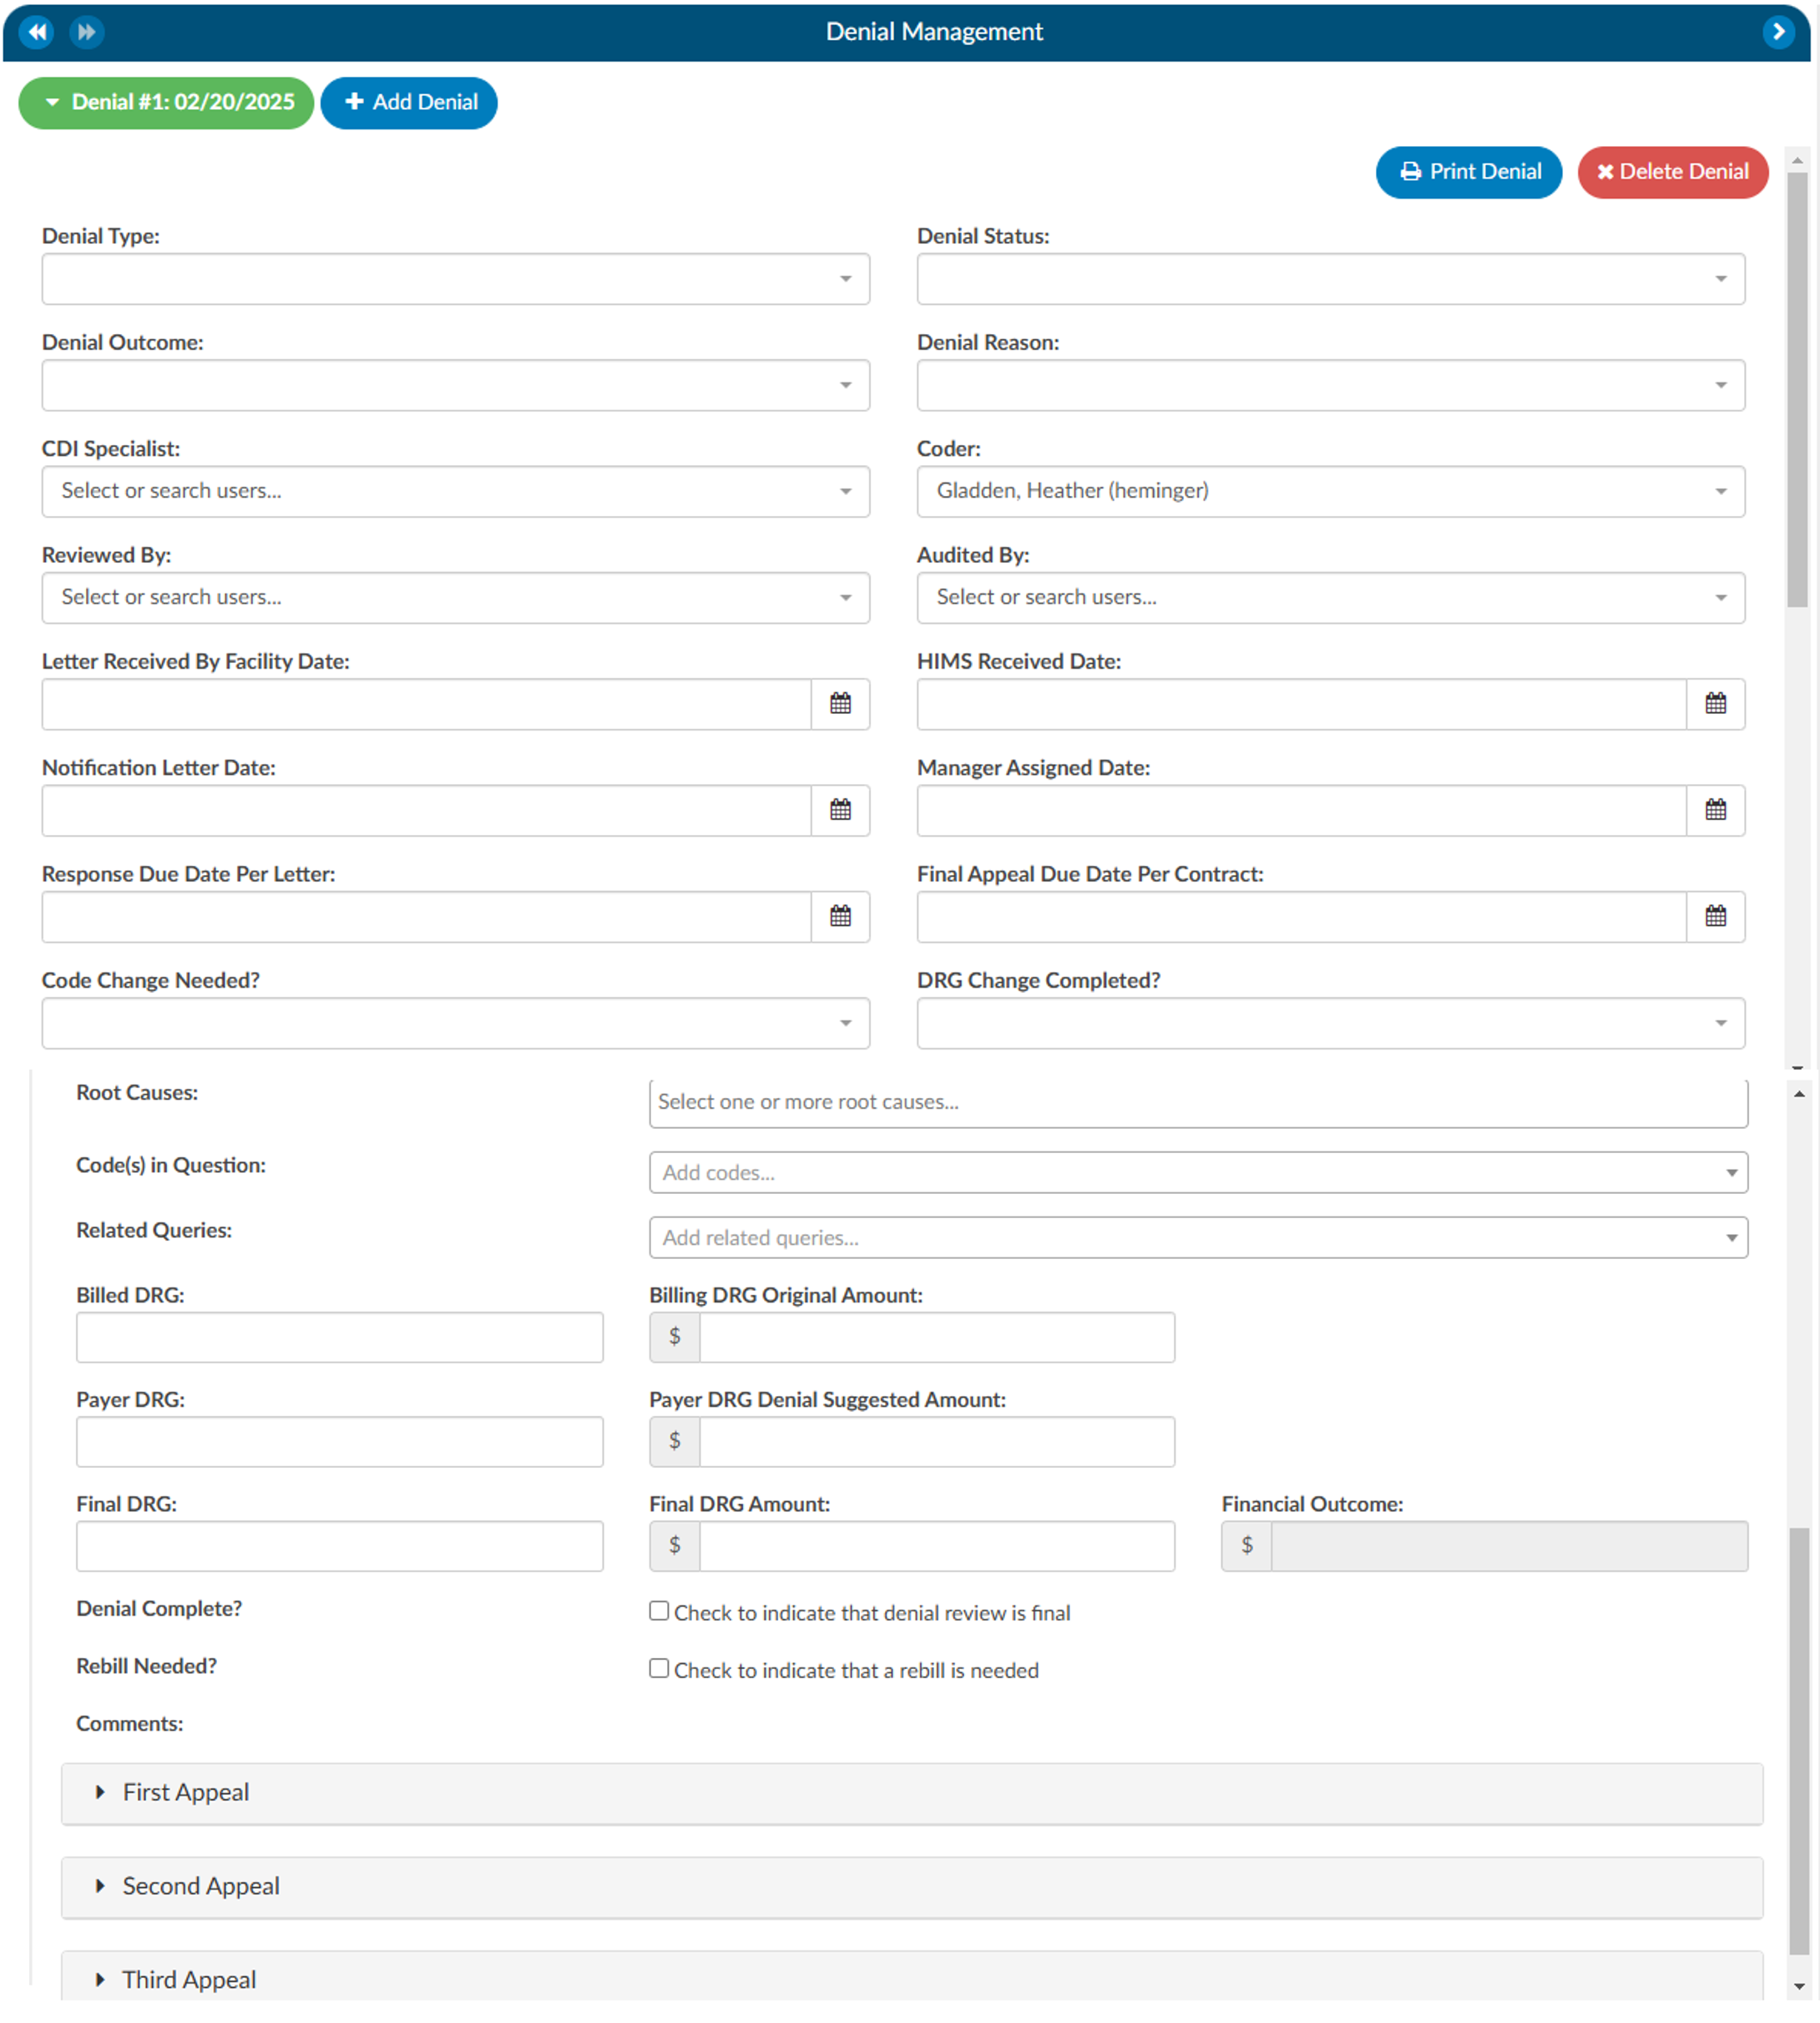


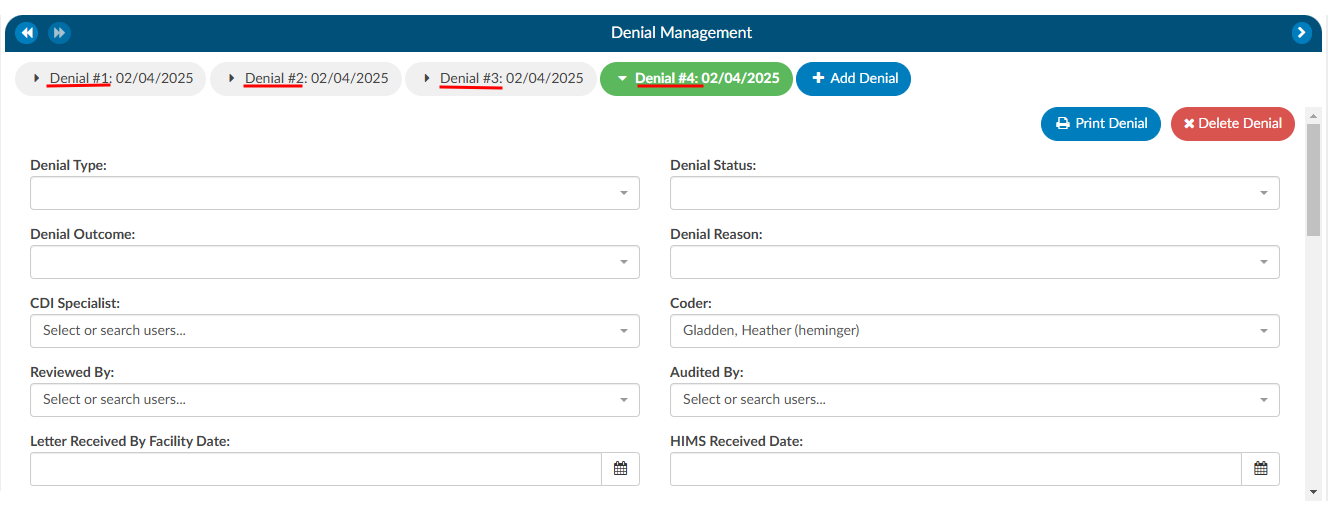


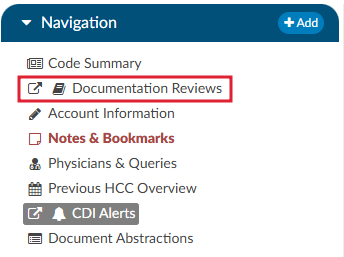


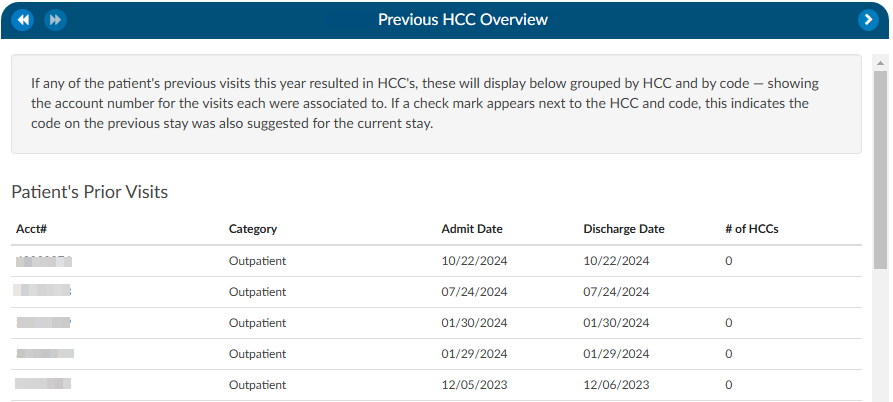


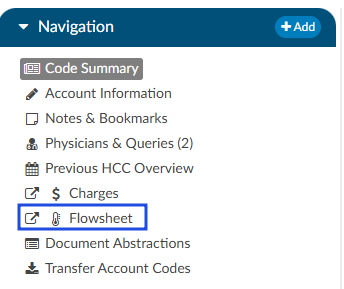
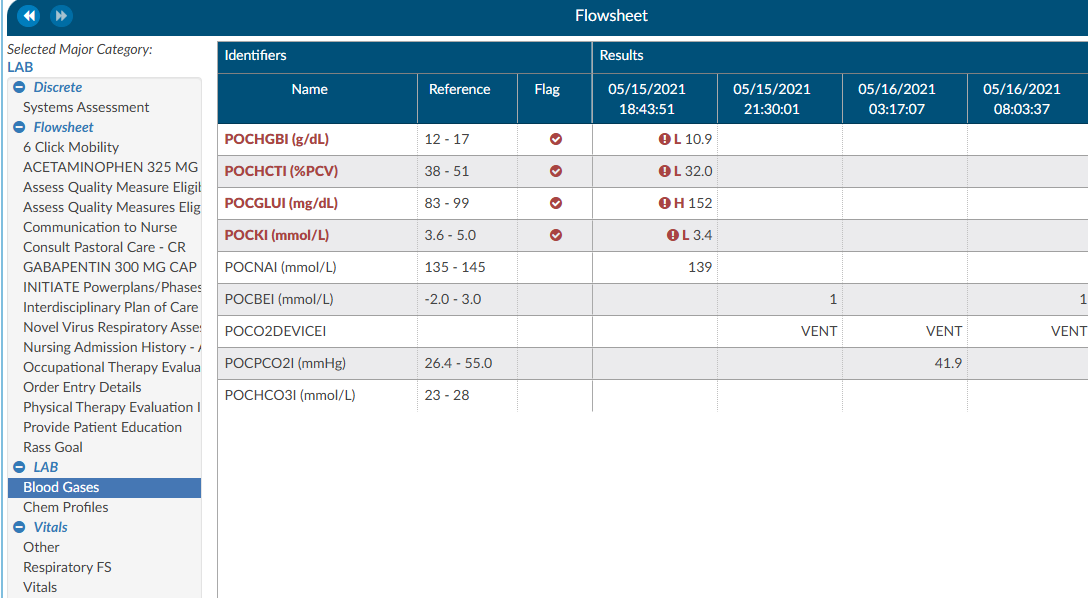
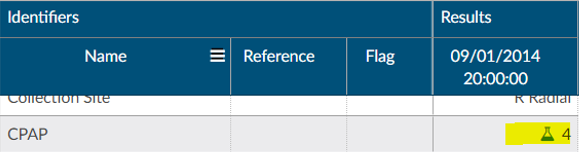
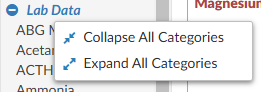


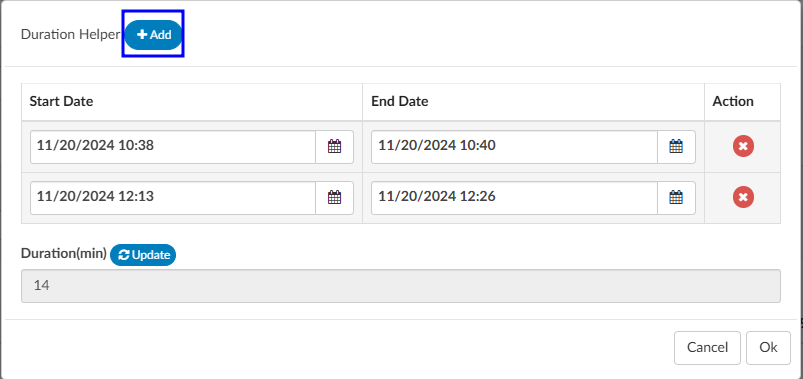


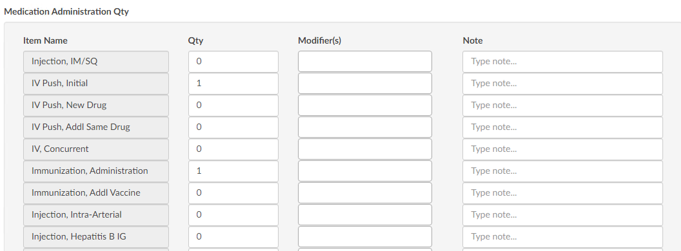
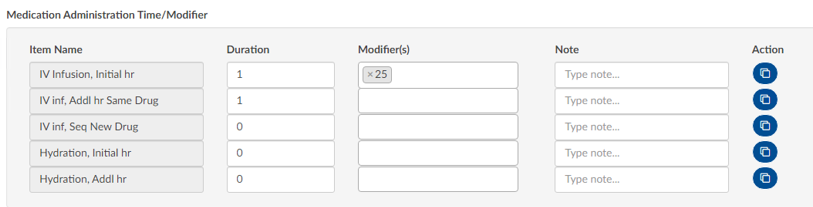


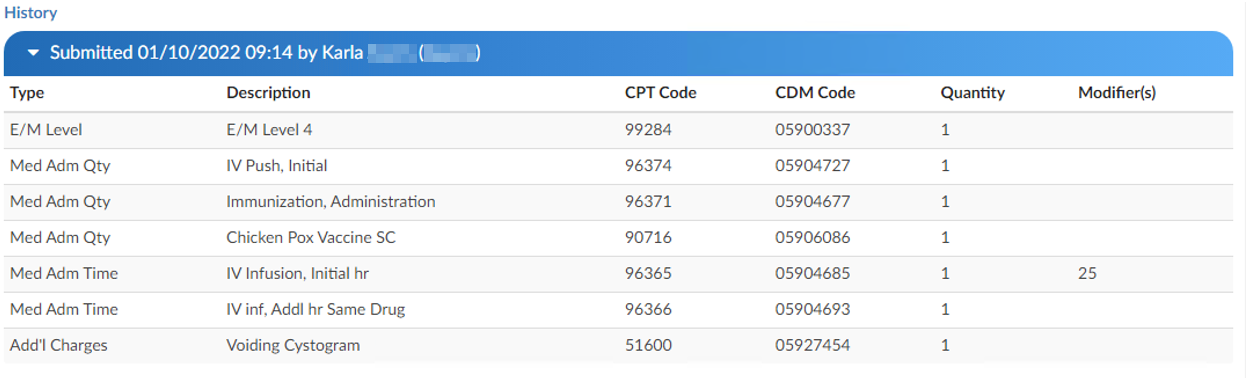
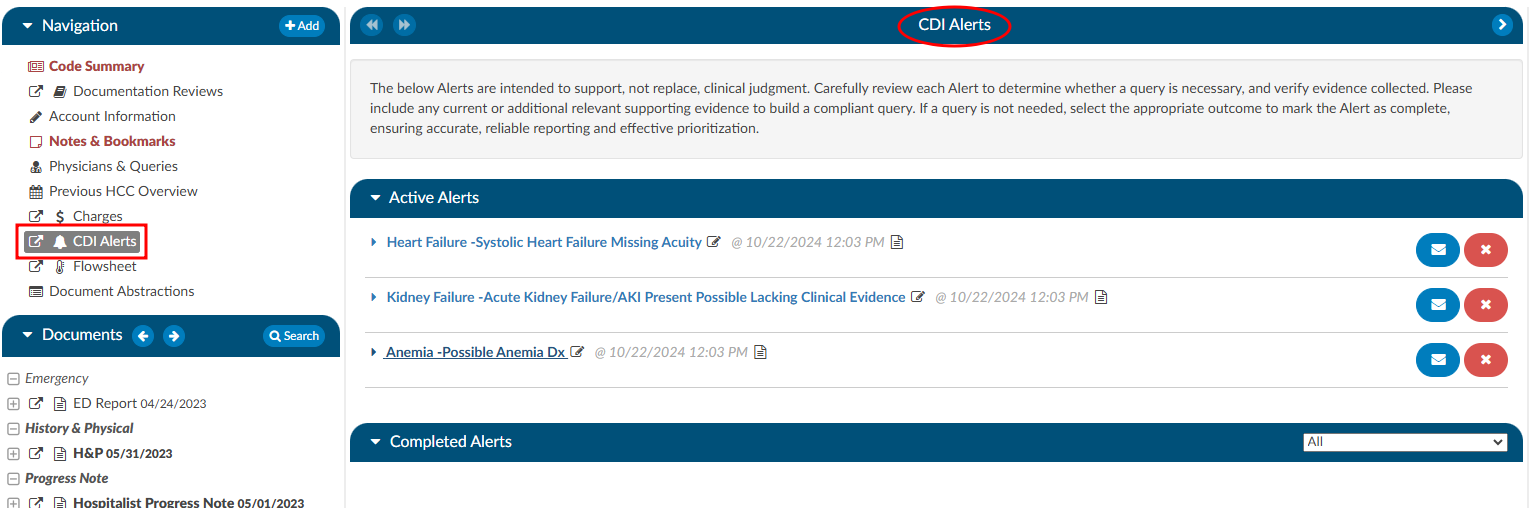
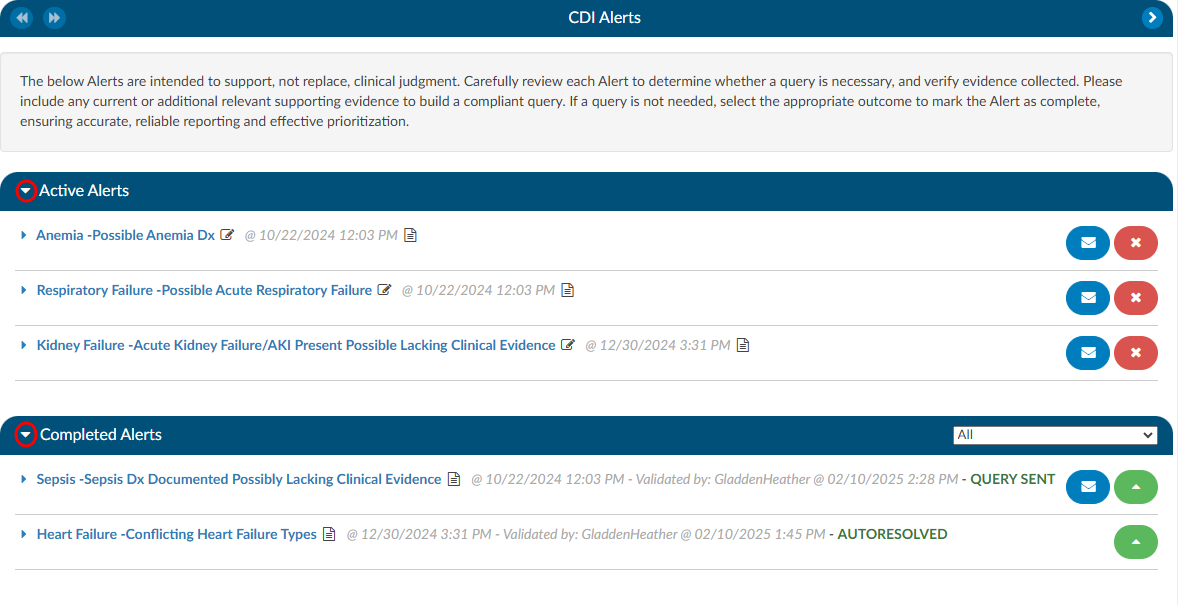
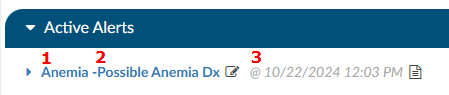
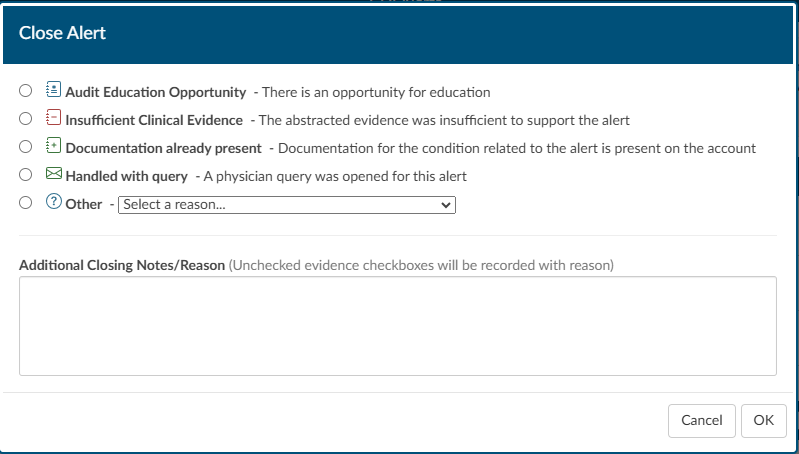

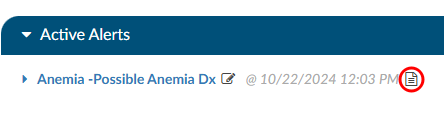


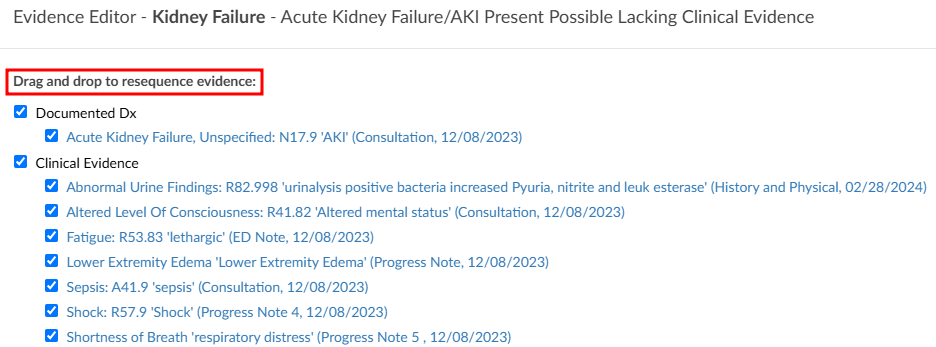


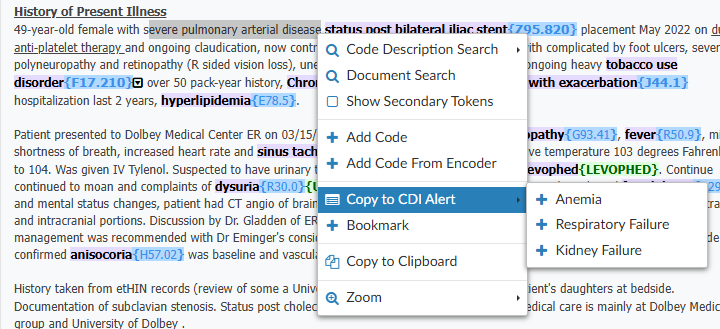
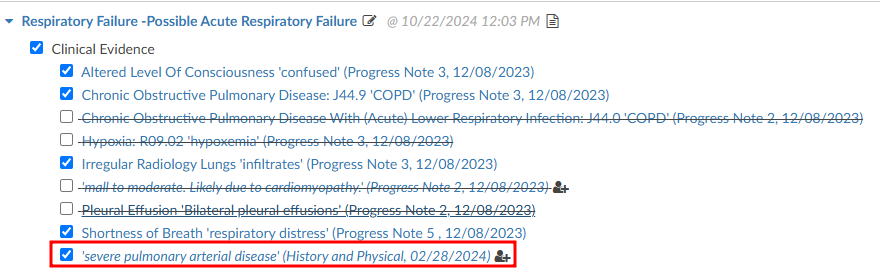
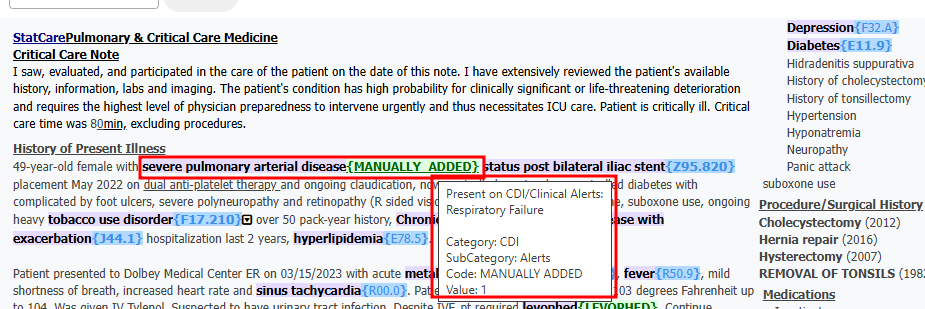
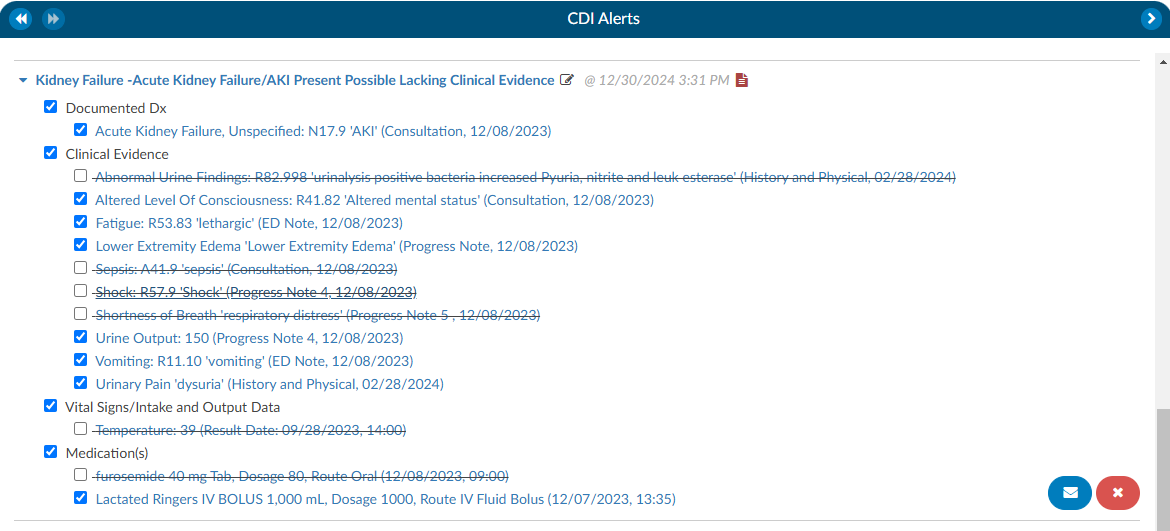

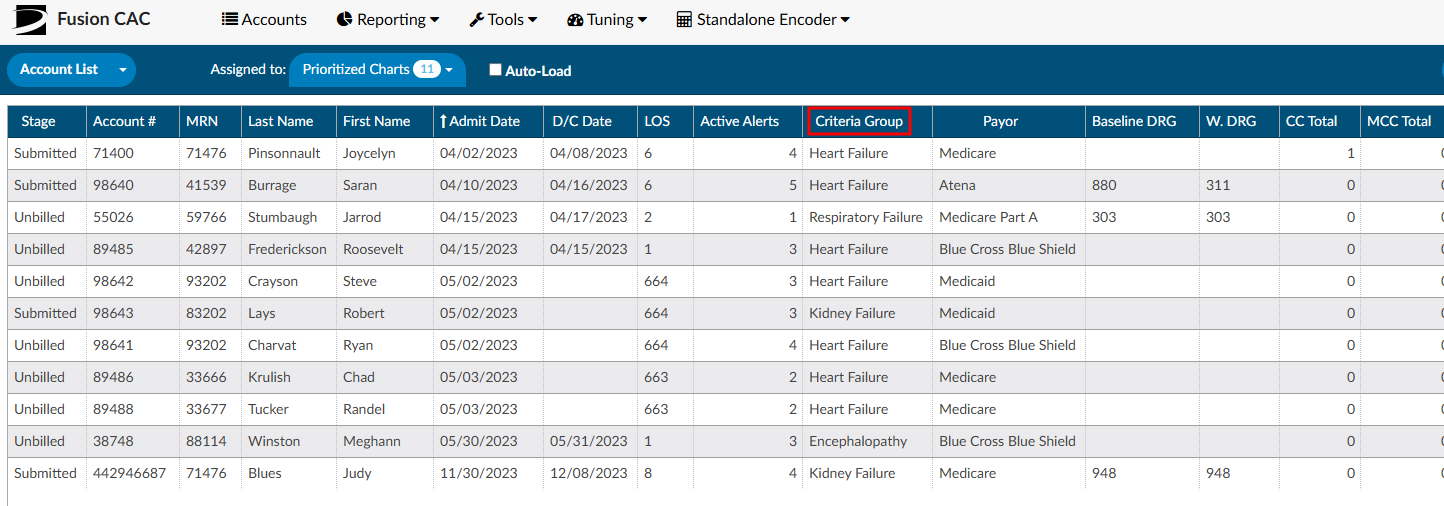
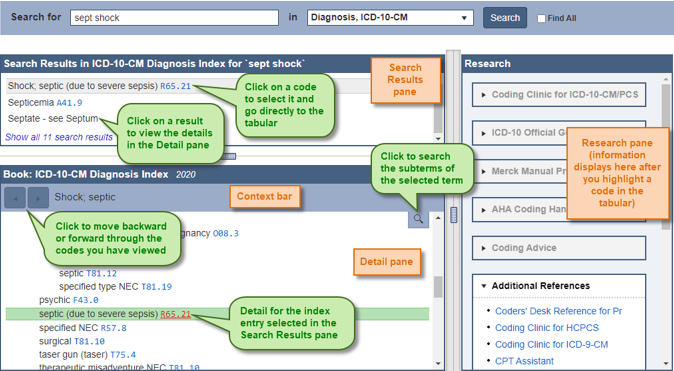

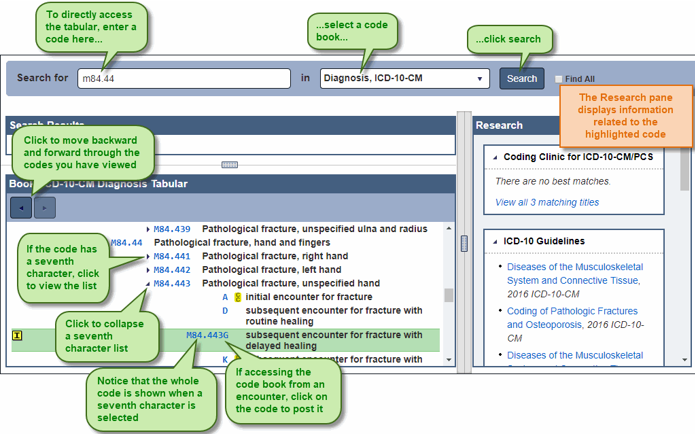
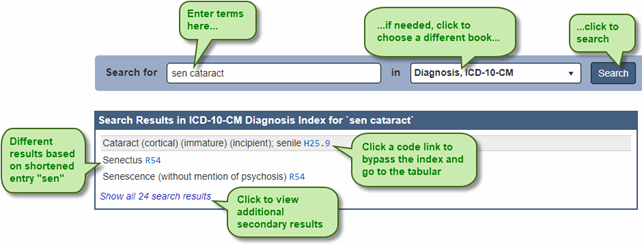
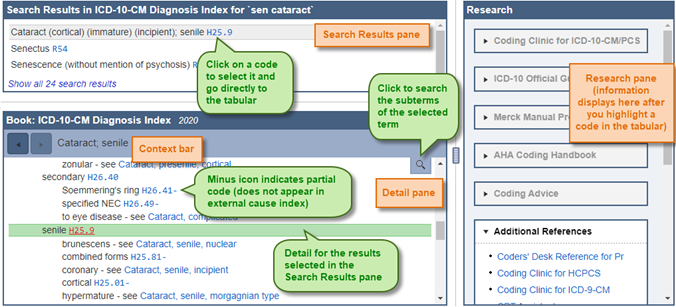
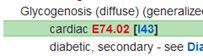

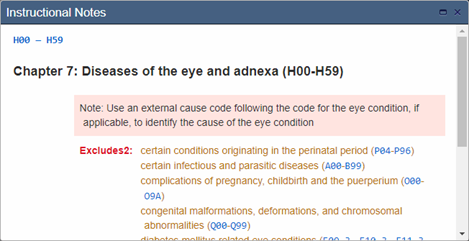
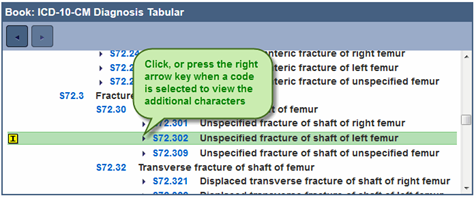
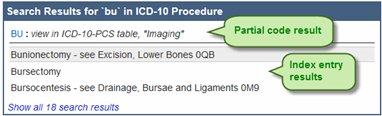
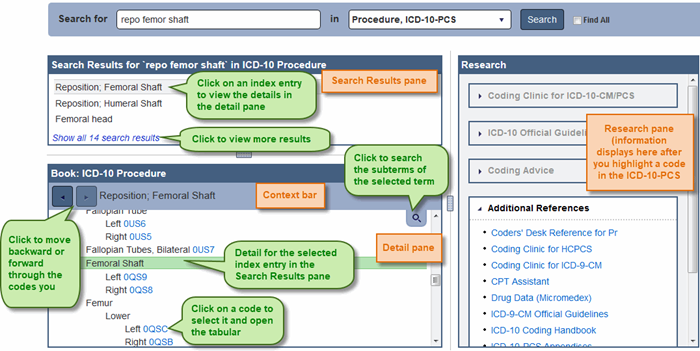
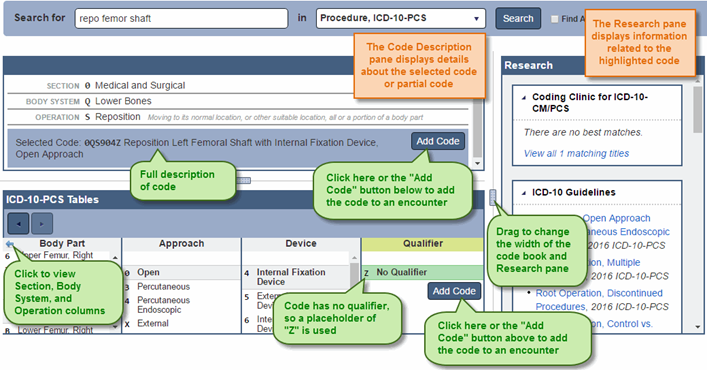
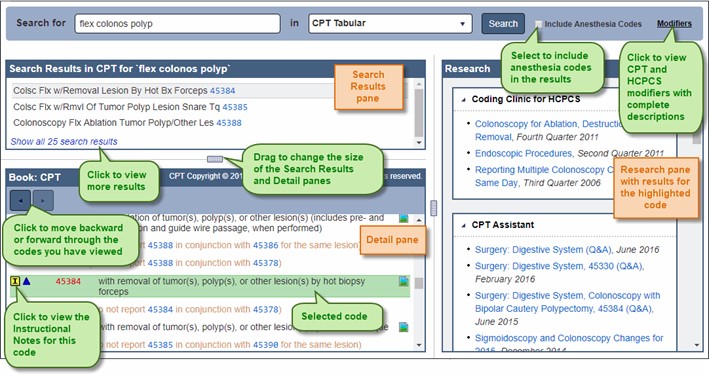
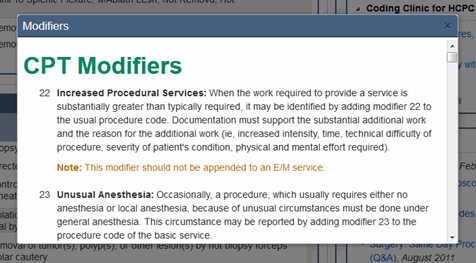
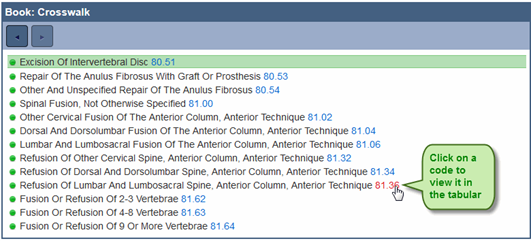
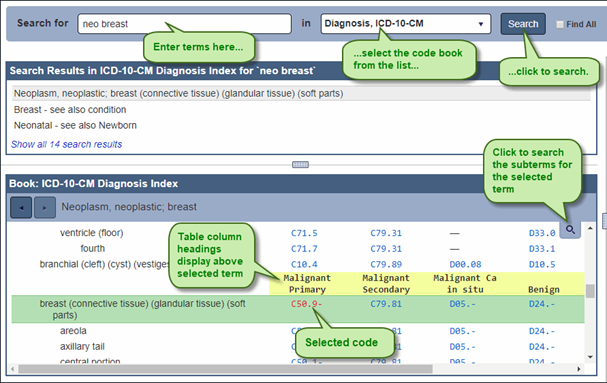


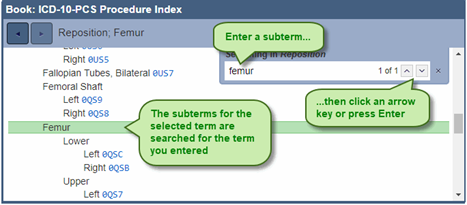


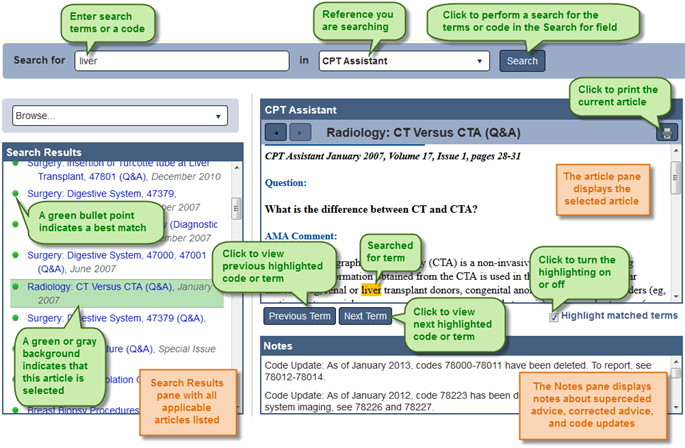


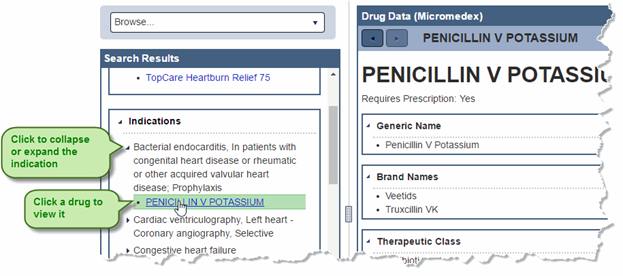
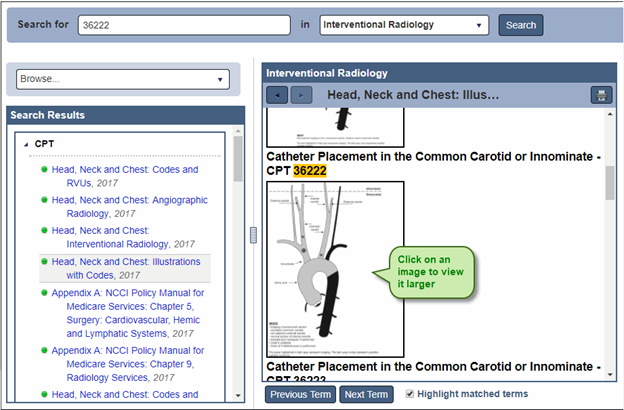
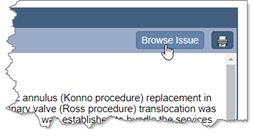
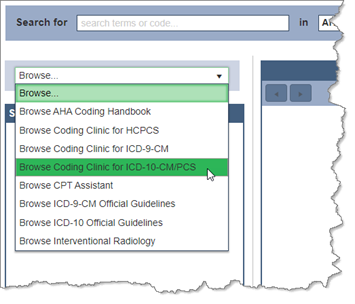
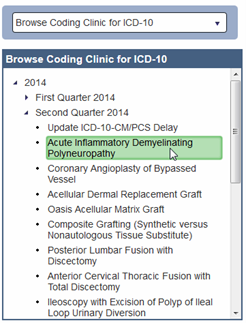

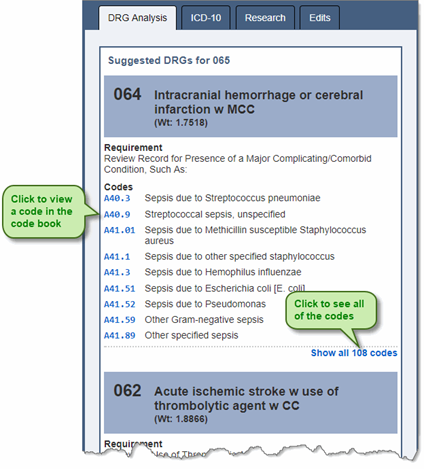
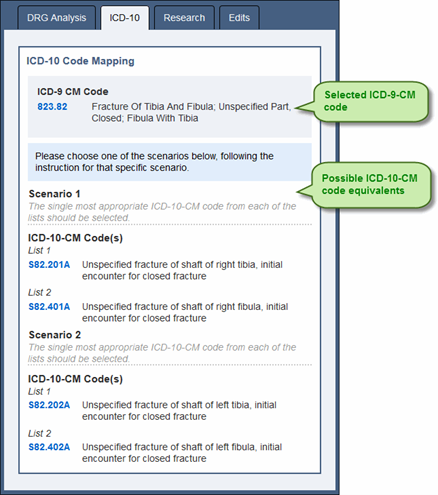
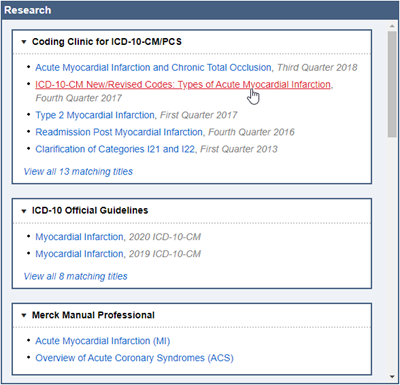
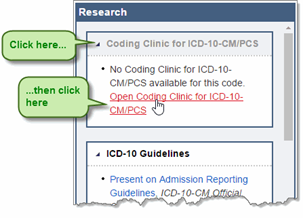
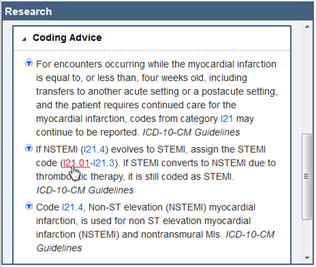
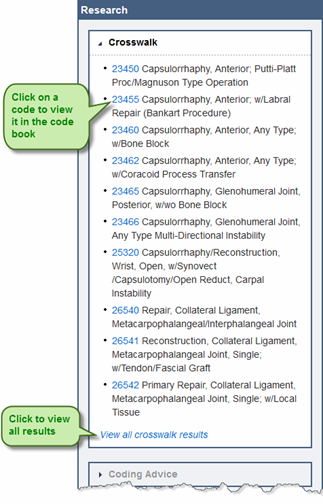

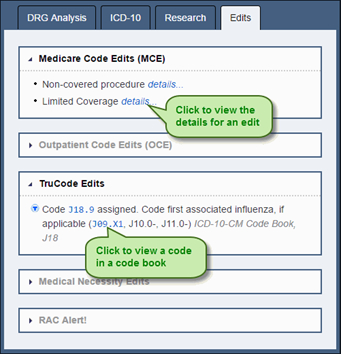
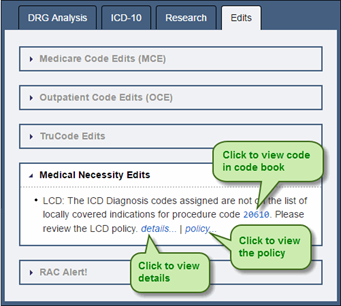

